Soil is half of the plant’s universe. Plants rely on the abundance of nutrients and microbes in the soil to turn sunlight into food – but they grow best in soil that is well-balanced. The best way to bring balance to the soil is by getting your garden soil tested so you can adjust accordingly.
Jump to:
Why Get a Soil Test?
You might notice that your plants seem listless or aren’t blooming as much as they usually do. Perhaps they’re being assailed by insect pests or diseases. Plants can’t tell us what the matter is, and the matter often lies in the soil.
You can’t exactly pick up a handful of soil and say, "Whoa, we have a problem with low potassium here.”
However, the cure isn’t more fertilizer. Synthetic fertilizers have made gardening easier in maybe ways, but excessive use is taking a toll on precious groundwater and lakes. Plants can’t absorb all the nutrients that synthetic fertilizers provide, so the rain washes it into streams, lakes, and oceans.
All the extra nitrogen and phosphorus creates dead zones in the water, clogged with rotten algae. This also affects groundwater, which is decreasing greatly due to climate change.
The best way to fix this dilemma is to optimize your soil (and garden) by getting your soil tested. Then, you can add only the fertilizers your plants need, saving money and the environment.
Read more: 7 Tips for Gardening in Sandy Soil
Here’s What Professional Soil Testing Tells You
- Whether your soil consists of sand, silt, clay, or loam.
- The pH level of the soil. If your soil pH is too high or too low, this can affect your plants’ ability to absorb different nutrients – creating more wasted fertilizer.
- What nutrients your soil contains, such as nitrogen, potassium, and phosphorus.
- What nutrients it lacks.
- How much organic matter the soil contains.
- Finally, you’ll get recommendations for soil improvement.
How often should you have the soil tested? For residential gardeners and farmers, every 3 to 5 years.
A soil sample can be taken any time of year if the ground isn’t frozen, but fall is best. You can amend your soil in the fall according to the soil test recommendations. Then it has all winter to adjust, and it’s ready to go just in time for spring planting. Also, the soil testing labs get swamped by farmers in spring – so skip the spring rush!
Read more: 3 Ways to Make Soil More Acidic and Lower pH Levels
Where Can I Get a Soil Test?
In the US and its territories, we have the University Extension, a service where many services related to homemaking, gardening, small businesses, and farming are relatively easy and inexpensive. They also provide affordable soil testing. Find your nearest Extension branch here.
The Extension service is cost-effective, and your local Extension agent will have an extensive knowledge of local soils and the best ways to amend them.
A private soil lab can also test your soil. If a soil lab is affiliated with a fertilizer company, be aware that they might want to sell you something. Private soil labs cost more, but they will test your soil for additional features upon request. Some even send a representative to do your testing for you.
Soil testing kits are available online, but they can be wildly inaccurate, and they won’t give you fertilizer or soil amendment recommendations tailored to your needs.
In England, soil testing for farmers is now compulsory in an attempt to save waterways, and it might soon be required in Scotland and Wales as well. A list of laboratories that take soil samples can be found here. You can get more detailed soil tests and analyses for specific needs, such as tests for soil pests or nematodes.
In Canada, you can get soil tests from private labs such as SGS Labs, A&L Canada, FarmersEdge, or Agvise.
Read more: How to Build Your Garden Soil
What Do I Need to Take Soil Samples?
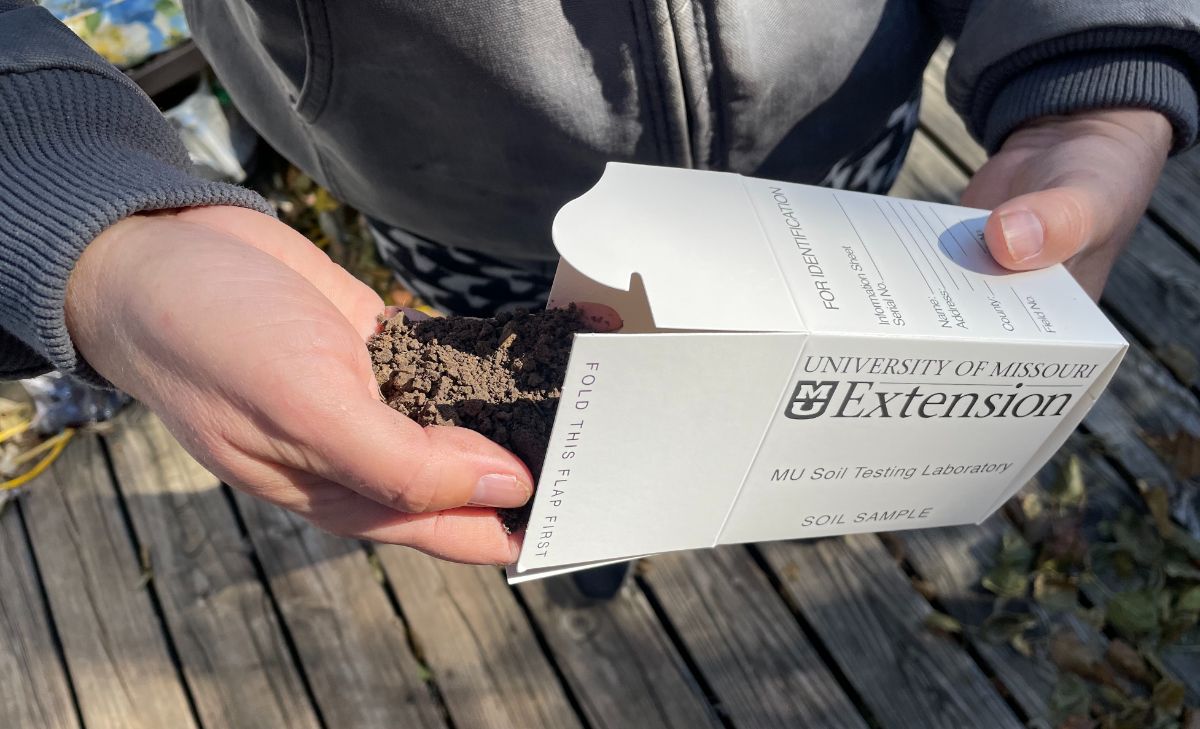
- The box or bag from the Extension Service OR your soil lab.
- A sheet to fill out about your soil and what you’re growing.
- A clean shovel, soil auger, or soil probe that’s chrome-plated or made of stainless steel. Rusty or galvanized tools will give you inaccurate results.
- A clean plastic bucket.
If you’ve recently applied lime or fertilizer (except for N) to your soil, wait for six months to take a test. If you’ve applied manure or compost, wait six weeks. Otherwise, you will get inaccurate results.
In gardens, don’t take samples where beans, peas, or legumes have grown recently – these plants fix nitrogen in the soil, which also skews results.
If you live near a gravel road, take samples from over 300 feet away because the rock dust will affect your results. My soil science professor talked about how he took soil samples from next to his limestone gravel road and was told that his soil was really high in lime – but it actually was not!
Rules of the Road for Taking Soil Samples
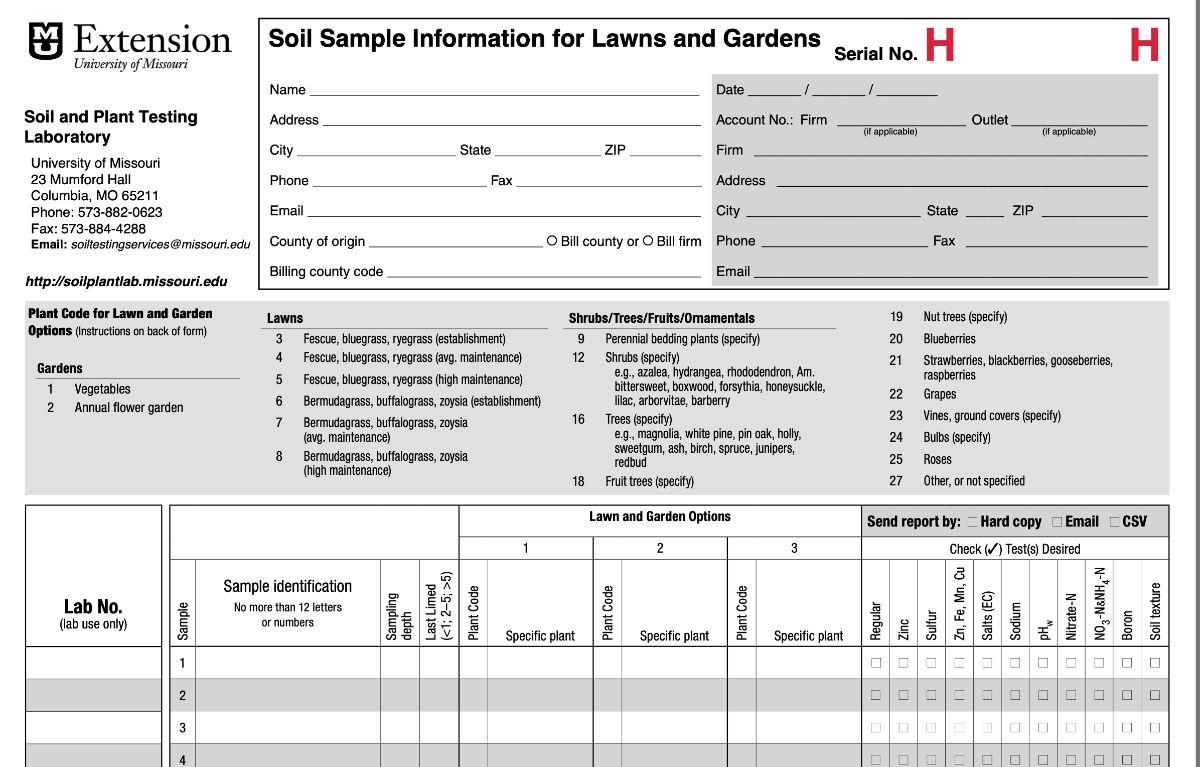
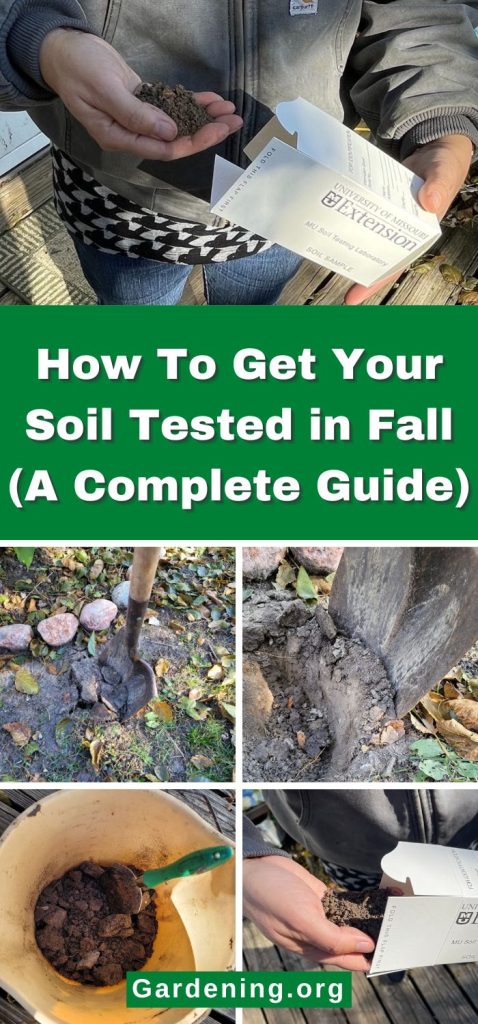
- On the side of your soil sample bag or box, write the appropriate information with a ballpoint pen or waterproof ink. (Do this before you start because it's hard to write on the box once the soil's inside.)
- Fill out the sheet you got from your Extension service or lab.
- Check the ground for moisture – the soil you’re testing should crumble in the hand and not be wet.
- Take one soil sample for each specific use area. That means you’ll take one for the garden, a second one for the pasture, a third one for the orchard, and so forth.
- If your yard has a healthy area and a sickly-looking area, sample both separately.
- Within each area, take subsamples from 6 to 8 different locations, spaced some distance apart for best results. In larger areas, such as pastures or acreage, take 15 to 25 subsamples.
Read more: 5 Ways to Make Soil More Alkaline and Raise pH Levels
How to Collect Soil Samples
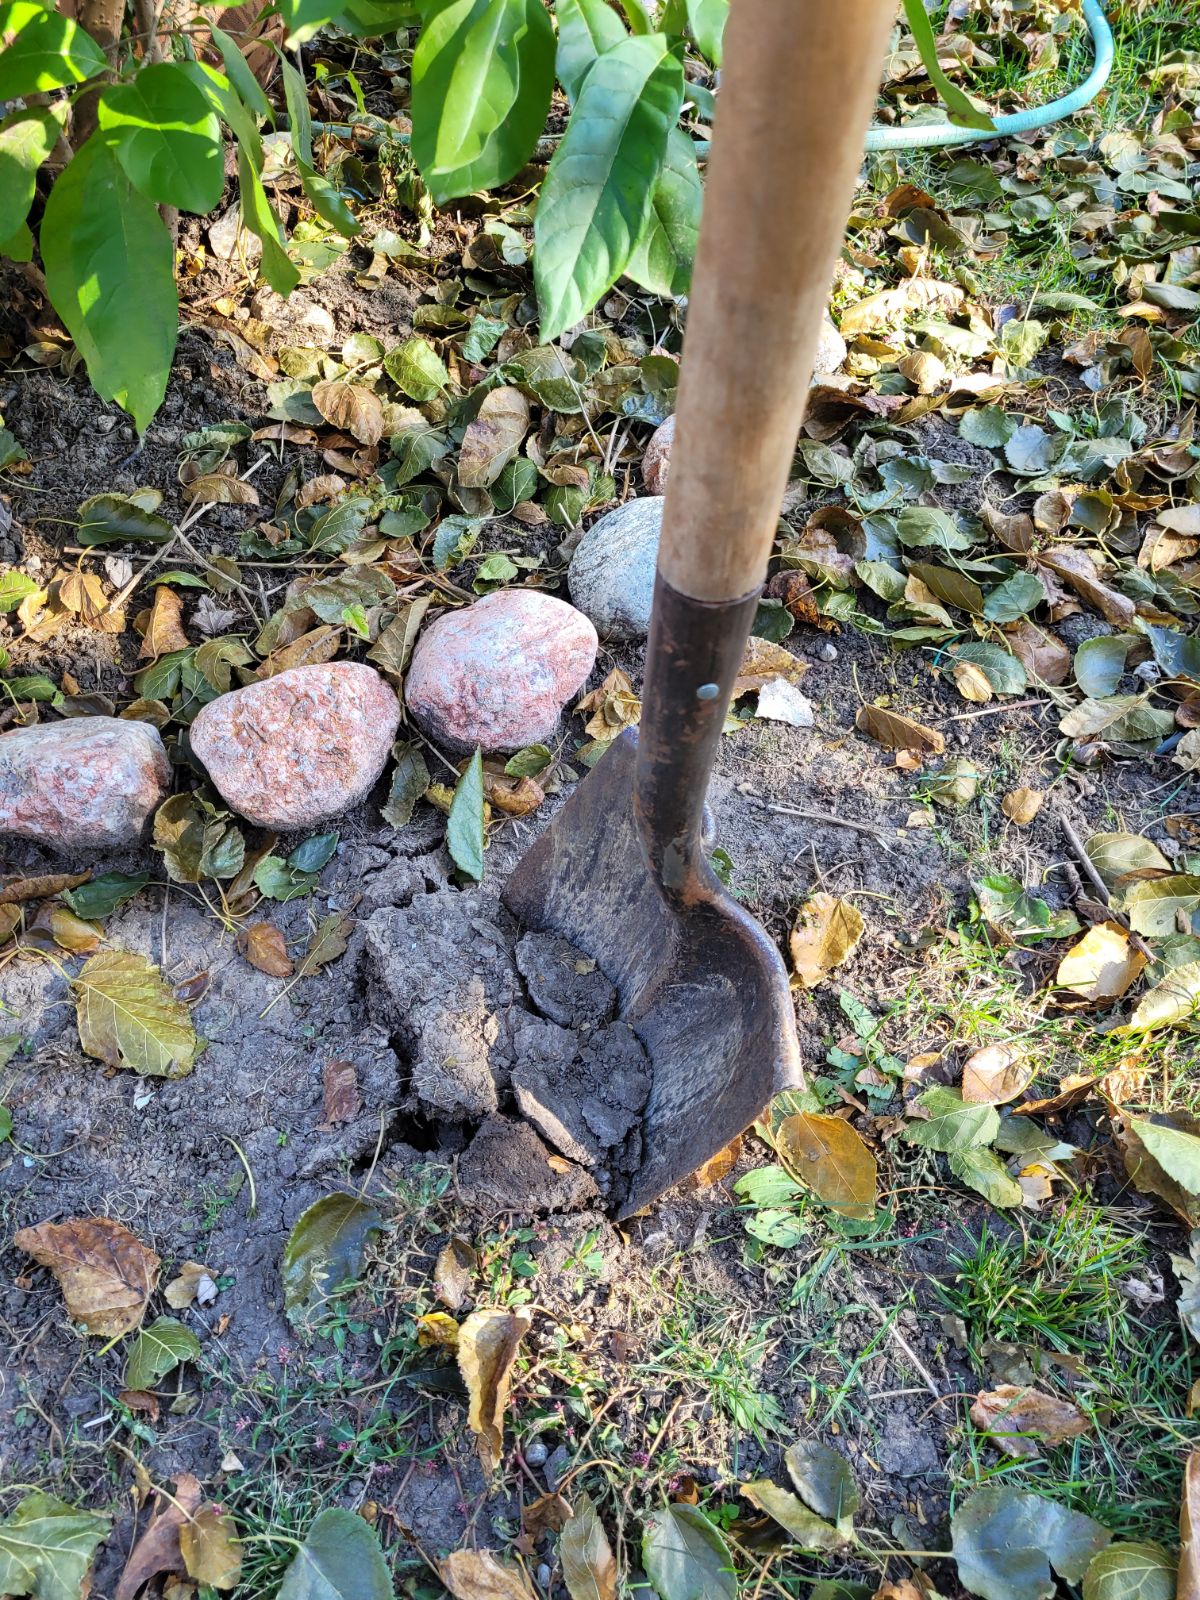
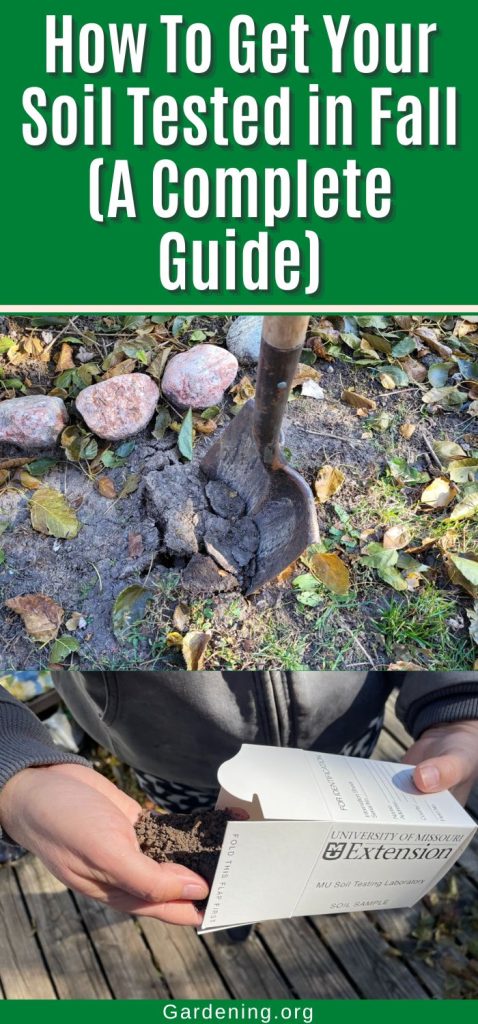
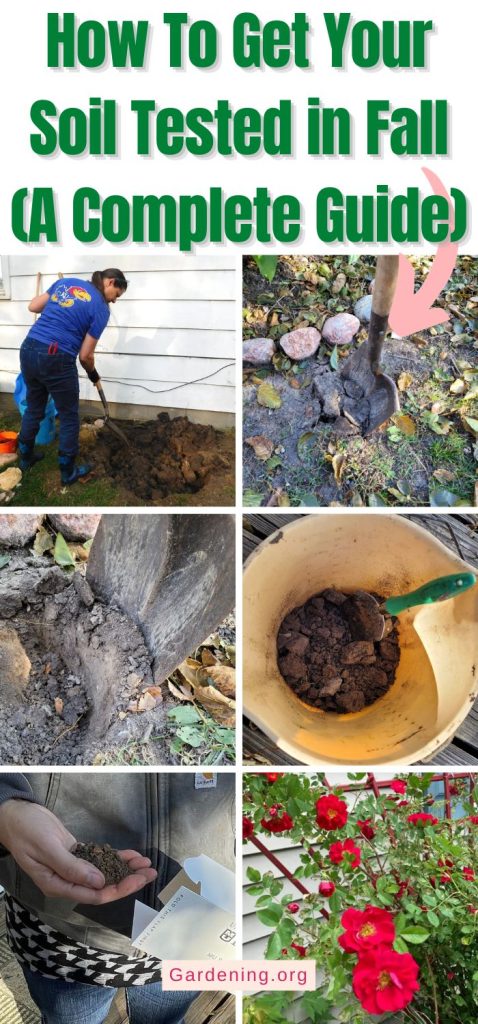
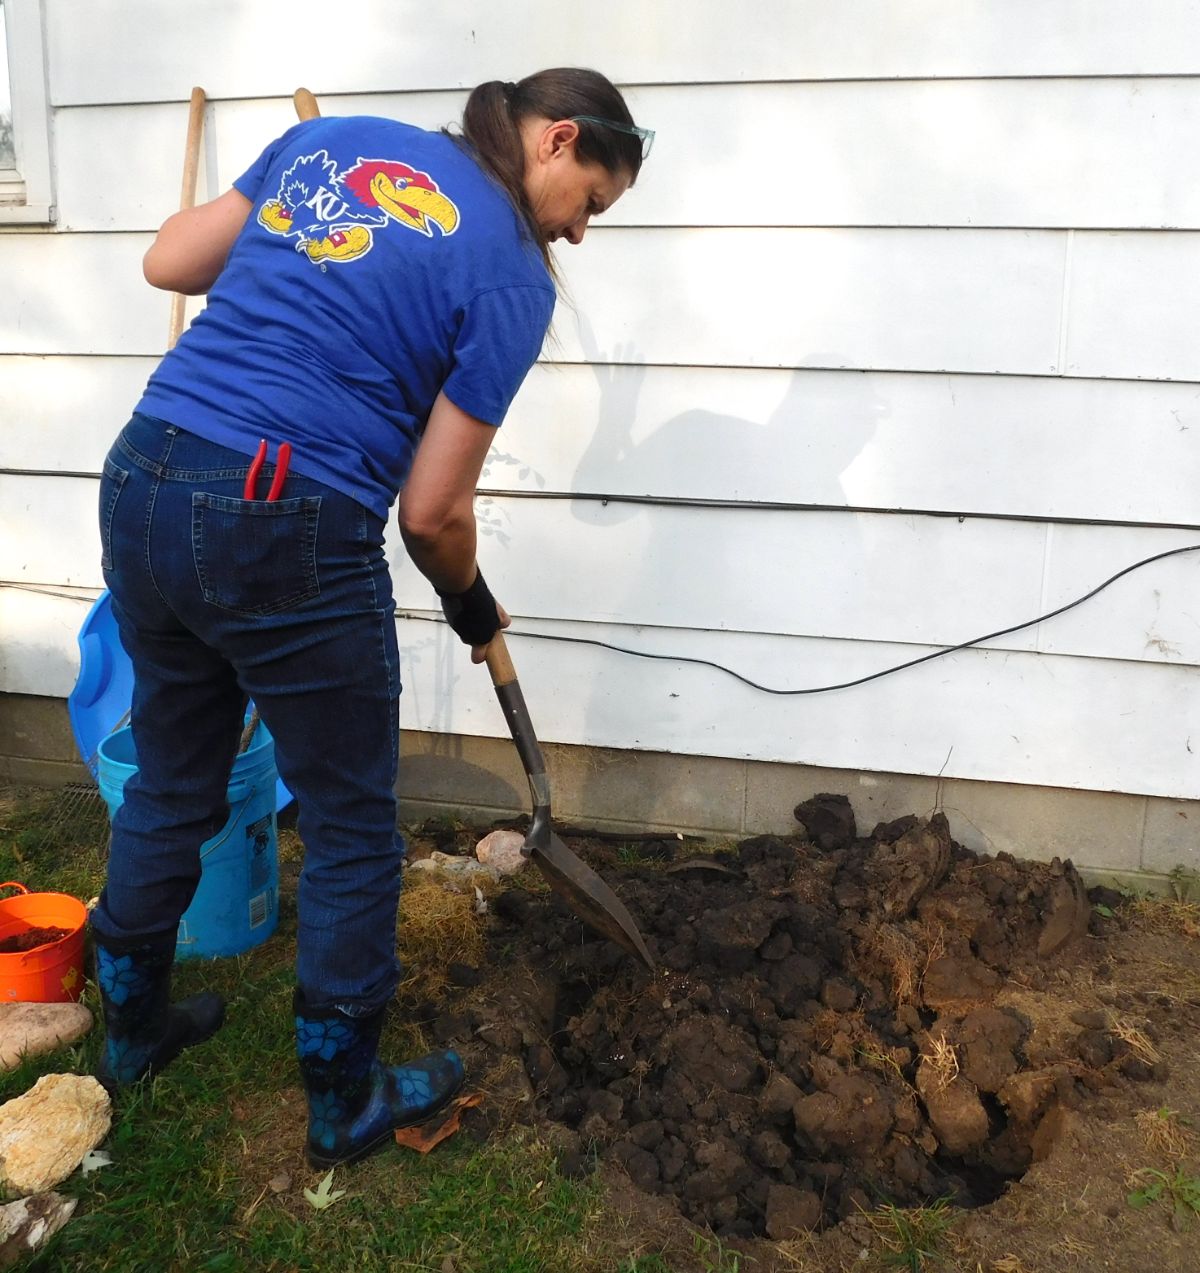
First, set the shovel into the soil -- about 5 to 7 inches -- and throw aside the first shovelful.
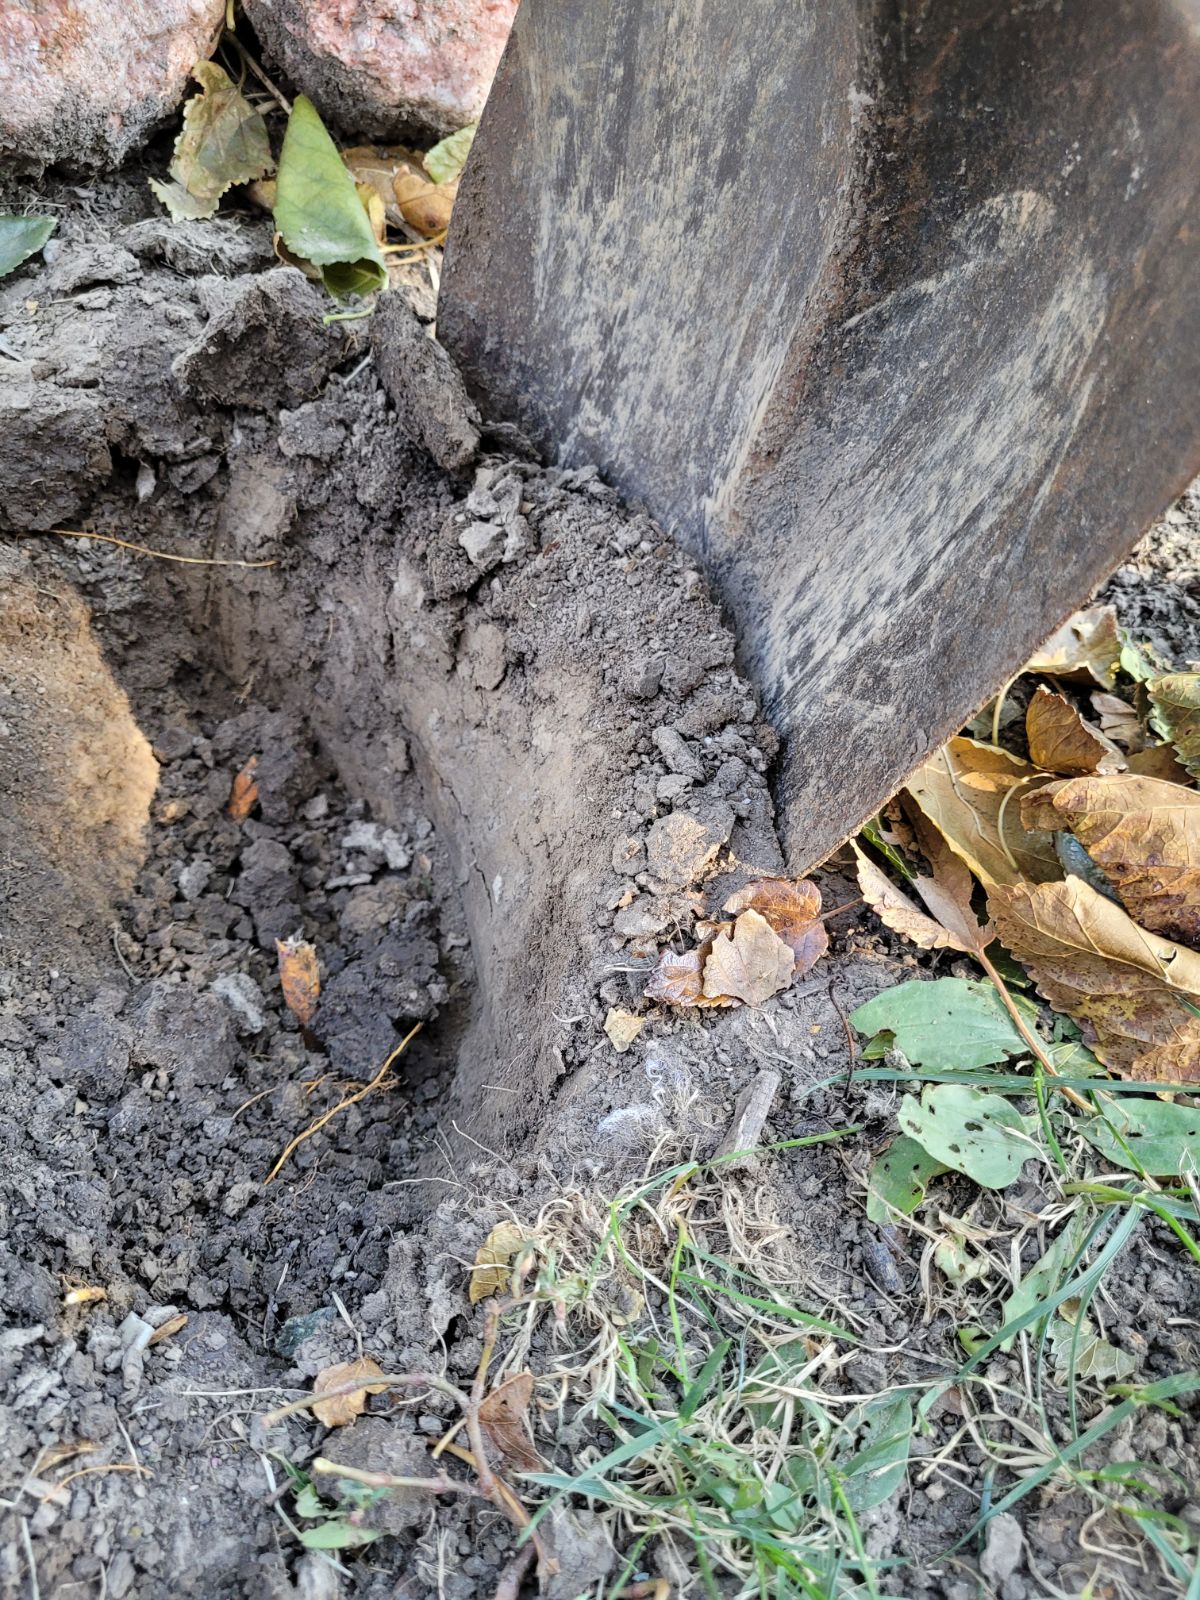
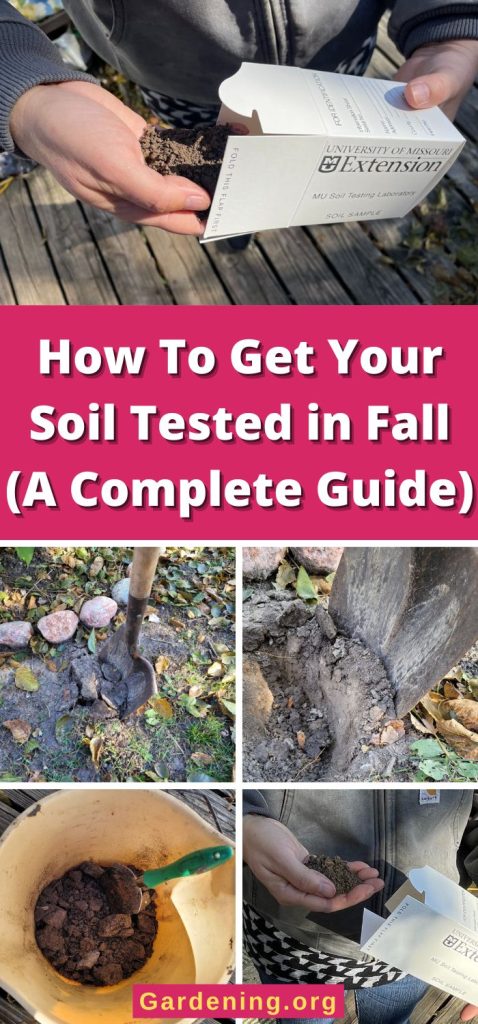
Then, at the back of the hole (where the shovel's back rested), cut a slice about an inch thick and 5 to 7 inches deep. Pull off the layer of grass and roots at the top, then place the soil in the bucket.
Then, zigzag around the sample area as you take subsamples.
If you’re using a probe or augur, simply stick (or drill) them into the ground, pull up the soil, and knock it into the bucket, removing the layer of grass and roots at the top.
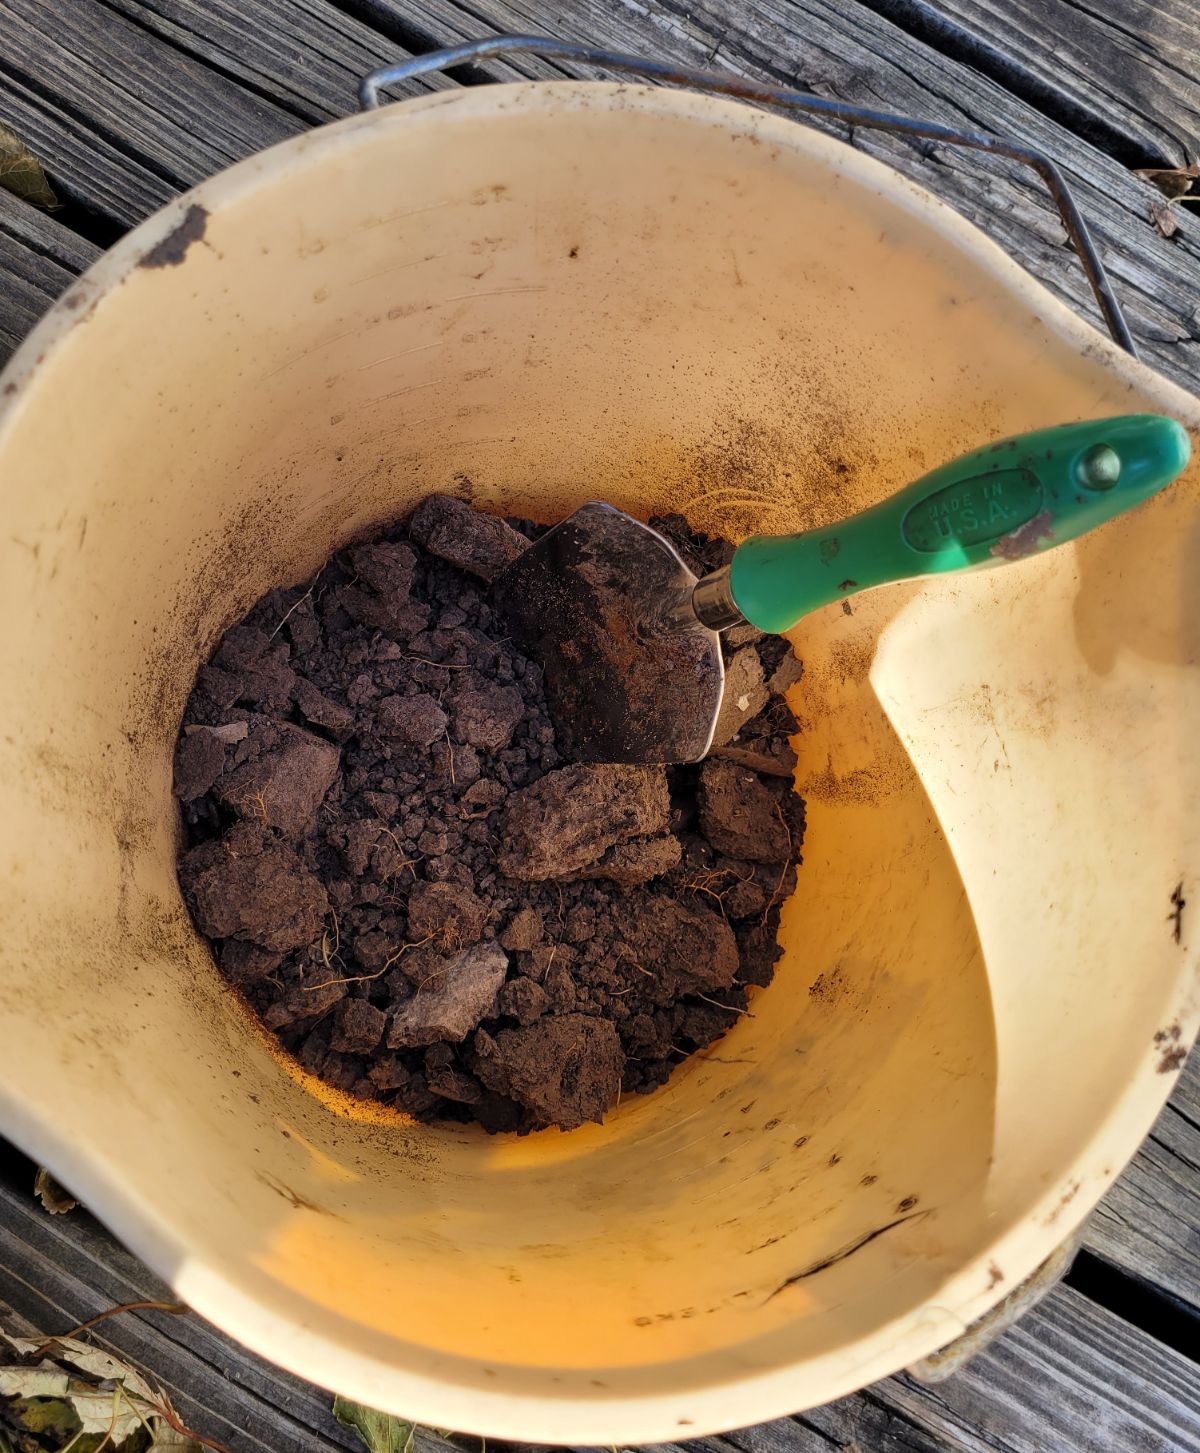
Once you’ve collected all your subsamples from all over the sample area, mix them together in the plastic bucket, breaking big clods into crumbs until the soil consists of mostly uniform aggregates.
Then, scoop the soil out of the bucket and put it into the box or bag for analysis.
Deliver or mail your box to the soil lab. Include the processing fee and the soil information sheet that you filled out. Results return in three or four weeks, though during busy seasons, they’ll take longer.
Interpreting Your Soil Analysis
In the United States, the soil analyses have been geared toward farmers, so your average homeowner might be cowed by this. They really can be confusing, so don’t worry. We’ll walk through this together.
The soil analysis will reveal several things:
- How much organic material your soil contains
- How much phosphorus (Ph), potassium (K), and other nutrients are available to your plants
- Your soil’s pH
- Cation exchange capacity
- Soluble salts in the soil
- Fertilizer recommendations and suggestions
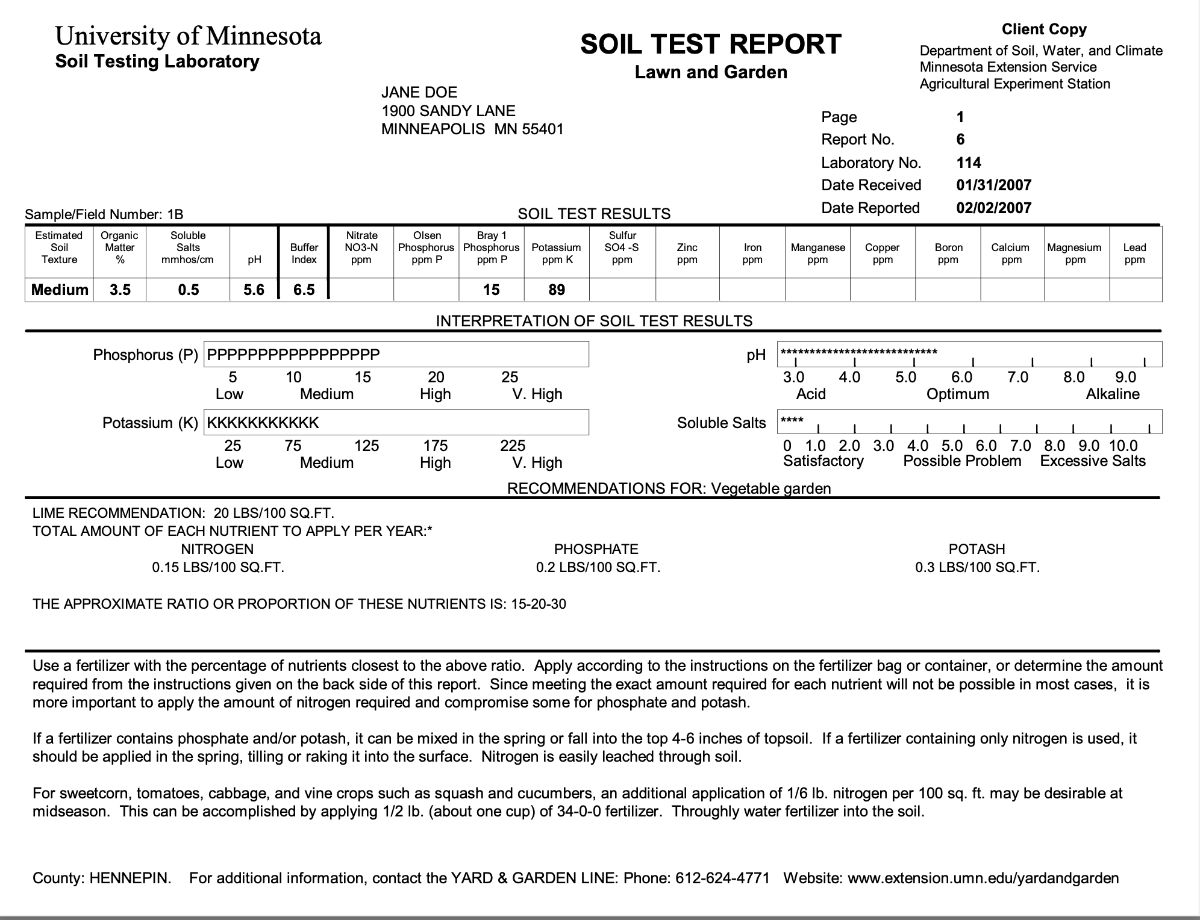
Some soil analyses have additional information.
Nutrients such as phosphorus, potassium, calcium, and magnesium are listed from being “very low” to “very high.”
Those that are listed as “low” are nutrients that your soil is especially deficient in. These levels might take a year or more to bring back to normal.
Nutrient levels listed as “medium” are adequate, but it wouldn’t hurt to add a little more.
A “high” amount of a nutrient needs no amending.
A “very high” amount should not be amended; otherwise, that nutrient may reach levels that are toxic to the plant. More is not always better!
The pH level of the soil shows whether the soil is acidic (below 6.0), normal (6.0 to 7.0), or alkaline (8.0 to 12.0). If the soil is too acidic or alkaline, nutrients are locked away, and plants can’t absorb them.
However, areas where you’re growing acid-loving plants, such as blueberries, will need to be tested separately because these plants need that low pH to prosper.
Lime is used to neutralize acidic soil, allowing the plant’s roots to absorb nutrients. Adding lime is also recommended if the soil needs phosphorus, calcium, or magnesium (the last of which is available in dolomitic limestone).
Organic material (OM) is the plant or animal residue that is broken down in the soil, such as compost or manure. Organic materials provide nitrogen, nutrients, and trace minerals; they help the soil retain nutrients, improve soil structure, and retain water.
A soil high in organic material also has an active biomass, which benefits soil health greatly. These benefits do not show up on soil tests. Well, a soil test can’t do everything.
Cation (pronounced “cat-ion”) exchange capacity, or CEC, indicates your soil’s capacity to hold nutrients. A higher number often indicates a more fertile soil. Levels above 20 or 25 mean that the soil has more nutrients than plants can use in a year. Levels below 10 mean that nutrients will be depleted very quickly and will need amending.
Clay soils often have a higher CEC because the microscopic, negatively charged clay particles hold on to positively charged ions of calcium, magnesium, potassium, and nitrogen and keep them from leaching away. Soils high in organic matter also have a higher CEC – yet another reason to add more compost and organic mulches that break down to become rich, black soil.
Recommendations: The soil report will also list recommendations on how much fertilizer to apply for different cropping options, how much lime to apply, if any; and how much nitrogen to add and when to add it.
Read more: 18 Top Soil Amendments to Improve Your Organic Garden
Acting On the Results
When you start amending your soil, use organic materials for good, long-term results. Remember, soil is complex and can take a while to change, but you can coax it along. When adding lime, for instance, expect to see complete results a year after putting the lime down. This is why it’s a good idea to be patient and to pile on the compost while you’re being patient!
Building good soil won’t take place overnight. Soil building is an ongoing process. I've written a whole book about nourishing the soil, but I’m still learning new things – and you will, too.
Getting a soil test or soil analysis means working with the soil to create the most nourishing and healthy home for your plants to thrive in. It’s how you can enjoy the best yields from healthy crops.

Leave a Reply