
Budding is a form of propagation in which a single bud from the desired shrub or tree is grown on a set of older roots. The bud results in a clone of the original plant that is genetically the same. It’s done for fruit trees, grape vines, roses, and other woody plants that don’t grow true to seed. It’s a propagation method that gives you a clone of the original plant on strong, well-developed roots.
Chip Budding and T-Budding are related ways of grafting that both lead to the same result – a new sprout growing on a rootstock that will turn into a brand-new fruit tree. Budding is easier than other forms of grafting and can be more cost-effective. What’s not to like?
Jump to:
What You Need for Chip Budding and T-Budding
What Are the Benefits of Chip Budding and T-Budding?
- It saves time. Budding is a quick way to start new trees on roots that are several years old, so your new tree reaches maturity faster – developing fruits and blossoms more quickly.
- It’s less labor-intensive than growing from scions. Grafting scions onto a rootstock takes longer than cutting a bud and slapping it onto a tree.
When Is Chip Budding and T-Budding Done?
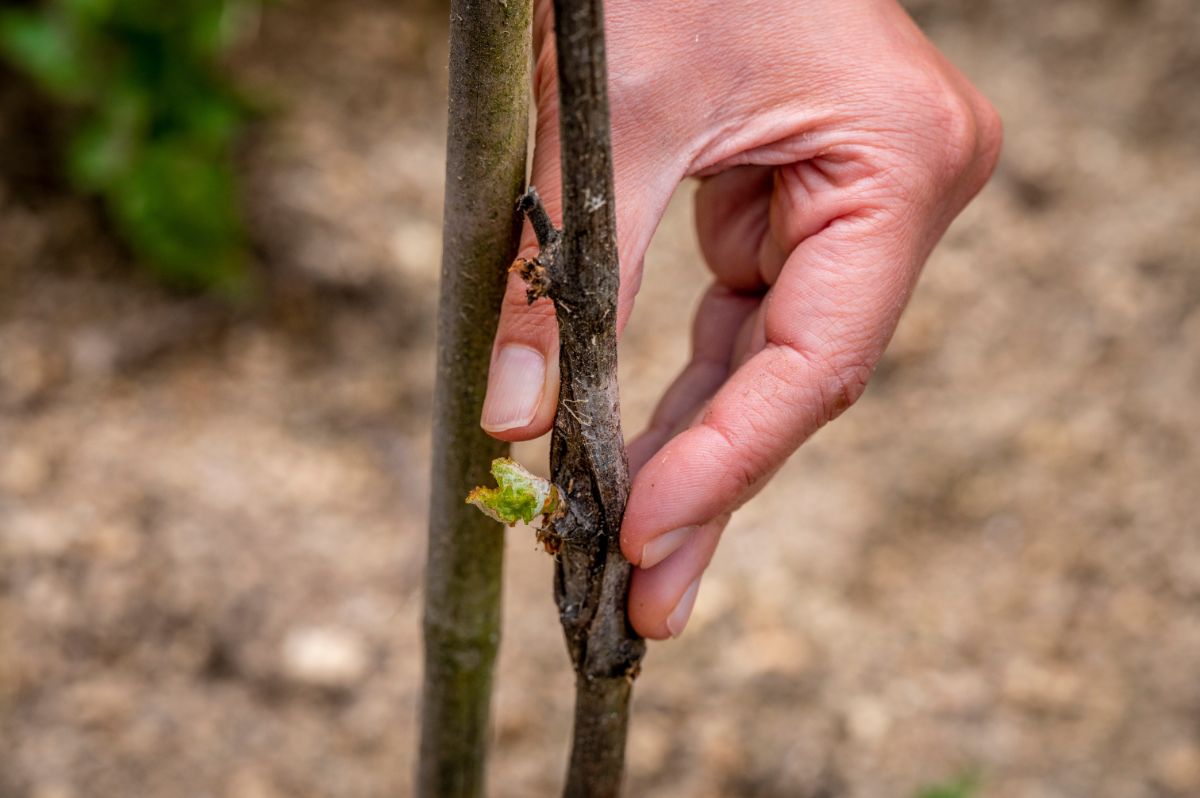
Chip budding can be done in winter and in early spring when the trees start putting out new growth and when the bark can be separated from the cambium. (The cambium is the green, growing layer of the tree. When you scrape away a little bark with your fingernail, the green layer that’s exposed is the cambium.) It works best in late summer once the terminal bud is formed and the shoots are finished growing.
T-budding should be done in winter with dormant stock and buds.
Read more: The Ultimate Guide to Planting a Food Forest
Supplies You Need for Budding
If you’ve never grafted before, today is a good time to start. Even if your early attempts don’t work, you’re out only a couple of dollars. Experience and practice will win you good results, eventually.
- A stock plant (i.e., rootstock) of the same genus and species as the cultivar, with a stem that is pencil-sized or larger (at least ½ inch diameter).
- Mature buds from the desired cultivar you want to grow – in winter, preferably dormant – for grafting. We’ll talk about collecting budwood in a moment.
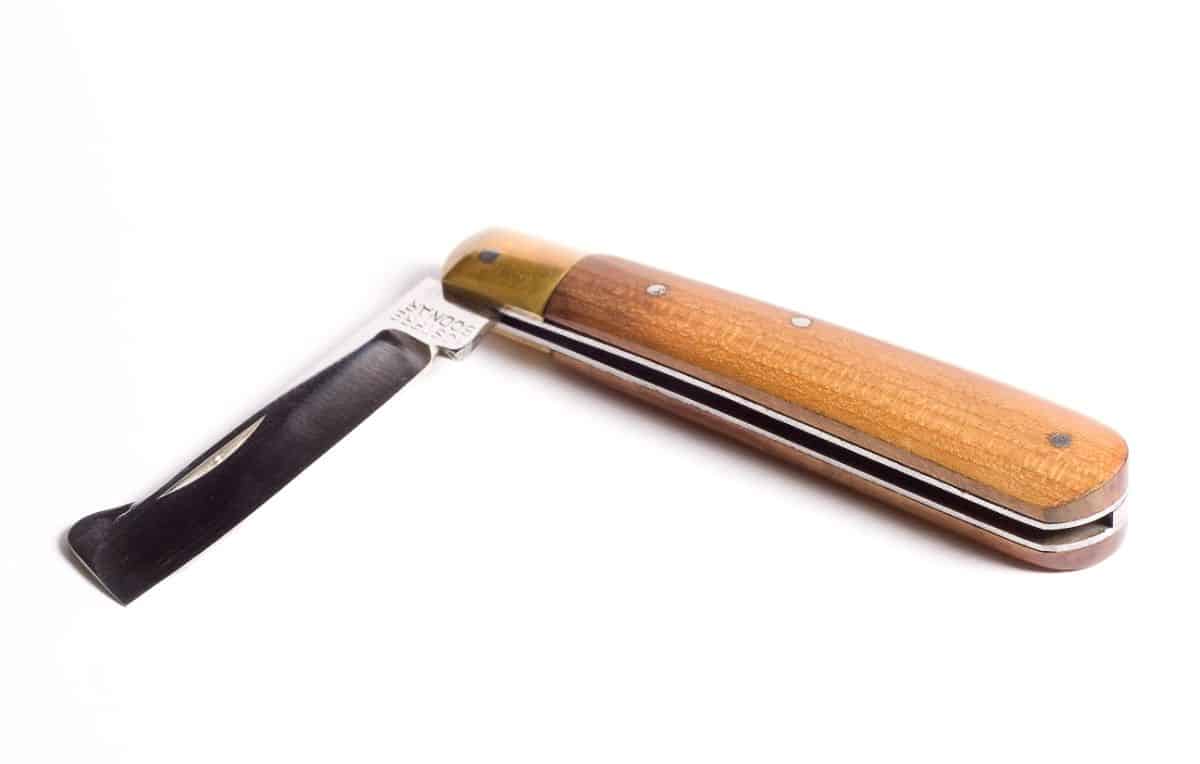
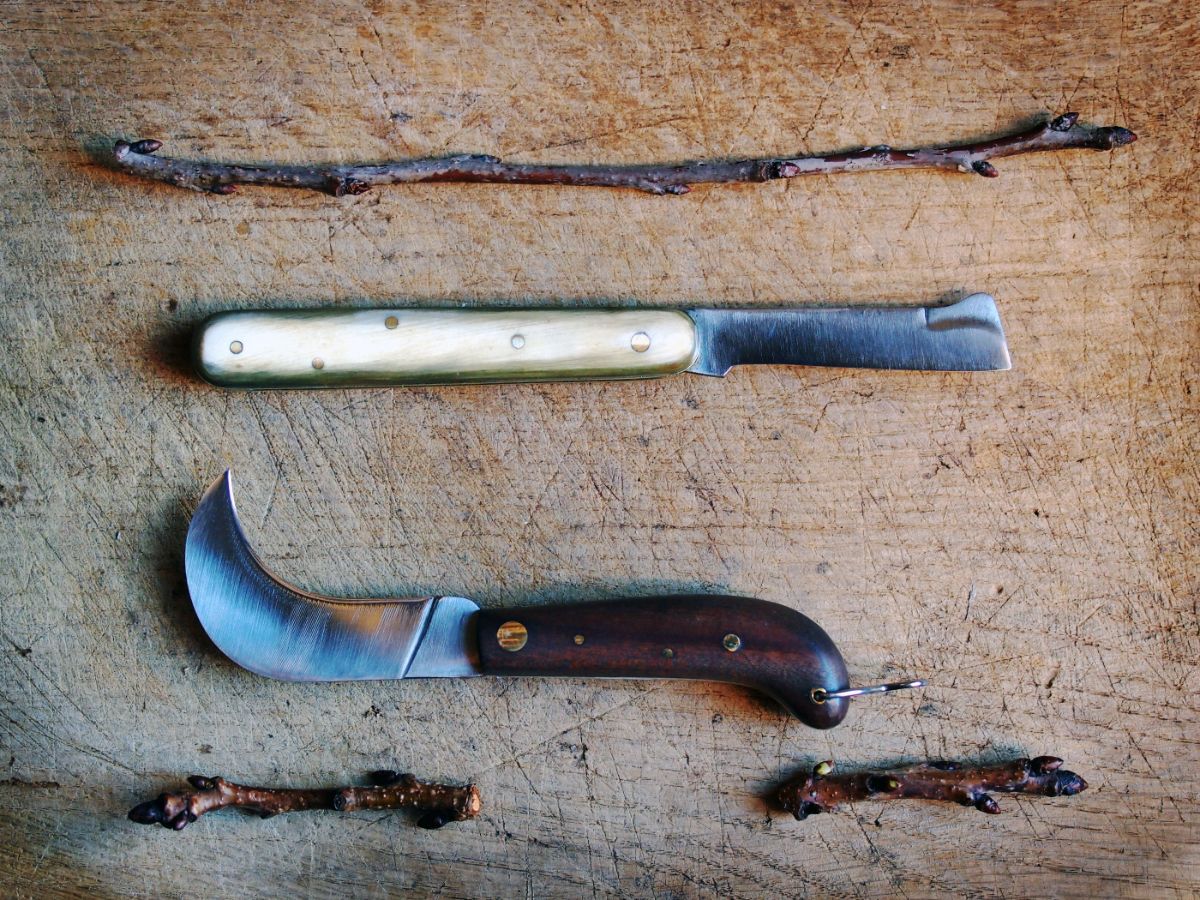
- A grafting/budding knife with a razor-sharp edge.
- A good-quality whetstone as well – learn how to use it correctly.
- Grafting tape to hold the bud in place, protect it from disease and damage, and keep moisture in.
Read more: How to Protect Young Fruit Trees Over Winter (Easy Tips)
How to Collect Budwood
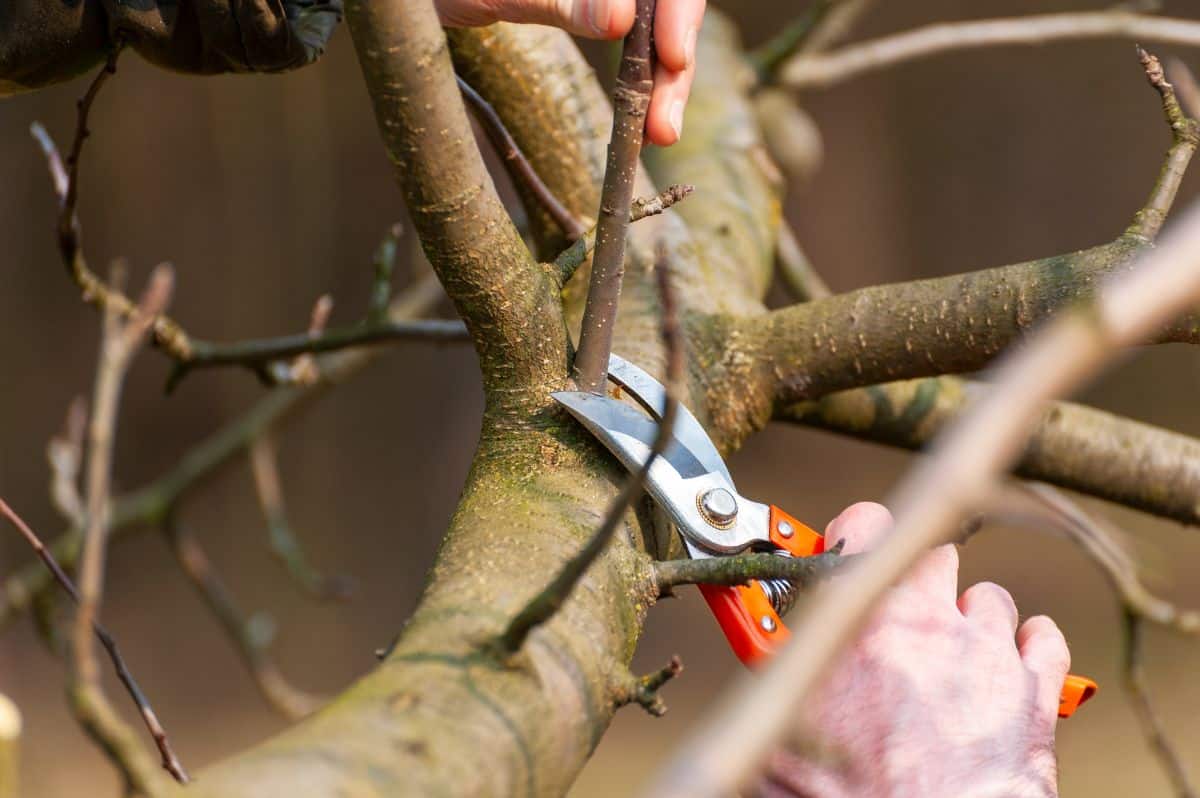
Choose vigorous new shoots less than a year old that have only vegetative growth – leaves – but no fruit or flowers. On fruit trees, these would be the watersprouts. These new shoots have smaller buds that will grow leaves and stems. (Large, plump buds on older growth contain flower buds – a bad choice if you’re trying to grow a new tree.)
Cut off the watersprouts until you have all the buds you need. Snip off the large part of the leaves, but leave the petioles. These will serve as small handles that will make it easier to pick up the buds. Wrap the watersprouts in moist paper towels and put them in a cooler so they don’t dry out. Moisture loss is your enemy in this process.
Purchasing Budwood
You can also purchase scion wood online, and it is generally budget-friendly. Each piece of scion wood can yield a number of buds. You can find a list of reliable suppliers at the bottom of this article.
Read more: 12 Low-Maintenance Fruit Trees Anyone Can Grow
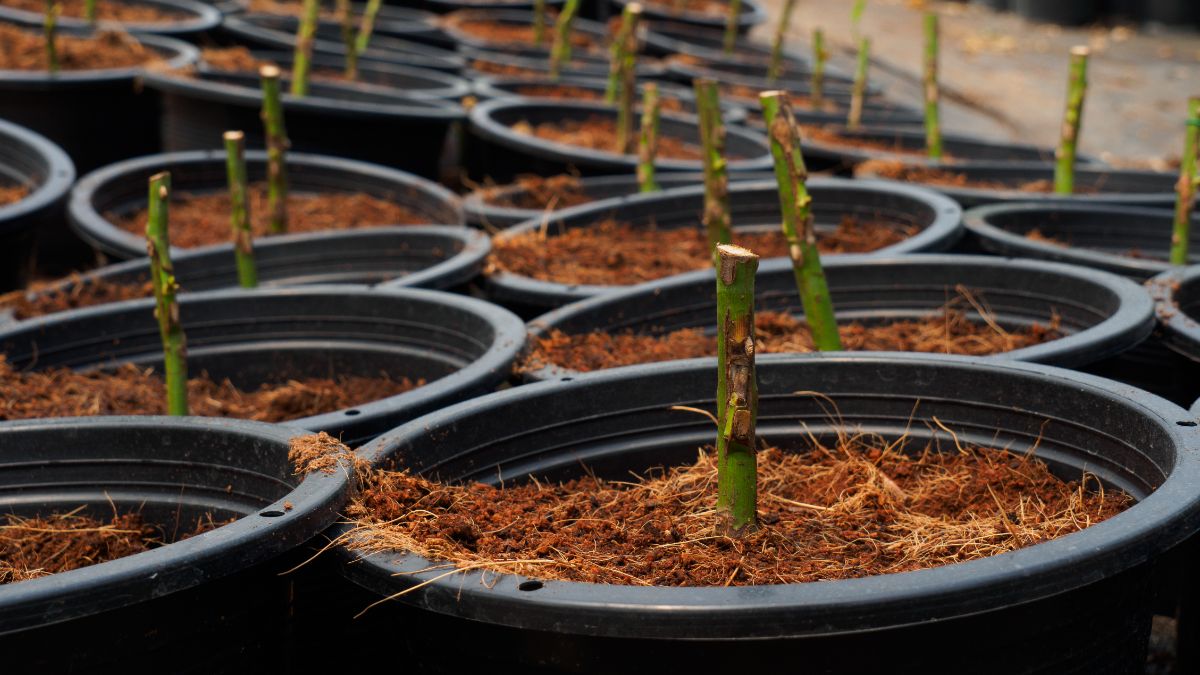
How to Get (or Grow) Rootstock Plants
A number of online nurseries sell rootstock (dwarf, semi-dwarf, etc.). They’ll take a few extra years to mature, but the price is right.
However, buying rootstock plants every year will add up, so dedicated DIY growers might prefer to grow their own rootstock. This allows you to focus on rootstock varieties that work well for your area.
Some fruit trees will sucker from the roots. If so, dig down to where the suckers come out of the tree and cut them off. Now you have clones of the original rootstock. Plant them and let them mature for a few years. Boom, rootstock.
For ages, gardeners have planted seeds to grow their own rootstock, then used the established plants for budding. Naturally, this will take longer than the aforementioned methods, but if you have the time, space, and will, then go for it.
Side Note: For Best Results, Join a Local Orchard Society
If you really want to dive into orchard growing, join local organizations for permaculture or home orchards. They are amazing and knowledgeable sources for scion wood and rootstocks and knowledge for grafting and budding near you. They also have regional meetings to share growing methods and scions of rare fruit varieties.
Read more: 13 Pruning Mistakes That Will Ruin Your Fruit Trees
How to Do Chip Budding
This type of budding is one of the most popular ways of budding in nursery production, and it’s the only budding practice that can be done on both dormant and actively growing stock plants.
Several important points:
- If you are going to chip bud rootstocks, use 2-year-old rootstocks with shoots that are about ½ inch in diameter or larger.
- Use chip budding when the cambium layer can peel off or be lifted off of the wood.
- The chip bud is cut from the current year’s growth on the cultivar you want to propagate. In winter, you’ll be using dormant buds. In summer, you’ll cut actively growing stems.
- Graft early in the year. The dormant buds need to have time to slowly grow and join together before the buds start popping open in spring.
Before you start, get all your supplies together!
- A sharp grafting and budding knife
- Budwood
- Rootstock
- Grafting tape
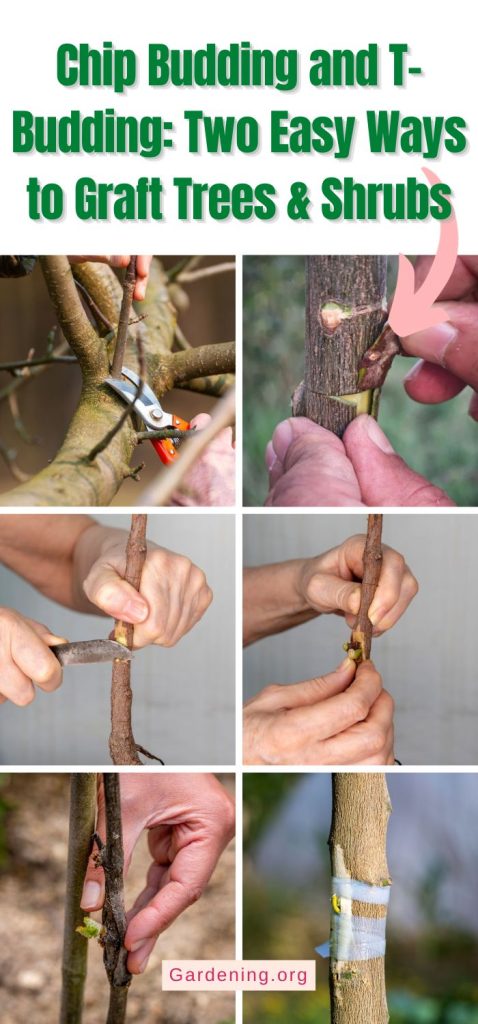
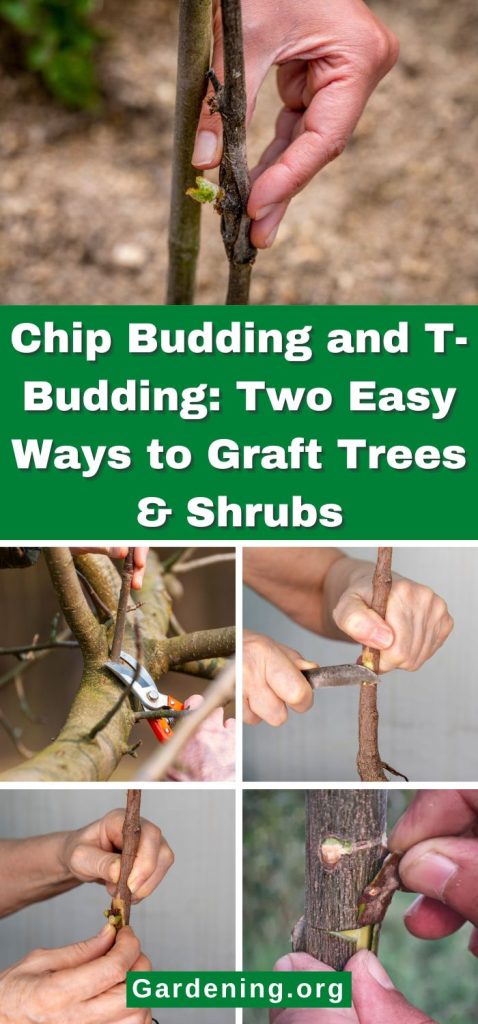
How to Do a Bud Graft
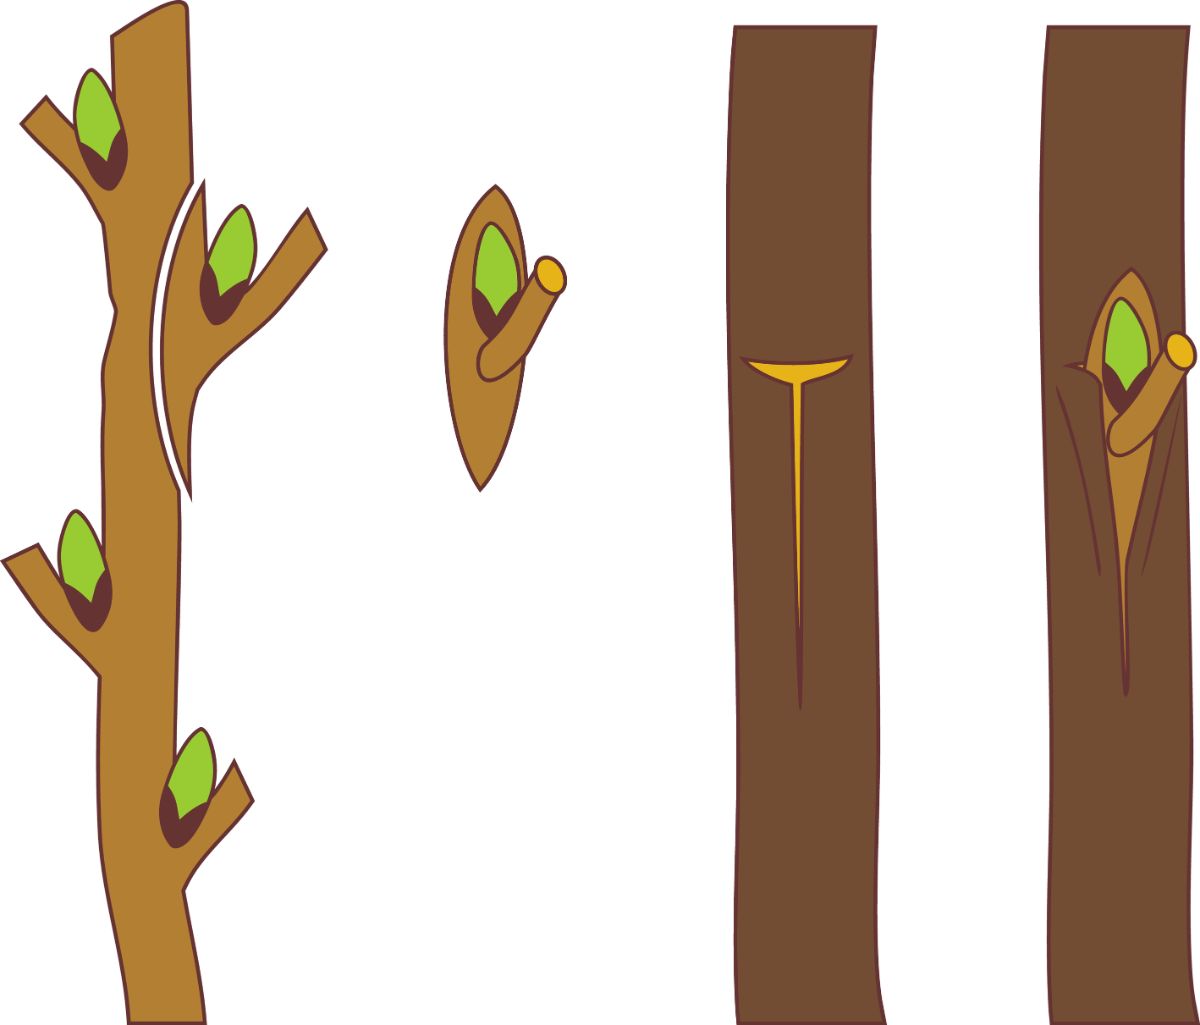
T-Budding

For T-budding, you will make a T-shaped cut in the bark of the rootstock about 6 to 8 inches above the ground.
The cuts should be shallow, cutting through the green cambium layer but not into the wood underneath.
Make a vertical cut 1 inch long, then a horizontal cut at its top that’s ½ inch long.
Cut the bud from the budwood. Give the bud about ½ inch of space above and below, so the entire chip will be about an inch long.
Again, make shallow cuts that go through the cambium layer.
Using the budding knife, carefully slice the chip off the wood.
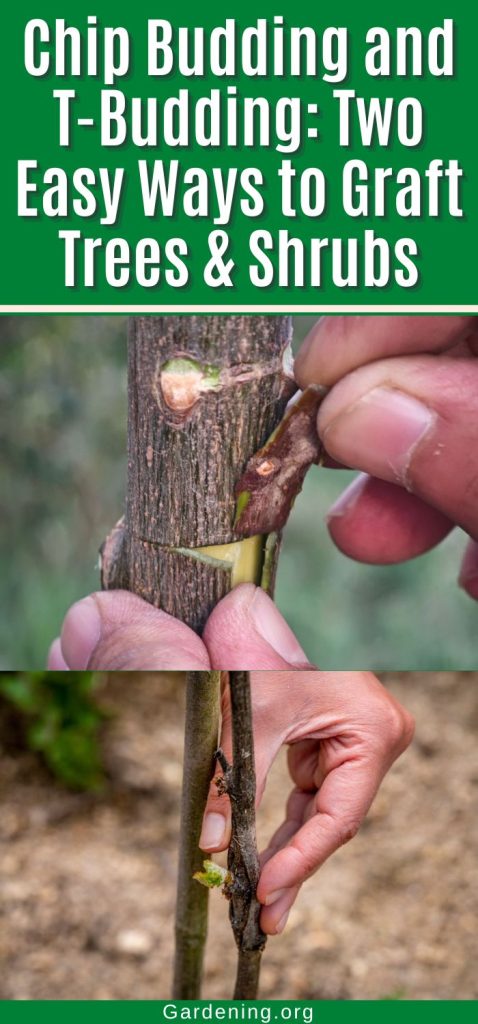
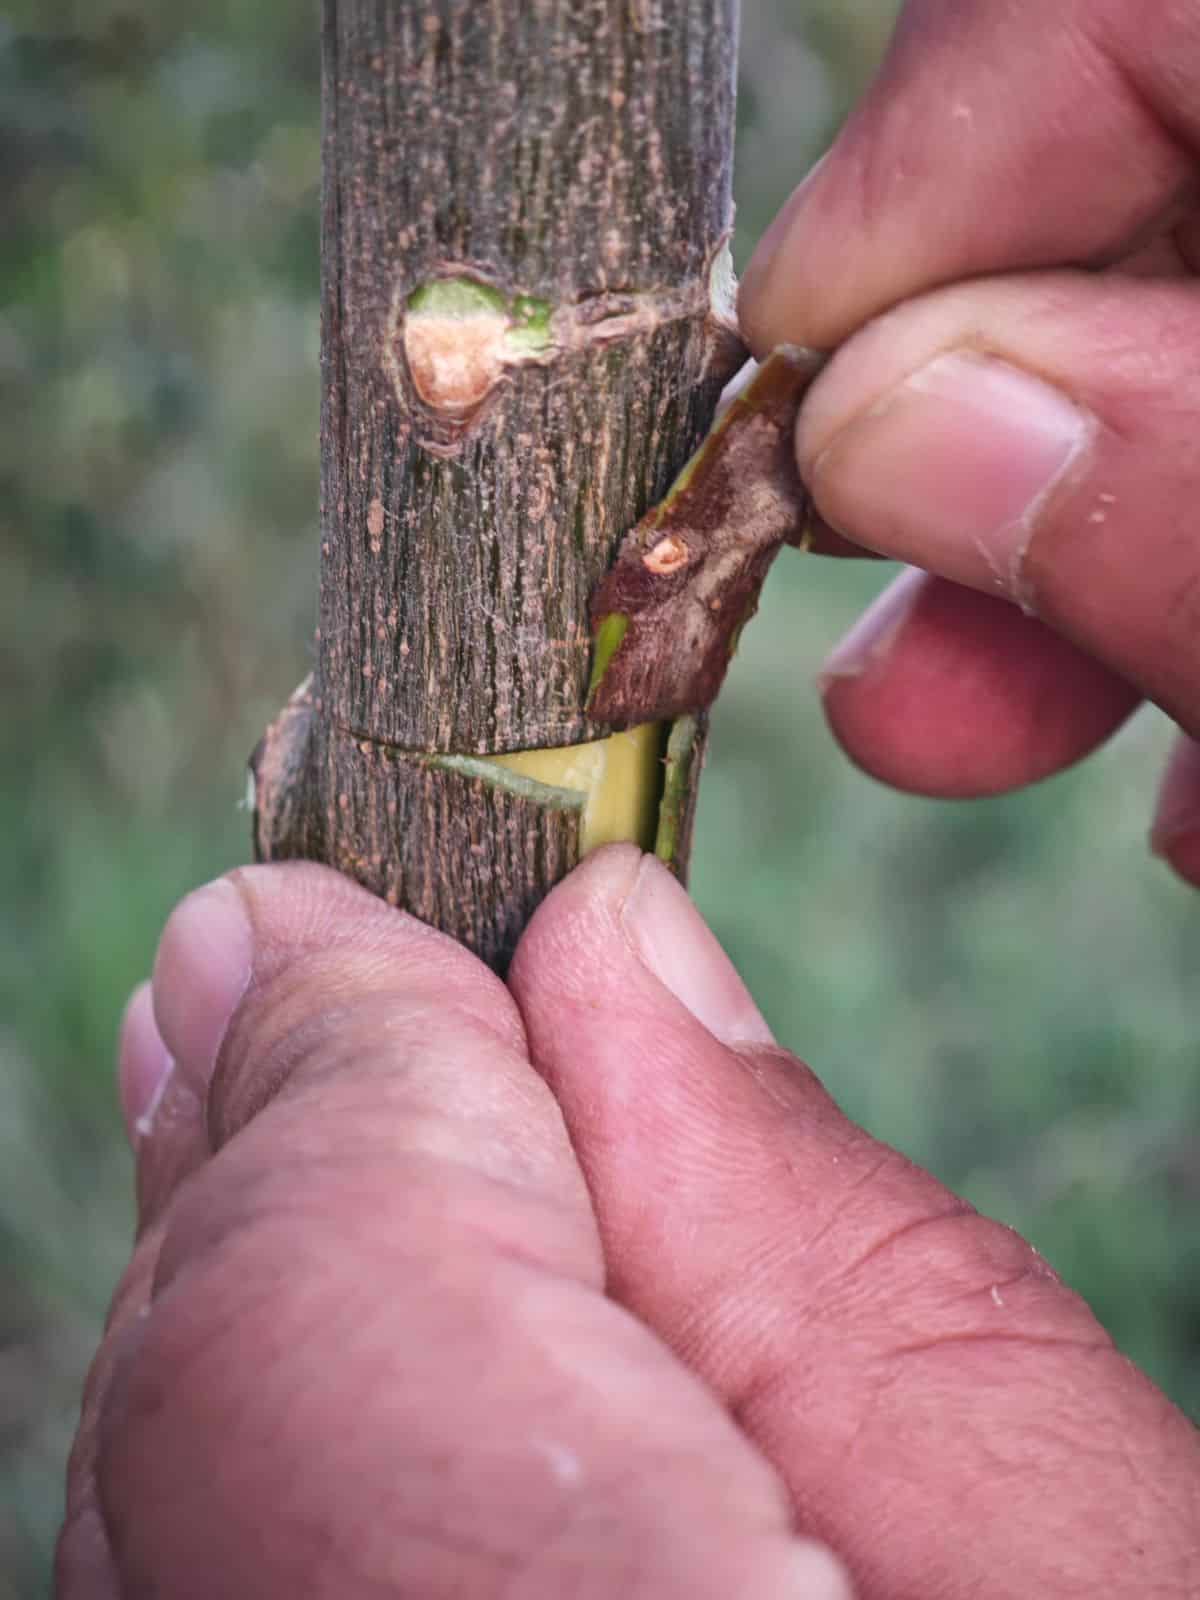
For T-budding, peel back the T on the rootstock enough to let you slide the bud underneath. The bud should peep through or above the flaps, holding the budwood in place.
Make sure you have good contact between the cambium layers. This is crucial. The cambium needs to be touching as much as possible. Adjust the bud as necessary.
Now wrap the bud with grafting tape, overlapping it. This will keep the bud in place, protect the cut areas, hold in moisture, and press the cambium layers together so they make close contact and can exchange water and nutrients as they grow.
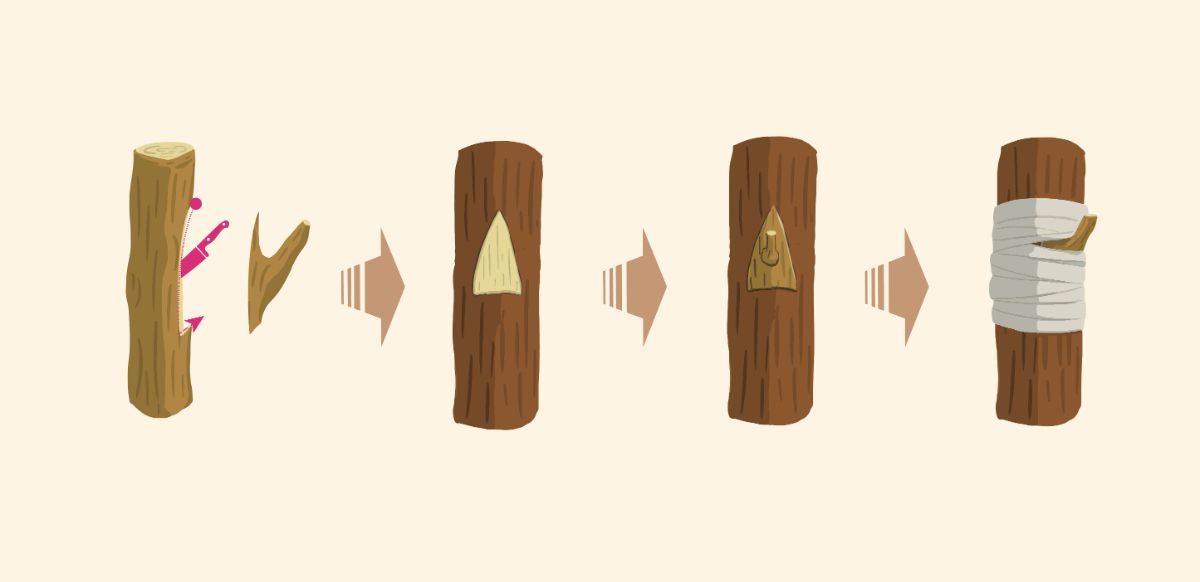
- Cut the chip bud from the scion.
- Have the cut ready on the rootstock.
- Insert the chip bud snugly into the cut.
- Wrap it, but leave a space for the bud to grow.
Chip Budding
The process for chip budding is very similar to the process of T-budding.
However, instead of cutting a T into the rootstock, you are going to make a cut that matches, as close as possible, the shape of the chip bud. With chip budding, you want to make a little puzzle piece that fits the gap on the rootstock.
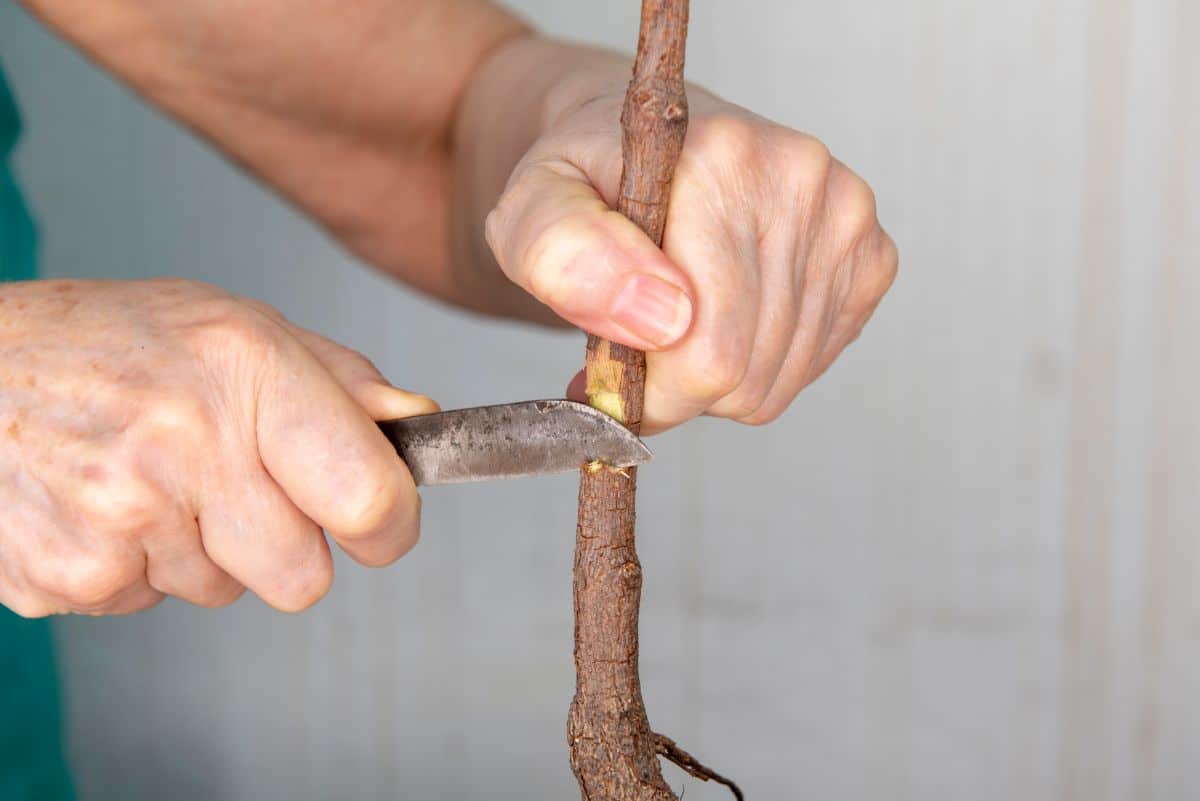
On the rootstock, make the first cut at a 45-degree angle, an inch below the bud you’re removing. This will serve as a little shelf for the incoming chip bud to sit in. The knife will need to cut through the cambium and slightly into the wood, but no deeper.
Make another 45-degree cut an inch above the bud.
Without removing the knife from the cut you just made, bring the knife straight down to slice the bud off the front of the stem. Remove this little chunk.
Now go to the scion or budstock and make the same cuts around the bud you want to graft. Do your best to make this chip the same size or slightly larger than the rootstock chip. (You can always trim down a chip that’s too large, but you can’t add back cambium on a chip that’s cut too small.)
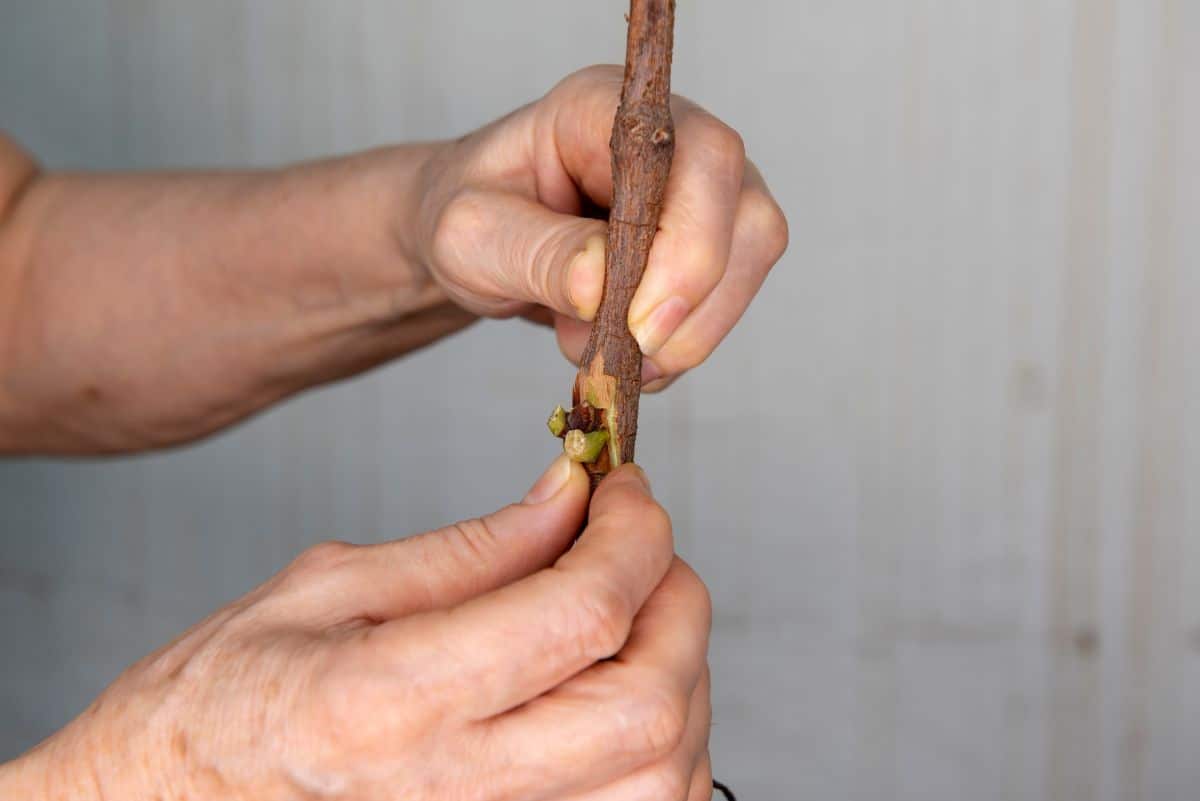
Your objective is to cut a chip that will sit in the lower notch on the rootstock and have most of its cambium touching the rootstock cambium. Again, this is crucial for good results.

Set the bud securely into place, as above, and wrap grafting tape around the bud.
Label your finished graft with the variety name, the rootstock type, and the date. Dab a little paint above and below it so you can find it later once the tape comes off.
Read more: How to Design Vibrant Year-Round Color in Your Garden
What Happens to the Budding Graft Next?
The bud doesn’t start growing when it’s inserted into the stock. It will stay dormant until the next spring. Under the bark and the grafting tape, it’s busy connecting to the surrounding cambium, growing callouses to close the wounds.
Before spring, remove the tape to see if the graft took.
If the bud is wrinkled and dried up, well, that’s the way it goes sometimes. You can try grafting the rootstock again.
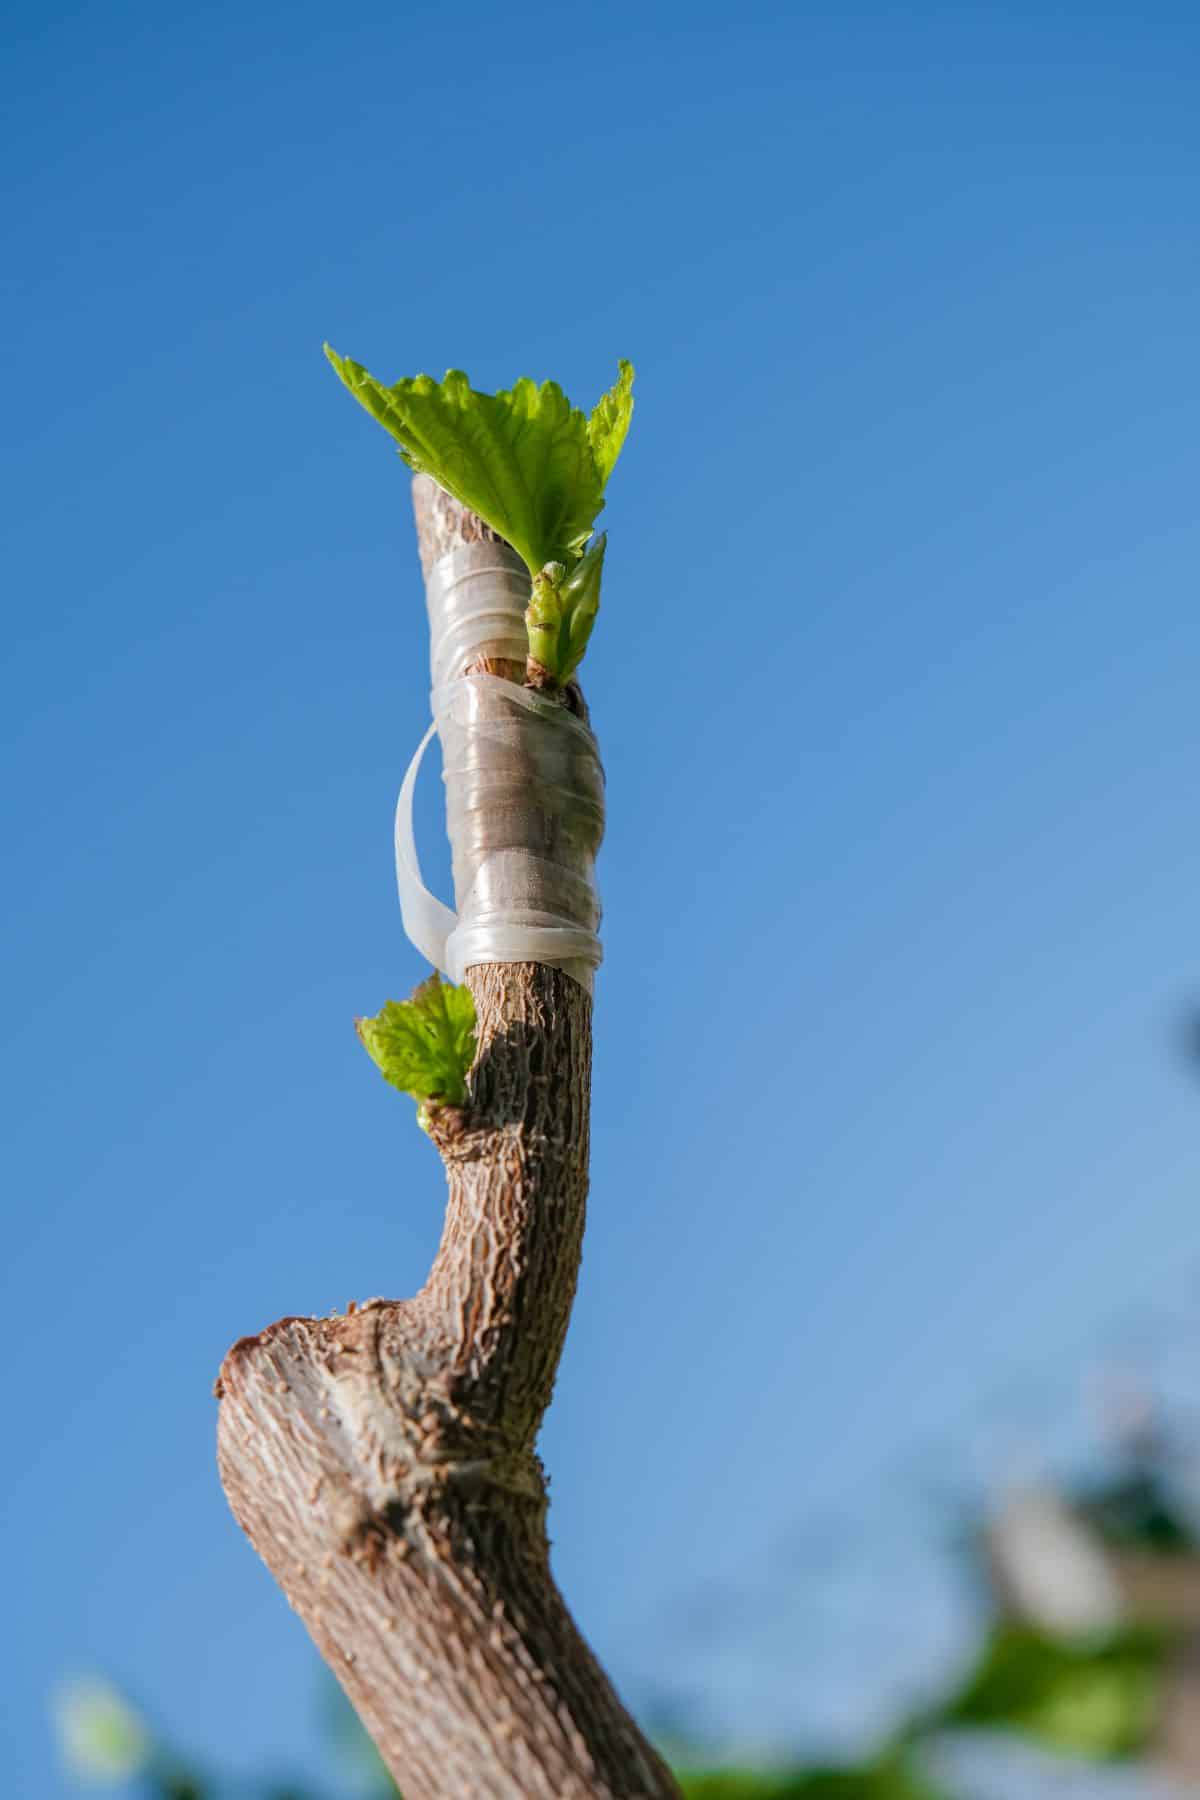
If the bud is plump and showing green growth, then cut off the top of the rootstock just above the new bud. Now, the bud will send up a shoot that will become the trunk of the future tree.
Stake your little tree. You might put a small cage around it to keep squirrels, rabbits, or deer from chomping it. Rub out any shoots that grow up from the rootstock.
If you have multiple shoots coming out of your scion bud, wait until they’re about 3 inches long. Then, choose the strongest and straightest to be the main trunk and pinch off the growing tips on the other two. You’re keeping these just in case the central stem gets broken or gets eaten by a deer.
Once the center stem reaches a foot tall without mishap, then remove the other two. Now, all the plant’s energy can go to the center stem.
Since the roots of the 2-year-old rootstock are already mature, the budded tree will be very large and strong. If it’s a fruit tree, then it will bear fruit sooner than a cutting would have.
SCION SOURCES
Here are a few small growers who sell good-quality scions for budstock. Most of these carry rare fruit varieties as well as many other interesting selections for your small orchard. Some also offer educational courses and a variety of other benefits.


Leave a Reply