Garlic is one vegetable that is hard to beat (and yes, garlic is a vegetable). People often think of garlic as an herb or spice because it is used in smaller quantities similar to herbs and spices. This is attributable to its strong flavor; a little goes a long way.
Garlic is, in fact, a vegetable member of the allium family—the same family that things like onions, shallots, and leeks belong to.
We love garlic for its flavor, but what many gardeners do not realize is that garlic is very easy to grow. It suffers from few to no pest problems, few issues of rot or disease, and needs little maintenance. Once you know how to grow garlic, you’ll only wonder why you didn’t do it sooner. And why you didn’t plant more.
Garlic Growing Basics
Zones: Best in zones 3-6 but will grow well in almost any growing zone. For zones 7 and higher more care should be taken in variety selection.
Growing season: October through June/July
Soil: Loamy, well-draining but moisture-retentive soil ideally with a pH of 6.0 to 7.0. Tolerates a large range of soil conditions.
Sun: Full sun
Why Grow Your Own Garlic

There are a number of reasons to grow your own garlic. First and foremost is having a steady supply of culinary favorites. It is a very good thing to have plenty of garlic on hand for cooking, preserving, or making your own minced or dried garlic powders and products.
Garlic has long been known to offer a number of dietary, health, and nutritional benefits, all of which can be harnessed simply by including garlic in your diet.
Other reasons to grow your own garlic include self-sufficiency, freshness, and the security of knowing how the garlic you consume was grown—what it may or may not have been treated with.
In terms of self-sufficiency, growing your own garlic means more than not having to go to the store to buy it. Growing your own garlic also means that you can grow and develop your own seed garlic crop (because garlic is grown from the same cloves that we eat). This means that you can grow your own self-sustaining seed garlic crop for both eating and planting.
Selecting and growing your own garlic year after year also means that you will, over time, develop a crop that is well-suited to your climate, soil, and garden and one that can be more resistant to stresses and can result in bigger, better bulbs and harvests.
Growing your own garlic means huge money savings, too. Good, fresh garlic can be expensive. Good-quality seed garlic is also very expensive (especially if you prefer organically grown). By establishing a self-sustaining food and seed garlic crop, you can have all the garlic you’ll ever need at no cost. What’s more, there is no difference in growing garlic for seed and replanting or for food use. It’s only a matter of how much you plant and how you use what you harvest.
You also have much more flexibility in flavor and variety when you grow your own garlic. If you are buying your garlic, you are limited to whatever kind of garlic is sold at your local store or market. When you grow your own, you can order from one or many suppliers and choose from different varieties. This lets you select for features like clove size, taste, and strength, ease of peeling, or ability to store well for long periods of time—whatever is most important to you.
Finally, Garlic is a very efficient plant and nearly all parts of the garlic plant can be used and eaten. Not only does this include the bulb and cloves that we know and love, but also garlic scapes, flowers, and leaves.
Softneck vs. Hardneck Garlic and Recommended Garlic Varieties
There are two main types of garlic and many varieties that fall into each of these categories.
To start with, garlic are either a softneck type (variety) or a hardneck type. The main difference is in the type of neck and the leaves of the plant.
Softneck garlic stems and leaves grow from the top of the cloves and the neck does not grow through the middle of the bulbs. The middle of a softneck garlic bulb is made up of smaller, sometimes very small, cloves.
Hardneck types have a more central stalk that grows through the middle of the bulb with cloves forming in a circle around it.
These mannerisms have implications for growing and storing. Other differences unique to each type will help you select which type of garlic is best for you to grow.
Softneck Garlic Benefits and Considerations
There are two major advantages to softneck varieties. First, softnecks are the best-storing and longest-storing type of garlic. If you are looking for something that can store in the range of eight months or more, a softneck variety is best. Softneck varieties are the varieties that we usually find available in grocery stores because they are the most reliable storing types of garlic.
Secondly, softnecks are the best type of garlic to grow in warm climates. They do not have as specific cold requirements as hardneck garlics and in very warm climates they are often the only type to consider. Softnecks mature faster than hardneck garlics, which is a big reason they are better for warmer climates—they complete their growing cycle before temperatures rise to higher southern extremes.
Because softneck garlics do not have a hard central stem, their dried leaves can be braided to make attractive garlic braids. This is one favorite crafty, decorative way to store garlic and bulbs can then be cut or pulled off when ready to use. Hardneck garlic is not considered good for braiding.
Softneck garlics have a tamer, milder flavor that does not vary as much from variety to variety. This makes it a reliable culinary choice, but one that offers less interest and fewer flavor options.
One downside to the growing character of the cloves and bulbs is that the bulbs of softneck garlic varieties are smaller and are more difficult to peel as compared to hardneck cloves. There is also less uniformity in clove size. Some of the middle cloves may be almost not worth bothering with.
Hardneck Garlic Pros and Cons
Hardneck garlic does not store as well or as long as softneck varieties, but it does perform the best in colder and more northerly locations. They are considered a hardier type of garlic.
Hardneck garlic has fewer cloves per bulb, but the cloves are larger (often quite a bit larger), so you do not need as many hardneck cloves to equal the same amount. The cloves are also easier to peel and because of their larger size, you will not need to peel as many for a given quantity.
Hardneck garlic exhibits more flavor complexity. Like cheeses and wines, they are said to reflect the “terroir” or natural flavor conditions and nuances of the area they are grown in. This means that a hardneck variety can result in a uniquely flavored type of garlic from one region to another, or even from one garden to another, and that can be a lot of fun, too.
Finally, hardneck garlics are the only type of garlic that grow garlic scapes—the flowering stalks that can be harvested and eaten before your garlic is ready to be harvested. If you want scapes, you have to grow a hardneck type of garlic.
Major Soft- and Hardneck Varieties to Choose From
Softneck and hardneck garlics are further broken down into subgroups and then again into specific varieties, of which there are many. When you account for the different varieties developed by growers over the years, there are even more types and names to consider still; variety names like “Music,” “German White,” “Romanian Red,” “Northern White,” “Inchelium Red,” “Silver Rose,” “Silver White,” and many, many more. Too many to list, really.
To avoid too much confusion, what is worth knowing are the main subgroups. From there, you’ll be able to look for the group that appeals to you and your growing zone, and then sort out specific selections from sellers’ descriptions.
The Softnecks: Artichoke and Silverskins are the two types in the softneck category. These are the longest storing of any type of garlic. Bulb size at maturity ranges from 1 ½ inches to 2 ¾ inches. There are typically 10 or more cloves per bulb, though they are smaller in size.
There is not as much difference between these two types as you will find between the hardneck types. These are good for braiding and roasting, too, and are the best garlics to grow in warmer climates (though many varieties can do well in northern zones).
The Hardnecks: The major types of hardneck garlics are Rocamboles, Porcelains, Purple Stripes, and Asiatic.
Rocambole varieties are known to be more spicy, hot, and pungent and are loved for their flavor by foodies and chefs. The downside is that Rocambole garlics do not store as well (they have the shortest storage life of any garlic variety), and they can be somewhat more difficult to grow. Rocamboles are easy peeling and easy to use, and are especially worthwhile if you plan to use a lot of garlic early on (such as for sauce-making, canning, etc.) and/or if you plan to preserve your garlic and not just store it for many months. Rocamboles are a medium to large sized garlic at two to three inches with 7 to 9 sizable cloves per bulb.
Porcelain garlic varieties are large bulbs, from two to three inches, with between 4 and 7 large cloves per bulb. They peel easily and are an excellent all-around, all-purpose garlic that store well for long periods. Porcelain garlic varieties are also hardy and easy to grow. Taken all together, these features make porcelains an excellent choice for beginner garlic growers.
Purple Stripe garlics run a bit smaller than the rocambole and porcelain varieties and are around 1 ¾ to 2 ¾ inches, with 10 to 12 cloves per bulb on average (cloves a bit smaller than other hardneck varieties). These are a very good variety for roasting. Purple stripes grow well in northern climates and can also do well in warmer, more southerly climates, so this type is a good option for southern growers who are looking for a hardneck garlic variety to grow. Purple stripes are also a good long-storing hardneck variety.
Asiatic garlic varieties are one of the smaller garlic varieties, topping out at between 1 ¾ to 2 ½ inches and 7 or 8 cloves per bulb. They are more difficult to grow but also can succeed in southern climates. Asiatic garlics are hotter and spicier in flavor and are long-storing. If you like the spice of rocambole garlics but need a longer-storing spicy garlic option, consider adding Asiatic garlics to your mix.
A note about Elephant Garlic: Elephant garlic grows around four huge cloves of garlic that are white and easy to peel. It is more spicy and onion-flavored. However, elephant garlic is not a true garlic at all and is actually a type of leek; it is often sold and grouped with garlic, and can be planted and treated the same as true garlic varieties.
Choose from among these main types and varieties and you will be one happy garlic grower. The differences beyond these major varietal breakdowns are subtle. They are fun to play with, experiment, and get to know, but certainly not worth stressing over.
Start by choosing a hardneck or softneck as your location and growing capabilities (and willingness to risk and experiment) warrant, and then choose from one of the major varieties for a start. Over time you can select among your own personal best performers and further hone your garlic crop through future planting and cultivation.
Where Does Garlic Grow?
The short answer is that garlic can be grown almost anywhere. However, it does do best on the middle growing zones, zones 3 through 6.
Garlic does require a cold period for proper bulb formation. Without it, bulbs are often small, but are still completely edible. They just may not be the large, well-formed bulbs and cloves you’d hoped for. In zones warmer than zone 6 (zone 7 and higher), the lack of cold winter weather can be a challenge, but is certainly one that can be overcome.
The key to growing garlic in higher planting zones is in selecting varieties that are known to perform better in warmer climates. These are usually the softneck garlic varieties. Hardneck varieties may be more difficult to grow the higher your zone and warmer your climate.
If you live in a very warm zone, you may find it helpful to trick your garlic into thinking it is in a colder climate by refrigerating your seed garlic for one or more months prior to planting. Warm-weather growers should also time their growing to have their garlic in the ground through the coldest months for their area.
Garlic can also be grown in zones lower than zone three, as long as the ground where you live is not permafrost.
How Long is the Garlic Growing Season (Days to Harvest)?
Determining the length of the garlic growing season is a little misleading because garlic is planted in the fall, then left to go dormant and do basically nothing for many months, to then wake with the earliest days of the coming spring. Growth then resumes and over the next few months the plant will become quite large and begin to feed and grow our favorite part, the edible garlic bulb.
Counting the dormant months, it takes about 8 months from the fall planting date until garlic is ready to harvest. This breaks down into about 6 weeks (ideally) of fall growth, most of which occurs underground as root formation with preferably/possibly some short green sprout growth above ground. Depending on the onset of cold freezing weather, you may see little to no sprouting above ground in the fall, and that is usually okay—it is not cause to give up on your garlic crop.
In early spring, late March or early April (may vary by location and often around the time early spring bulb flowers wake up), you should start seeing young green tops starting to sprout. Your garlic should be ready to harvest in three or four more months (late June or early July in most areas).
Know that a delayed or cold spring and other weather and growing conditions may affect this timetable, so do not be surprised if in some years your garlic is not ready for harvest for as much as a month later than expected. Be patient and let the signs that your garlic is ready to harvest guide you, not the number of calendar days.
When To Plant Garlic
The best time to plant garlic in your area, of course, depends on where you live. That said, if one had to choose a single date, it would be mid-October, around October 15. Even though there is a range of planting dates relative to your growing zone, most people who plant on or around the middle of October will have a viable, productive crop the following summer.
The recommendation of growers such as Keene Garlic (www.keeneorganics.com) is to plant six weeks before you expect your ground to freeze for the winter. Most sources will also tell you to wait until after you have had at least one fall frost. Southern states can plant later into the fall than northern locations.
When to Plant Garlic, Zone by Zone
Following are zone-specific recommendations for when to plant garlic:
- Zone 1: Late August to Early September (best to be planted no later than the end of September)
- Zone 2: Early to mid-September
- Zone 3: Mid September to Early October
- Zone 4: Early October
- Zone 5: Mid October
- Zone 6: Mid to Late October
- Zone 7: Late October
- Zone 8: Late October to Early November
- Zone 9: Early to Mid November
- Zone 10+: Early to Mid December
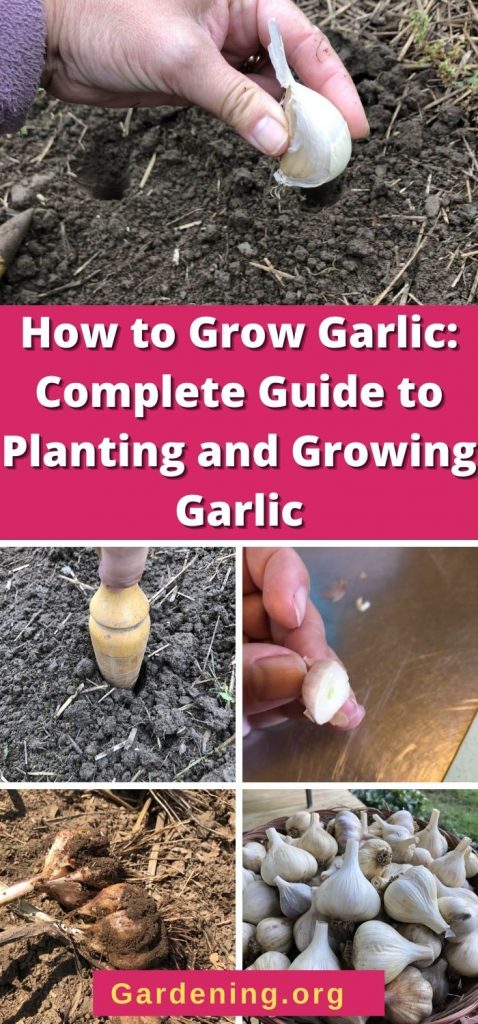
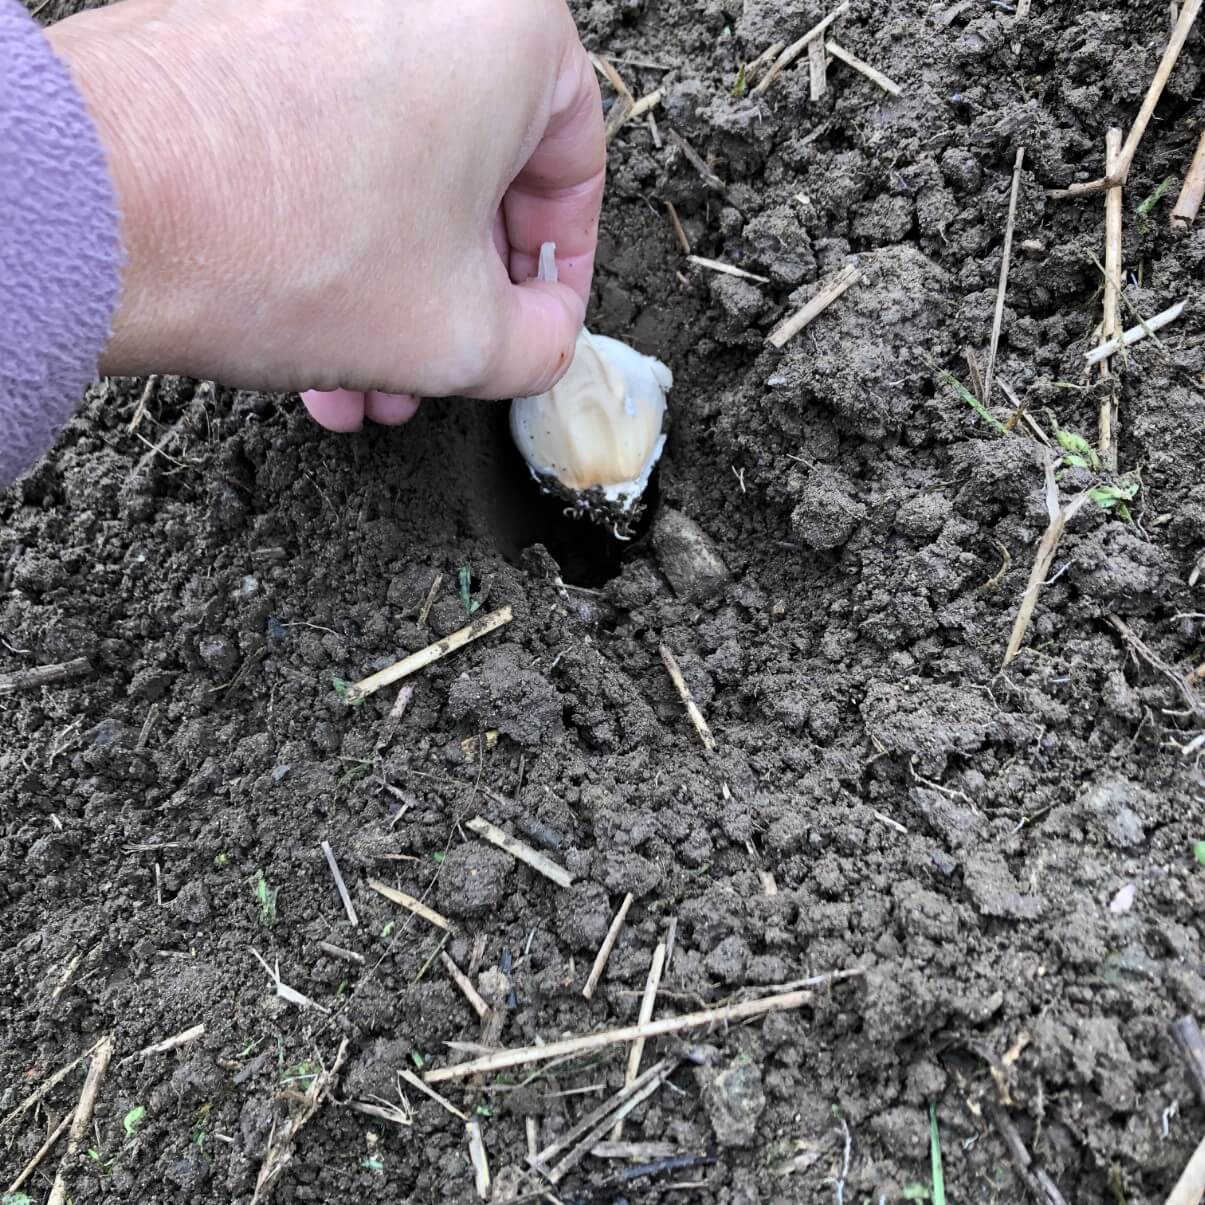
How To Plant Garlic
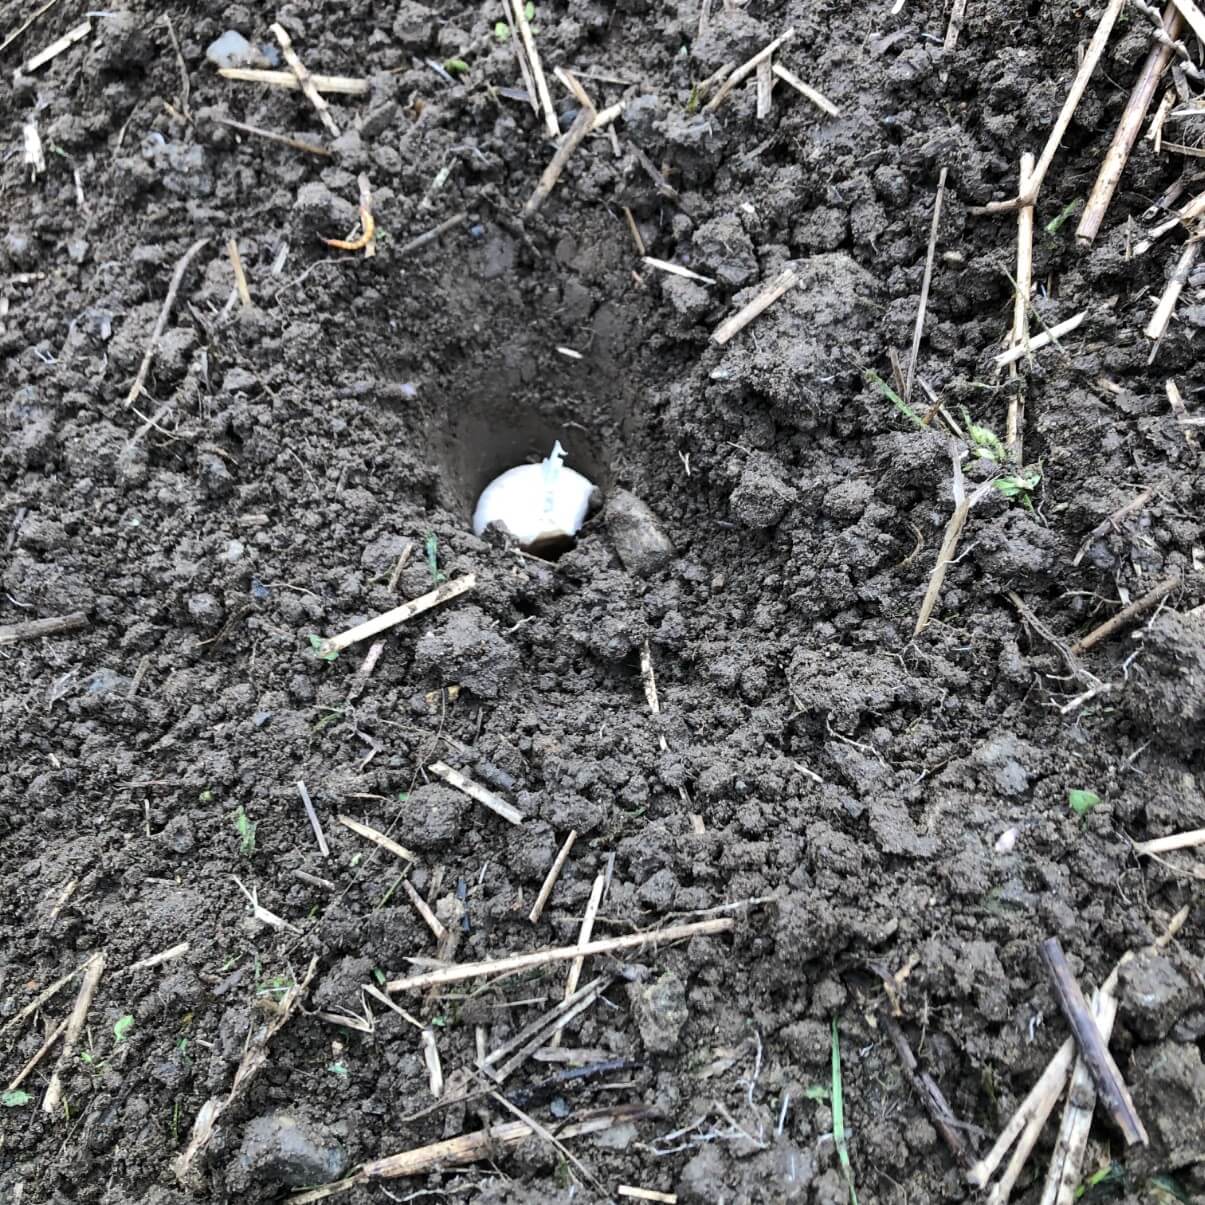
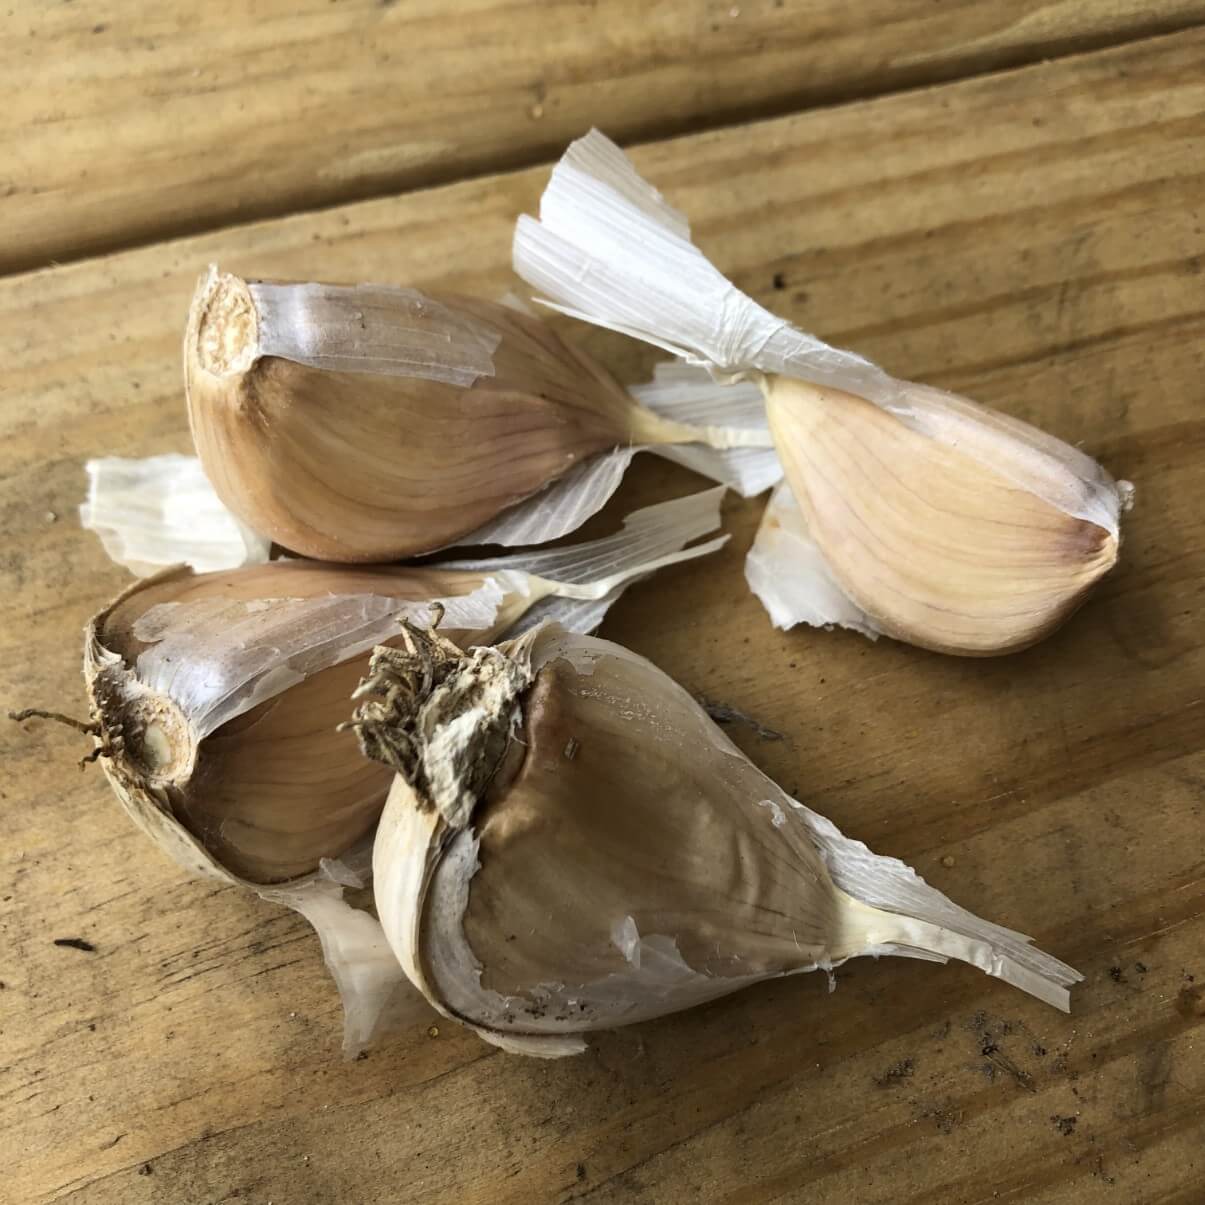
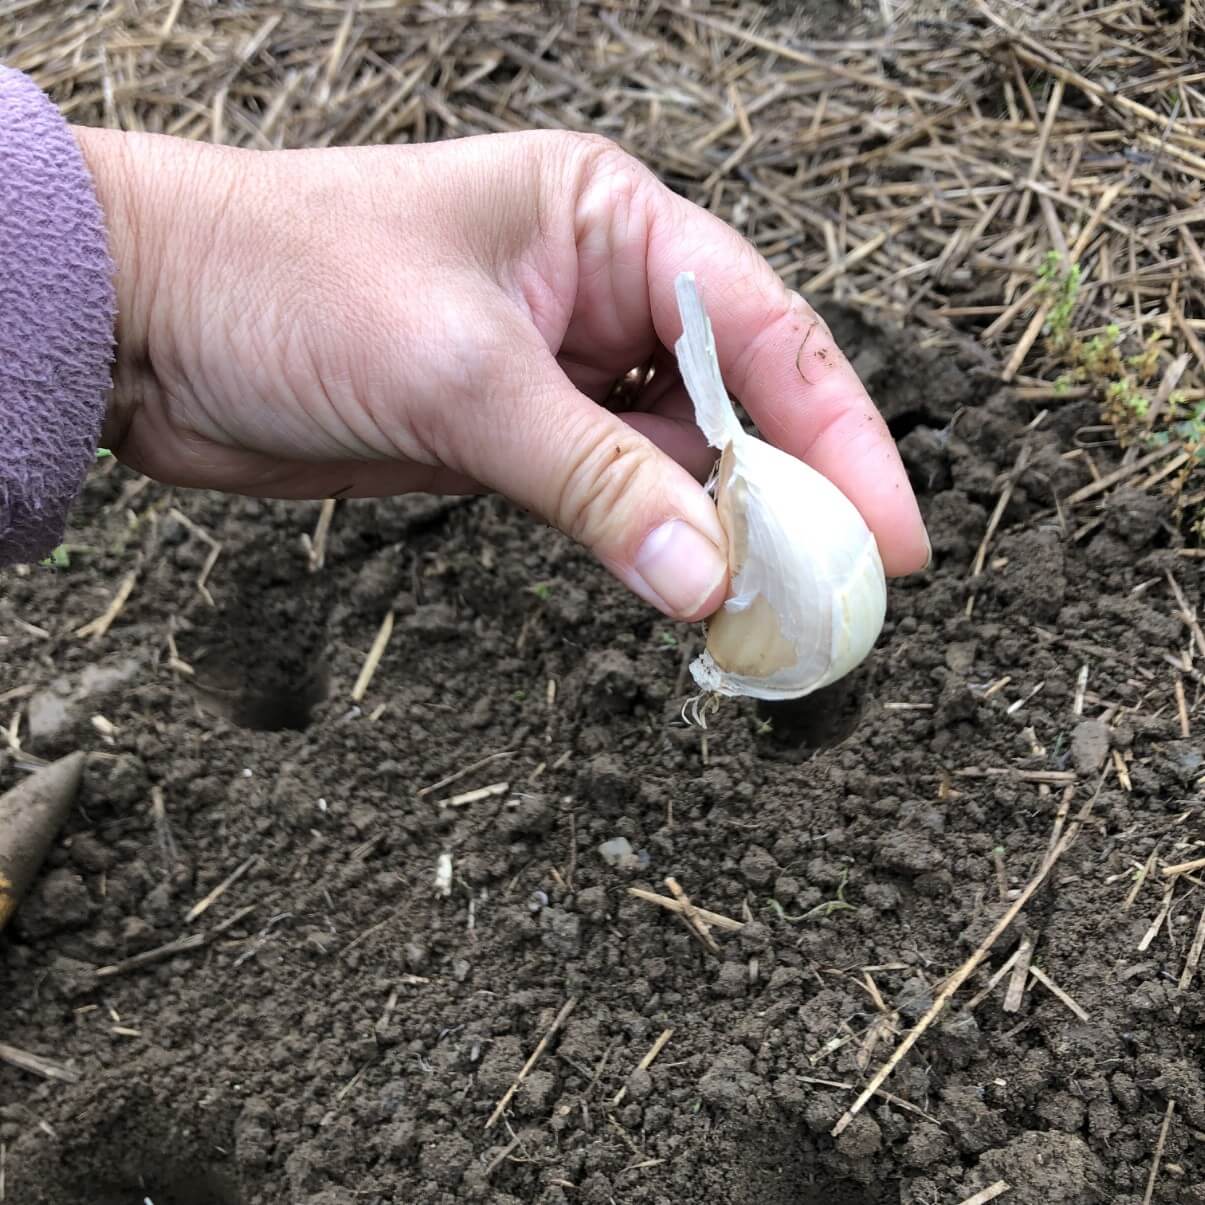
Garlic is planted from other garlic bulbs. More specifically, garlic is planted from the individual cloves of garlic bulbs. There isn’t really a difference between garlic that is used for planting and garlic that is used for eating—you just need to know where to buy your seed garlic and how to handle it for growing a new crop.
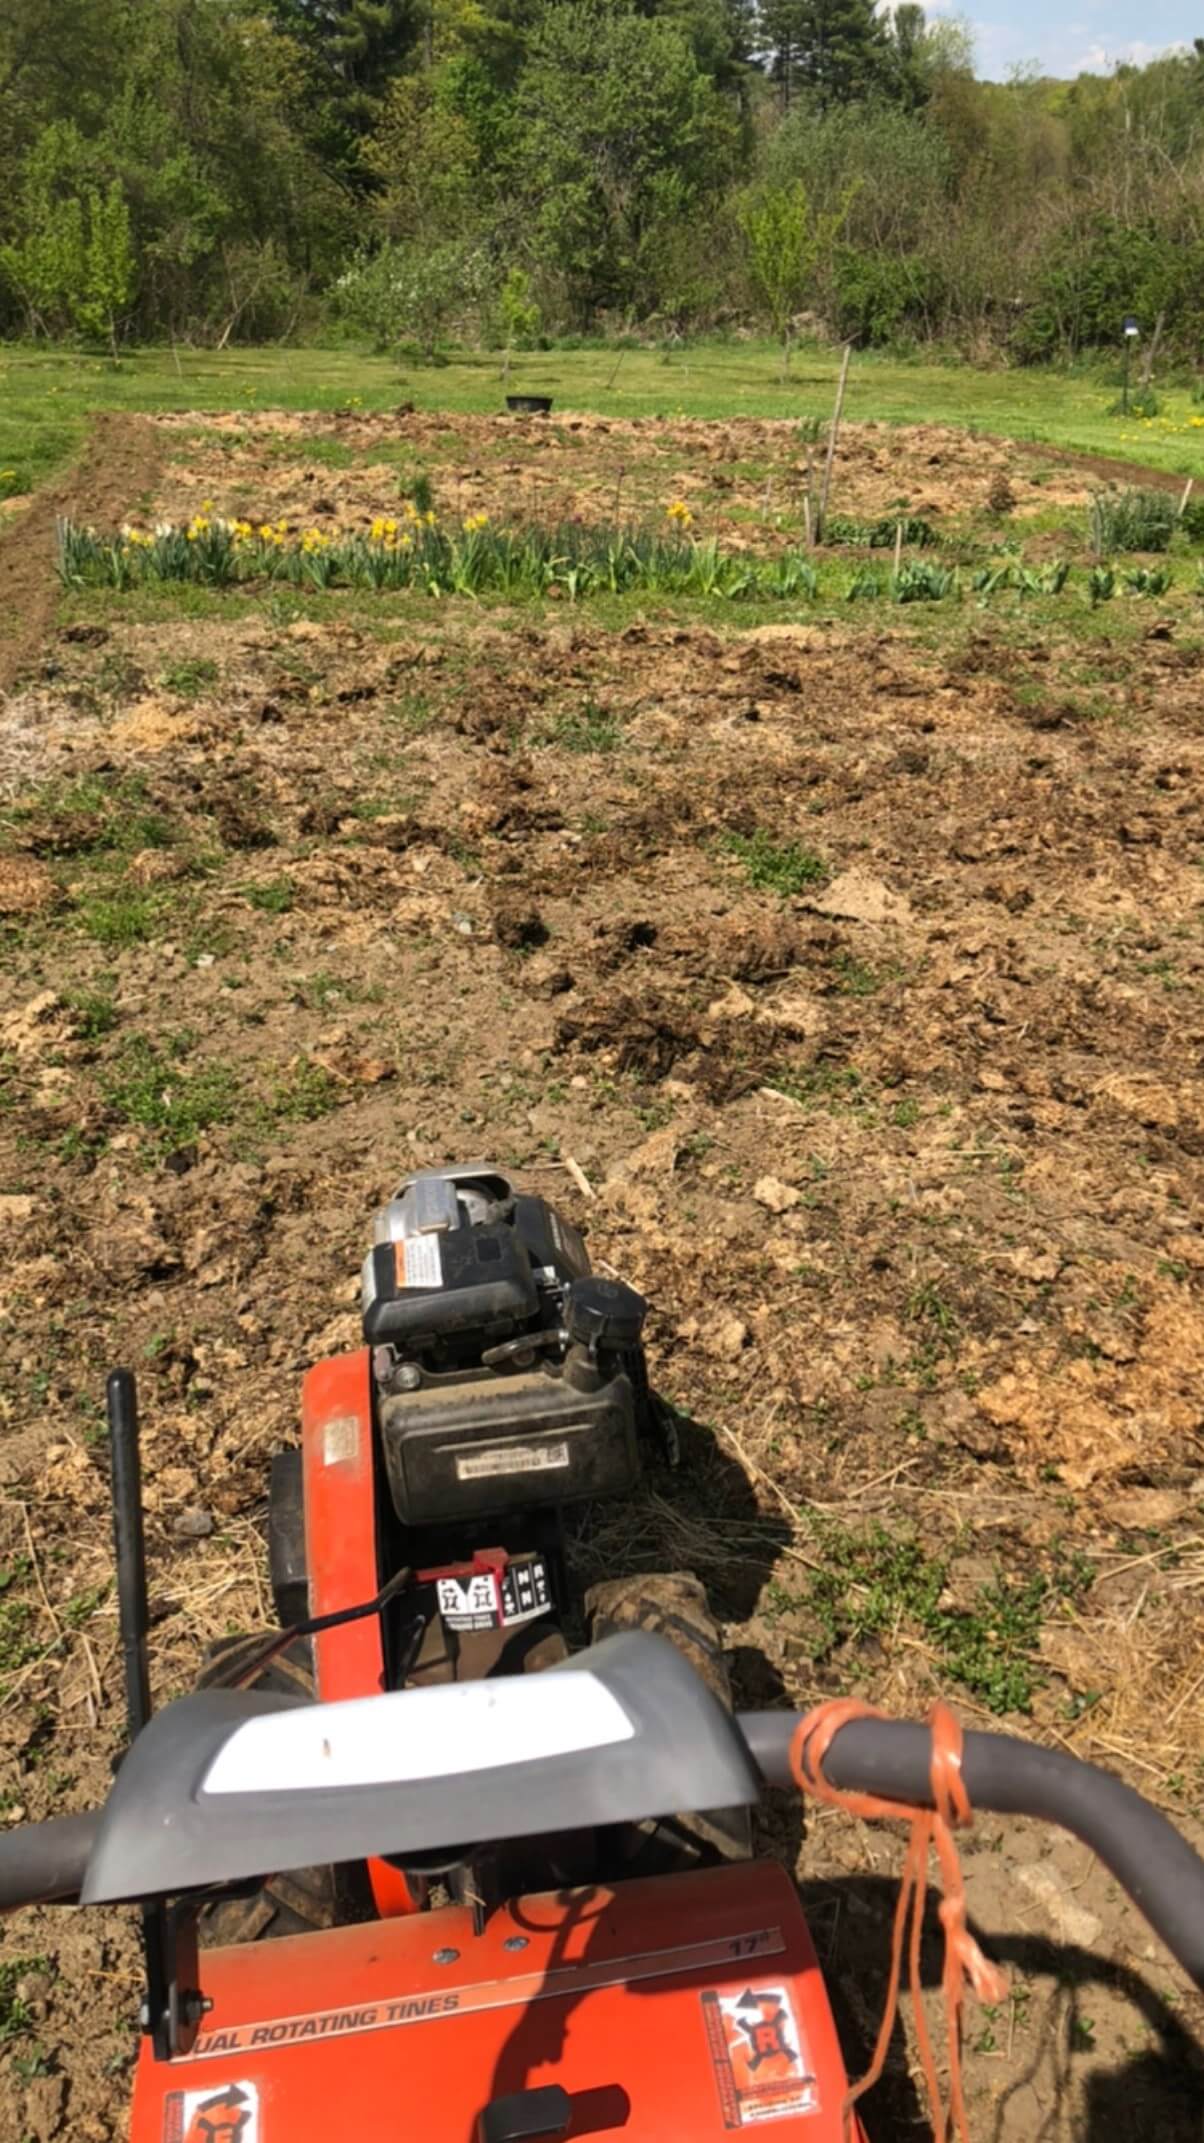
- Prepare your garlic bed. Apply fertilizer or aged manure or compost and work it into your soil well. Garlic should be planted in loose soil. It is recommended to till or work your soil to a depth of 6 inches before planting. Make sure the area is weed-free.
How Far Apart Should Garlic Be Spaced?
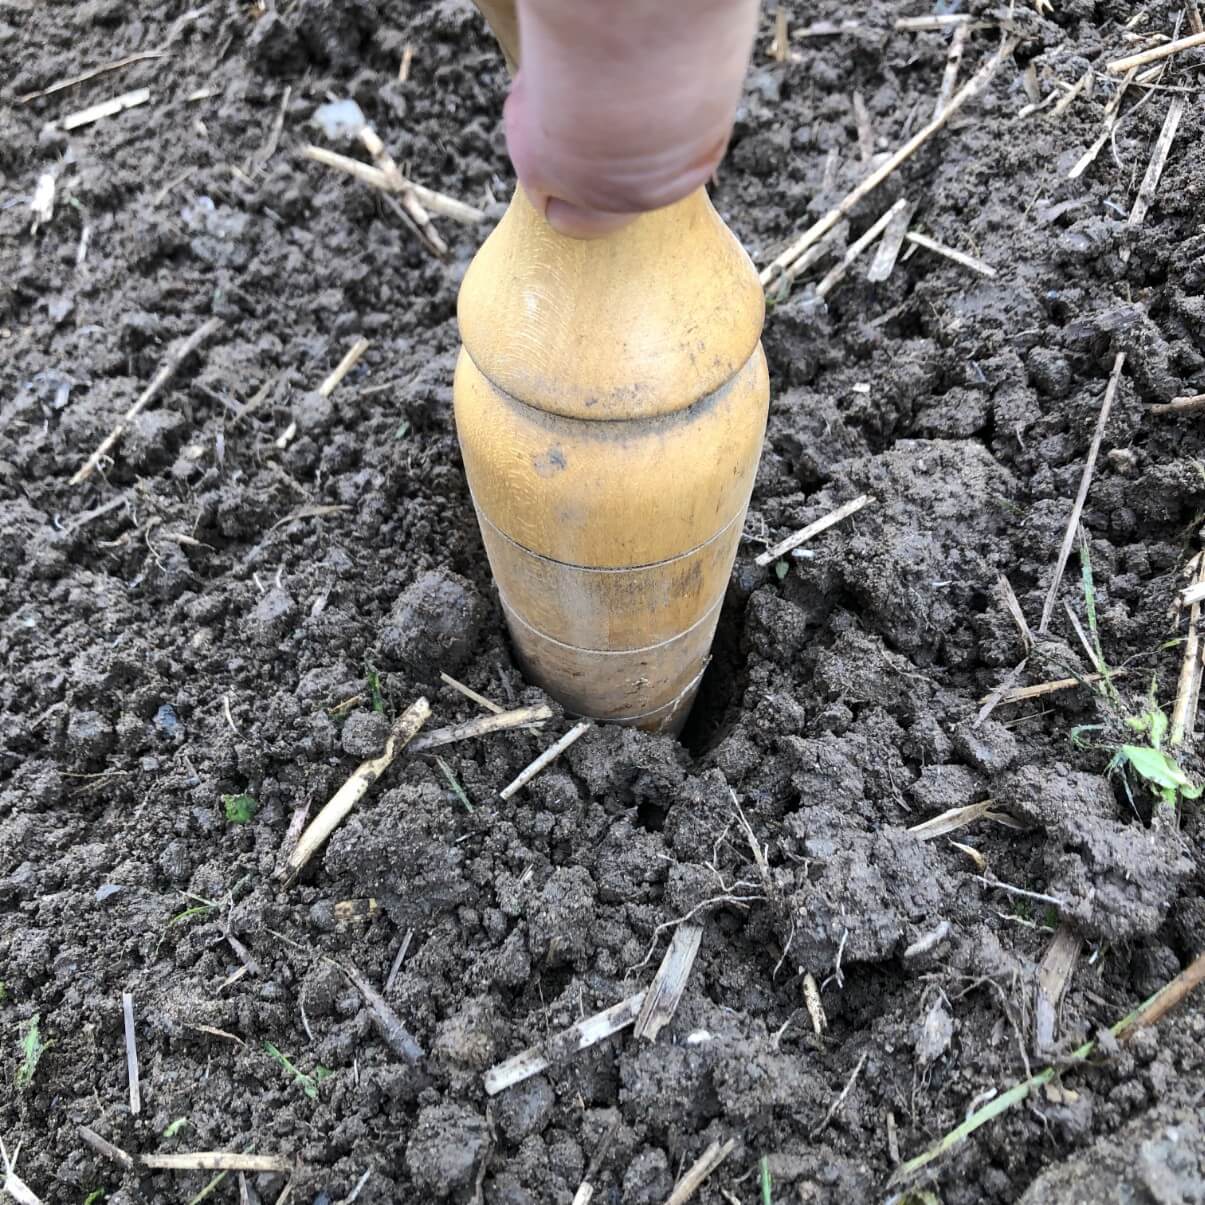
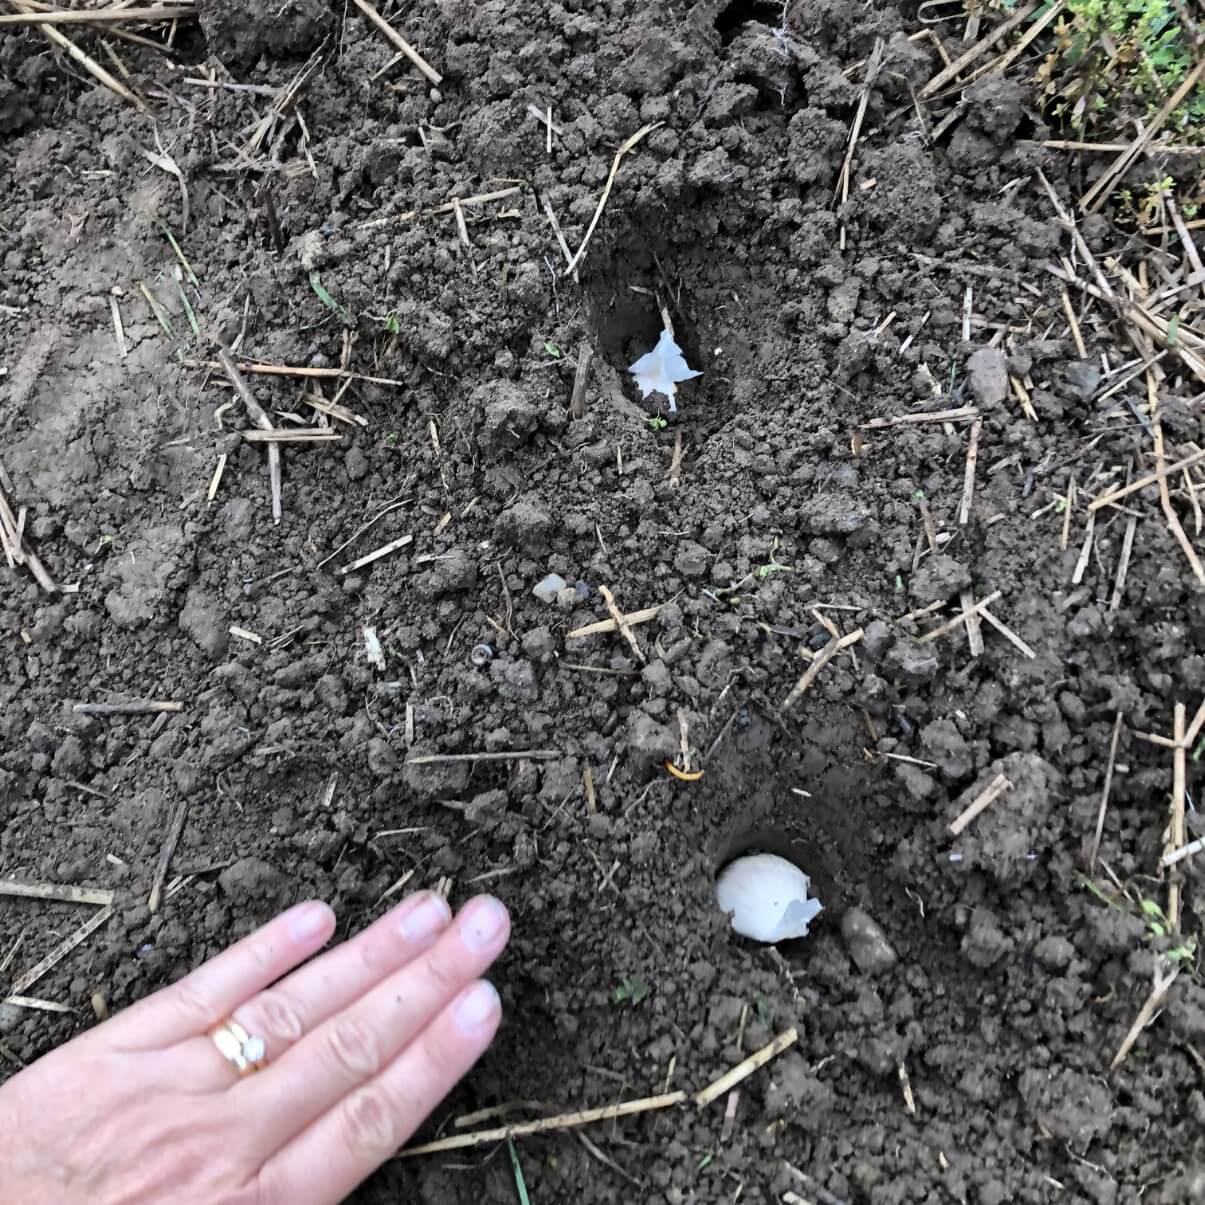
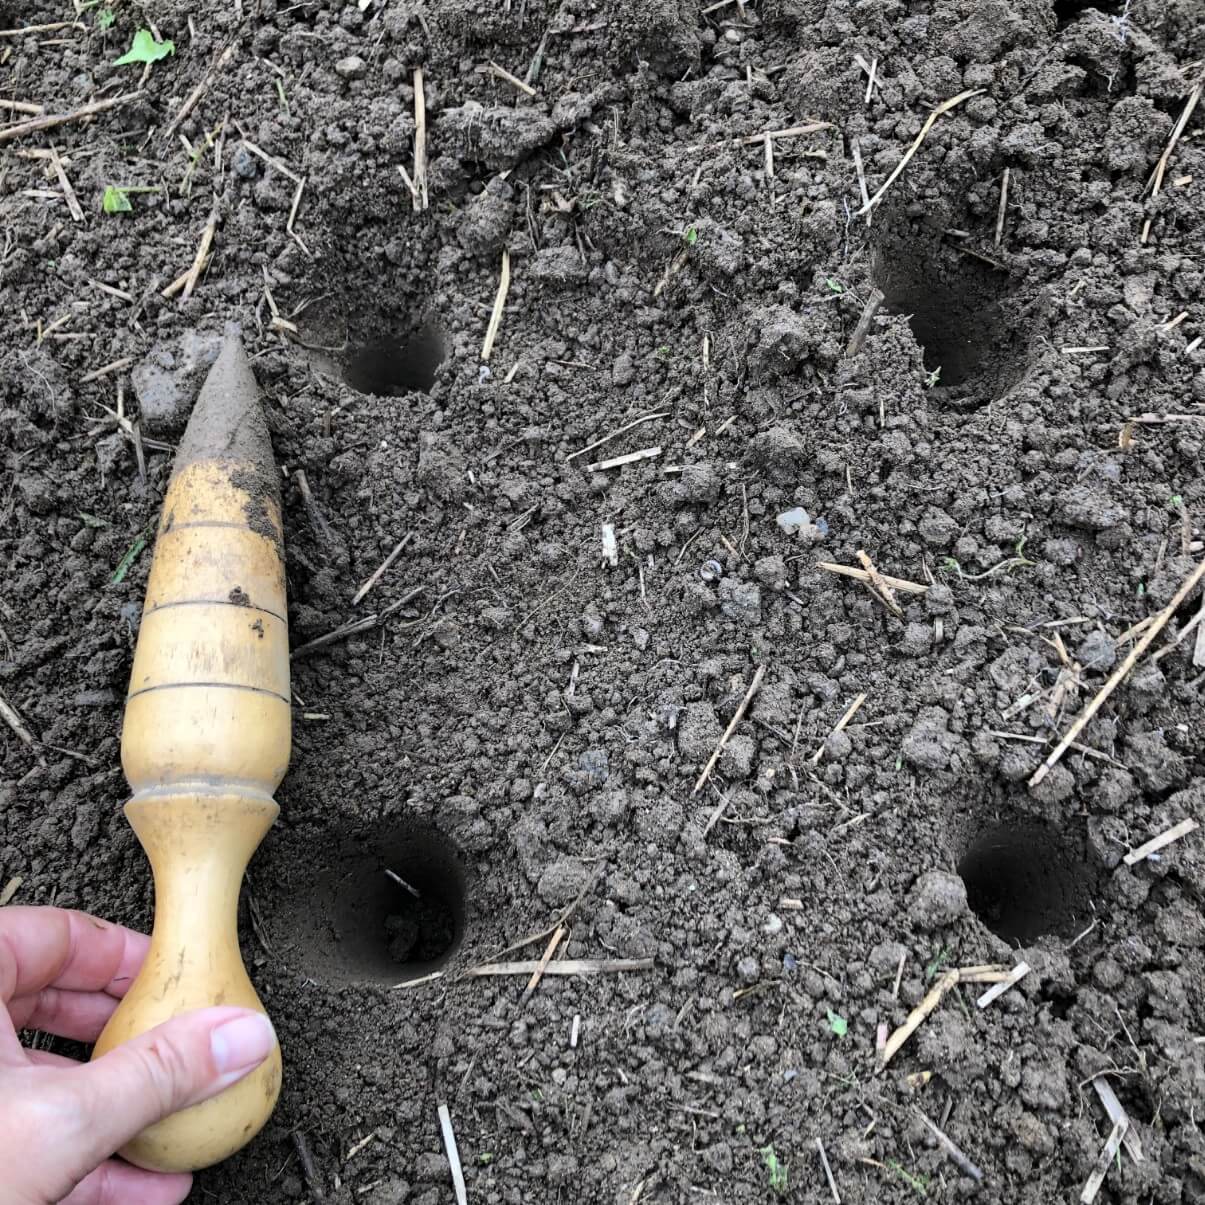
Garlic should be spaced 6 inches apart. That is, each clove should be planted with 6 inches of space all the way around it. Spacing may be as much as 9 inches all around, which leaves less competition for nutrients and water but leaves more space for weeds and invaders to grow.
Garlic rows are usually at least doubled, and often tripled or quadrupled or more to maximize row width without losing space to unnecessary empty aisles. There is no one rule for how far apart garlic rows need to be as long as each clove has 6 to 9 inches between and to each side from which to draw its food and water. The only consideration in how wide to make your garlic rows, then, is how much space you need to be able to get in and weed and maintain your rows without damaging your plants. As long as you can reach and maintain the rows from each side all the way to the middle, you can make your rows any width you like. For this, around four to five feet is usually comfortable and workable.
Ten garlic cloves will plant approximately 5-row feet, or about 50 cloves/heads per 25 feet of linear garden row. If planting in a raised bed, the average raised bed of 4 by 6 feet will hold around 100 garlic plants.
Can I Start Garlic Indoors and Transplant My Garlic?
This isn’t really recommended because garlic really should be planted ahead of time in the fall for best results. Also, garlic needs that cold period to perform well. If you do decide to try and start garlic inside, refrigerate the garlic heads for at least four weeks before planting, and then separate and plant them in a minimum of two-inch pots before starting. Plant the cloves immediately after removing from refrigeration because they will sprout quickly when pulled from the cold. Peat pots or biodegradable pots that can be planted in the ground are best. Plant in the ground outside as soon as your ground is workable. Again, while possible, this is not the ideal way to plant garlic.
How Much Sun Does Garlic Need?
Your garlic will need full sun to perform its best and grow its biggest. Generally speaking, full sun is considered at least eight hours, with a bare minimum of six hours if you are pressed for a space with a full sunny eight. The location should receive full-strength sunlight, not filtered sun or partial shade.
What Type of Soil Is Best for Growing Garlic?
Garlic needs well-draining soil with good amounts of organic matter (for example, compost) and good moisture retention capabilities. This may sound contradictory, but it means that the soil should not be puddling or muddy and that after a rain the water should filter through but the soil should be nicely moist and not dry out too quickly.
Heavy soils and soils with high levels of clay should be avoided as this will result in bulb deformation and rot. If heavy soil is your only option, consider a raised bed for your garlic or amend the soil with plenty of loam or compost to improve its tilth.
The ideal pH is a range of 6.0 to 7.0. Garlic will, however, perform in a range of soil conditions and elements and is one of the more forgiving vegetables to grow in less-than-optimal soil conditions.
How to Care for Garlic As It Grows
Once planted in a well-prepared area, garlic needs little from you. The most important things that your garlic crop requires are watering and weed control. Mulching will help with both of these things, but some hand weeding may still be required. If you do not use mulch, expect more frequent and more thorough hand weeding.
Be sure to pull all invading weeds that pop up, starting as early as you need to in the spring. The bulk of the weeding will need doing in June and July.
If you planted hardneck garlic, you should cut the scapes off all the plants when they appear to send as much energy as possible into the forming bulbs.
How Much Water Does Garlic Need?
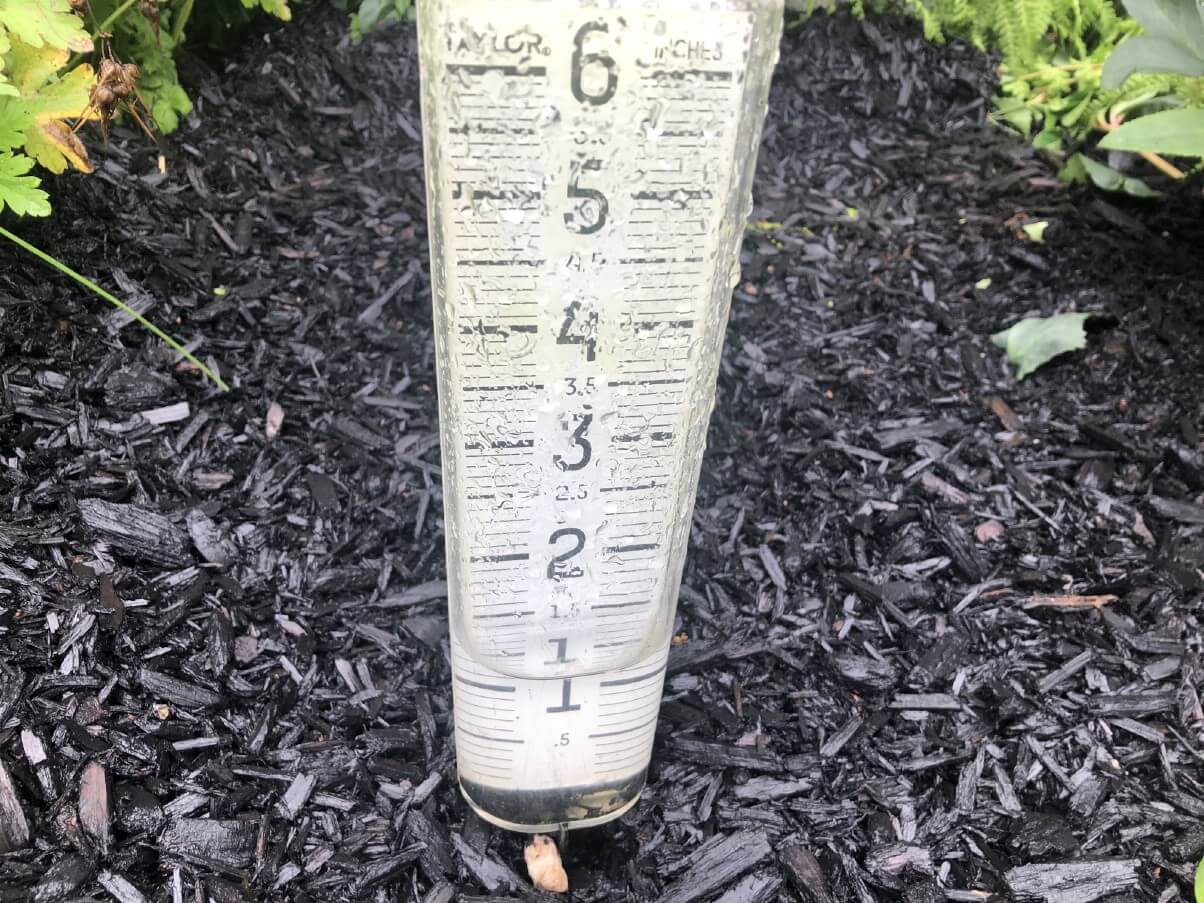
Garlic needs the equivalent of one inch of water per week through the growing season from spring through early summer (mostly the month of June). Start reducing the water as harvest time draws nearer, cutting watering down by half and watering a little less frequently for the last three or four weeks.
Stop watering altogether two weeks before you anticipate harvesting. If your garlic is receiving an inch of water per week from natural rainfalls, you do not need to provide any additional water.
Fertilizer Requirements for Garlic
Soil that is well-fertilized with rich organic matter such as compost is often all that is needed to grow good garlic. Rotted manure applied before fall planting is ideal. If needed a second application in early spring, applied as a top dressing, can also be used. Some growers also recommend a pre-planting sterilization and fertilizer soak https://keeneorganics.com/garlic-fertilization-soak/ to give garlic its healthiest and best start.
Garlic does have moderately-high nitrogen needs, but rotted manure or compost will typically fulfill the need. A nitrogen fertilizer (urea) can be applied if your soil lacks nitrogen but avoid adding too much nitrogen as it will delay the formation of bulbs and may stunt your crop. In nitrogen-deficient soils, nitrogen can be applied in the spring when sprouting begins and at three-week intervals as a top dressing.
Garlic does have a need for phosphorous, but phosphorous should not be over-applied because a high phosphorous content can build up in the soil if not used and can adversely effect the plants. Phosphorous is important for good garlic root formation which allows for good water and nutrient uptake.
Sulfur is a very important nutrient for garlic. Potassium is essential as well.
To sum it up, the four most important nutrients for garlic are nitrogen, potassium, phosphorous, and sulfur.
Good compost will typically host all of these nutrients and garlic will grow well in good soil. If you feel your garlic is not thriving, the only way to know what or how much of a given nutrient you should apply to your garlic patch is to have your soil tested to know which of these elements you need to adjust. If not tested, the best bet is to apply a good all-purpose garden fertilizer according to package directions. Consider using a slow-release fertilizer to fulfill garlic’s needs over its long growing period. End fertilizer applications when garlic scapes appear, or about four weeks before harvest.
How To Mulch Garlic
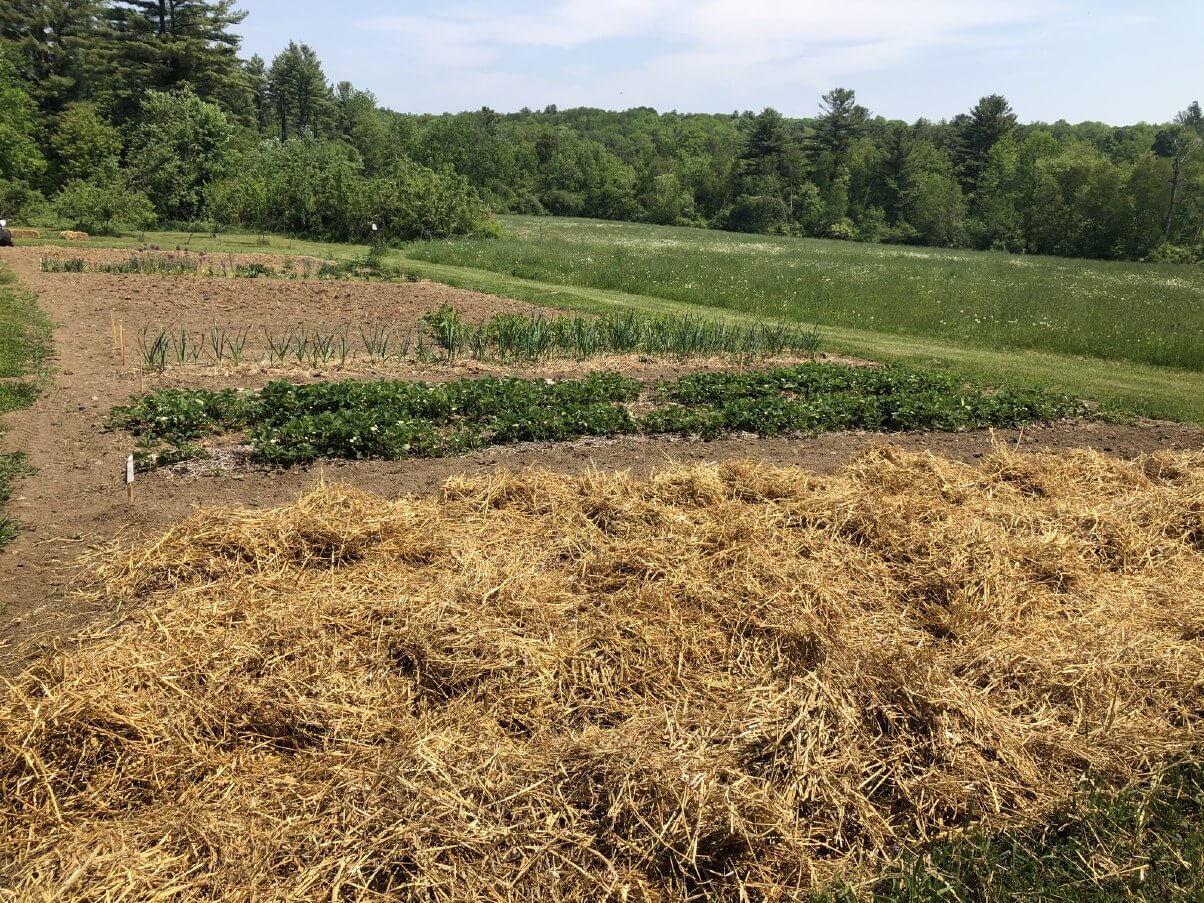
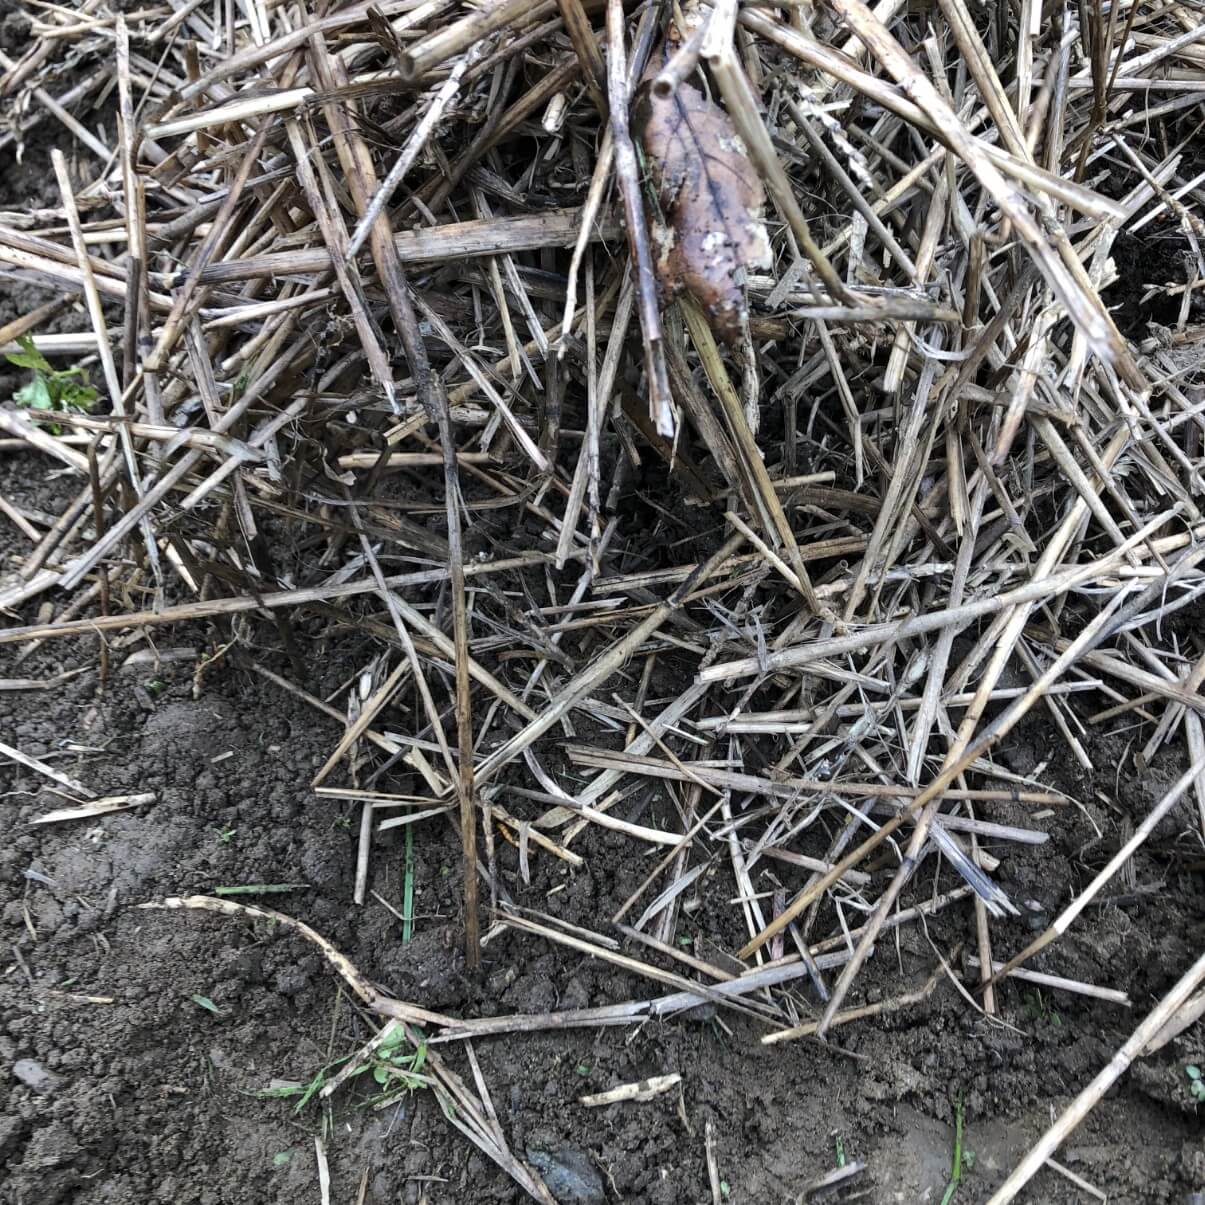
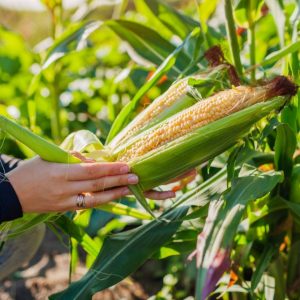
A good layer of organic mulch will serve your garlic well. After planting, apply a layer of mulch four inches deep over the entire area. Seed-free straw is an ideal mulch, but you can also use other mulch materials if they are available to you. Some good options include chopped up leaves, grass clippings, pine needles, or dried chopped plant stalks such as corn stalks.
The mulch can stay in place as a weed suppressant in the spring but if it seems your garlic is struggling to sprout up through the deep layer of mulch, pull it back and/or thin out the mulch until the tops can break through and are well established. If your ground is not warming, it is helpful to pull the mulch layer back to let the warmth and sunlight penetrate and warm the ground.
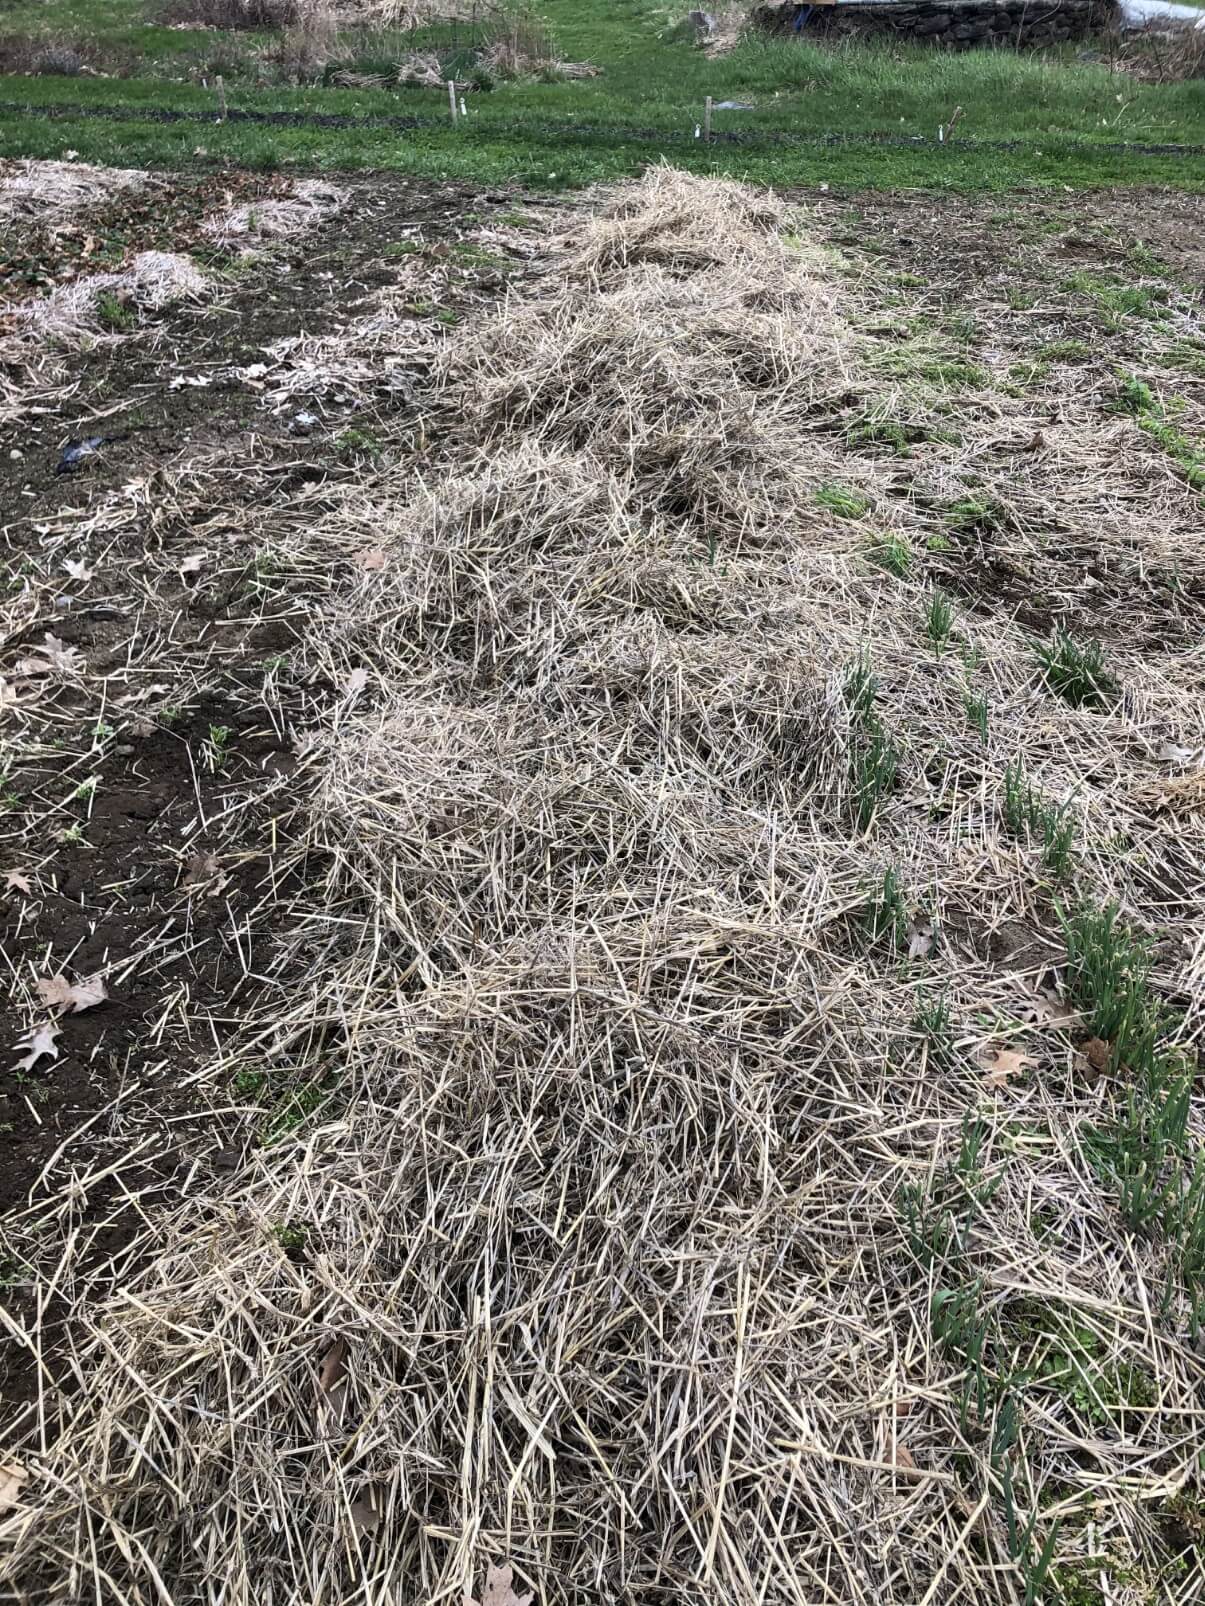
Check your garlic quite early—before you are thinking about planting anything else—to see if it is sprouting and if it needs the mulch rearranged to break through. Replace the mulch after breakthrough to help retain moisture and suppress weeds. Add more mulch if necessary for weed control.
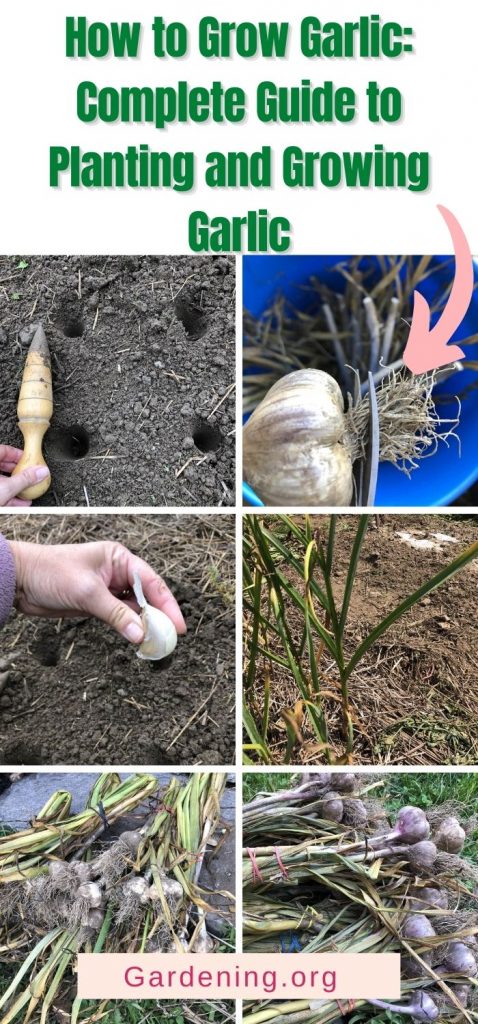
How and When to Cut Garlic Scapes
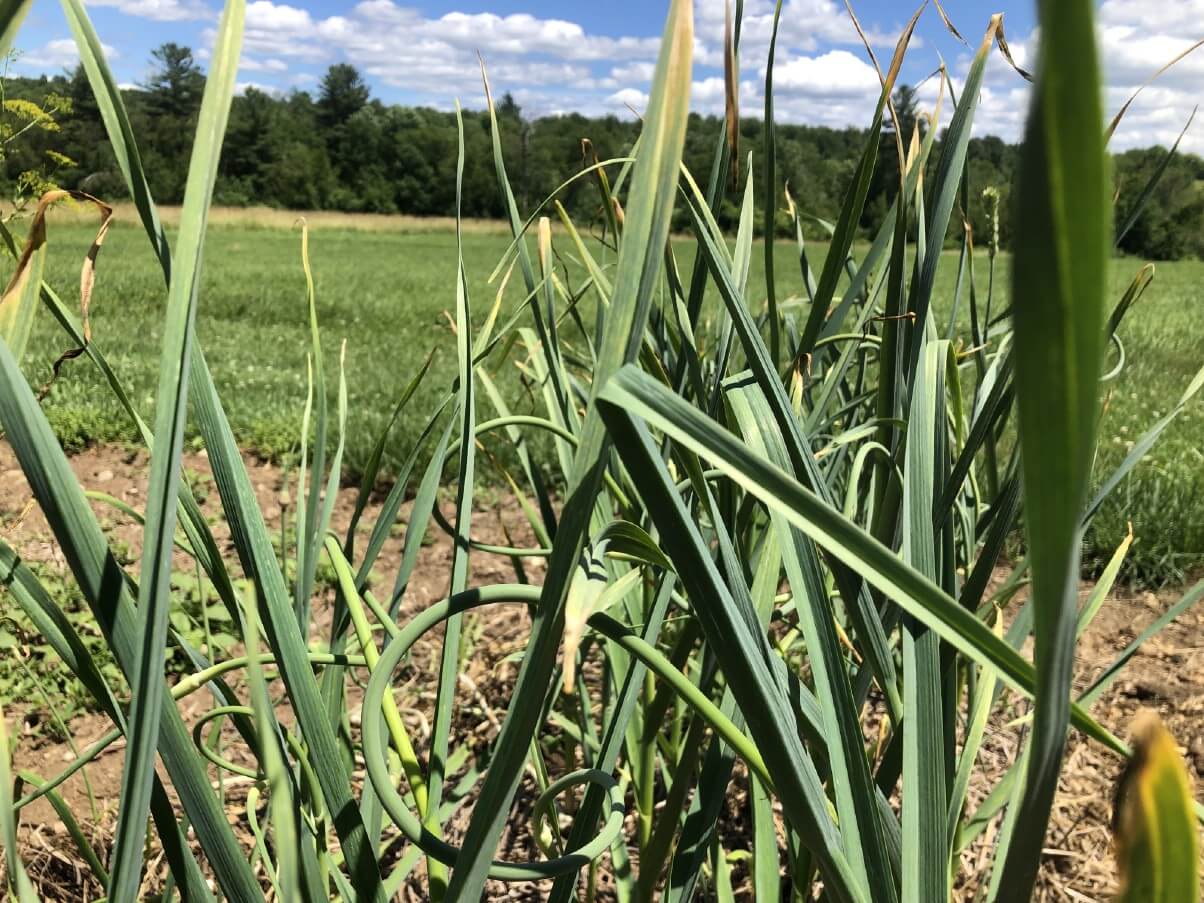
Garlic scapes are a culinary delight to those who know them and are a much sought-after seasonal product at local farm stands and farmers’ markets. Scapes are the flowering stalks of hardneck garlics and are completely edible, which means that your hardneck garlics will give you a substantial produce to harvest even before your garlic is ready to be harvested and eaten.
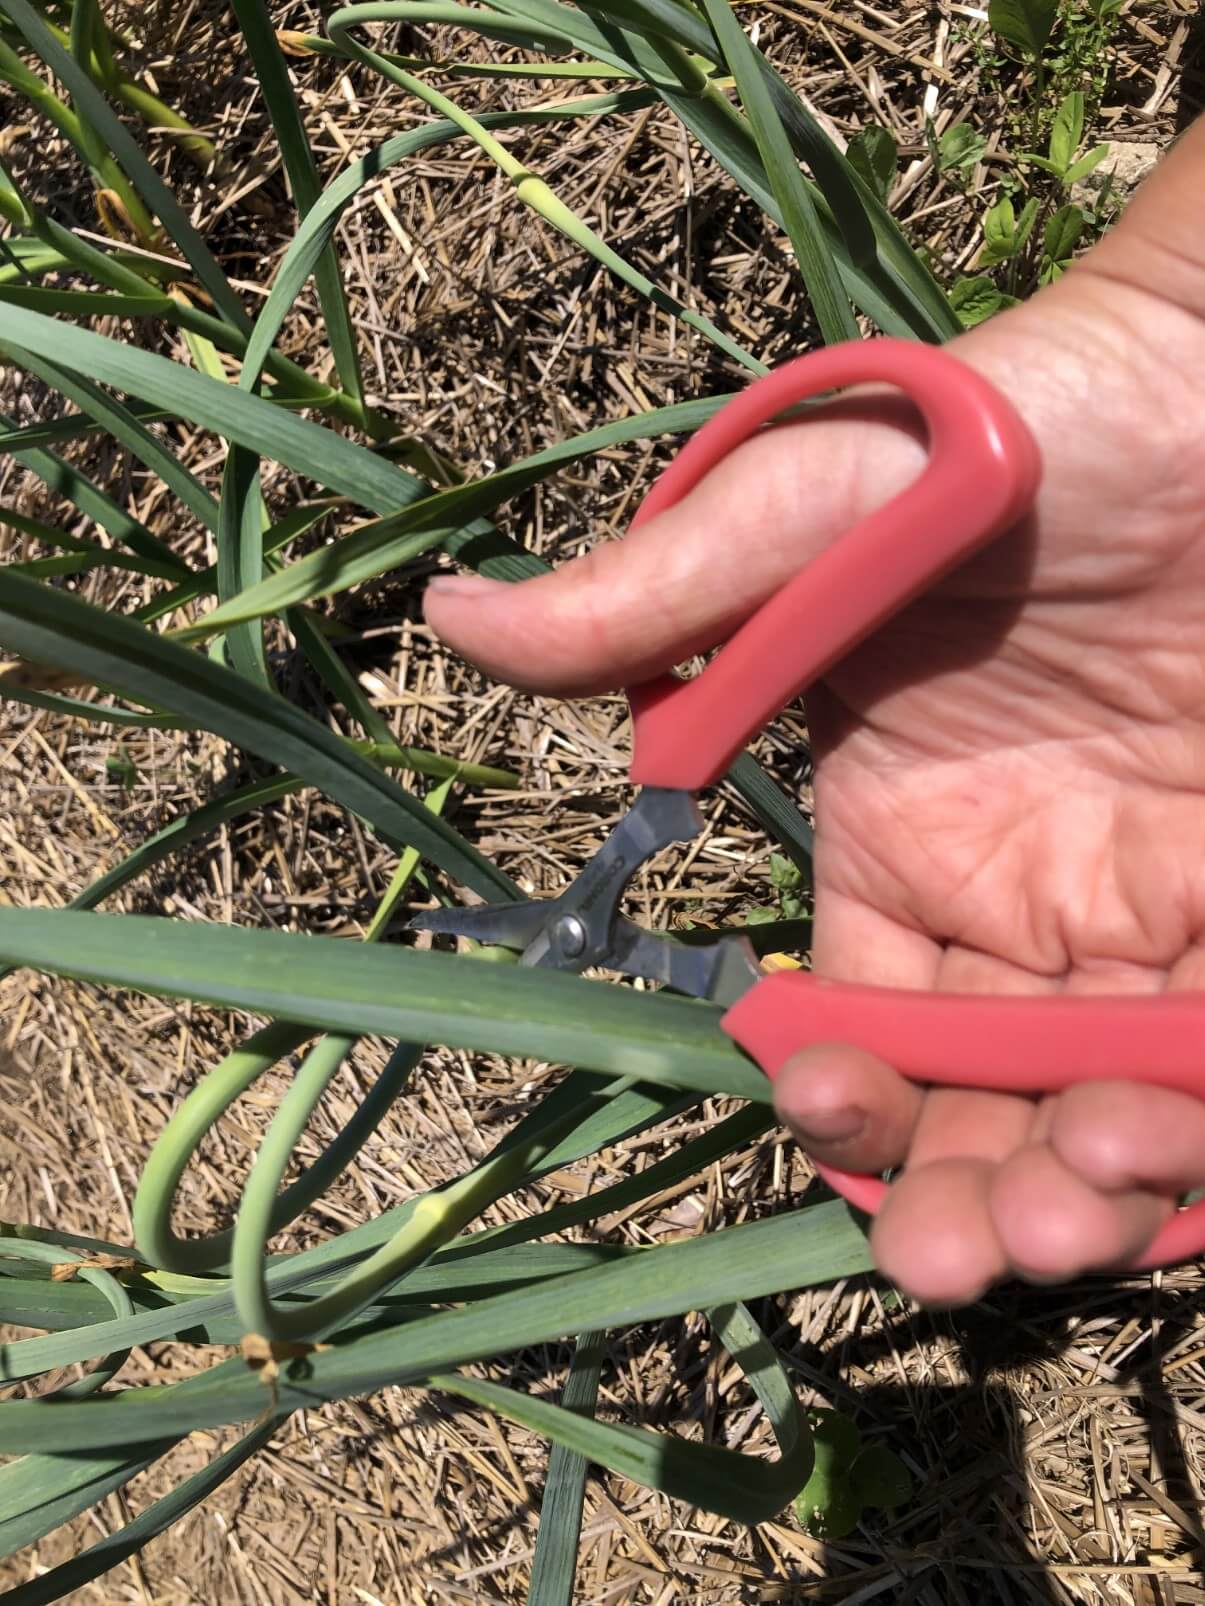
In fact, it is recommended that you do cut and harvest the scapes of hardneck garlic when they appear. This is not only because you will have a lovely early green garlic product to use in a variety of ways, but also because it is what is best for the plant. Scapes that are left on the plant usually divert into tiny bulbils that rob valuable nutrients and energy from the forming bulbs, and so this results in smaller bulbs and smaller garlic cloves at harvest time. By cutting off the scapes, you reroute those resources into the garlic bulb. This results in the biggest and best possible cloves and bulbs.
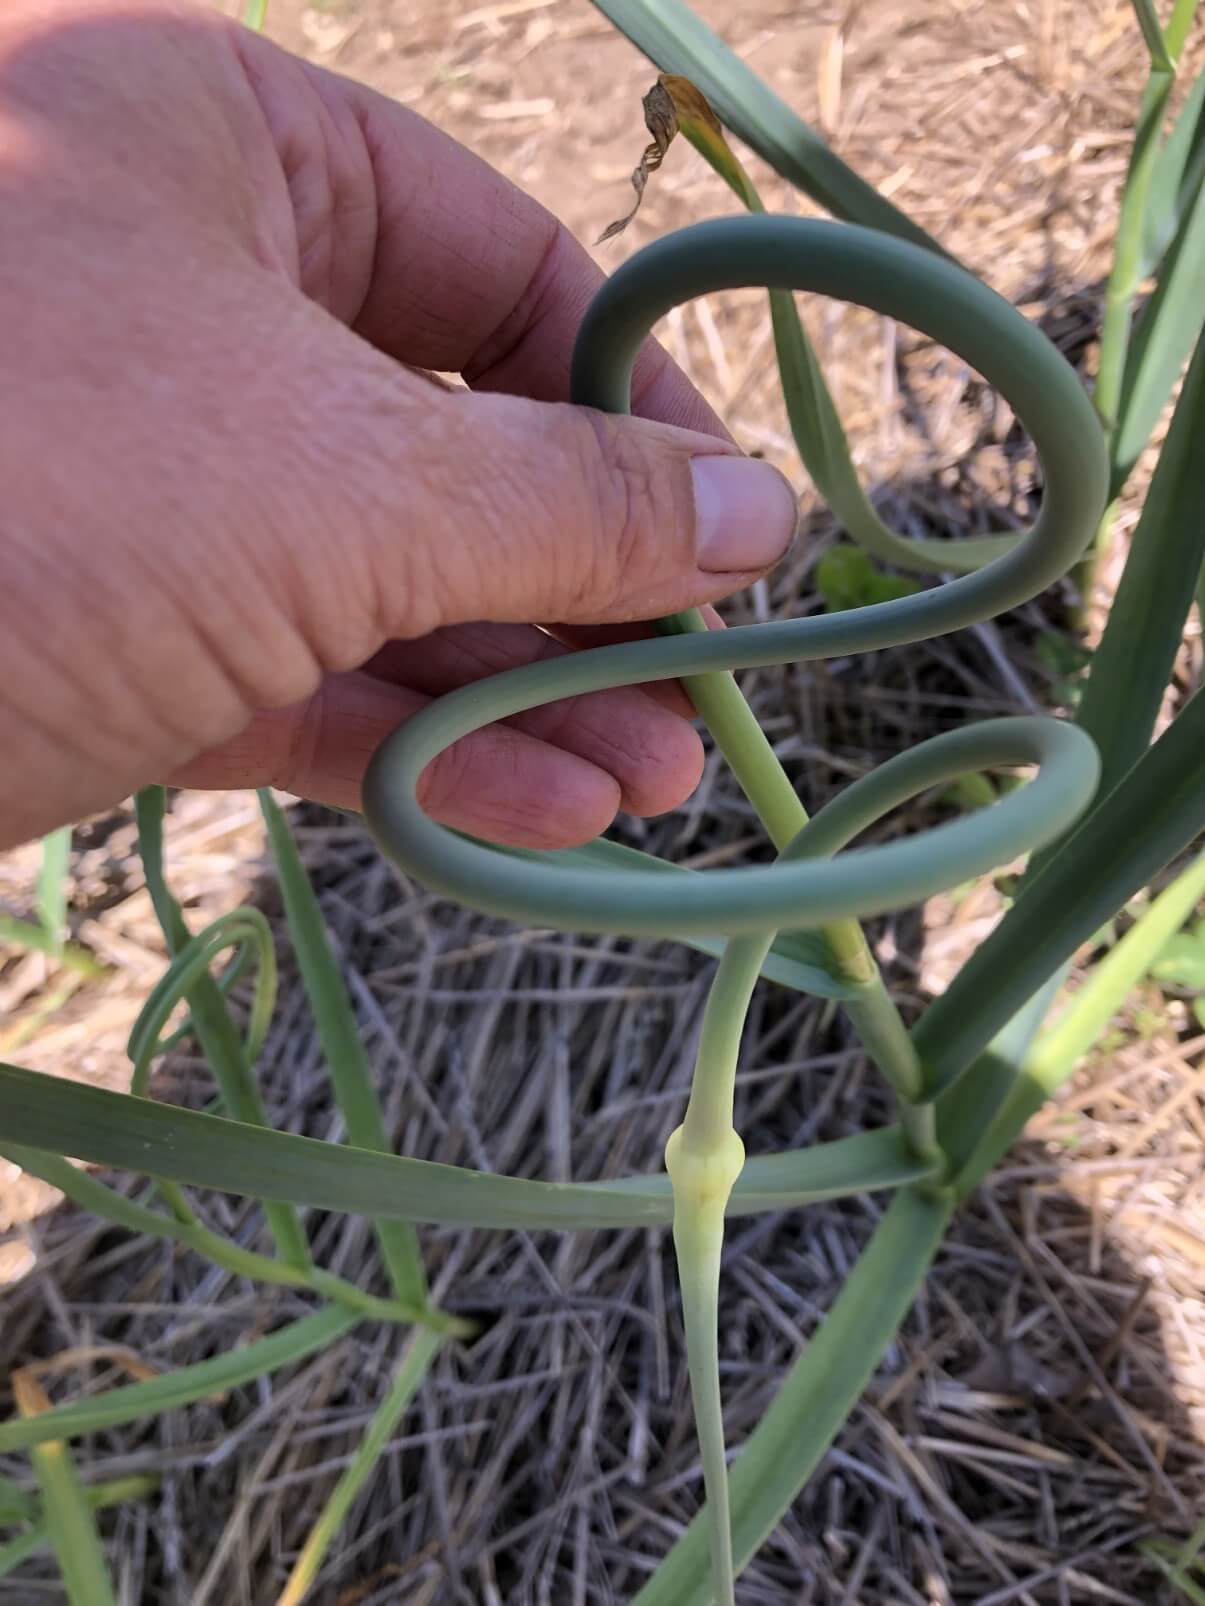
Scapes will look like a hard stem-like stalk growing from the center of the garlic’s leaves. They will form a small bud-like growth that turns into bulbils if left. Once the scapes start to bend and curl (this will happen from the stem portion), it is time to cut the scapes off. Simply follow down the stalk and cut low down on the stem. You will usually have about six to eight inches of straight stalk and about the same in curling scape.
The entire scape—stalk and flower-like bulbil bud—is edible. The lower portion may be harder and slightly woodier, though, so you may choose to trim the stalk where it starts to get tough.
Garlic scapes only grow on hardneck varieties. Don’t worry when your softneck garlic doesn’t sprout a scape—it’s not supposed to!
How Can I Use Garlic Scapes?
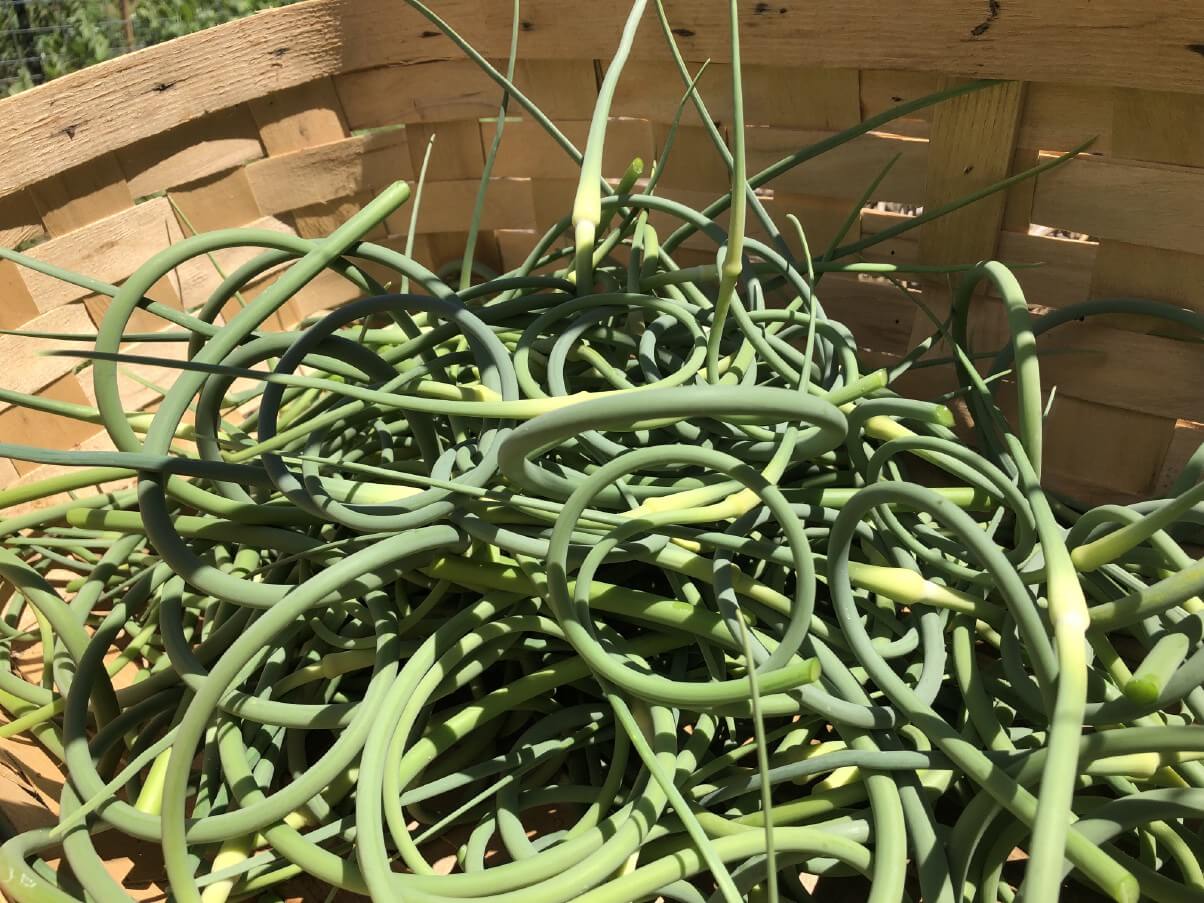
Garlic scapes can be used in cooking just like you use regular garlic. Sautee it, chop it, add it fresh to salads, use it in place of garlic in cooking and other dishes, or use it to make early fresh pesto—delicious! Scapes can also be dried to preserve them, frozen for future use, or pickled for a tasty treat or unique condiment!
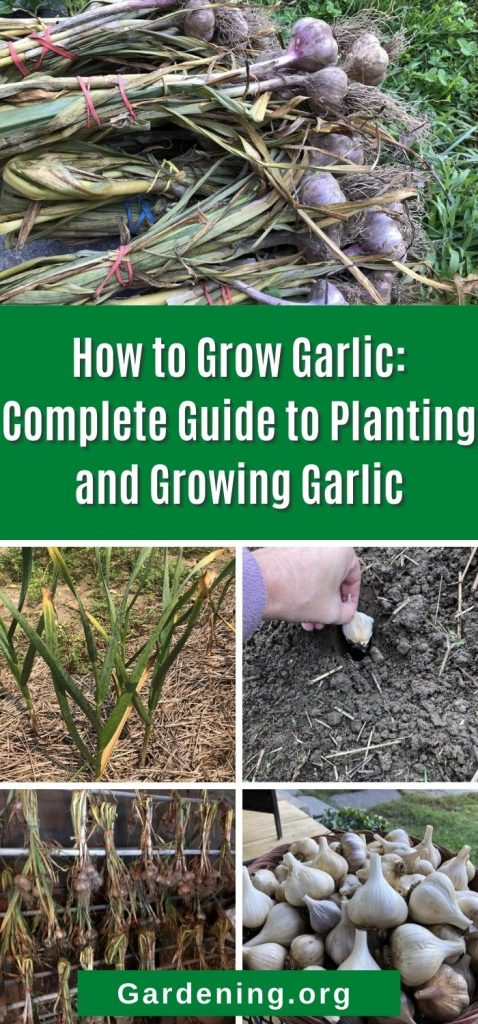
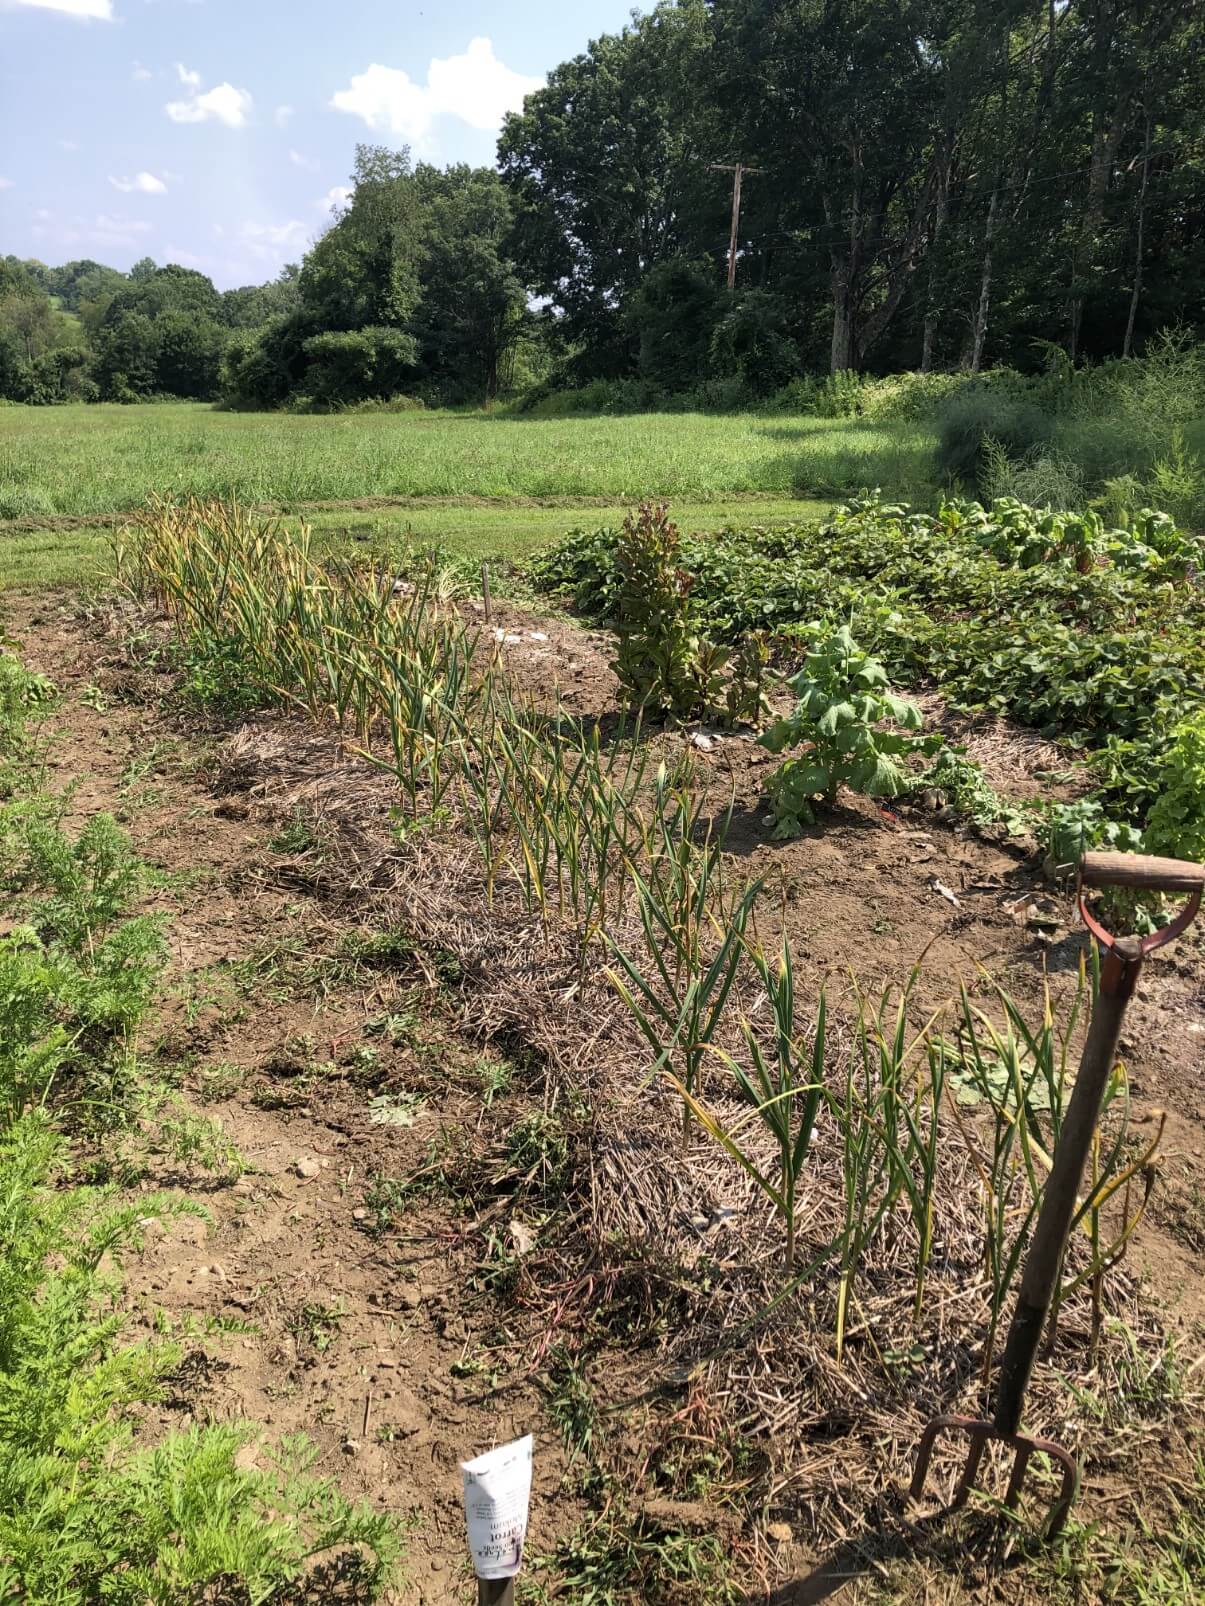
How and When to Harvest Garlic
On average, garlic is ready to harvest around the end of June through the end of July. There can be quite a range of harvest times for garlic, though. In warmer climates the harvest may be earlier, whereas in cooler climates it may be as late as into early August.
It is important to know, too, that weather and the conditions of the growing season can impact the harvest time quite a lot. A long winter/late spring may push the harvest into July or August; a mild winter or early spring may have the opposite effect. For this reason, it is important to let your garlic be your guide and not the calendar. Have a loose idea about when you expect the garlic to be ready to harvest, but let the growth and condition of the garlic determine when you harvest it.
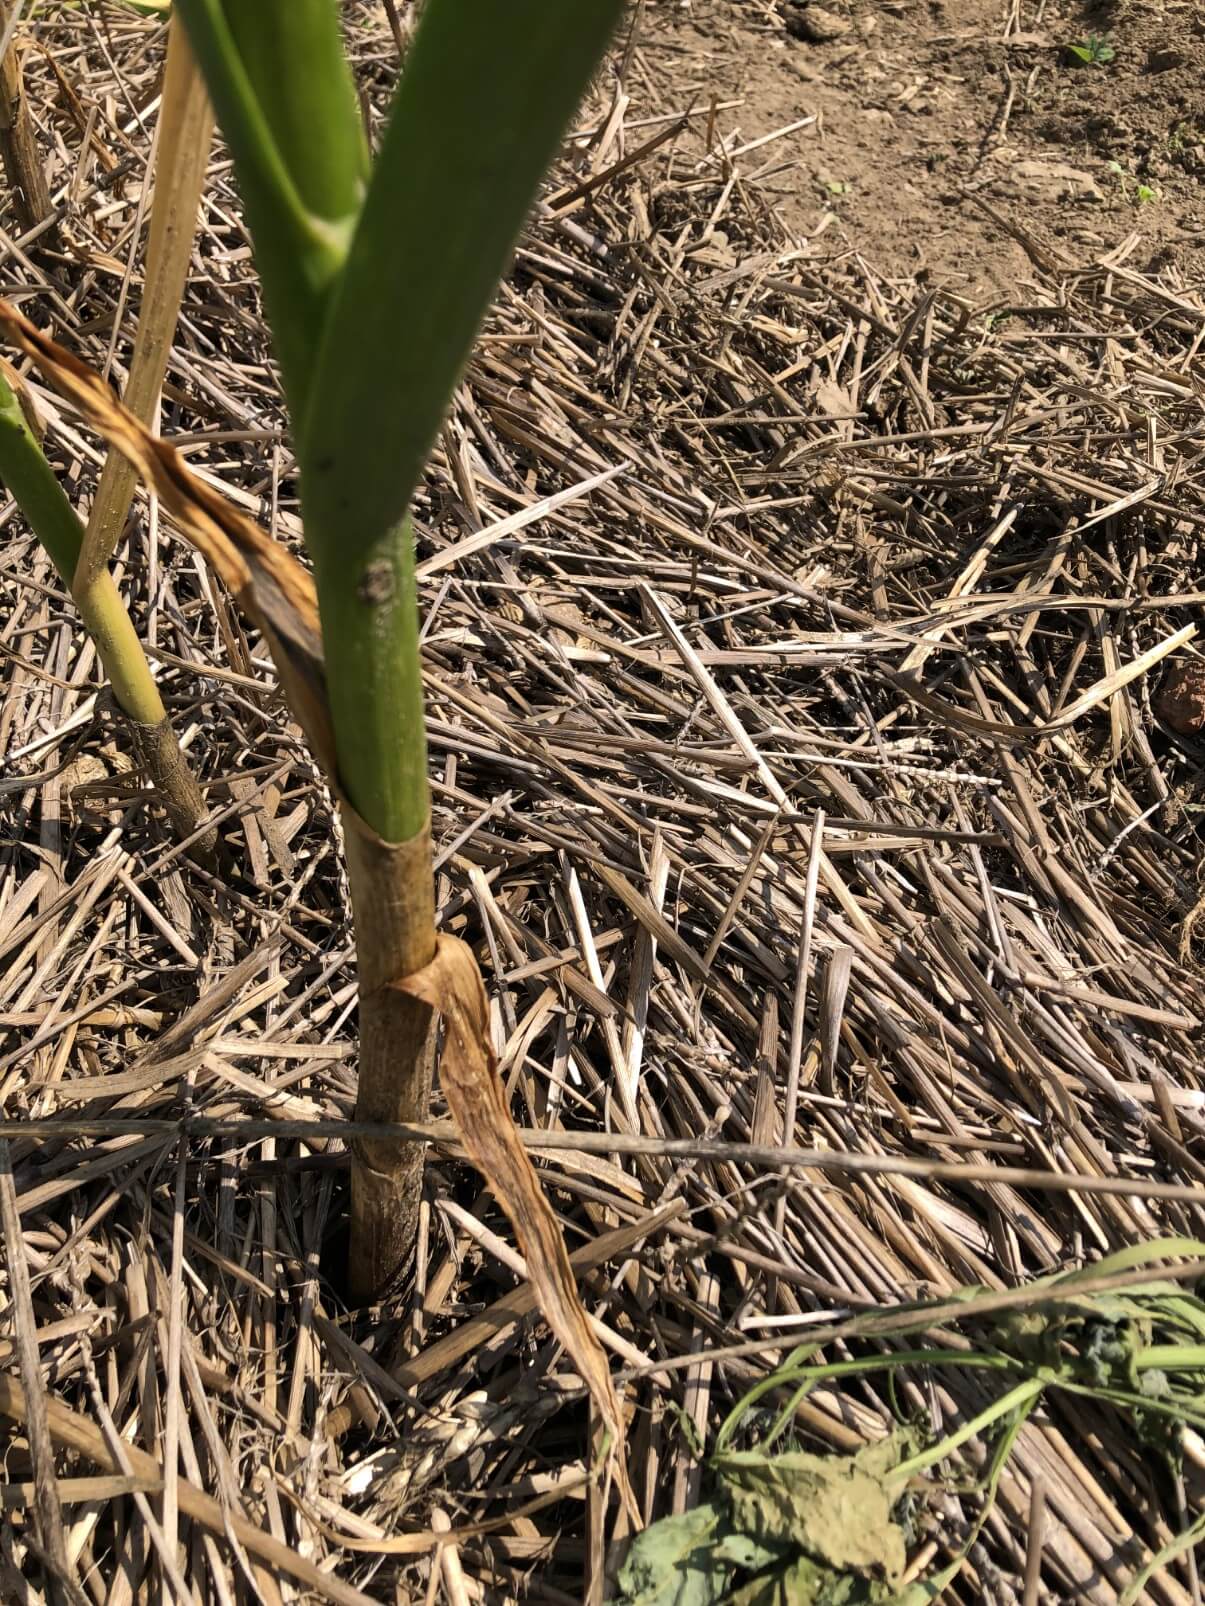
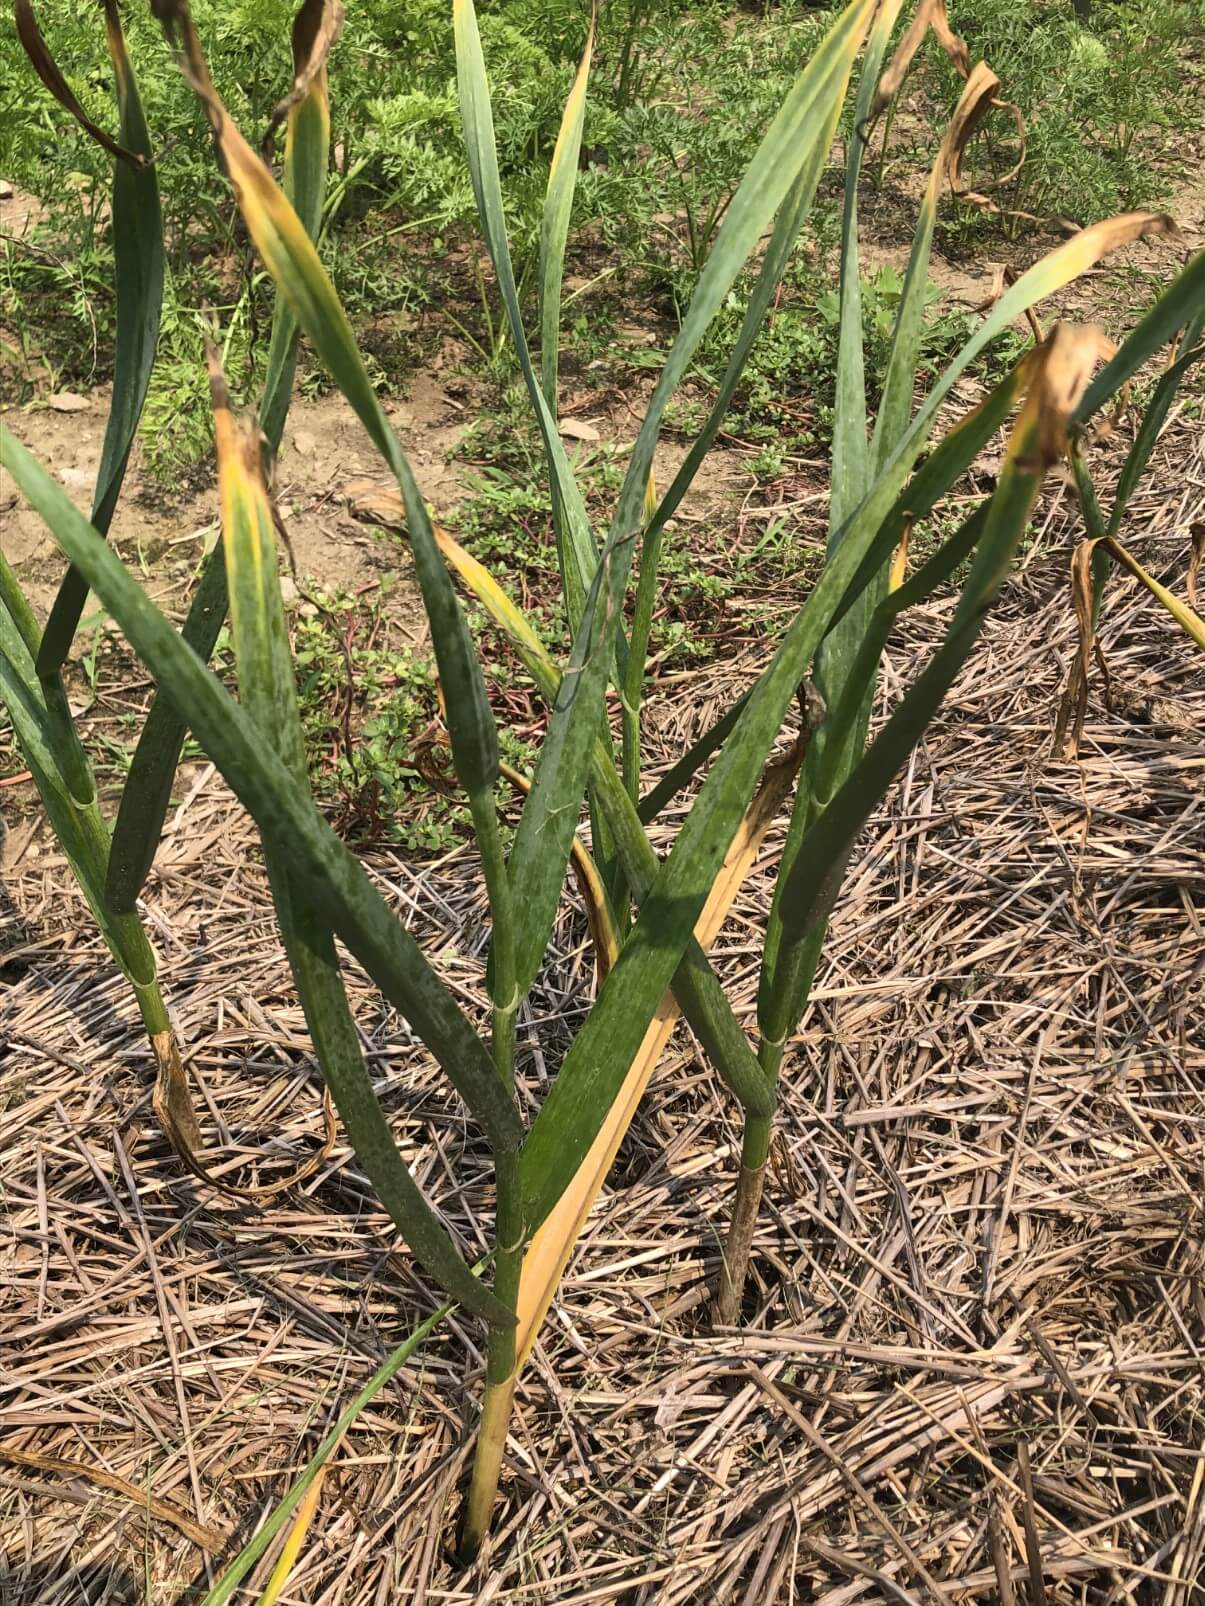
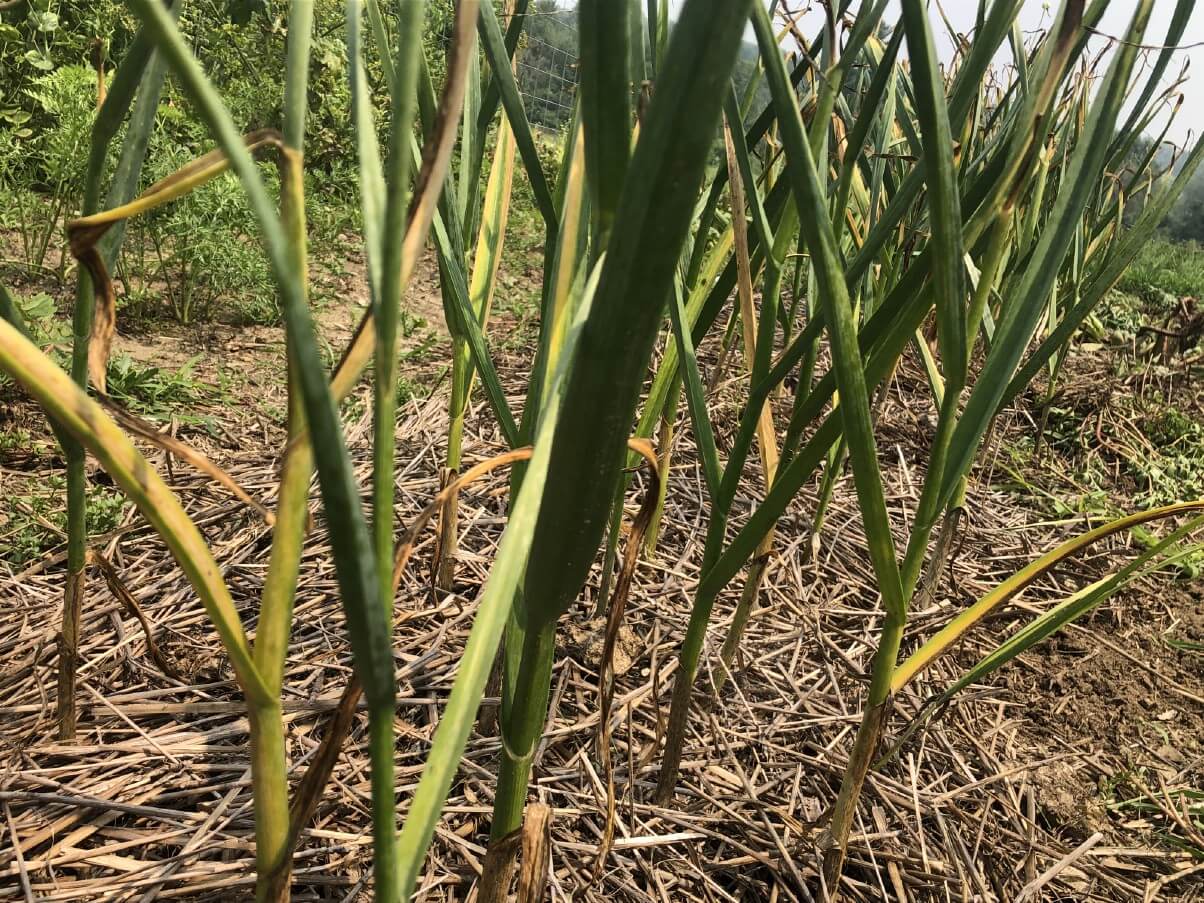
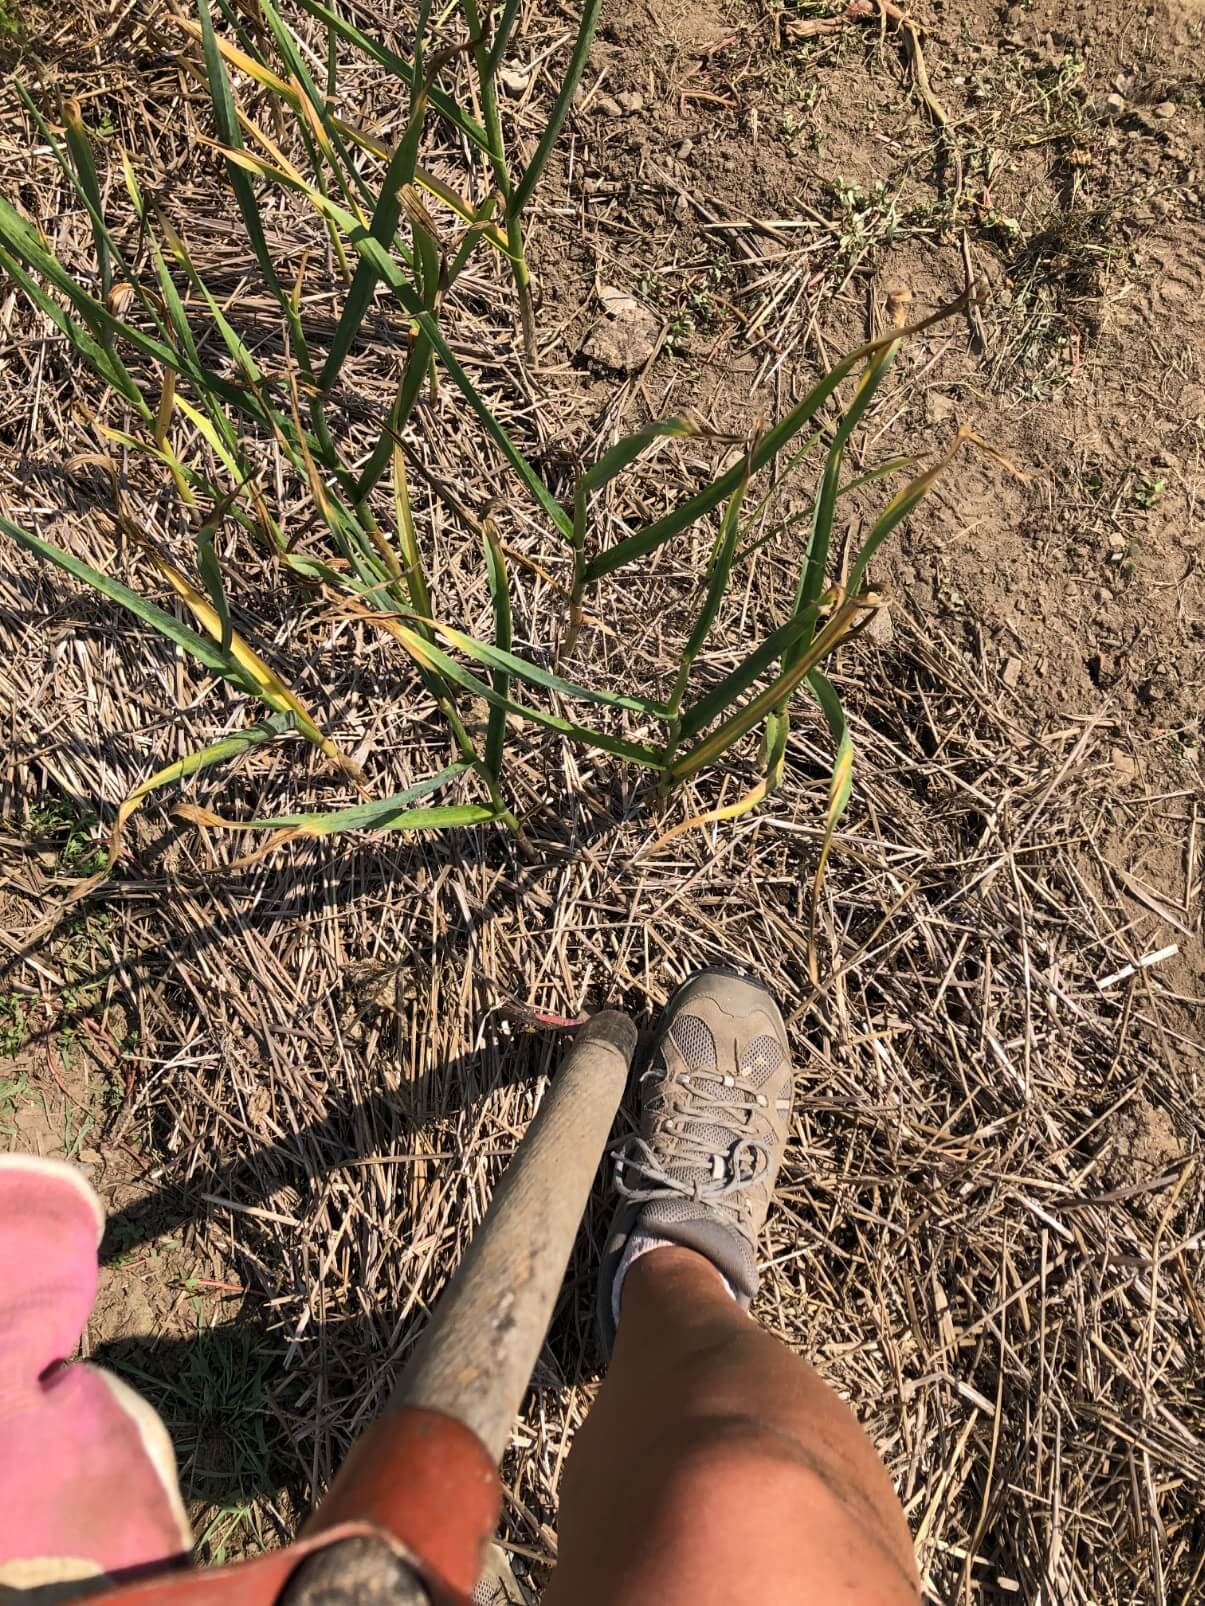
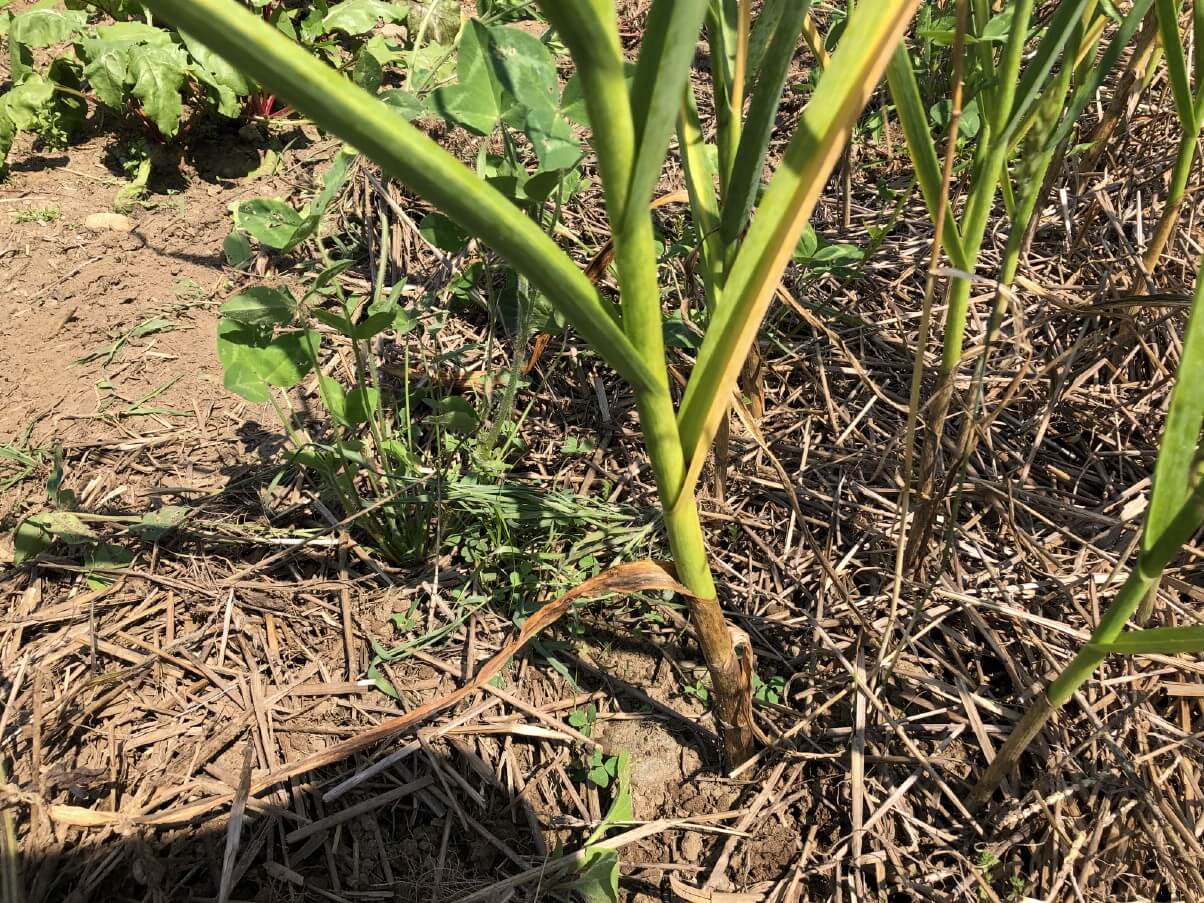
Garlic is ready to harvest when:
- The bottom leaves have turned brown and died back.
- About half of the upper leaves should still be green. This should leave about four green leaves at the top.
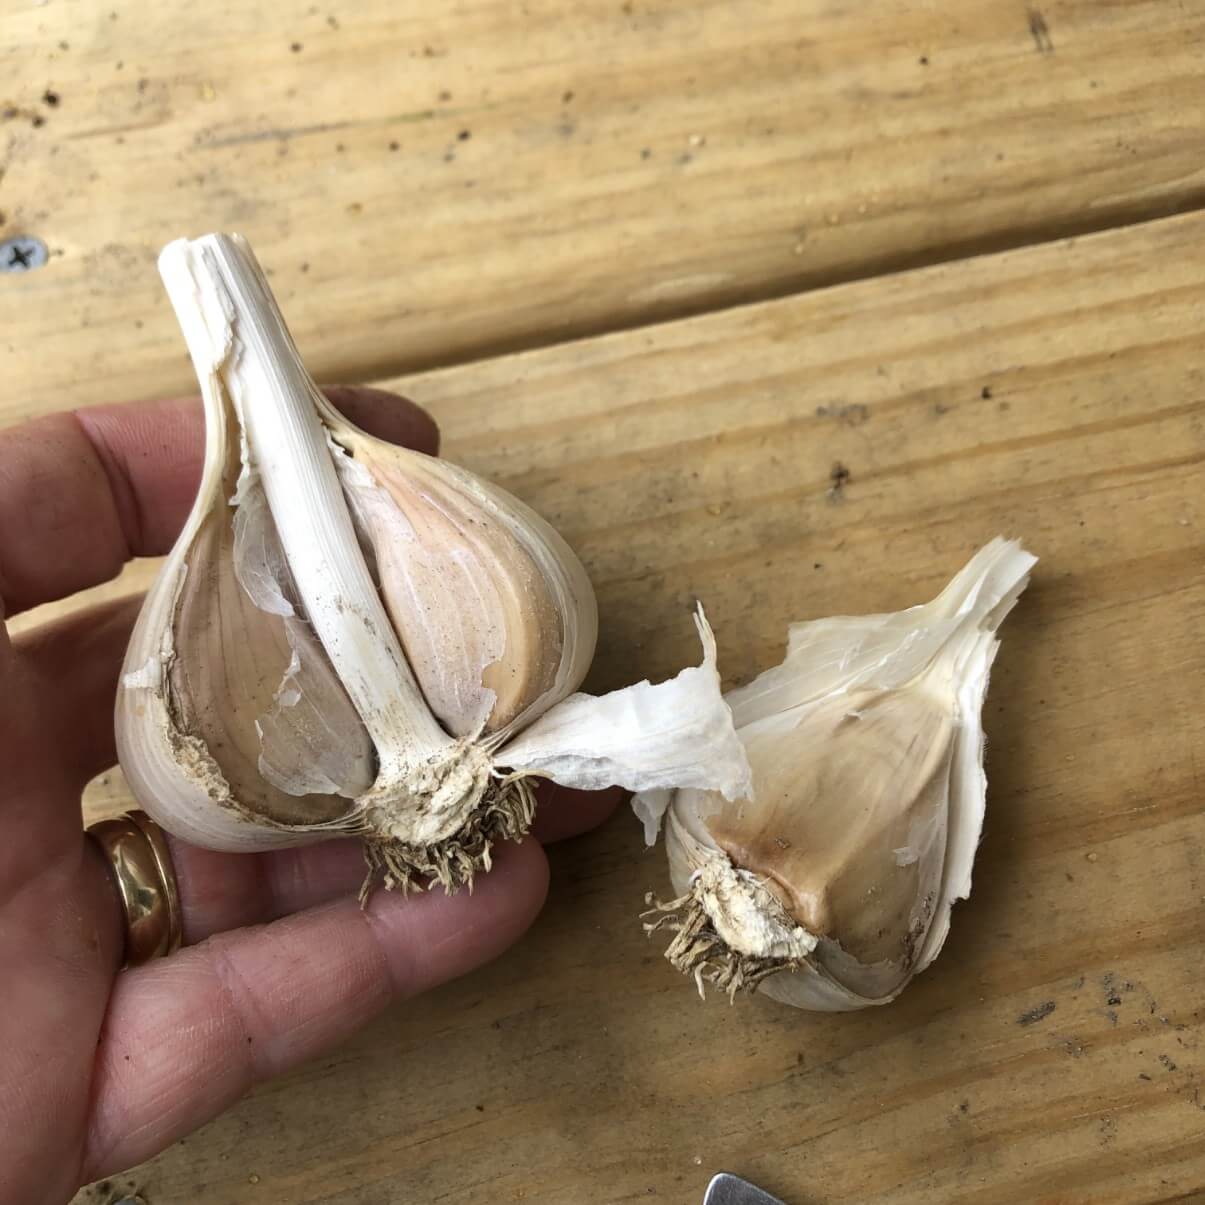
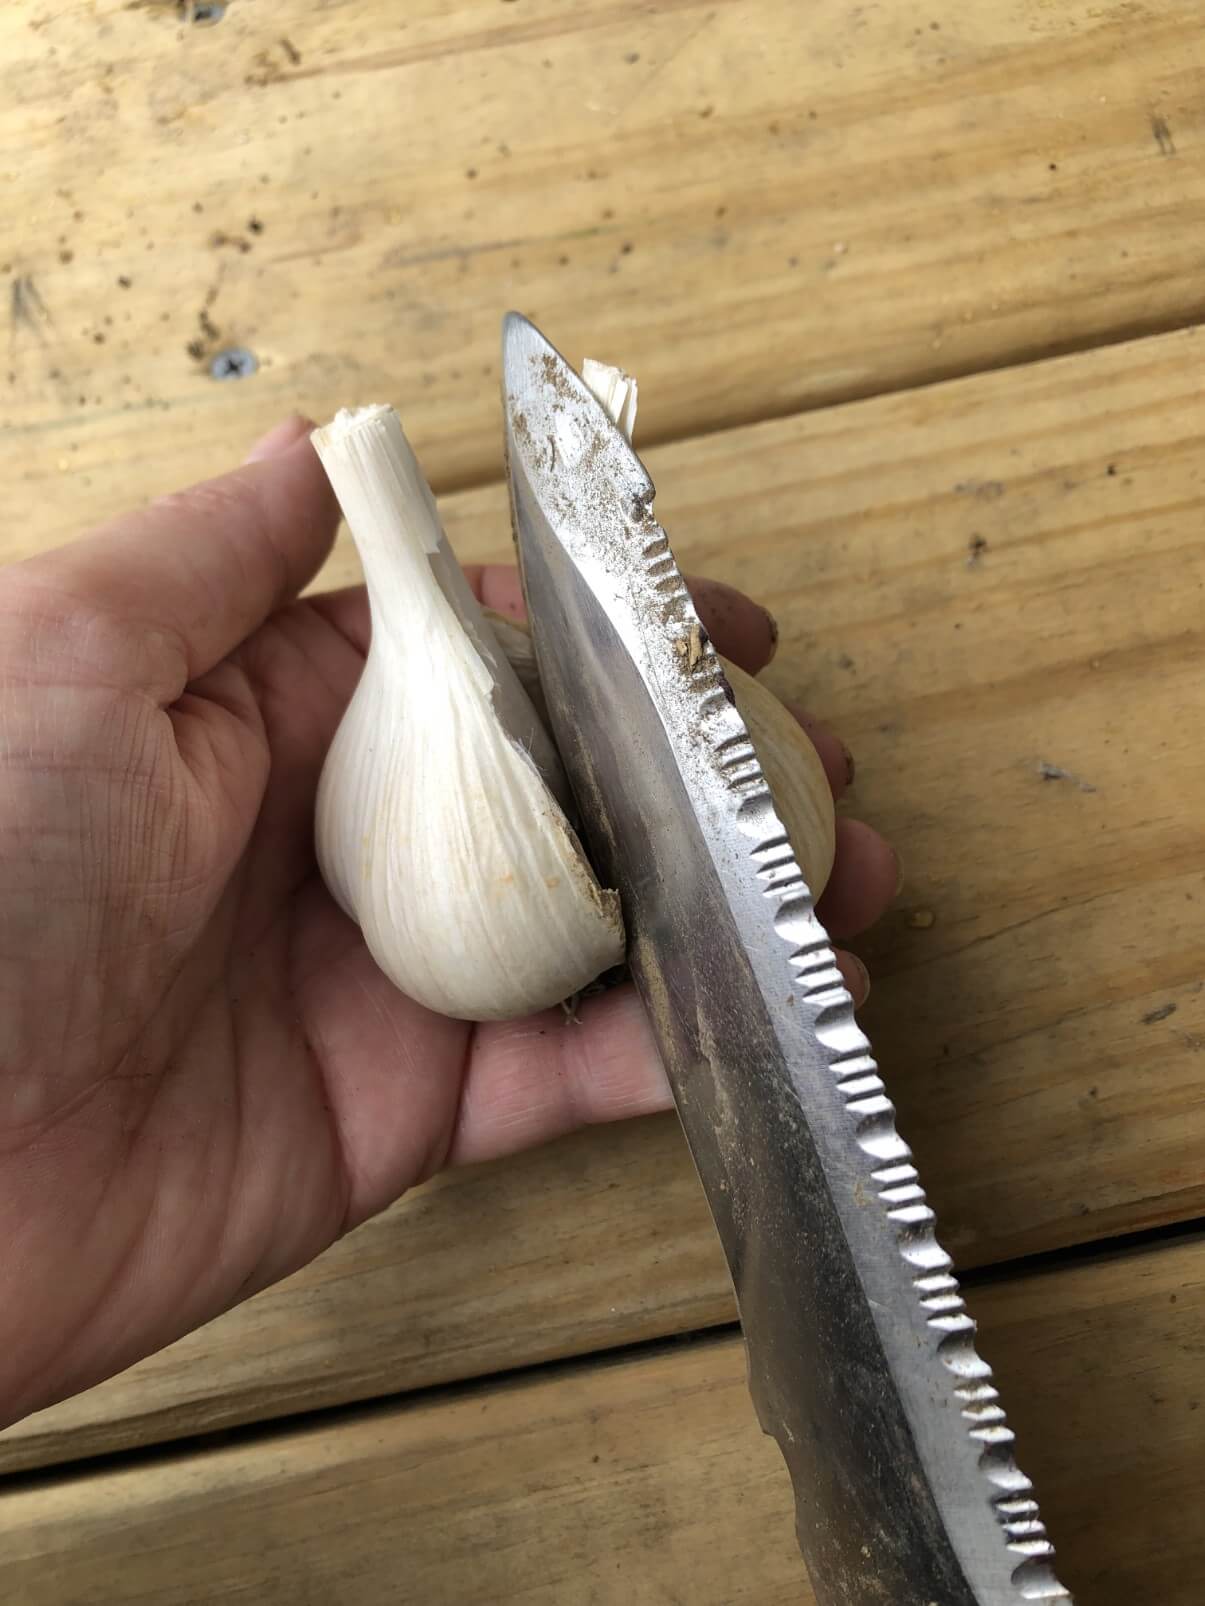
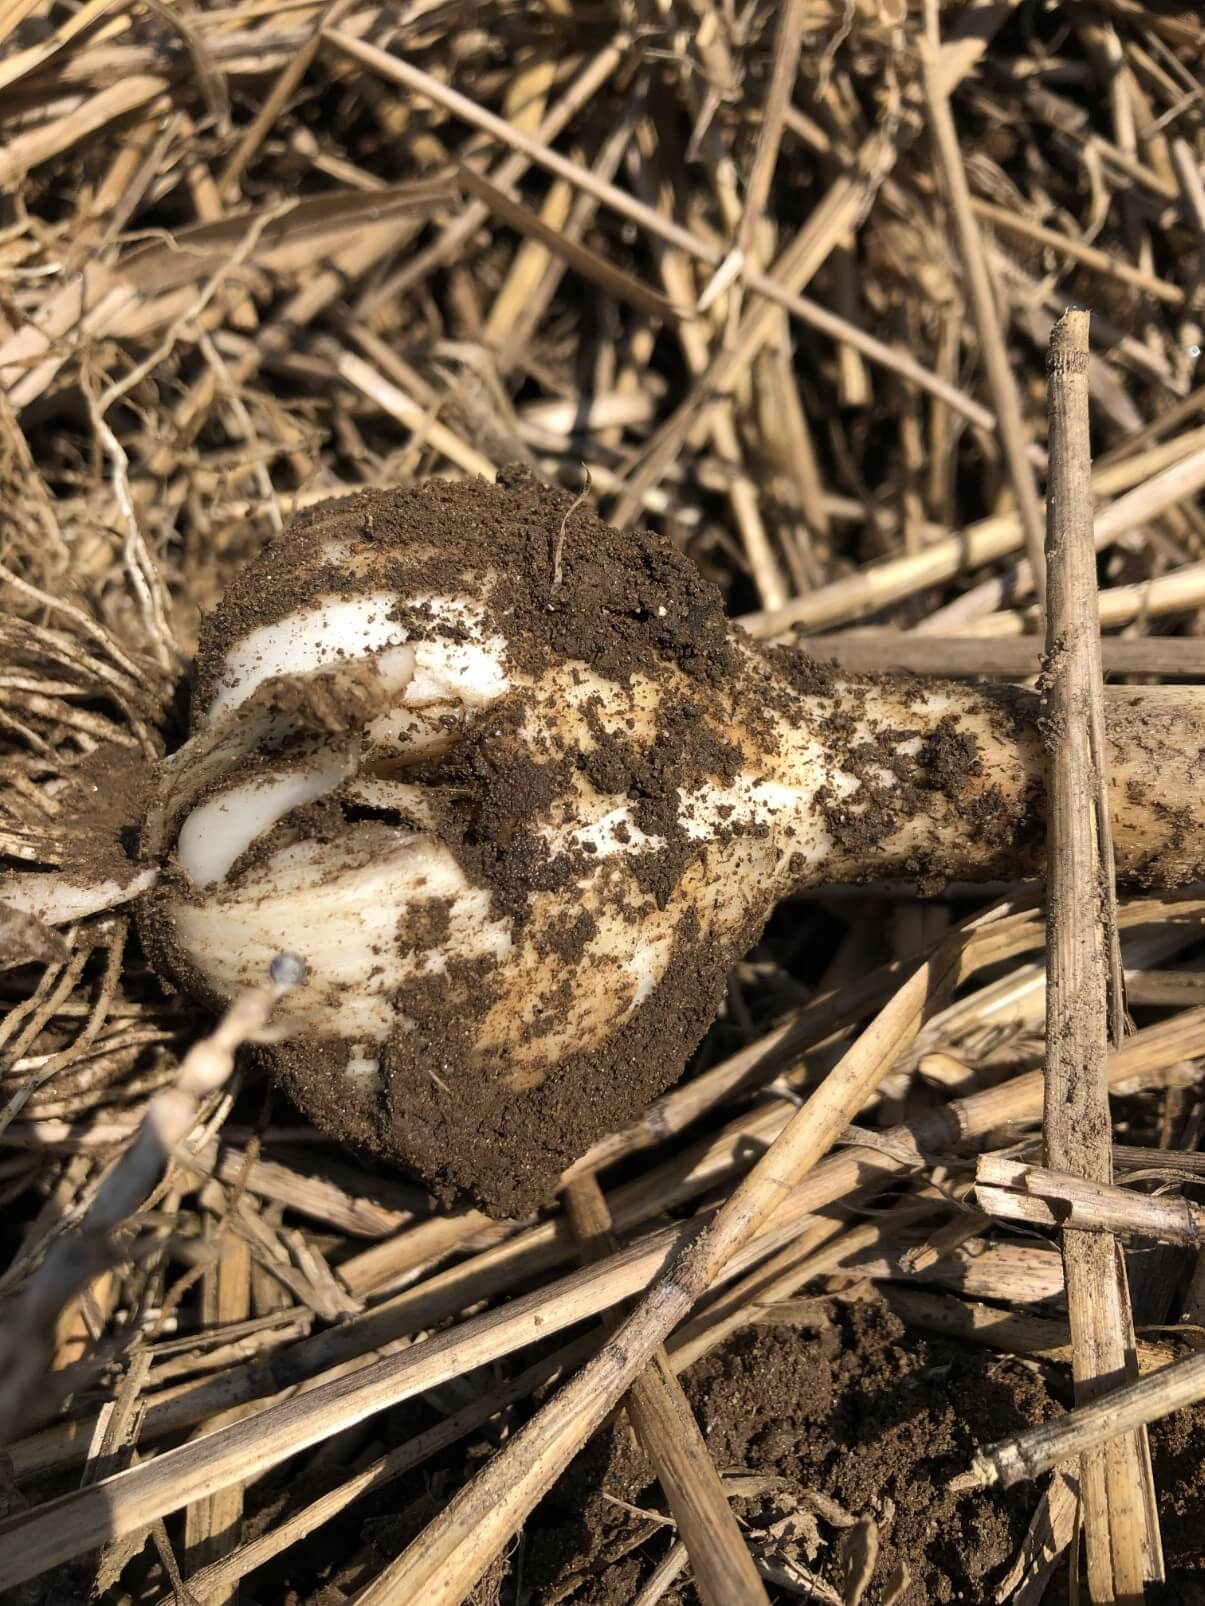
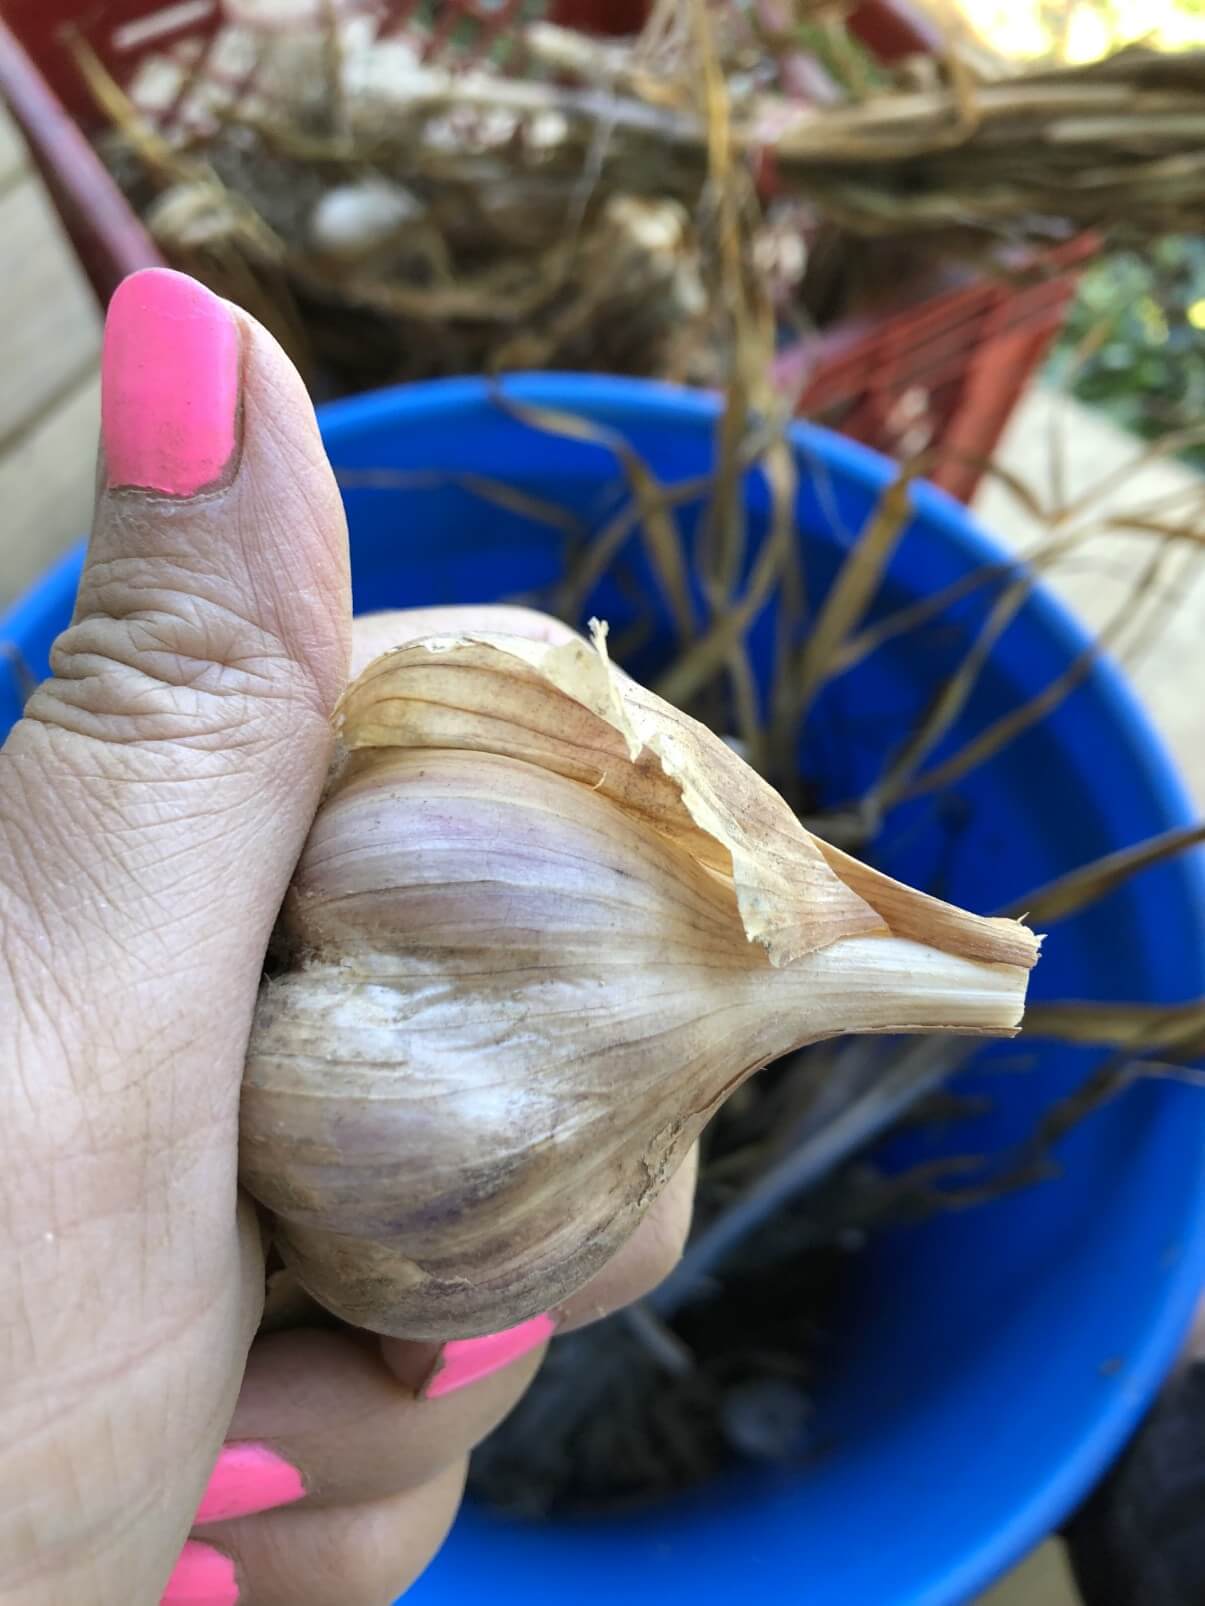
- Cloves fills the papery skins. If you pull a few heads of garlic and cut them in half, you should see the cloves completely filling out the wrappers.
This is a very good video from Territorial Seed Company that details how to know when to harvest garlic as well as how to dig it and cure it: https://youtu.be/v8gQBqaBUjw
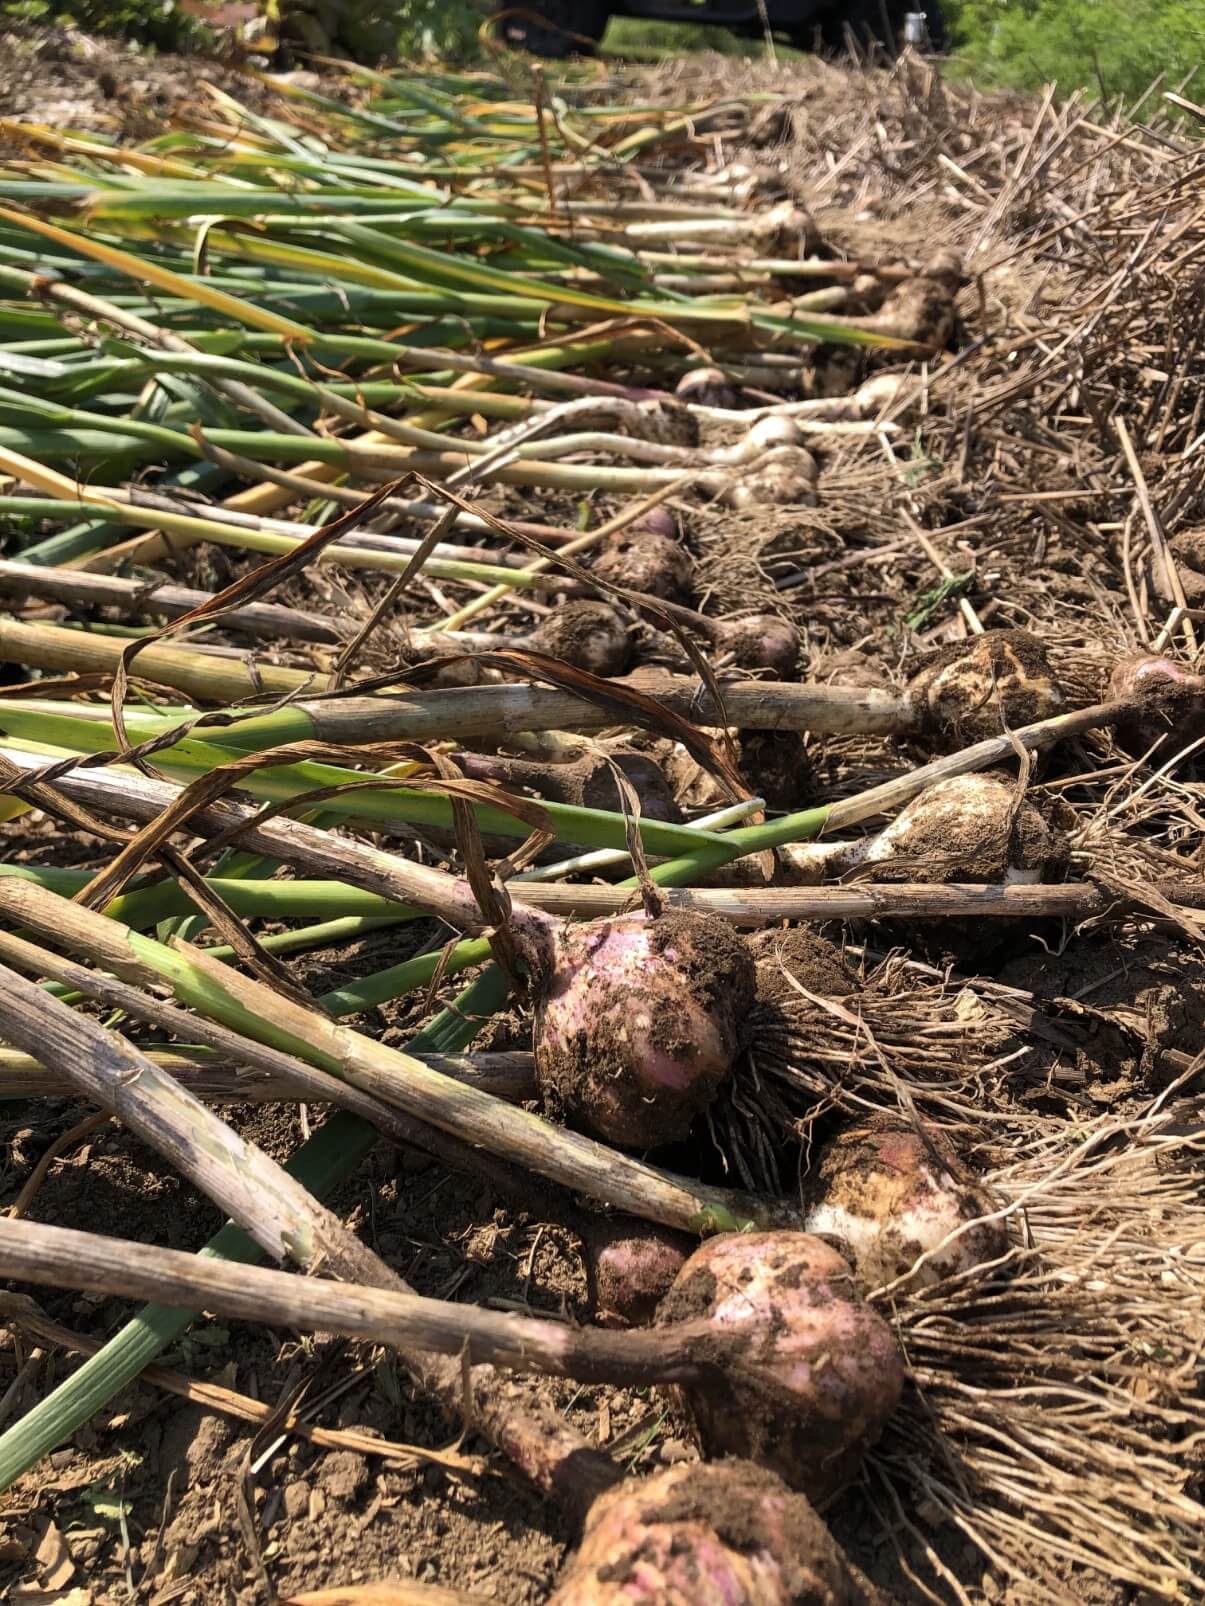
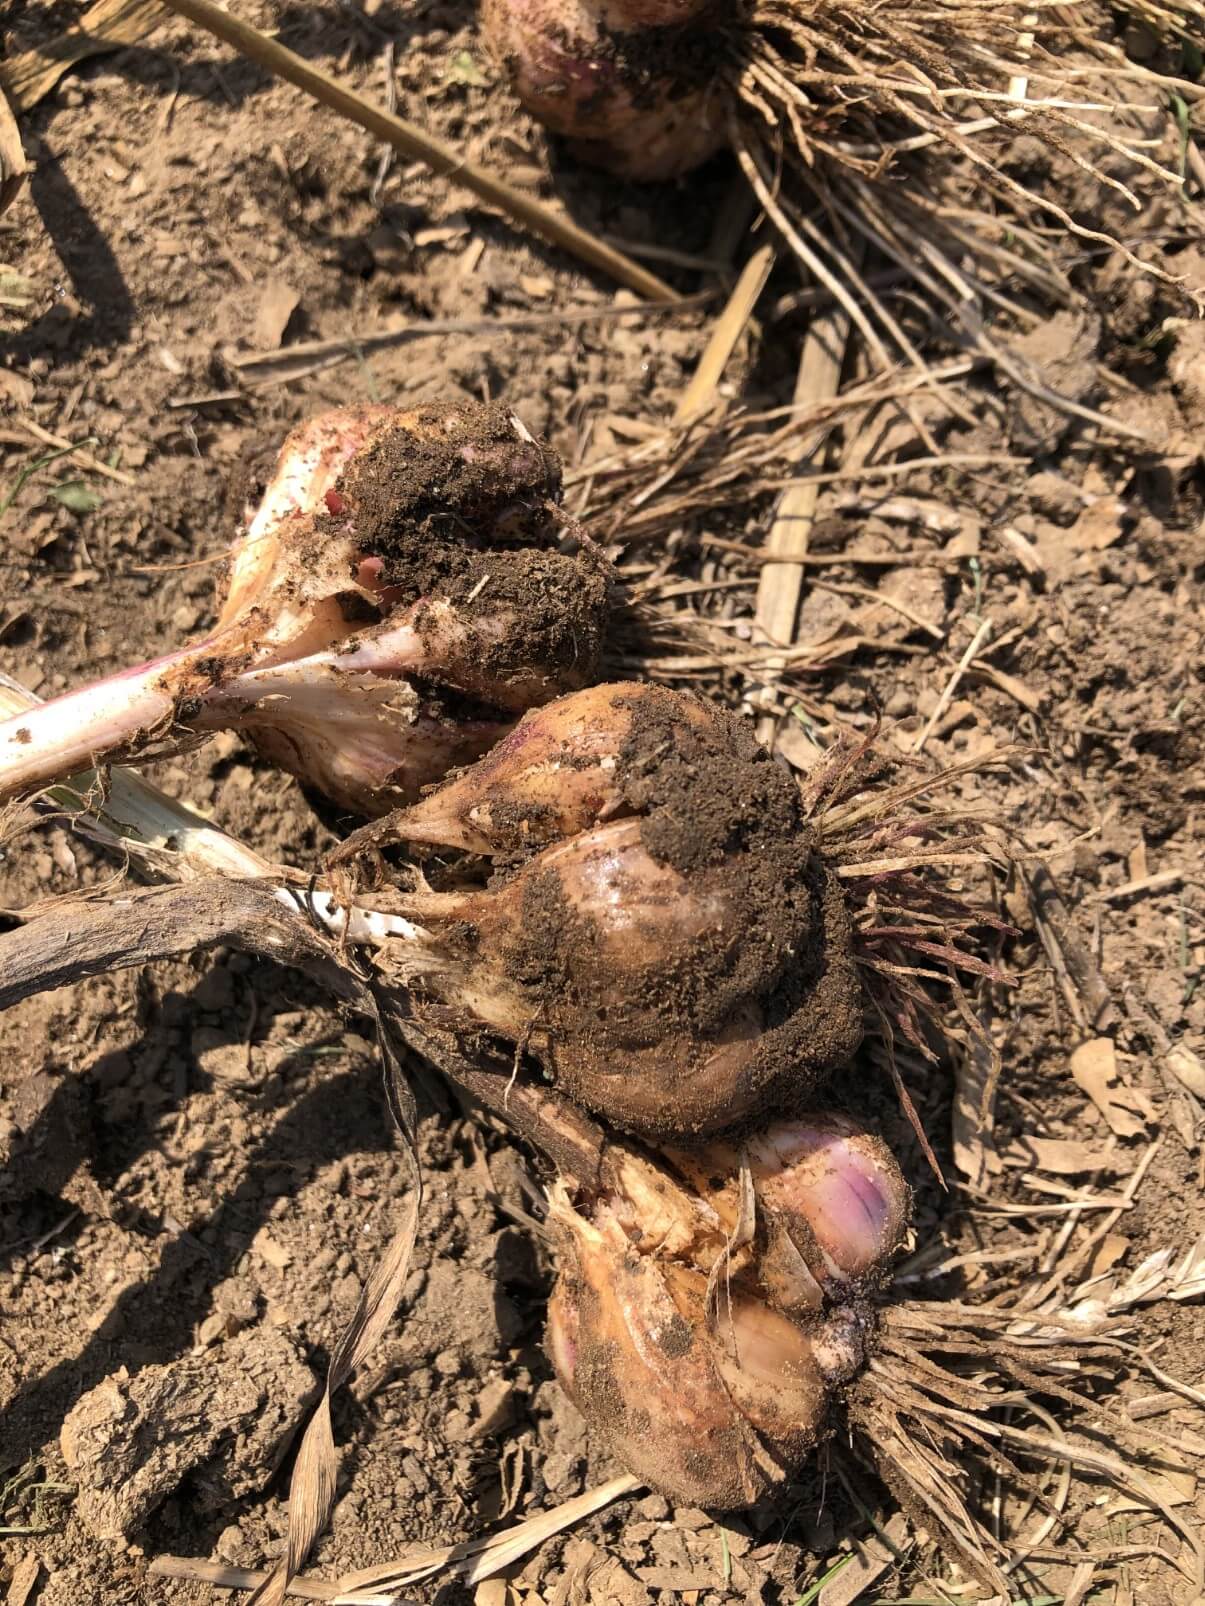
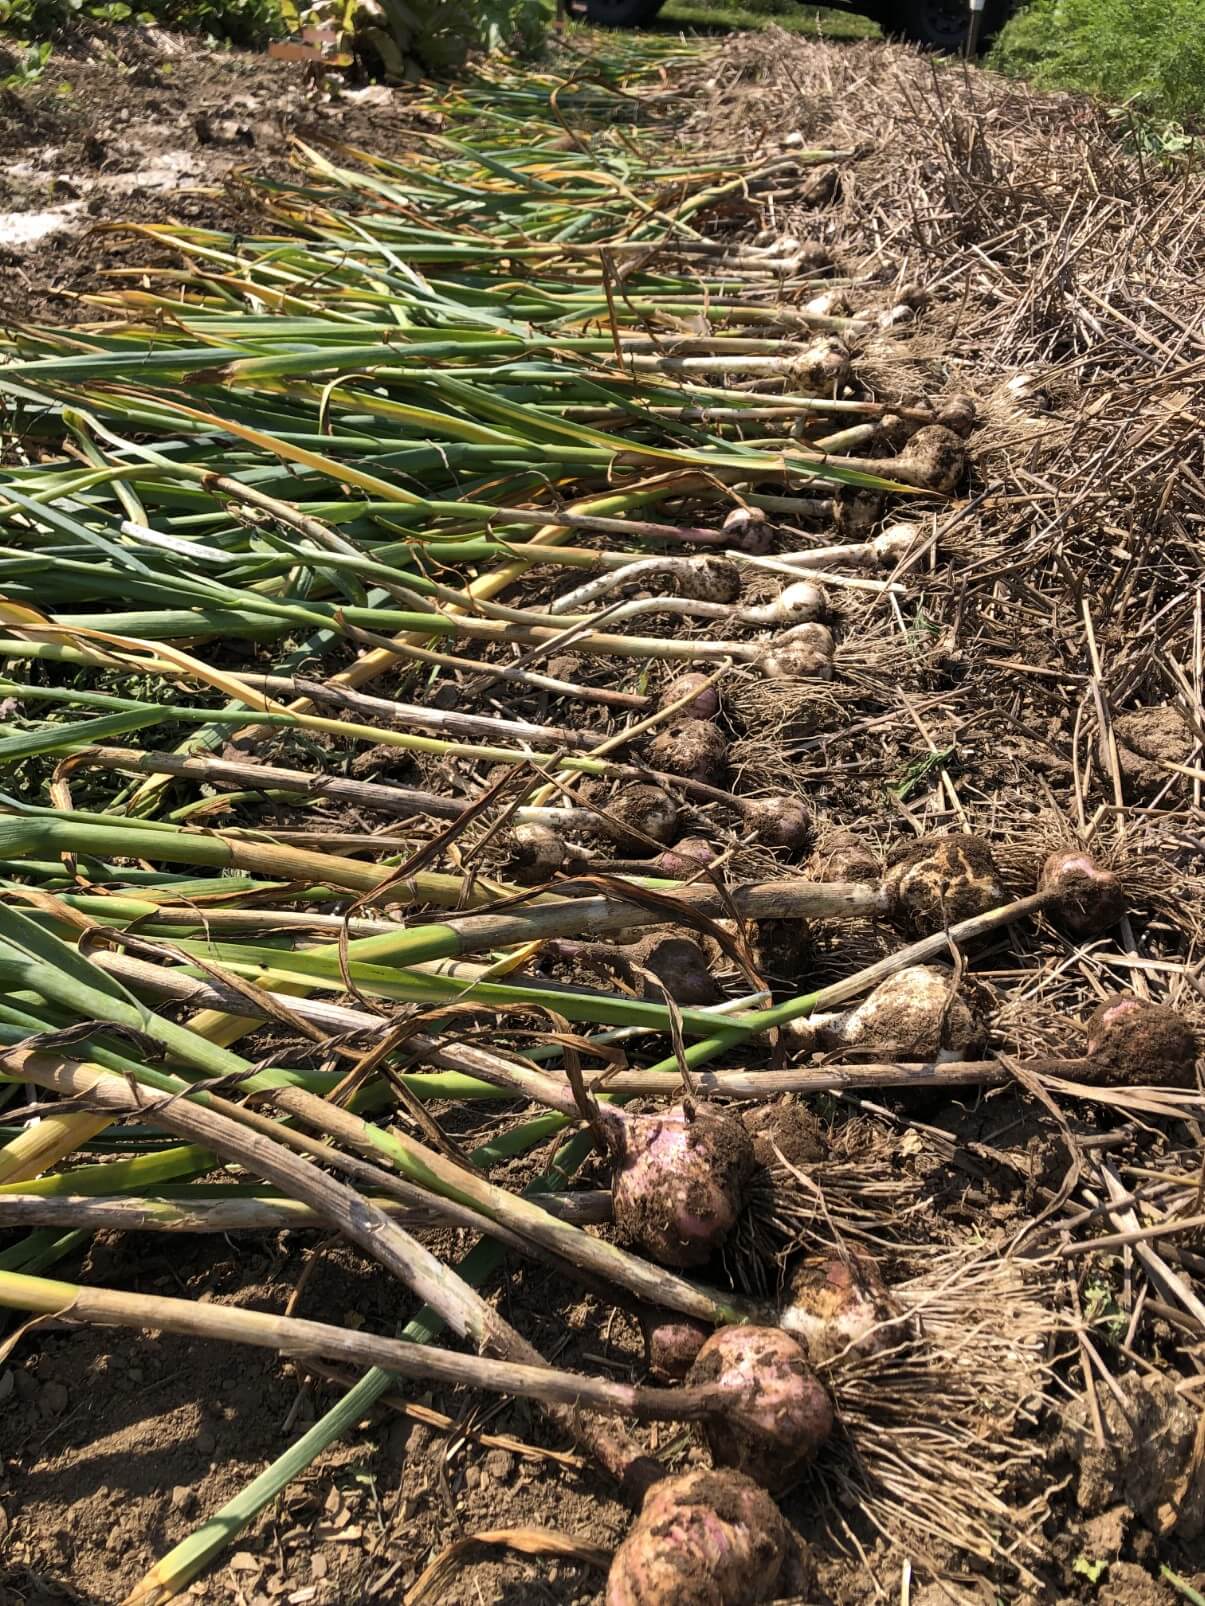
How to Harvest Your Garlic
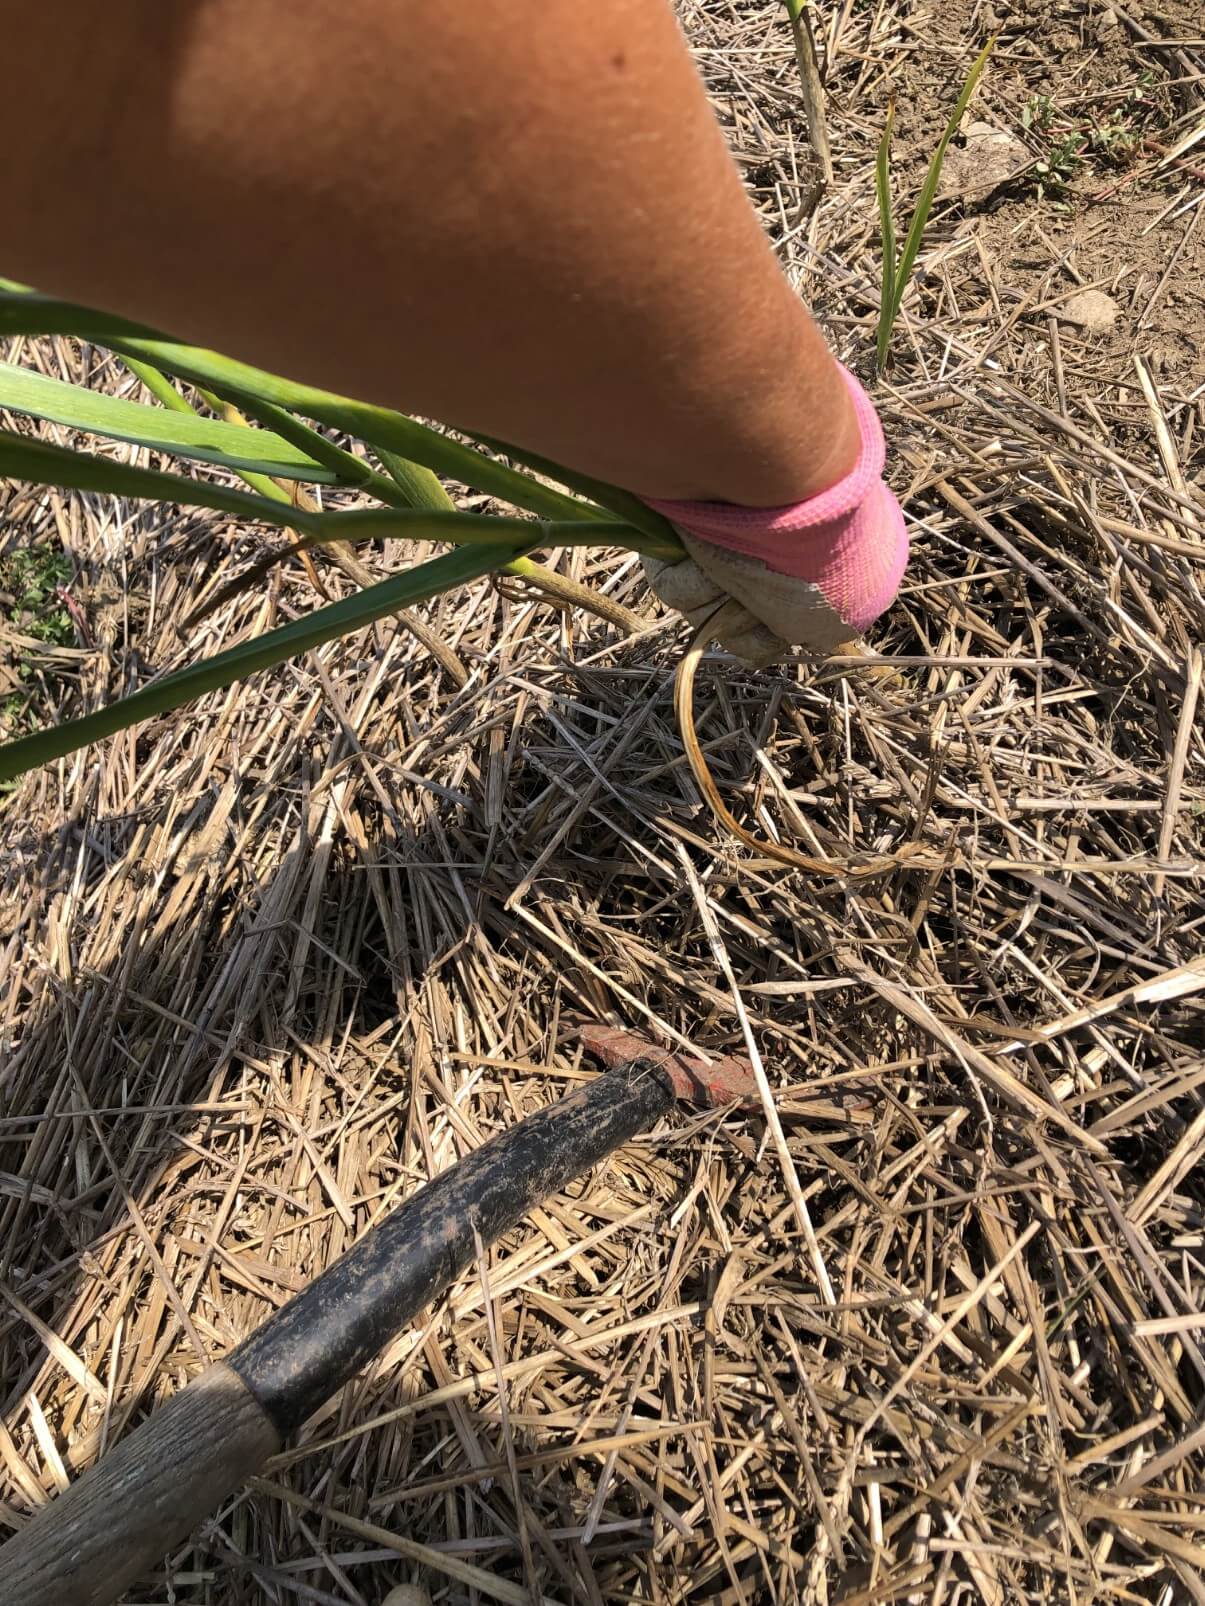
Garlic is quite easy to harvest:
- Use a garden fork and place it several inches away from the base of the garlic. Take care not to stab the garlic bulbs. (If you should accidentally injure a few, set these aside and use them soon—it happens to the best gardeners!)
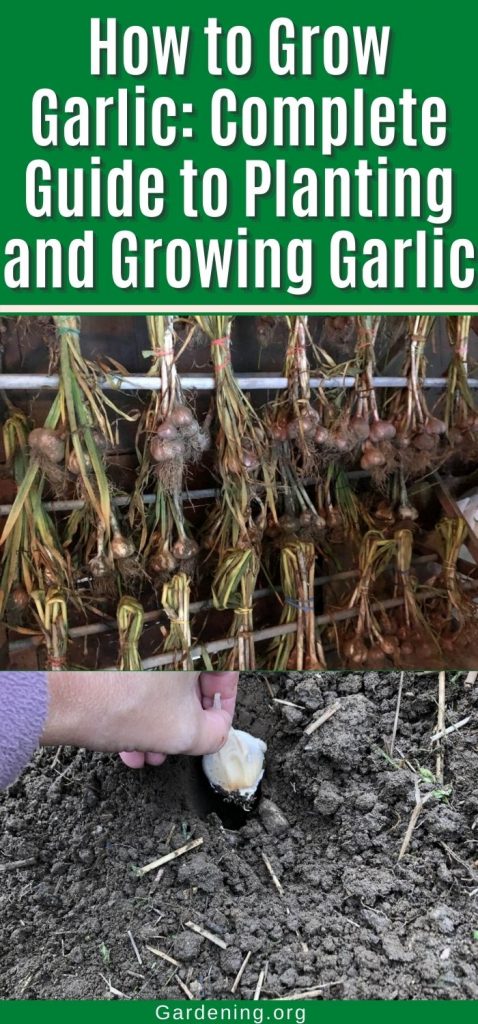
How to Clean and Cure Garlic
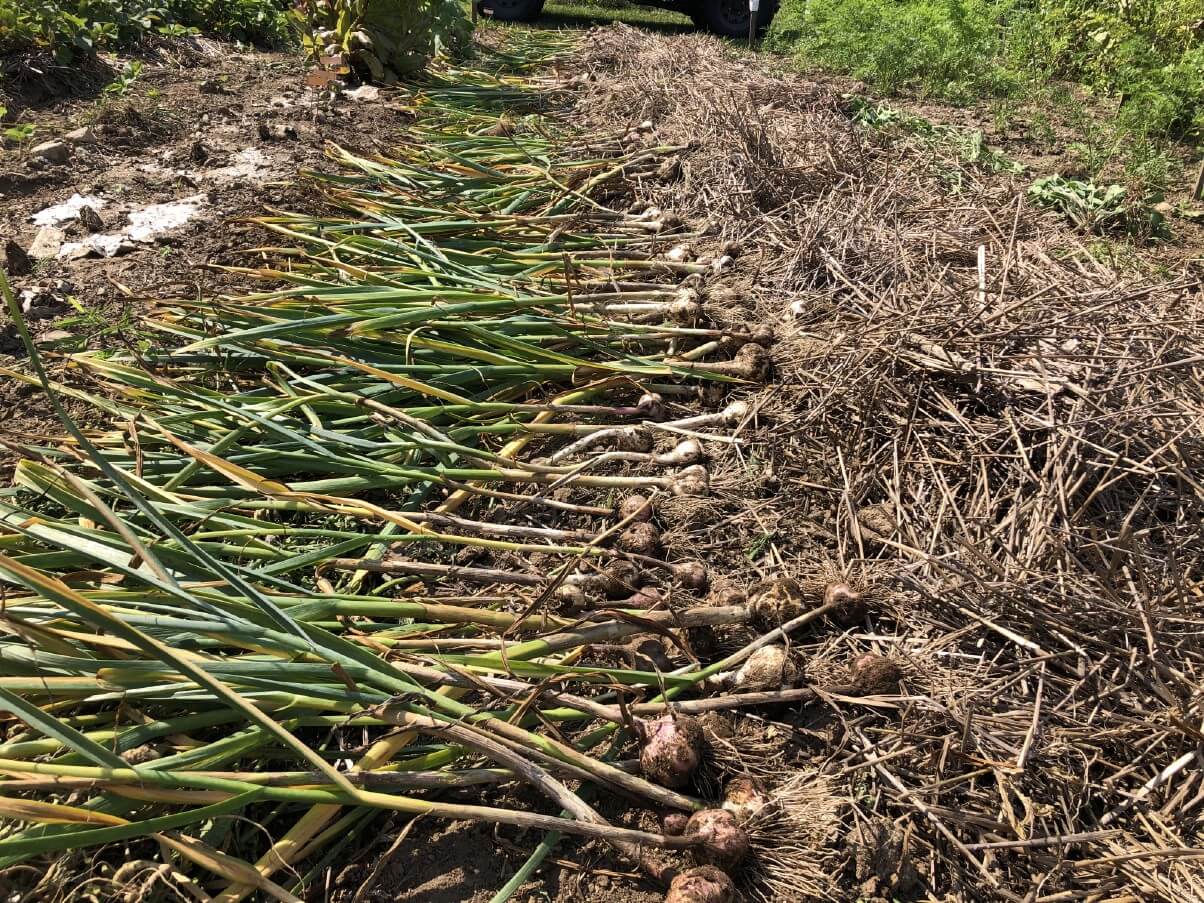
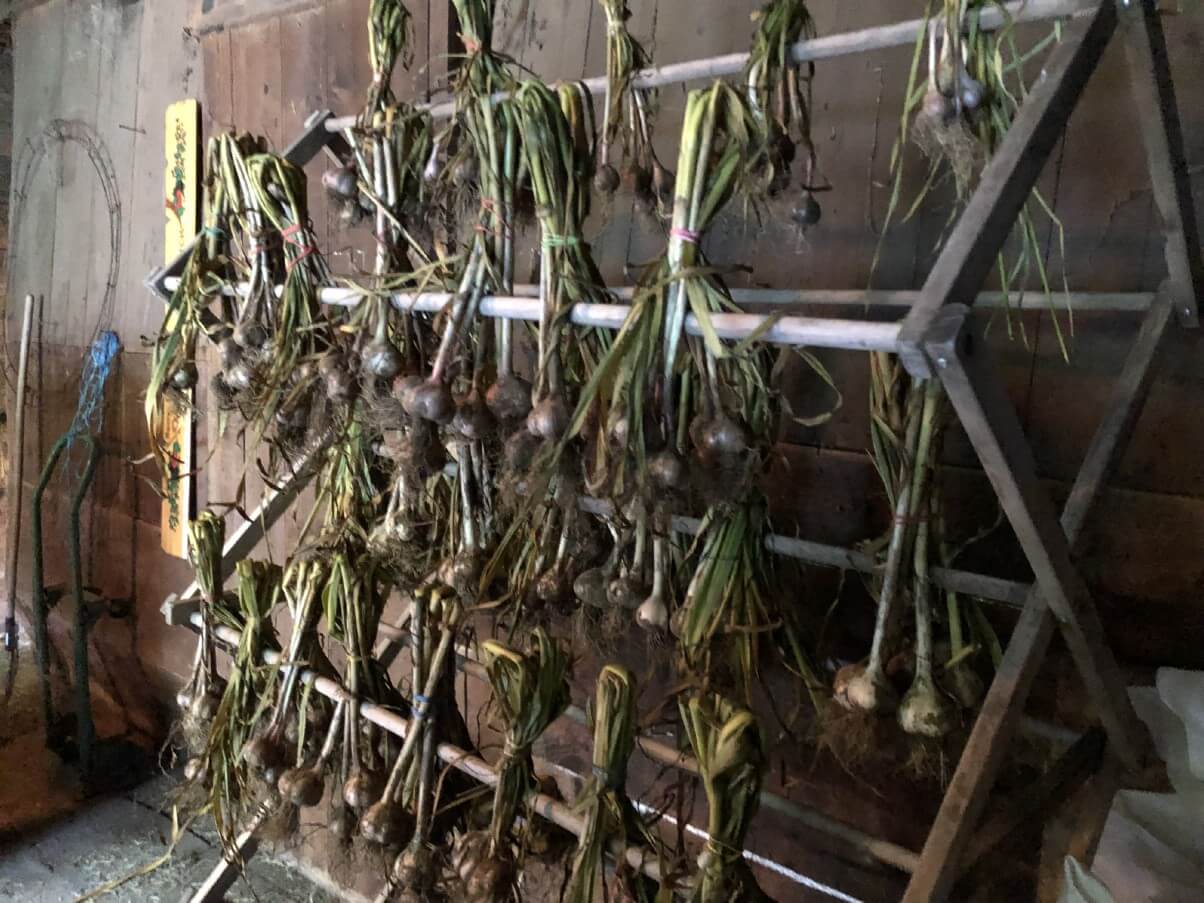
After your garlic is harvested it needs to be cleaned and cured. After several weeks of curing, it will need to be cleaned and trimmed one last time.
To prep and cure your garlic:
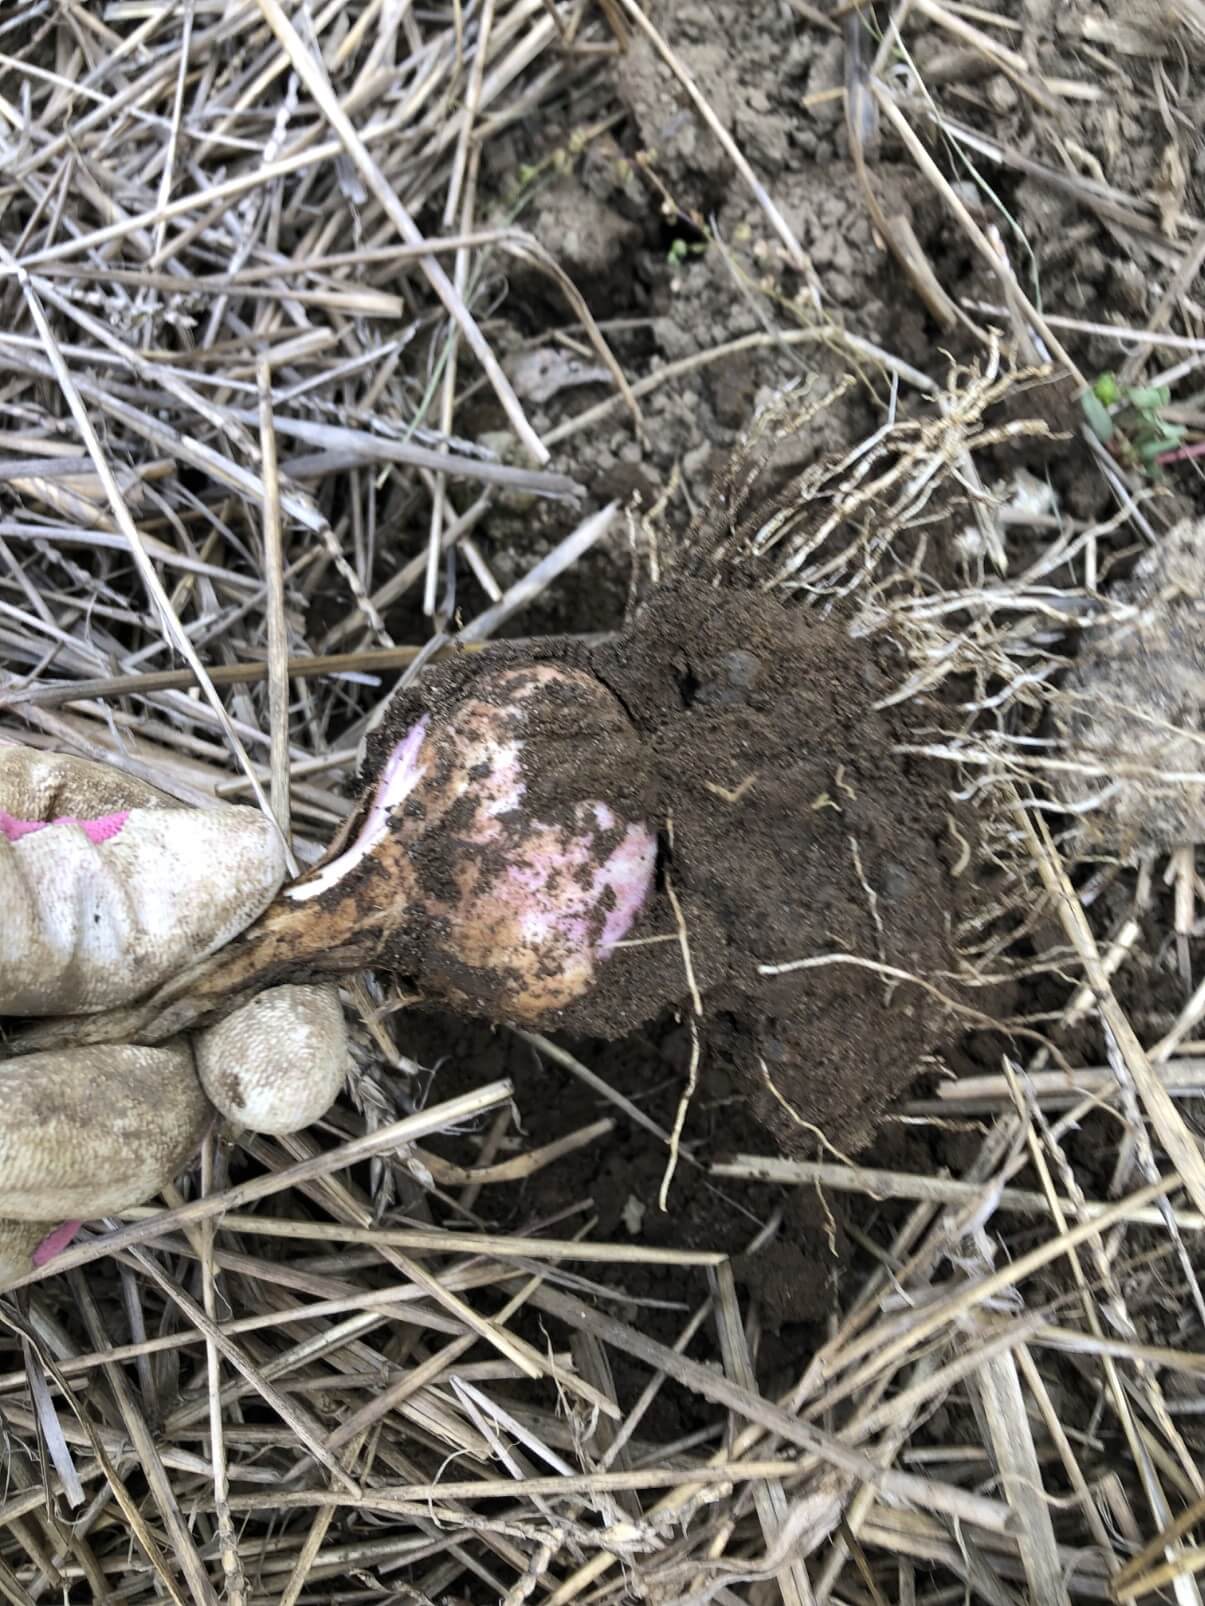
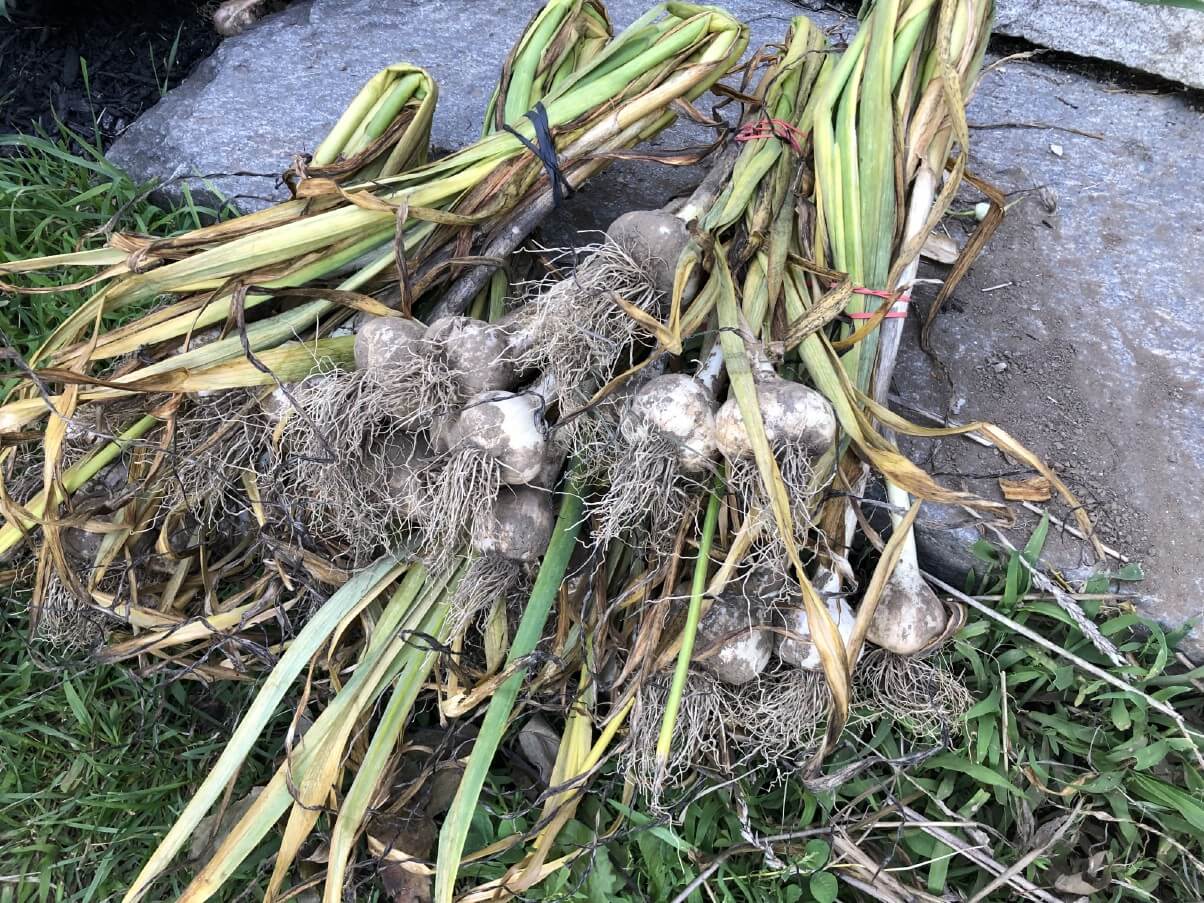
- Knock off excess dirt and soil, especially large clumps on the roots. Do not worry about getting all of your garlic perfectly clean—much of what is left will fall off as the garlic cures and the remainder will be removed after curing when the heads are trimmed.
- It is best not to spray your garlic and not to get it wet. Let air and time do the cleaning.
- Leave the stems and leaves attached to the garlic heads as they cure.
How to Trim and Store Cured Garlic
Trimming your heads of garlic is the final step before storing them.
Your garlic is now ready to use and ready to store. Properly cured and trimmed garlic will store well for many months—at least four for the shortest storing varieties, but many varieties will store for 6 to 8 months or more.
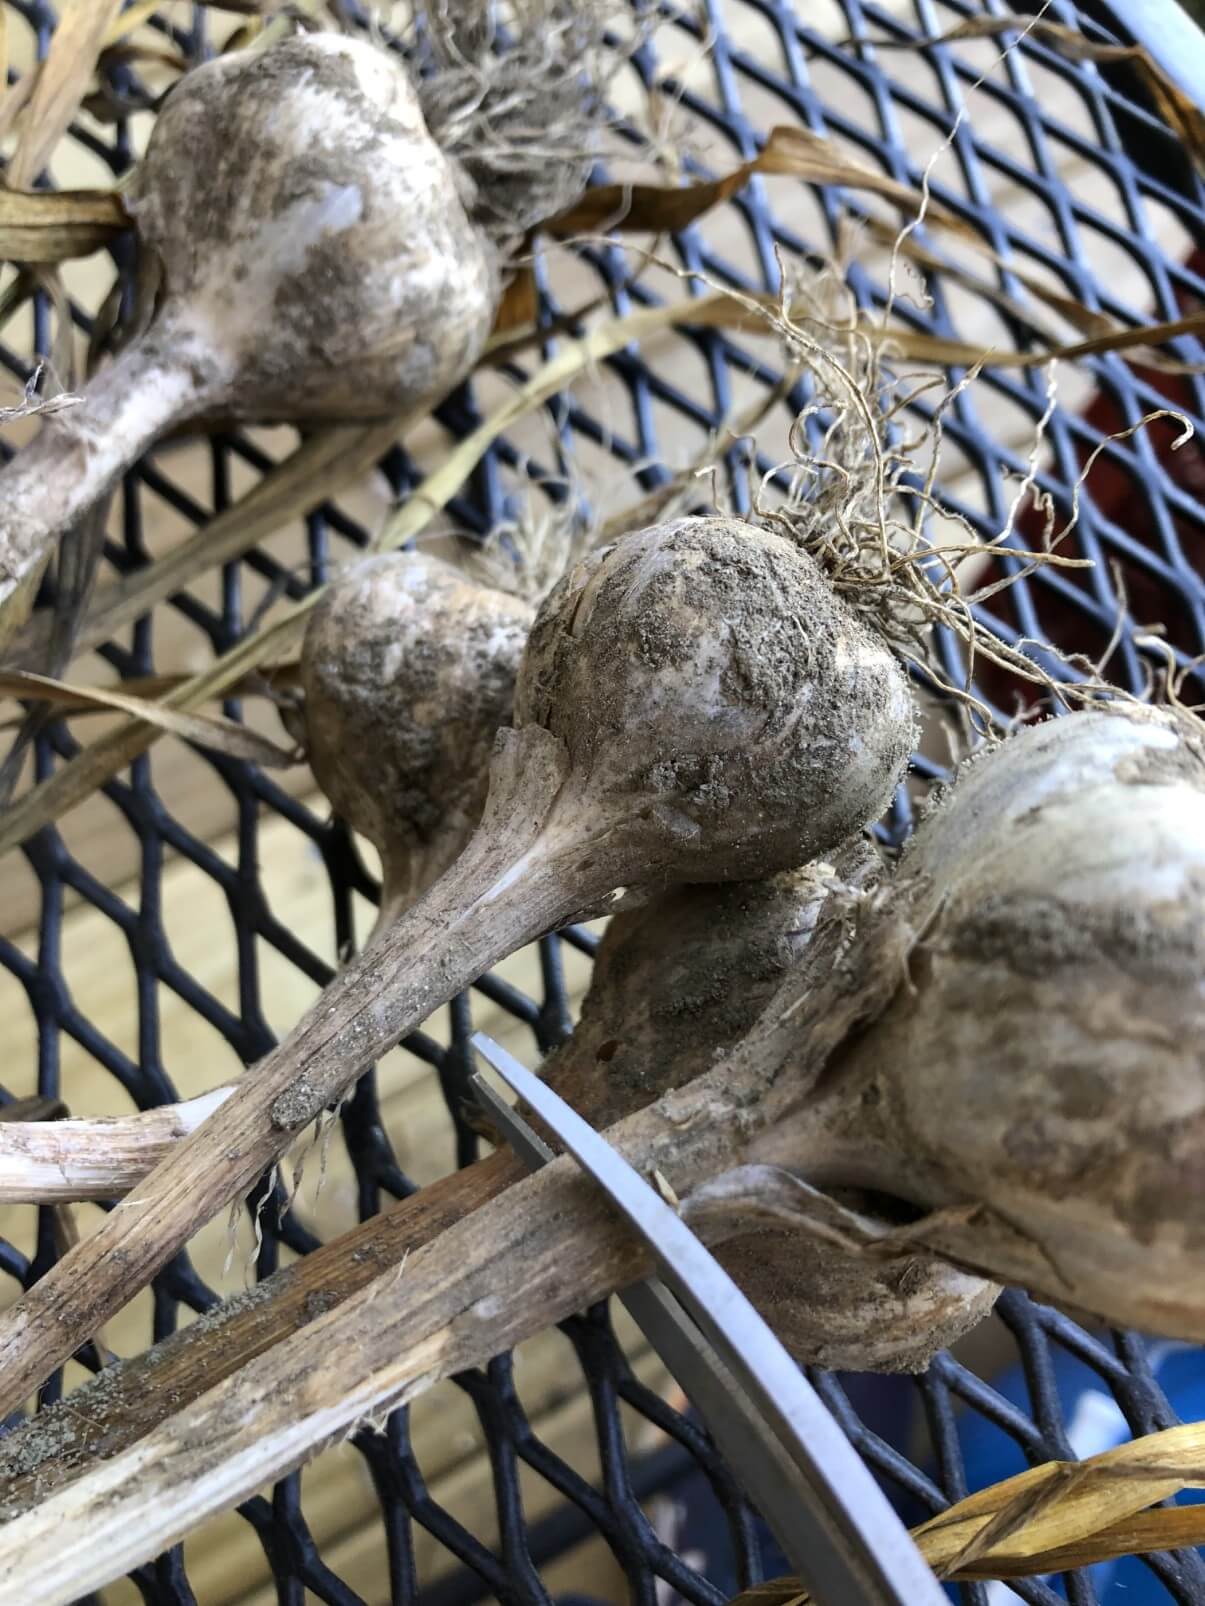
- Use scissors or garden nippers and cut off the stem and leaves, leaving about an inch of hardened stem on the top. (If you want to braid your softneck garlic, skip cutting the stems off.)
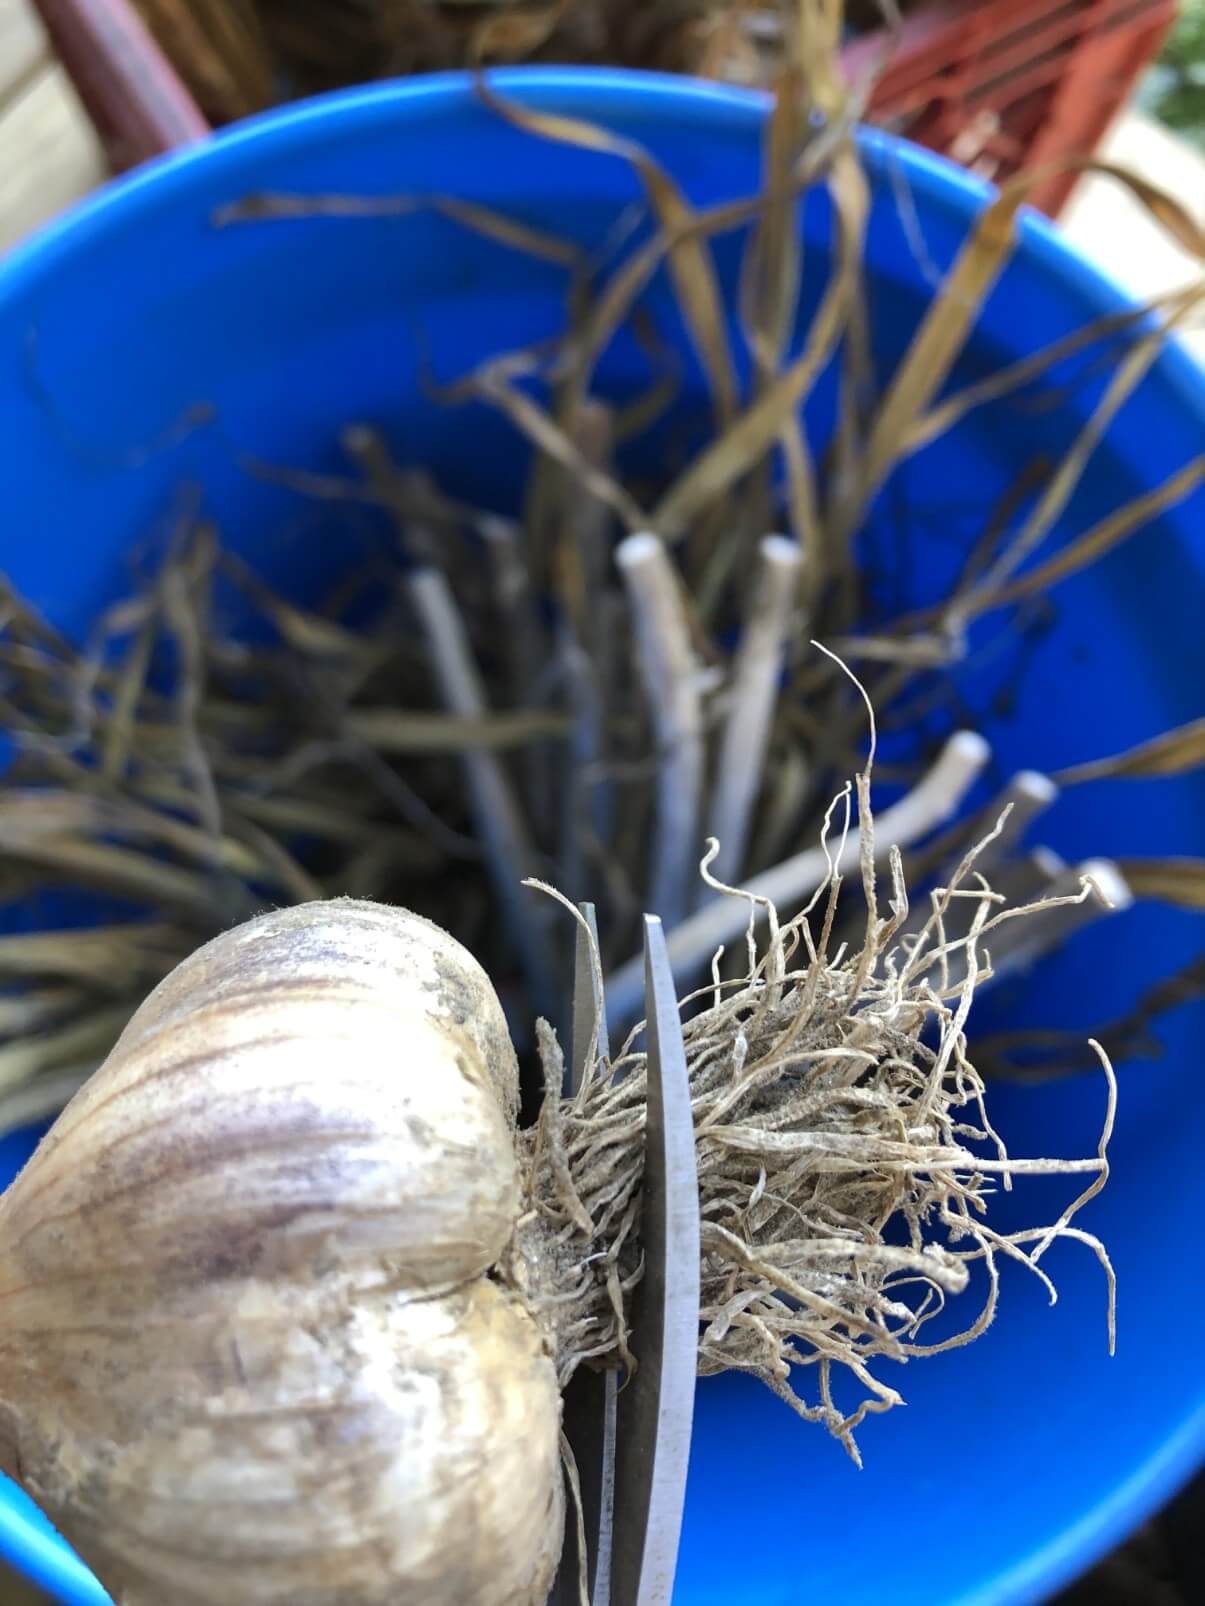
That’s it! Your garlic is now ready for storing.
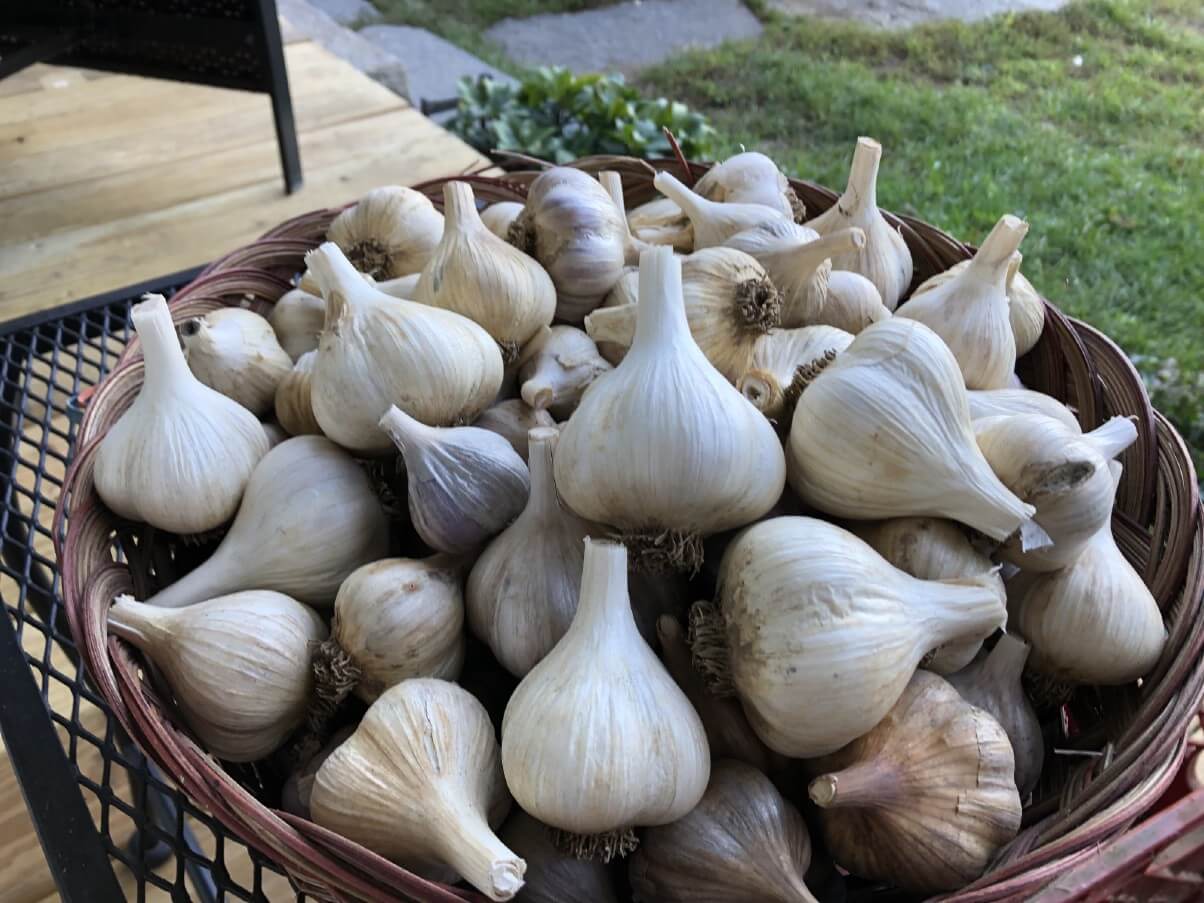
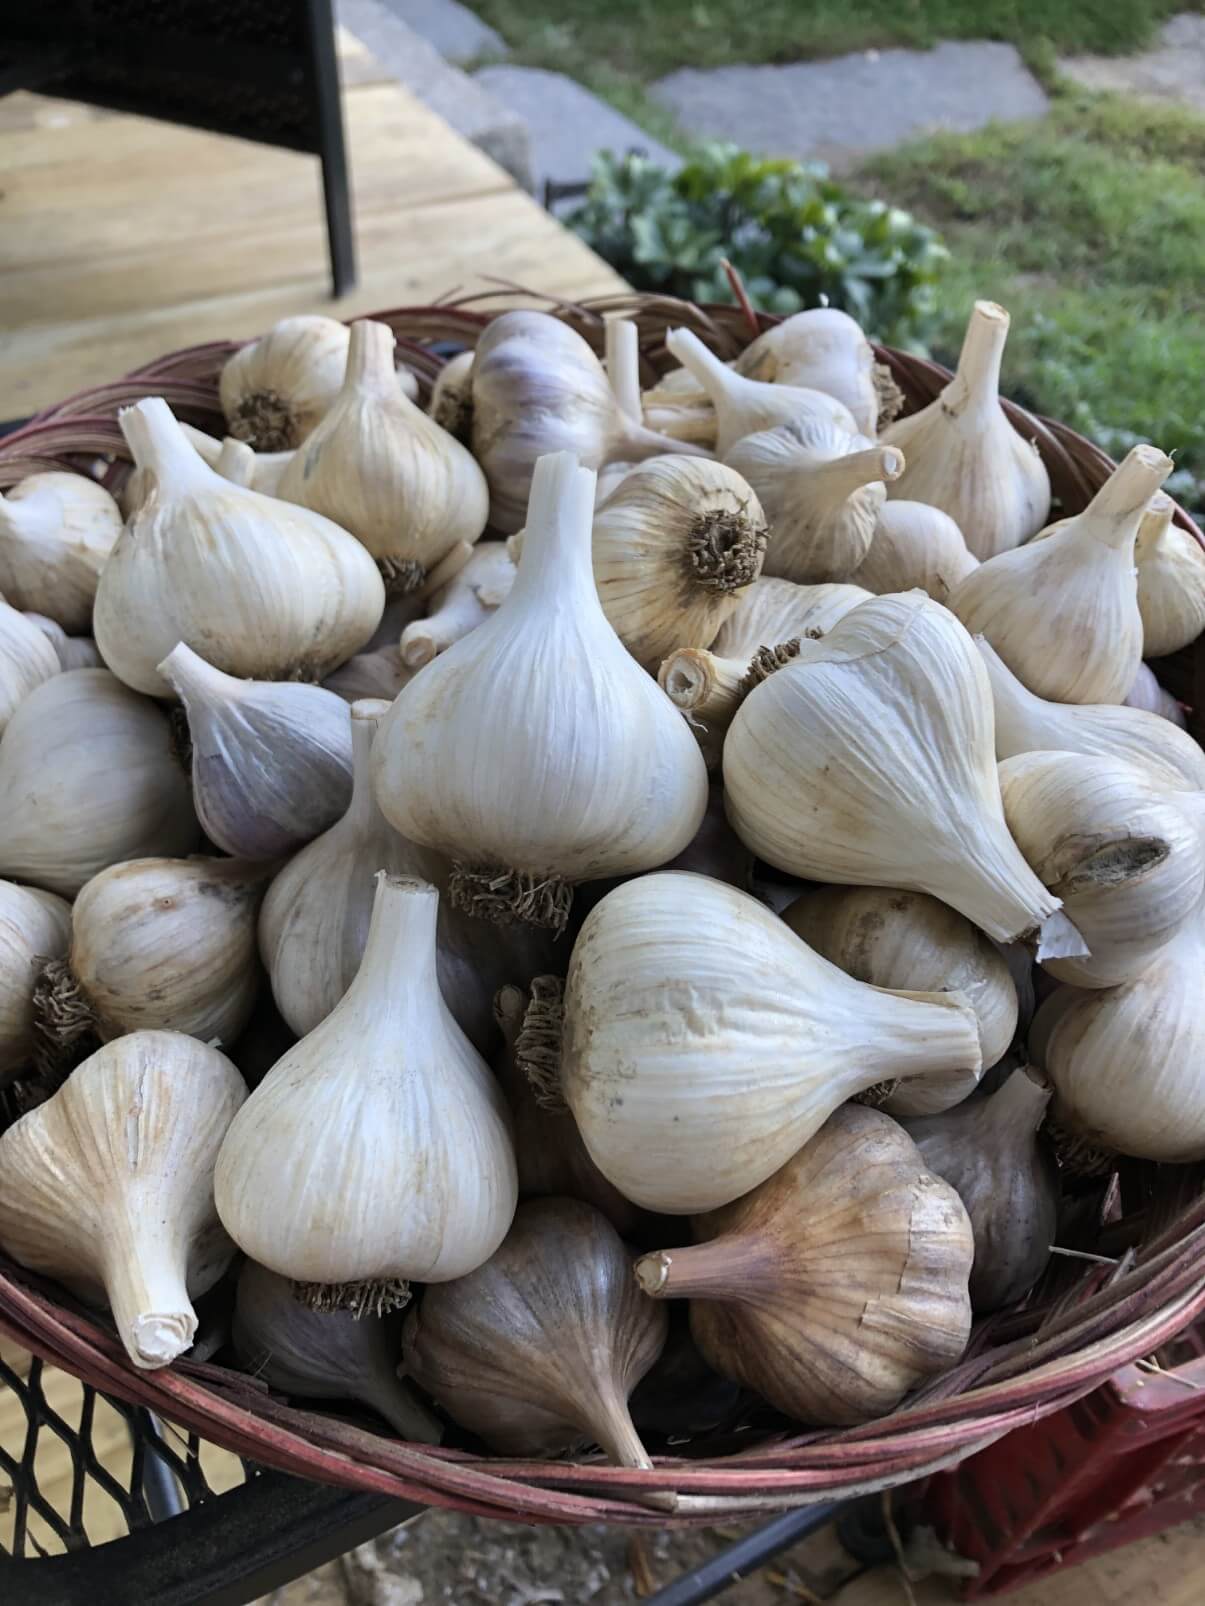
For bulk storage, you can store your heads of garlic in a net bag or paper bag, or in a basket in a cool cabinet or pantry. Garlic appreciates good airflow in storage, but does not appreciate very warm temperatures or big temperature fluctuations. A steady 60 to 65 degrees Fahrenheit (15 to 18 Celsius) is ideal. Keep stored garlic out of heat and light, both of which will cause your garlic to dry out and deteriorate.
You may also choose to further preserve your garlic. Some options include drying or dehydrating, making garlic powder or minced garlic, pickling garlic cloves, or chopping and freezing in oil. This is, obviously, an extra step (or steps!) and is not necessary, but is also a good way to make your garlic ready-to-use. Preserving can keep garlic from drying out, rotting, or becoming unusable and might be something to consider especially if you grow mostly shorter-storing varieties.
Using Cured Garlic as Seed Garlic to Grow Your Next Crop
Now that your garlic is cured, it is ready to use as seed garlic. Simply follow the instructions detailed above for planting garlic—your home-grown, cured, and separated cloves are as good to plant as any other’s.
Is Garlic Prone to Pests or Disease?
Garlic is not very prone to pest or disease, though there are a couple things that can plague them.
Onion maggots are one garlic pest. These pests chew into the stem of the garlic which makes them wilt and die off prematurely. Good soil health and fertility help garlic to outcompete potential infestations. Rotating your garlic crop each year into a new space where garlic or onions and related plants were not grown in the previous year is the best prevention method. Crop rotation denies the food source that the maggots need to complete their lifecycle, and without that nearby source, they die off without becoming a problem. Soil fertility and rotation should be your main focus in controlling onion maggots as there are not many effective pesticides available to the home gardener.
High soil temperatures (90 to 95 F) kill off the maggots; most areas will reach this in late May or June, but in a rainy year when soil temperatures frequently cool the maggots are able to get more of a lasting foothold.
The most common diseases affecting garlic are fungal rot diseases. The key to managing these types of disease are good gardening practices—planting healthy, quality seed stock, regular weeding and weed control, well-draining soil that does not stay wet, and crop rotation to avoid previous leftover fungus infection. Keep in mind that for garlic, crop rotation and disease control also means not planting where onions, leeks, shallots, or other alliums were grown in the previous year.
Both fungal rot and onion maggots multiply in rainy, wet conditions. Avoid overwatering and pay more attention in wet growing seasons.
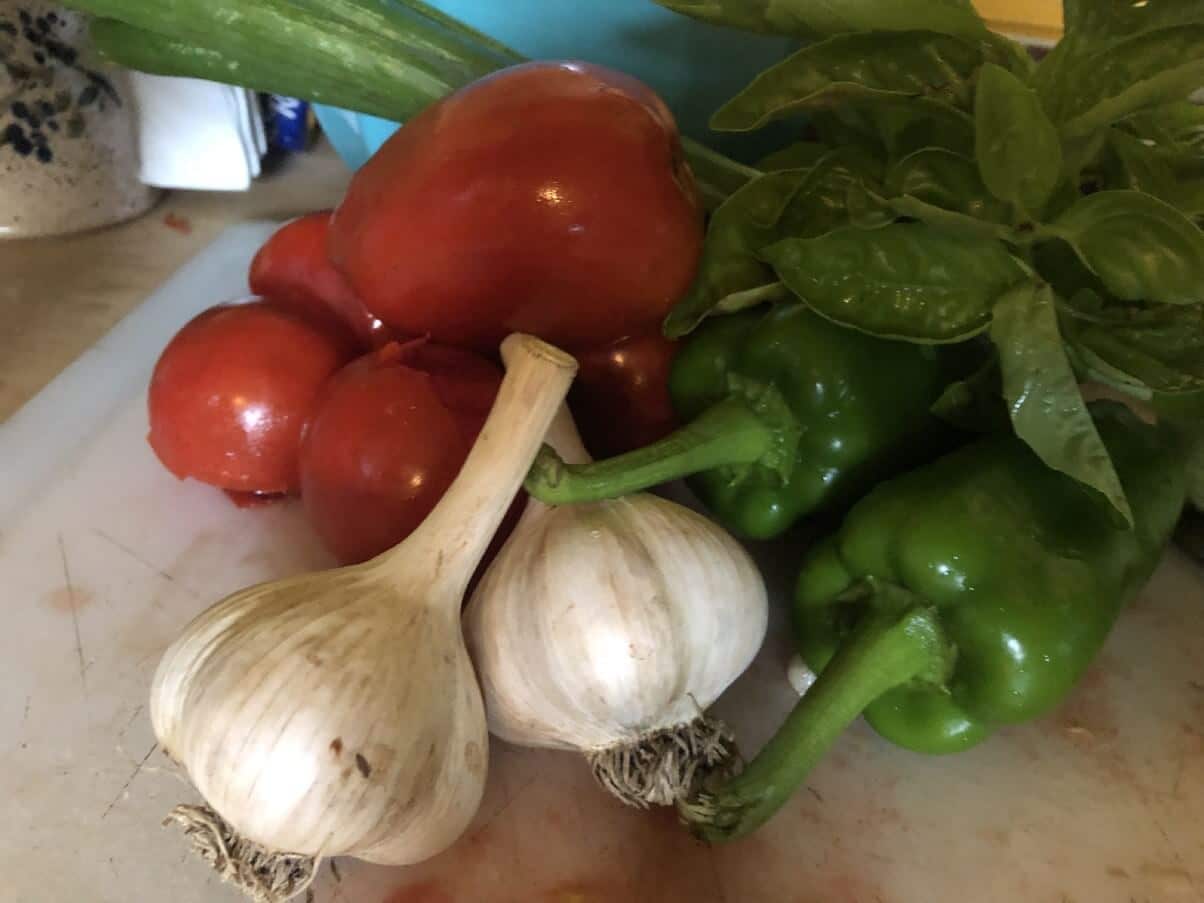
Companion Planting With Garlic
Garlic is not well-loved by problem pests, so it can make a good companion plant that keeps insects from infesting other vegetables. Its natural sulfur content can also help control soil-borne fungal diseases. However, companion planting with garlic can be a little difficult because it is planted in the fall, long before you’ll be planting those other plants. So the planning and logistics of it can be hard. There are some perennial food crops that can benefit from companion planting with garlic, though, and for those, the planning and planting is much easier.

If you do feel up to the task, here are some good companion plants to grow with garlic:
- Cabbage
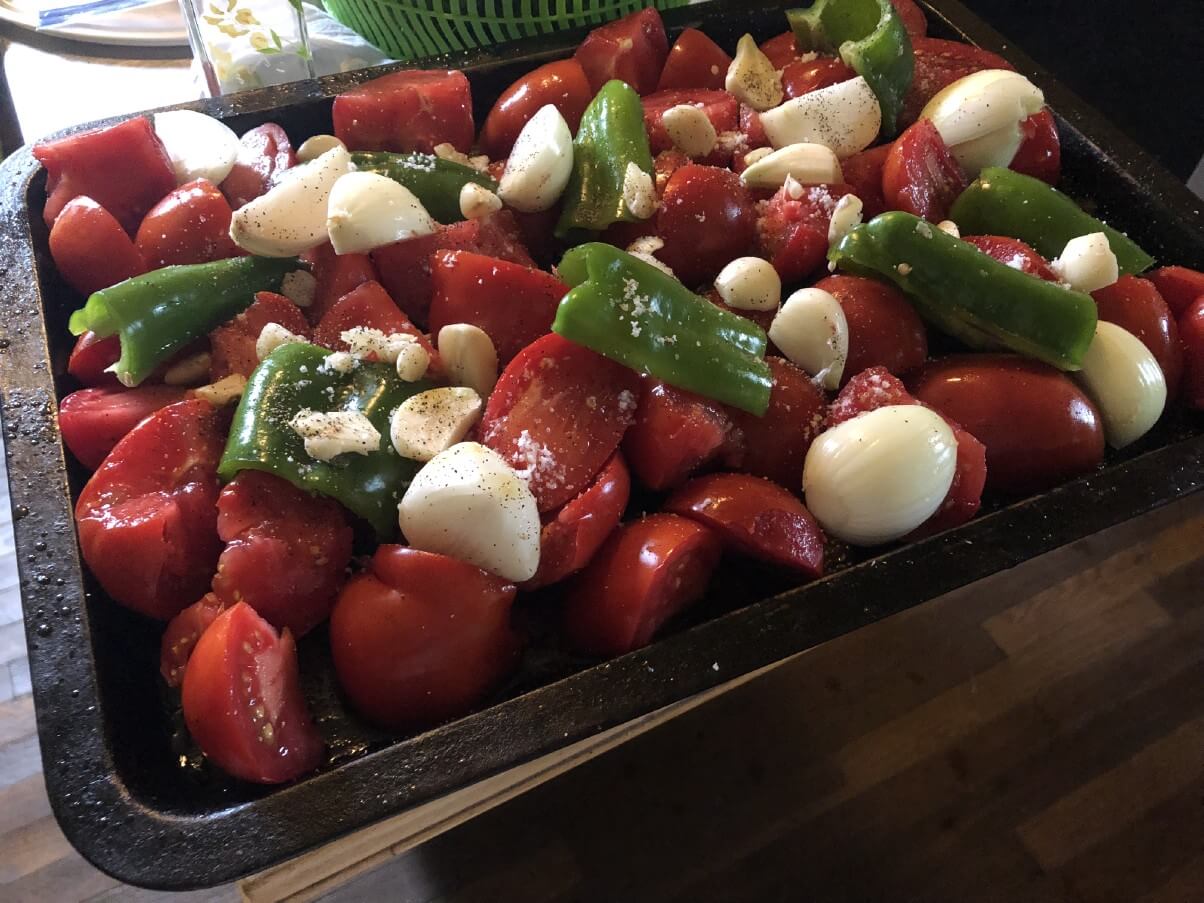
- Peppers
- Eggplant
- Spinach
- Brassicas like cauliflower, kale, and broccoli
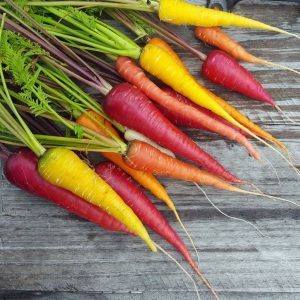
- Root crops like beets and carrots
- Tomatoes
- Fruit trees and berries
- Strawberries
- Chamomile
- Dill
When companion planting with garlic, it is important that you do not damage or disturb the roots of the established and developing garlic plants. It is also important that you do not plant large plants like trees, bushes, broccoli, kale, etc. too close so that you do not shade your garlic plants. Smaller greens with smaller root systems (spinach, for example) might be easier companion plants to accompany your garlic.
Where to Buy Seed Garlic for Growing Garlic
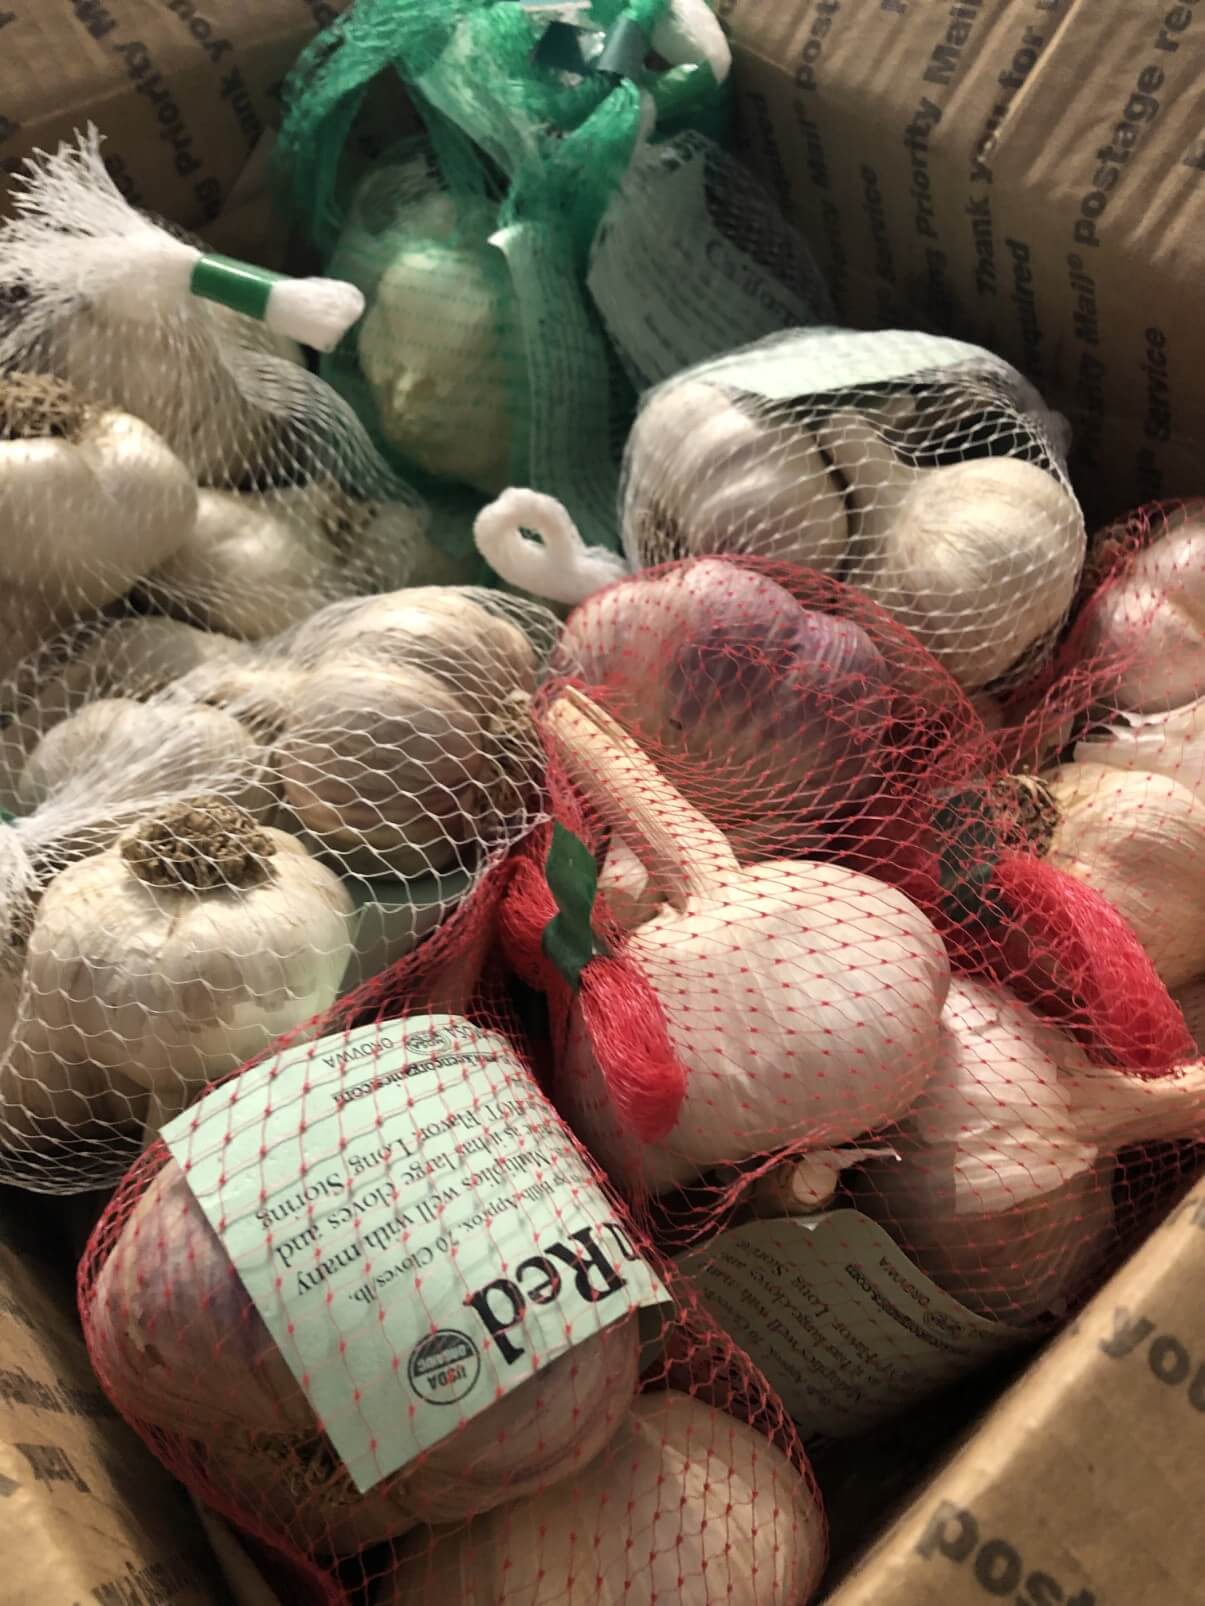
The best place to buy seed garlic for planting is from a reputable, quality grower. Many seed companies sell seed garlic in the fall and there are a number of companies that focus exclusively on selling garlic for seed. Often the dedicated garlic companies have a wider selection and higher stock, and so their product is often available later in the season (seed garlic does have a tendency to sell out quickly, so ordering early is always a good idea—but know that ordering may not be open until late July or August).
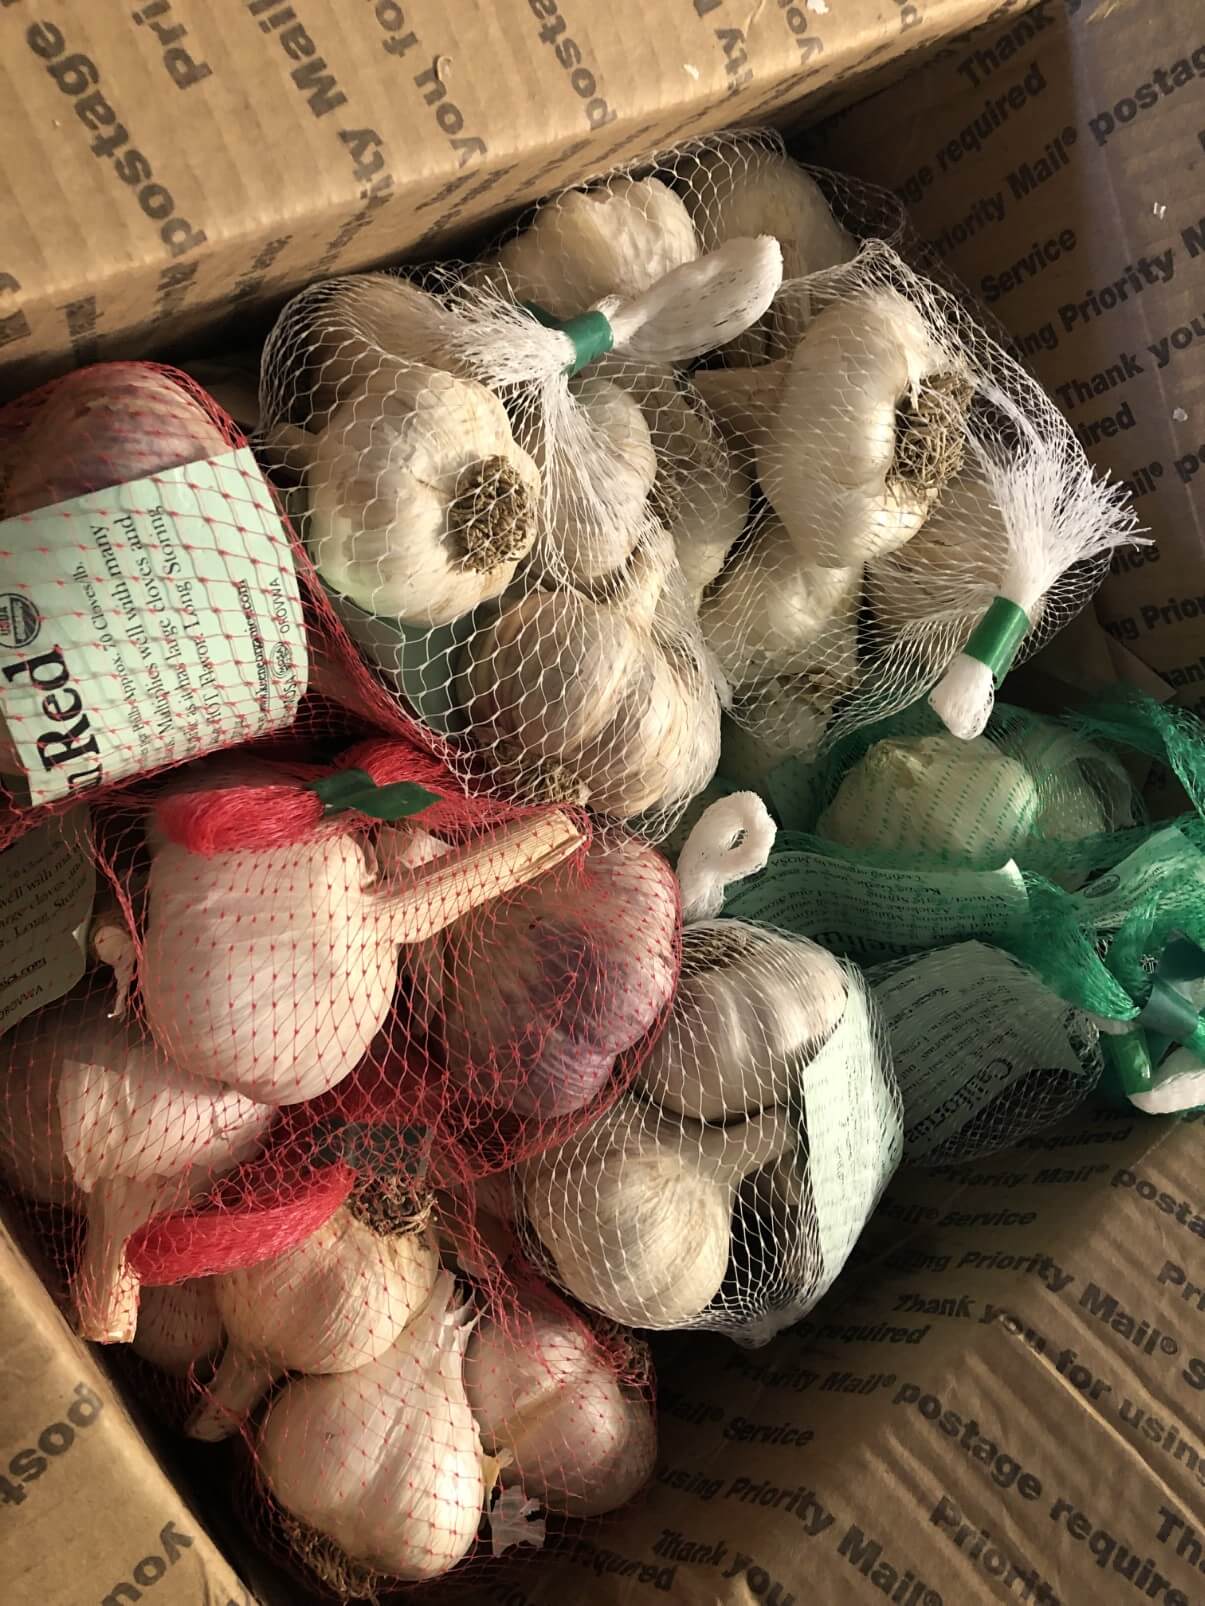
It is also an option to buy your seed garlic locally, such as from a farm or garden store. Local garlic growers and farmers’ markets are also a good place to buy seed garlic; just be sure to ask the grower and make sure the garlic has not been treated with anything to prevent sprouting—you need your seed garlic to be able to sprout. If not treated, locally grown garlic intended for eating can be used as seed.
When selecting heads of seed garlic, choose the biggest bulbs with the best, largest cloves. Harvest size and production relate specifically to the size and quality of the cloves that you planted. Avoid bulbs and cloves with signs of rot or damage—these are not traits you want to pass on. You may also select for other characteristics that are important to you, such as taste, storage performance, and ease of peeling, or any feature that you want to encourage in your crop.
If you are growing your garlic from garlic that you grew, you want to choose the biggest and best bulbs and cloves, too—the bulbs you select and plant are the characteristics that you can expect to continue in your next generation. If you choose the best of the best each harvest year, you will, over time, improve both your eating and seed garlic supply.
Can I Grow Garlic from the Store?
Technically speaking, yes, you can buy garlic from a store, such as a grocery store, and separate the cloves and plant them. This is not really recommended, though, unless you have no other choice.
First off, most grocery store garlic is treated to prevent sprouting and prolong storage. Those treatments, besides being an added chemical intervention, will work against you trying to get your garlic to sprout quickly and grow and may result in rotting and dying instead of growing and producing. This garlic is also likely to be quite old and may not be as likely to grow anyway.
Most grocery store garlic is grown and shipped from somewhere far away—it may even be coming from an entirely different country clear across the globe. This means that the garlic is not acclimated to your region or growing conditions and is not as likely to perform well, as is a local garlic supply or one that has been professionally grown and selected for certain growing regions and conditions.
Finally, you will not have a very good selection of type or variety at all if you purchase garlic from a grocery store to grow in your garden. Commercial garlic is almost exclusively a softneck variety, and there is no telling which variety it is or if it is one that might survive and thrive in your garden.
How Much Garlic Should I Buy for Planting?
To decide how much garlic you should buy, try to get an idea of how many bulbs or heads of garlic you want to have to get you through the year. Every clove of garlic that you plant will turn into one full head of garlic, so plan for one clove per head at harvest (and then add a bit more to accommodate for some loss, as is common—increase your number by about 5%). If you also want to grow extra so that you have enough garlic for both eating and for seed for planting next year, add that number to your total.
With that number in mind, what you need to know now is how many cloves of garlic you can expect in a measure. Garlic is usually sold by the ounce or the pound. The following is a list of how many cloves you will get on average for each of the types of garlic: (HN indicates hardneck type, SN indicates softneck variety.)
- Artichokes (SN)—approximately 120 cloves per pound
- Silverskins (SN)—approx. 120 cloves per pound
- Rocamboles (HN)—approx. 60 cloves per pound
- Porcelains (HN)—approx. 40 cloves per pound
- Purple Stripes (HN)—approx. 90 cloves per pound
- Asiatic (HN)—approx. 80 cloves per pound
Frequently Asked Questions about Growing Garlic
Yes, garlic can be grown in pots or containers. It will require a minimum depth of 6 inches of soil. Soil should be of good quality, designed for potting or container growing so that it does not compact. Be sure the container has drainage holes. Expect to water container-grown garlic more frequently (check daily but will probably need watering every two to three days). Soil should be kept moist but not wet and never muddy. A regular regimen of all-purpose fertilizer is beneficial for garlic grown in containers.
Yes! Garlic does very well when grown in raised beds. A raised bed can be helpful because it is easy to know exactly where you planted your fall-planted, over-wintered garlic. Raised bed garlic growing also makes weed control easier. Growing garlic in a raised bed is best for gardeners with hard, compacting, and/or clay-rich soils.
If you missed the fall planting window for garlic, you can try sprouting garlic cloves in small pots or peat pots and then planting them outside as soon as your soil can be worked. You can also plant garlic in the spring, but it needs to be in the ground very early on. This means planting as soon as the ground has thawed. Expect spring-planted garlic and transplanted garlic heads to be smaller than fall-planted garlic. Do know, though, that garlic of any size, even garlic that failed to split into cloves and may more resemble an onion at harvest, can be eaten.
If your garlic did not grow any scapes the most likely reason is that it is a softneck variety, and softneck garlic doesn’t grow scapes. If you are sure your variety is a hardneck variety that should grow scapes, the reason might be late planting (such as spring planting) and a not long enough growing season, or the scapes might simply be delayed due to weather and growing conditions, and you might just need to wait a bit longer to see your scapes appear.
Yes! If you select the best and biggest heads of garlic from the garlic you grew and harvested, you can create stronger and stronger garlic over time. The garlic that thrives where you grow and that presents the best characteristics is well acclimated to your climate, location, and growing conditions. This means, essentially, that you're fine tuning your garlic to your garden.
Apolo
Thank you for this great article!!!
Mary Ward
You're welcome, and thank YOU!
Ken Haley
http://www.ElephantGarlicWorld.com
Great place to get Elephant Garlic seed stock. Non GMO and Pesticide Free. Plus No synthetic fertilizer is used.
Collins Rushesha
Very informative planting diary ...inspire a lot of farmers. Thnx
Mary Ward
Thanks for the kind words. We hope it does!
Arthur .S.Saidu
Thank you so much for the guide on how to plant garlic. I became a fan of garlic during the Covid 19 outbreak as it was mostly recommended to give good health
on various aspect. I am certainly going to start this year to grow at least some quantity in my backyard and next year embark on growing it I.
Mary Ward
That's great! It's such great stuff--and tastes so good. Good luck with your garlic growing!
Steve
What would be your recommendations for growing garlic in Thailand where it is hot and humid from March to October with a rainy season from June to October.
Mary Ward
Hi Steve. Honestly I'd have to advise you to research a more locally-specific resource for such a unique growing situation. I would expect, however, that you would need to look to softneck varieties that do better in warm climates, plant after October as things cool, and try to choose a variety that will be dug before your rains begin in June. Something with a shorter number of days to harvest. If you do not get cold for a long period of time (if it will not get below 40F for 4 to 6 weeks) you should probably cold-treat the bulbs before planting by refrigerating them in a paper bag for a month or two. Once removed from the refrigerator they will start sending shoots pretty quickly and so they should not be taken out of the refrigerator until you're ready to plant.
Norman Booysen
Great article
Mary Ward
Thank you!