Garlic braids are a great-looking way to cure and store garlic. Unfortunately, hardneck garlic is difficult to near impossible to braid. Hard neck garlics are not really intended for making garlic braids. Garlic braids are generally only made with softneck garlic varieties.
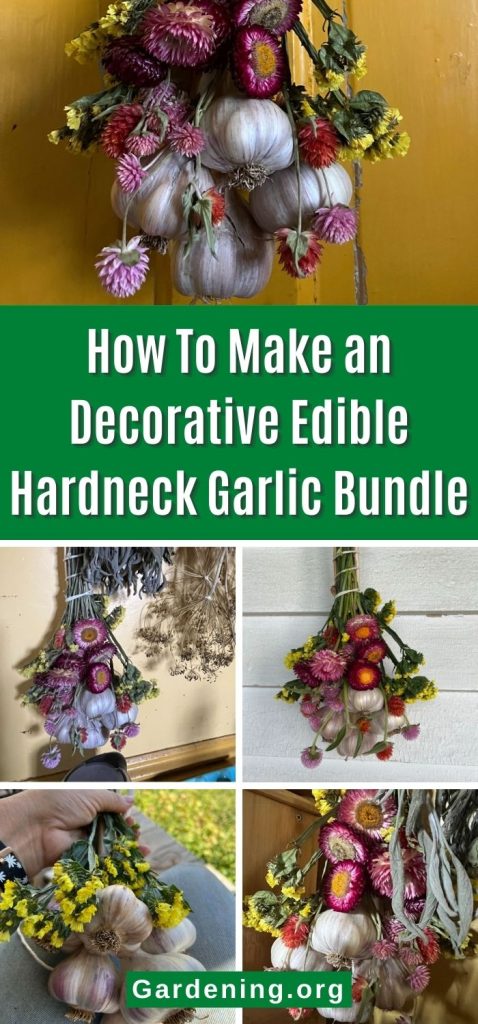
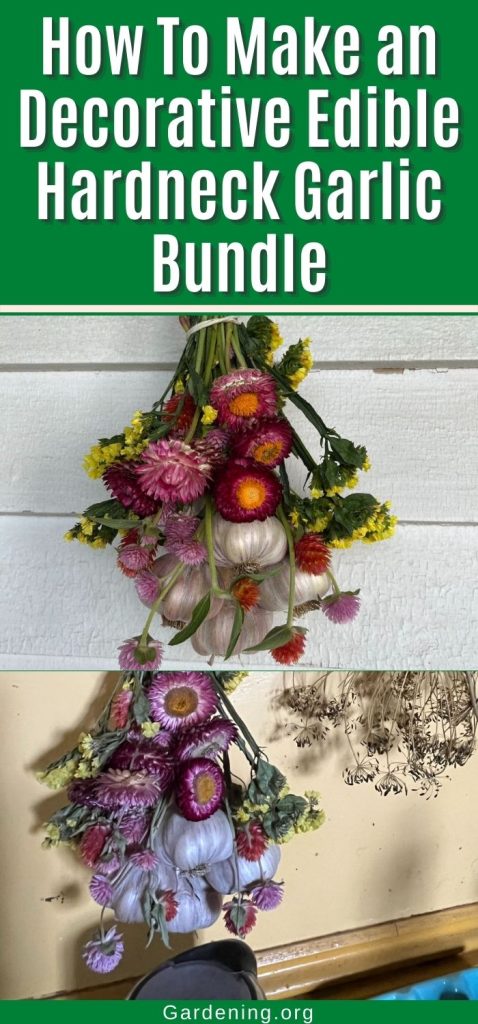
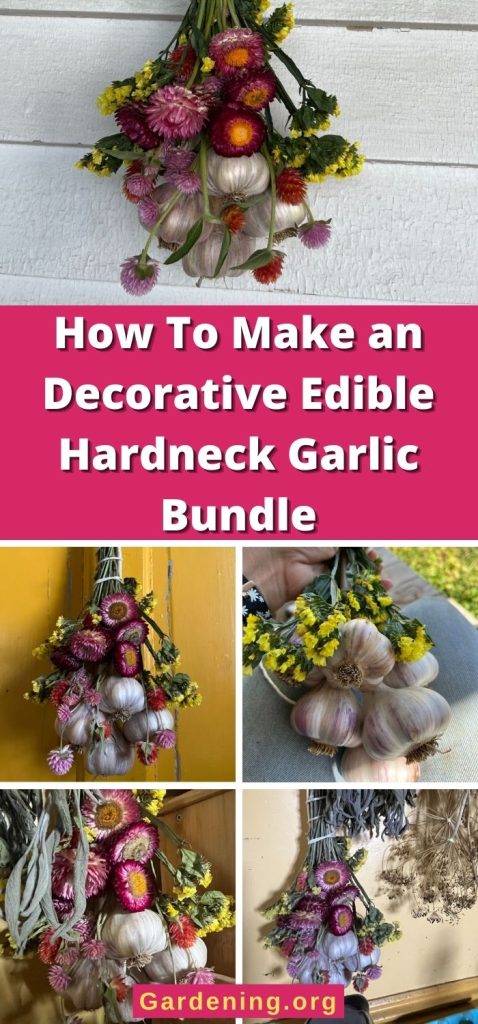
That doesn’t mean you can’t create a lovely, decorative, edible and functional garlic bundle for your kitchen or pantry, though! Make this easy DIY garlic bundle to hang and store your hardneck garlic.
Jump to:
- Why Hardneck Garlic Doesn’t Braid
- So Why Not Just Grow and Braid Softneck Garlic?
- How To Make a Hardneck Garlic “Braid”
- Gather Your Garlic and Supplies
- Step 1 – Clean and Prep the Garlic
- Step 2 – Choose Flowers or Decorative Touches
- Step 3 – Cut a Long Length of Twine (Or String, etc.)
- Step 4 – Gather and Bunch the Garlic
- Step 5 – Lay Dried Flowers/Decorations
- Step 6 – Start the Wrap at the Bottom of the Garlic Bundle
- Step 7 – Continue Wrapping Up the Stems
- Step 8 – Finish the Wrapping and Tie Off
- Step 9 – Make a Loop for Hanging
- Step 10 – Do Your Final Trimming
- Step 11 – Hang and Enjoy!
- Other Options for Decorating Garlic Bundles
- Why Braid and Bundle Garlic?
- Bundles as Decorative Garlic Curing Solutions (+ When You Can Use Your Garlic)
Why Hardneck Garlic Doesn’t Braid
Hardneck garlic doesn’t braid well because, well, it’s hard. And as the name implies, softneck garlic has a soft stem.
To be a little more specific, hardneck garlic has a central stem that grows up through the middle of the head of the garlic, all the way from the roots through the middle of the cloves and upwards from there.
Softneck garlic doesn’t really have a “stem” as such; it has outer leaves that grow around the head of garlic and then up in a leafy, stem-like top. The cloves in a softneck garlic are not one ring of cloves, like a hardneck garlic is, they are larger outer cloves that get smaller in the center.
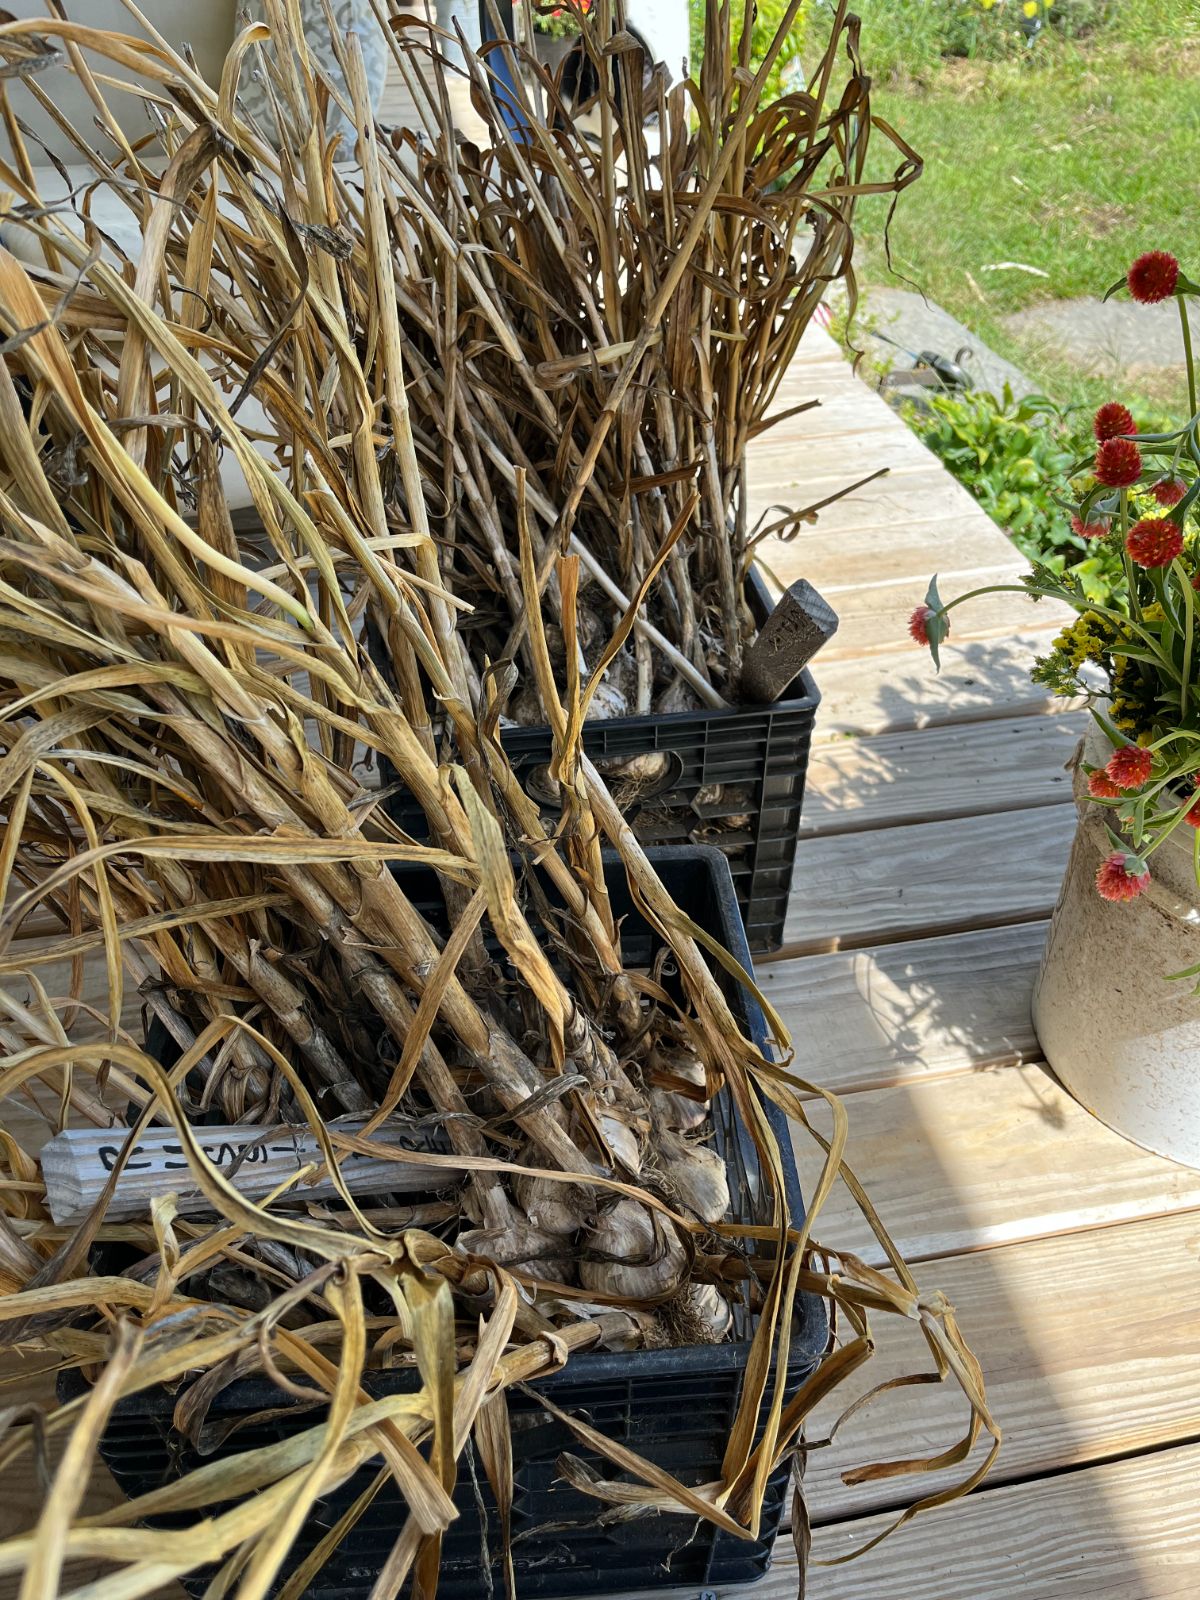
As hardneck garlic die, cure, and dry, the stems become very dry and very hard. They are not flexible enough for making nice braids. If you do braid them the stalks tend to break and the whole thing falls apart.
Also, on hardneck garlic the cloves are large and surround the central stalk. They break away easily when needed, which is an advantage of hardnecks (they also peel easily!), but the sort of bending and working the stalks that braiding requires can loosen the cloves, which makes it so they don’t store as well.
So Why Not Just Grow and Braid Softneck Garlic?
There are a lot of reasons to grow hardneck garlics.
For one, there are many different varieties and different flavor profiles (for both hard- and soft-neck garlic). Hardnecks are usually larger, yield more, and are also a lot easier to use and to peel. The cloves are consistent sizes throughout the whole head, while in softnecks the inner cloves often get too small to even bother with, and they are harder to peel.
Hardneck garlics are also the only type of garlic that grow a flowering stalk—what you might know as a garlic scape. These scapes can be harvested early in the season, before the head of garlic is ready for use and harvest. They are delicious, can be used just like garlic, made into pesto, or dried and powdered. The scapes give you a whole other harvest off the same single plant.
The biggest reason you would choose one over the other (soft versus hard necks) is your location, and which type is suited to growing where you garden. For the most part, softneck garlic is more suitable for warmer, more southerly locations. Hardnecks are more versatile over more locations. While they are thought of as more of a northern grower, they can also do well in warmer climes.
Really, neither hardneck nor softneck are “bad” garlic. There is no such thing. It’s a matter of preference and of suitability to growing in your location. There are a lot of gardeners, however, for whom softneck varieties are not a good choice.
So, there we have it. There are real reasons to grow hardneck garlics. If you’ve always loved the look of hanging garlic braids, though, that might make you sad.
But no more! Hanging garlic bundles are the answer to the problem of hardneck garlic braids!
How To Make a Hardneck Garlic “Braid”
These bundles are very easy to make. The size and design are flexible, too. Make them larger or smaller, add or subtract as it suits you.
You can make these bundles with fresh-pulled garlic before it is cured or with garlic that is cured and still has the stems attached. If you use fresh green garlic, the garlic will cure in the hanging bundles when it is hung.
Here’s how to make your hardneck garlic “braid” (that’s not really a braid at all).
Gather Your Garlic and Supplies
For each bundle, you will need:
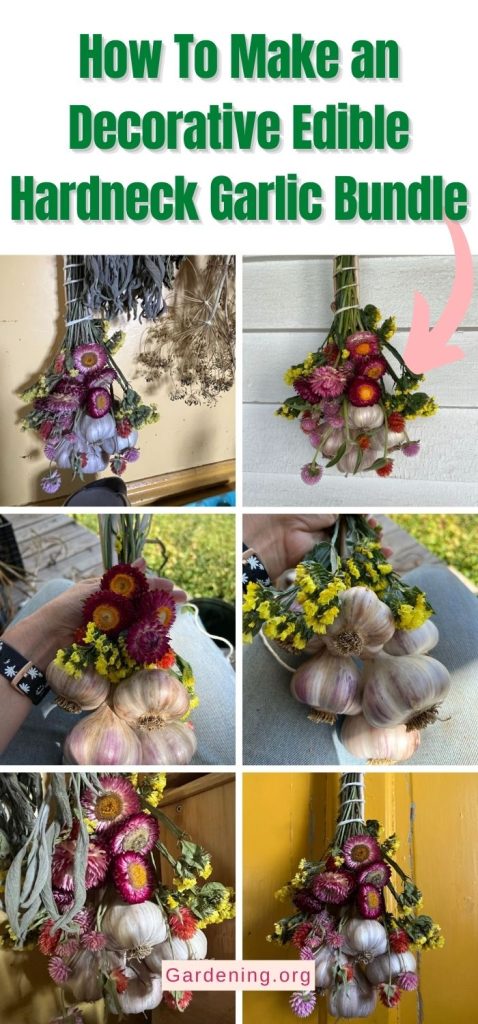
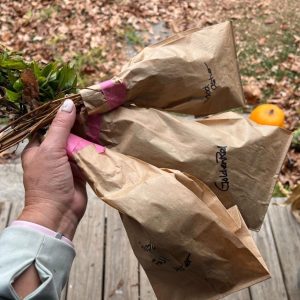
- 6 heads of garlic, left long with long stems attached (more or less, depending on how large you want your bundles and/or how much garlic you have)
- 1 small to medium bunch of good drying flowers (optional)
- Heavy string or kitchen or garden twine
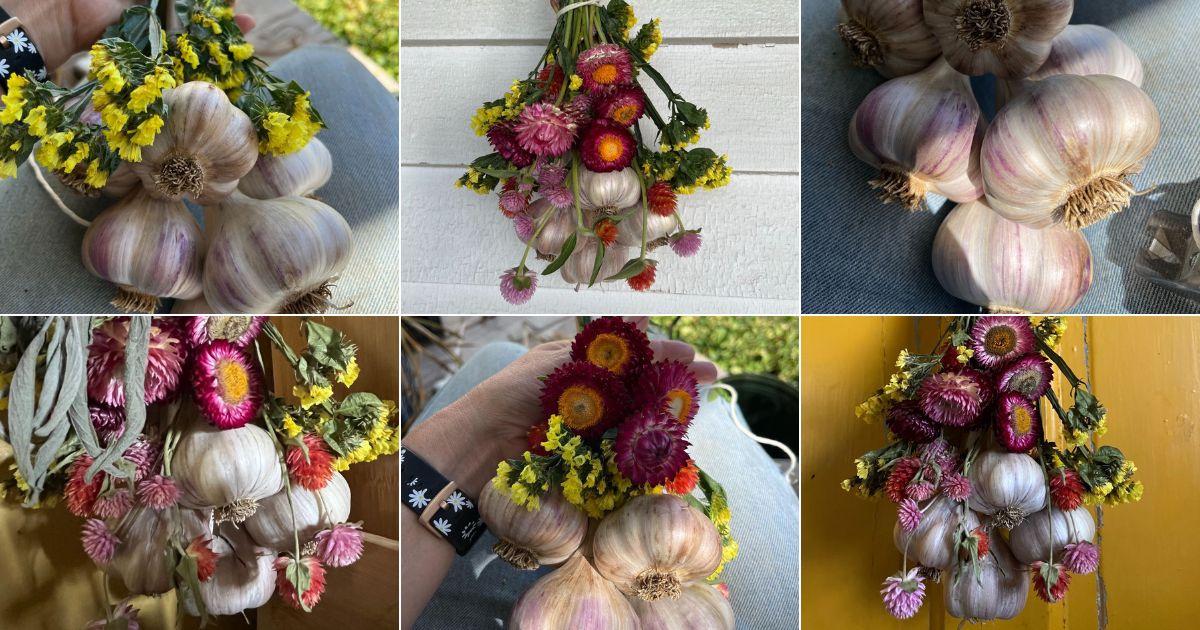
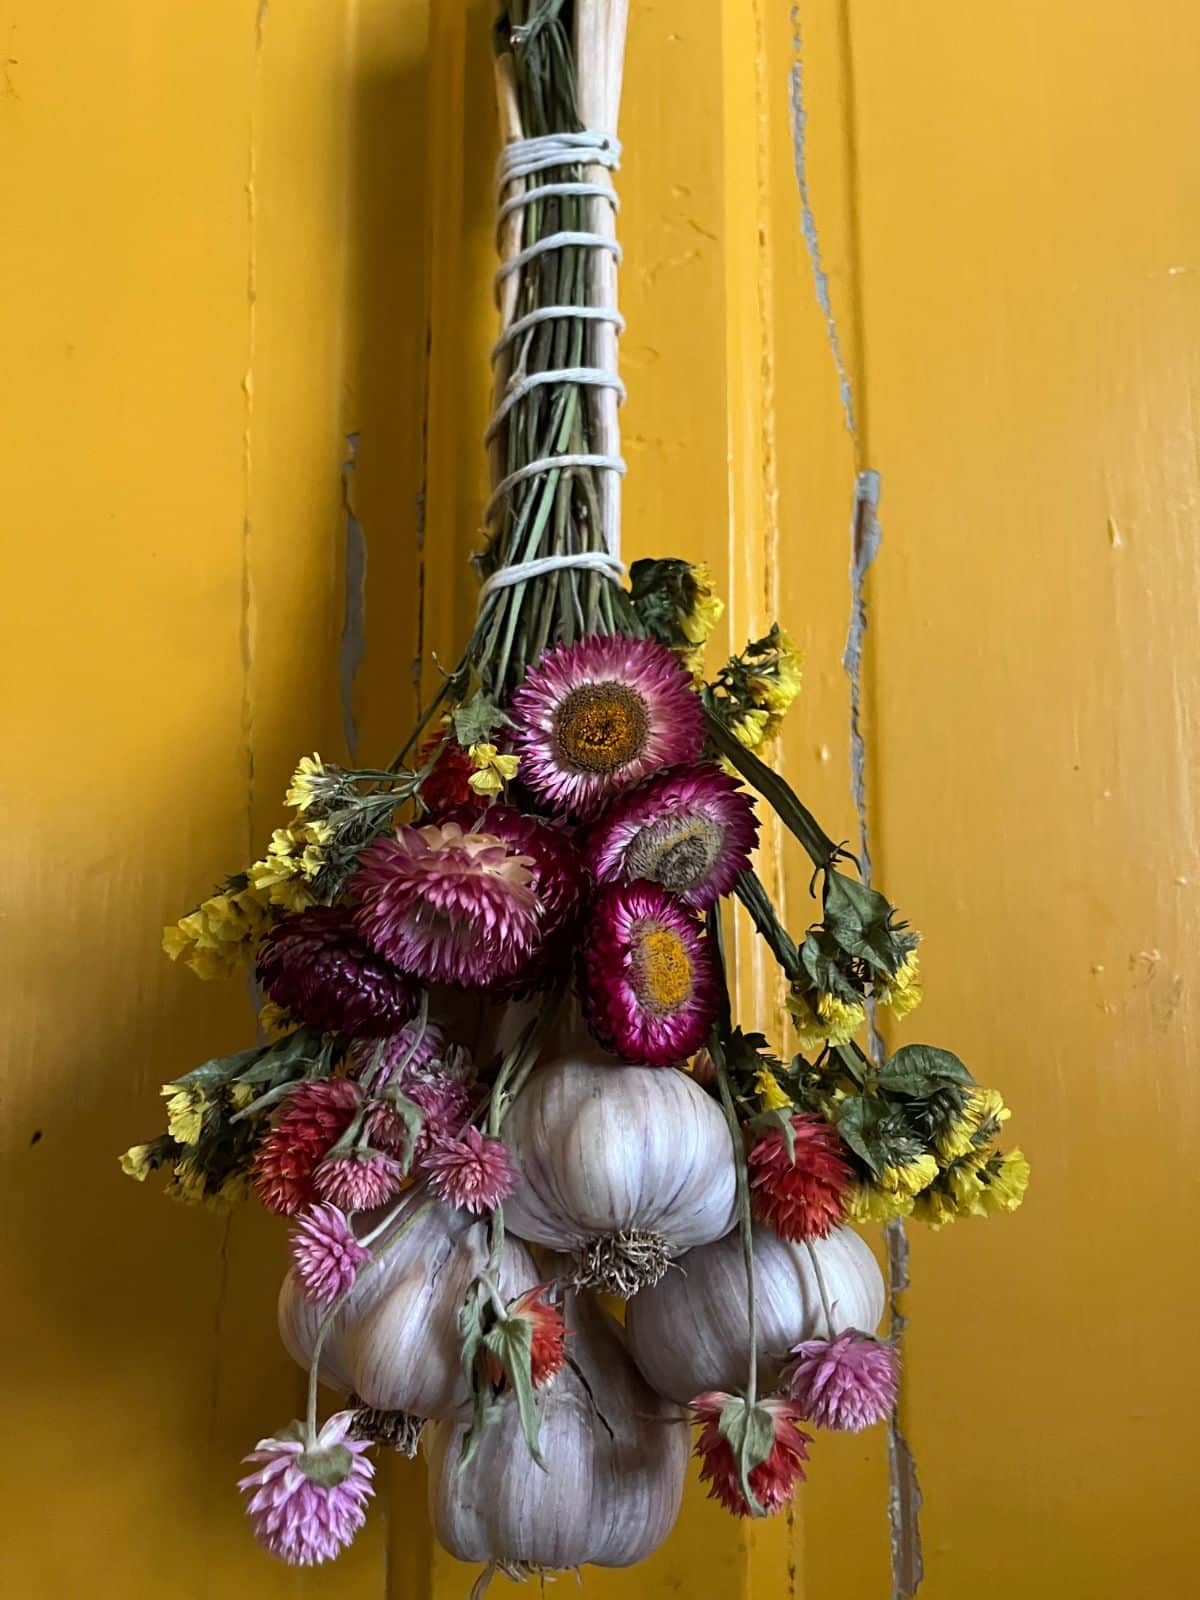
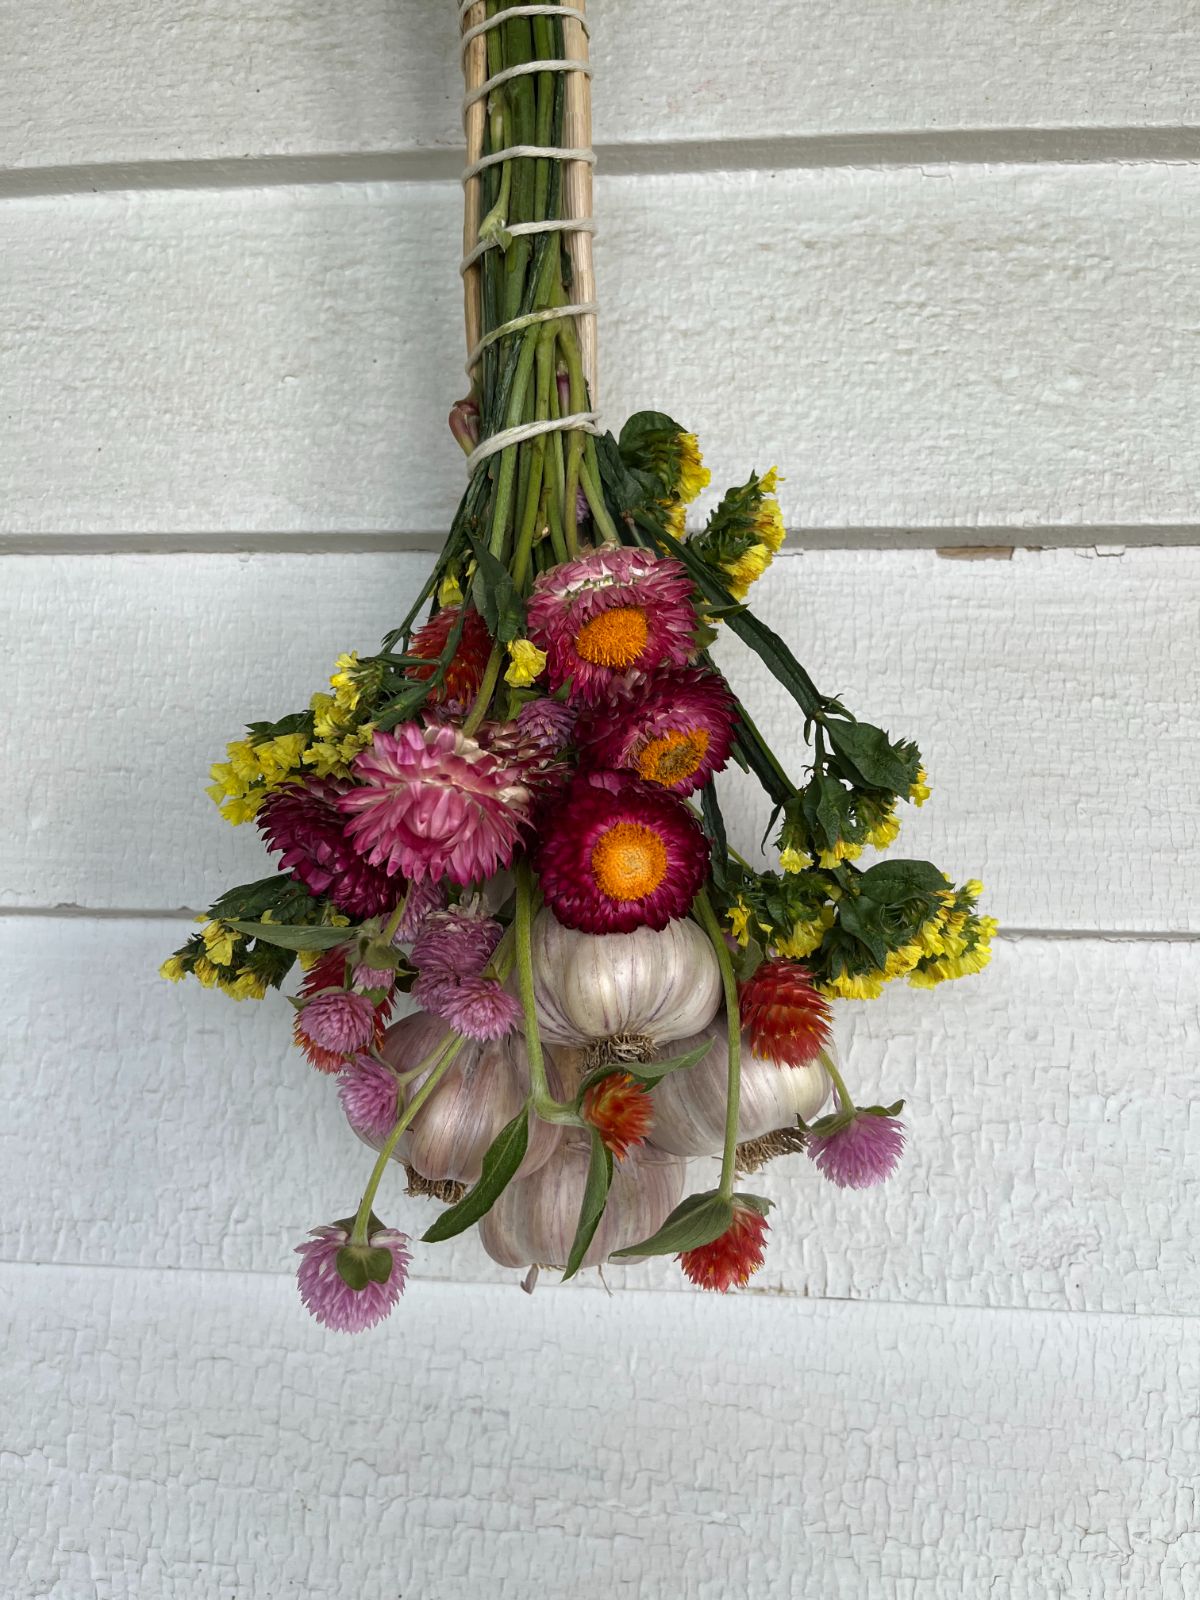
For these bundles, we added a few types of flowers that are good for dried hangings and dried flower arrangements. The flowers can either be fresh cut (in which case they’ll dry down along with the garlic after they hang for a few days), or they can be dried already.
Step 1 – Clean and Prep the Garlic
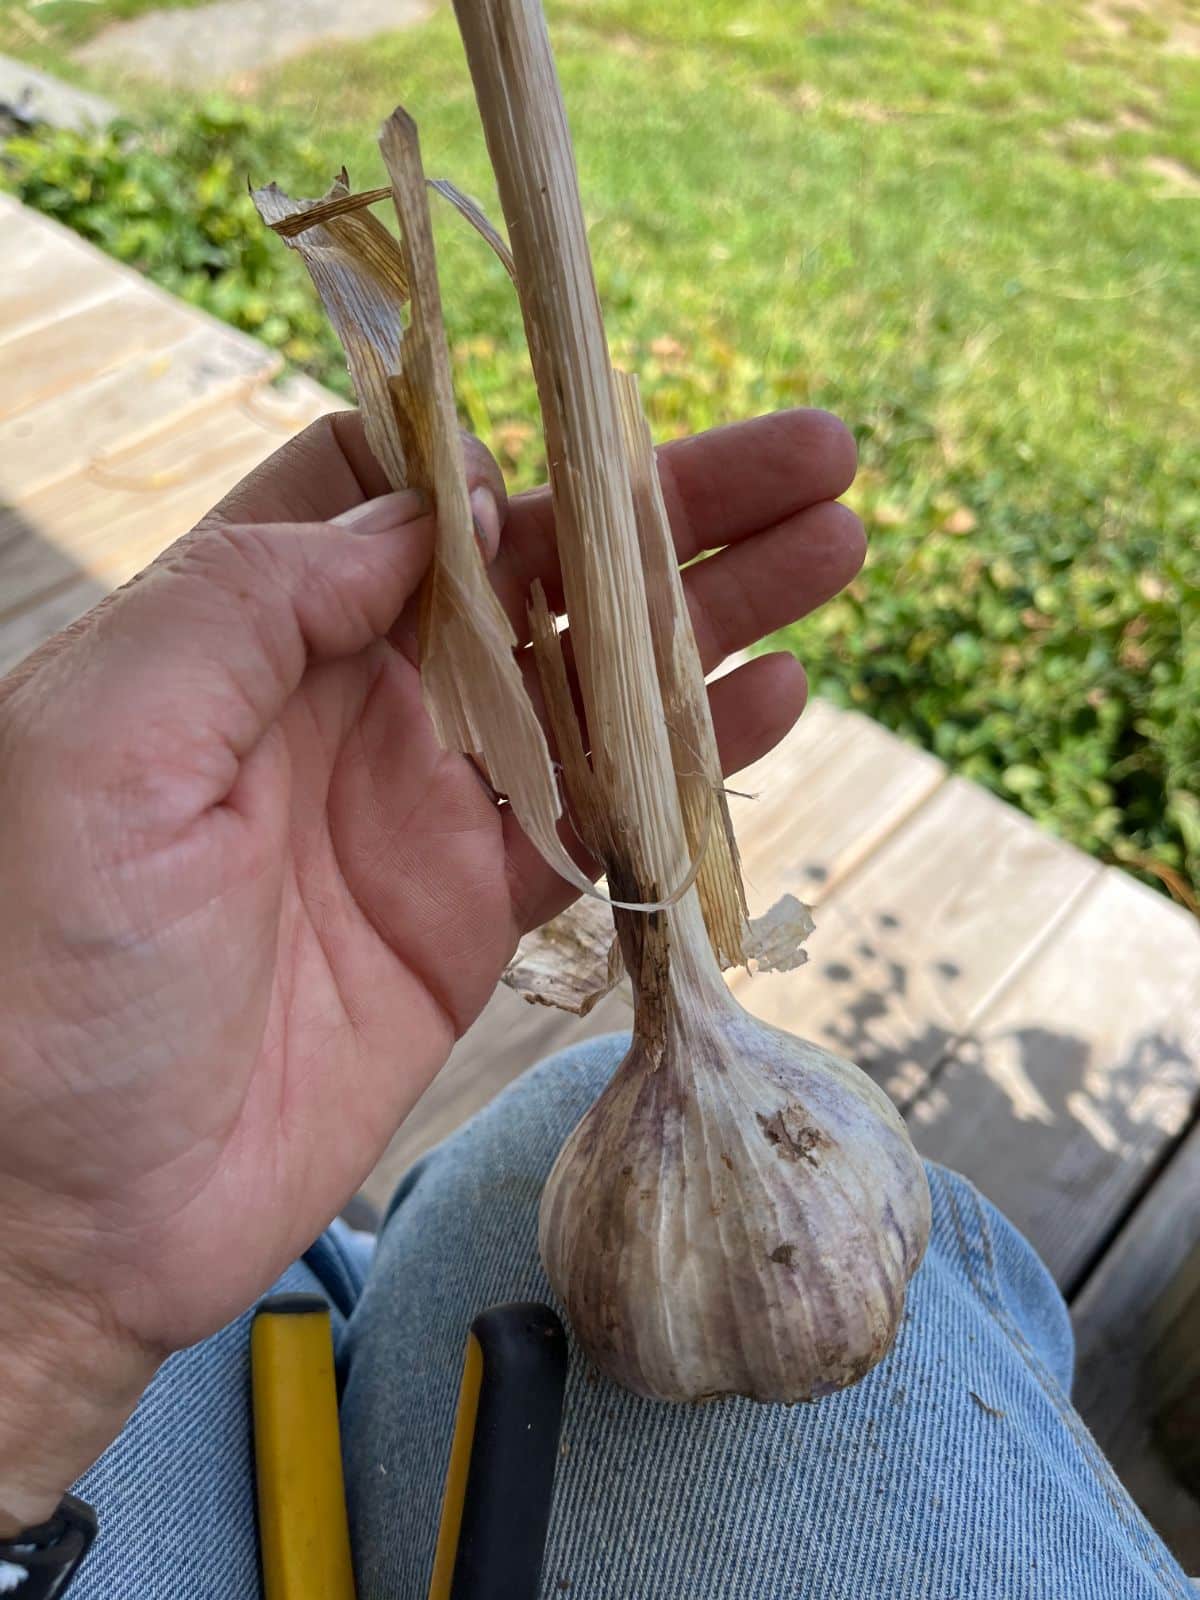
Before you start, you’ll want to clean and trim your garlic. To do this, first brush off as much dirt as you can.
With sharp scissors or garden cutters, cut the garlic stem to the length you want for your bundle. Twelve to 14 inches is a good length. At this point, you can leave it a little longer and do a final trim later, but there’s no need to keep the extra stem at the top. It will only get in the way of trimming and bundling.
Trim the roots off the bottom of the bulb. Trim them almost flush with the bottom of the head of garlic.
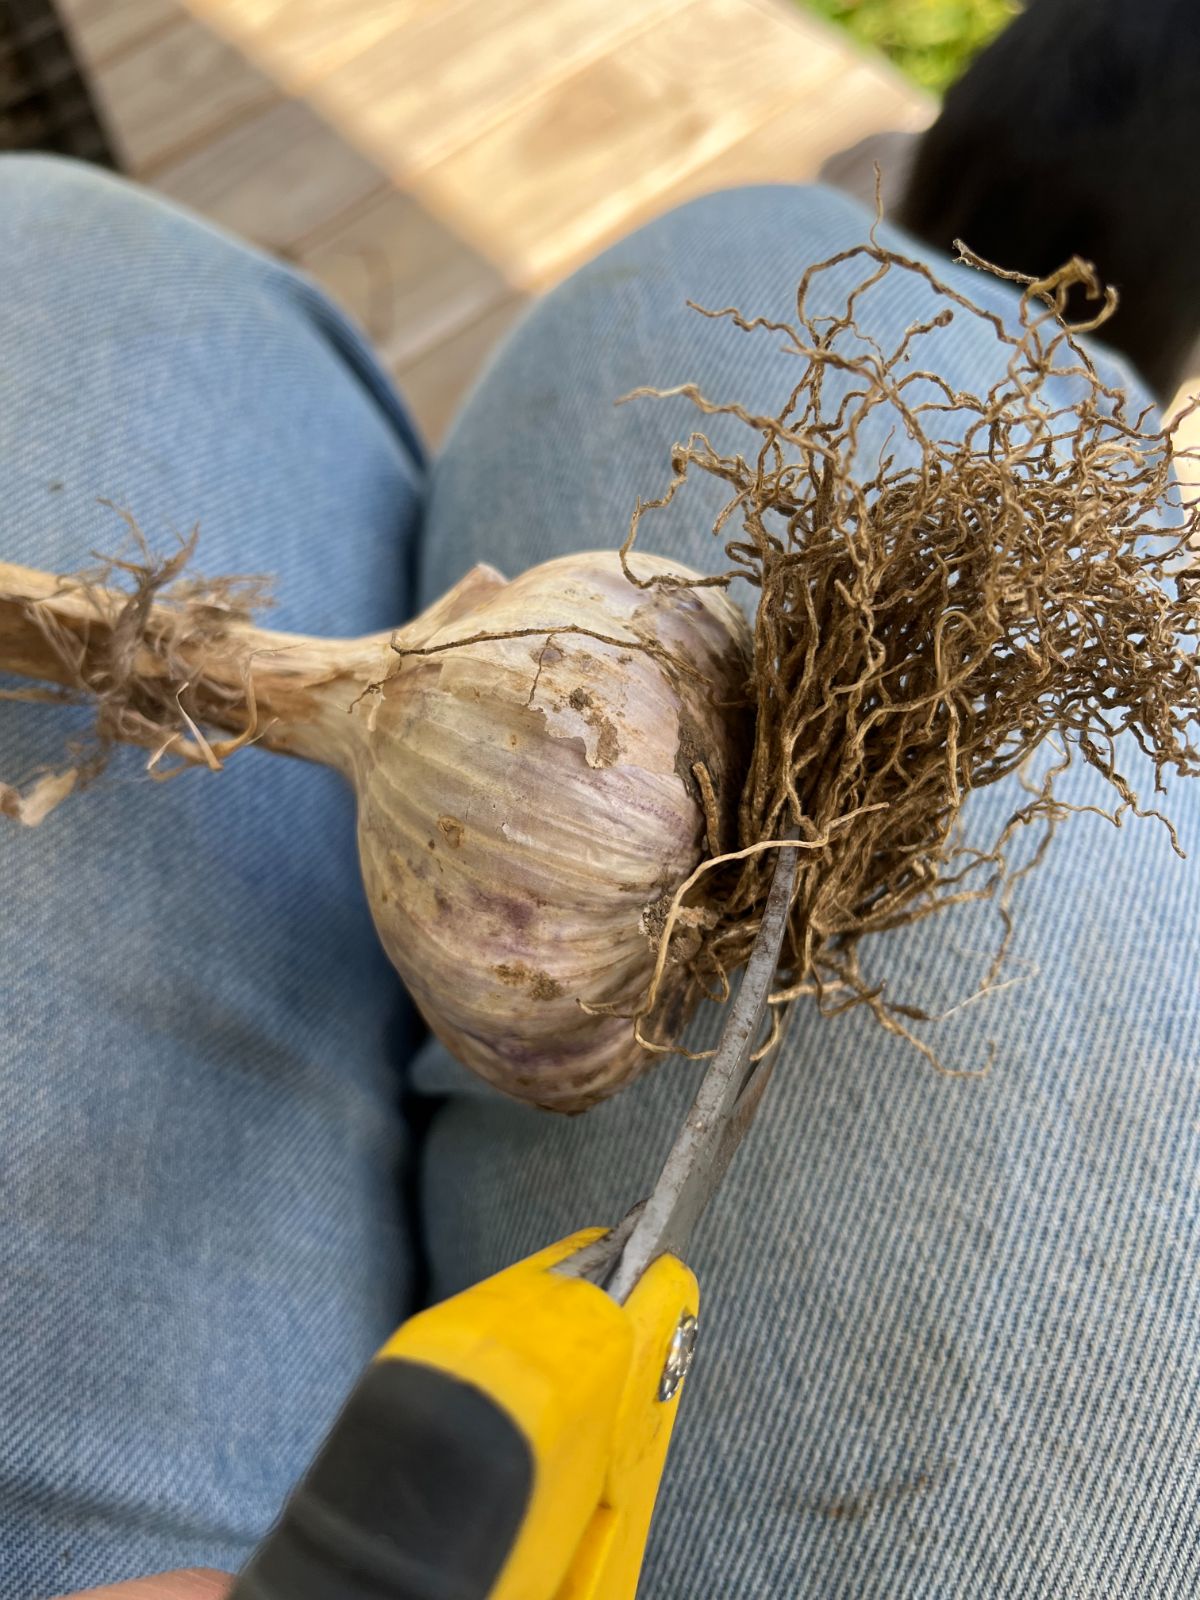
Next, peel off the outer one or two layers of the stem and leaves (as much as it takes to remove dirt and unsightly, dead matter, but not too far down that the stem attachment becomes weak). Peel from the top down and remove the first layer of “paper” on the bulb, too. If the bulbs are dirty or stained under that layer, you can go down one more, but you don’t want to take too much outer cover off the garlic bulb.
If your garlic is freshy harvested and uncured, you should be able to peel the first green outer leaves/skins from the top of the stem down and over the bulb. This will leave you with a nice, clean bulb. If the stems are older, it will probably come off in pieces, which is fine, too.
If there is stubborn dirt on the leaves that looks unsightly, wipe it with a damp cloth with warm water and vinegar. DO NOT SOAK THE BULBS! Wetting the bulb too much will compromise its cure and storage ability. A damp wipe will dry quickly enough not to be an issue. Do not rub too hard and don’t rub through the paper layer, either.
Repeat this for all six heads of garlic.
Step 2 – Choose Flowers or Decorative Touches
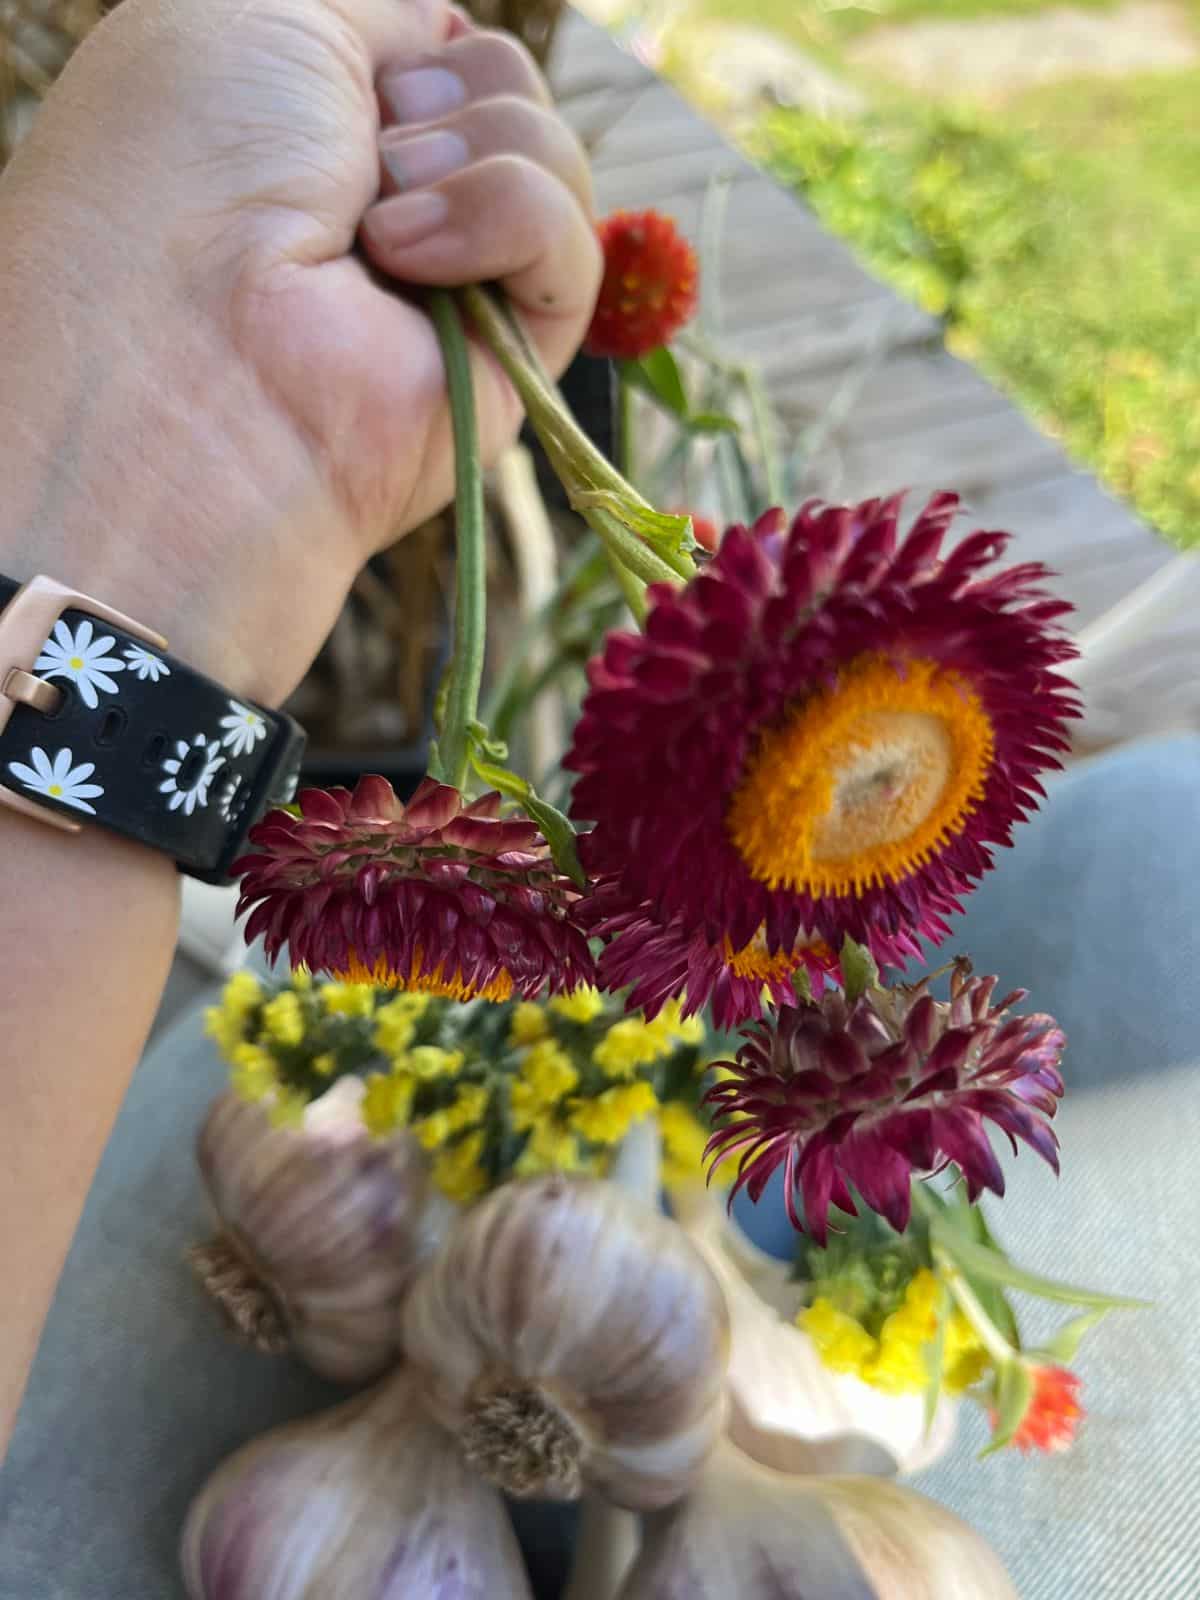
It’s easiest if you choose the flowers or other decorative touches before you start bundling everything together.
Pick out several stems. There is no right or wrong number; this is a matter of personal preference. If you are looking for a little more guidance, 8 to 12 stems gives a nice, full look.
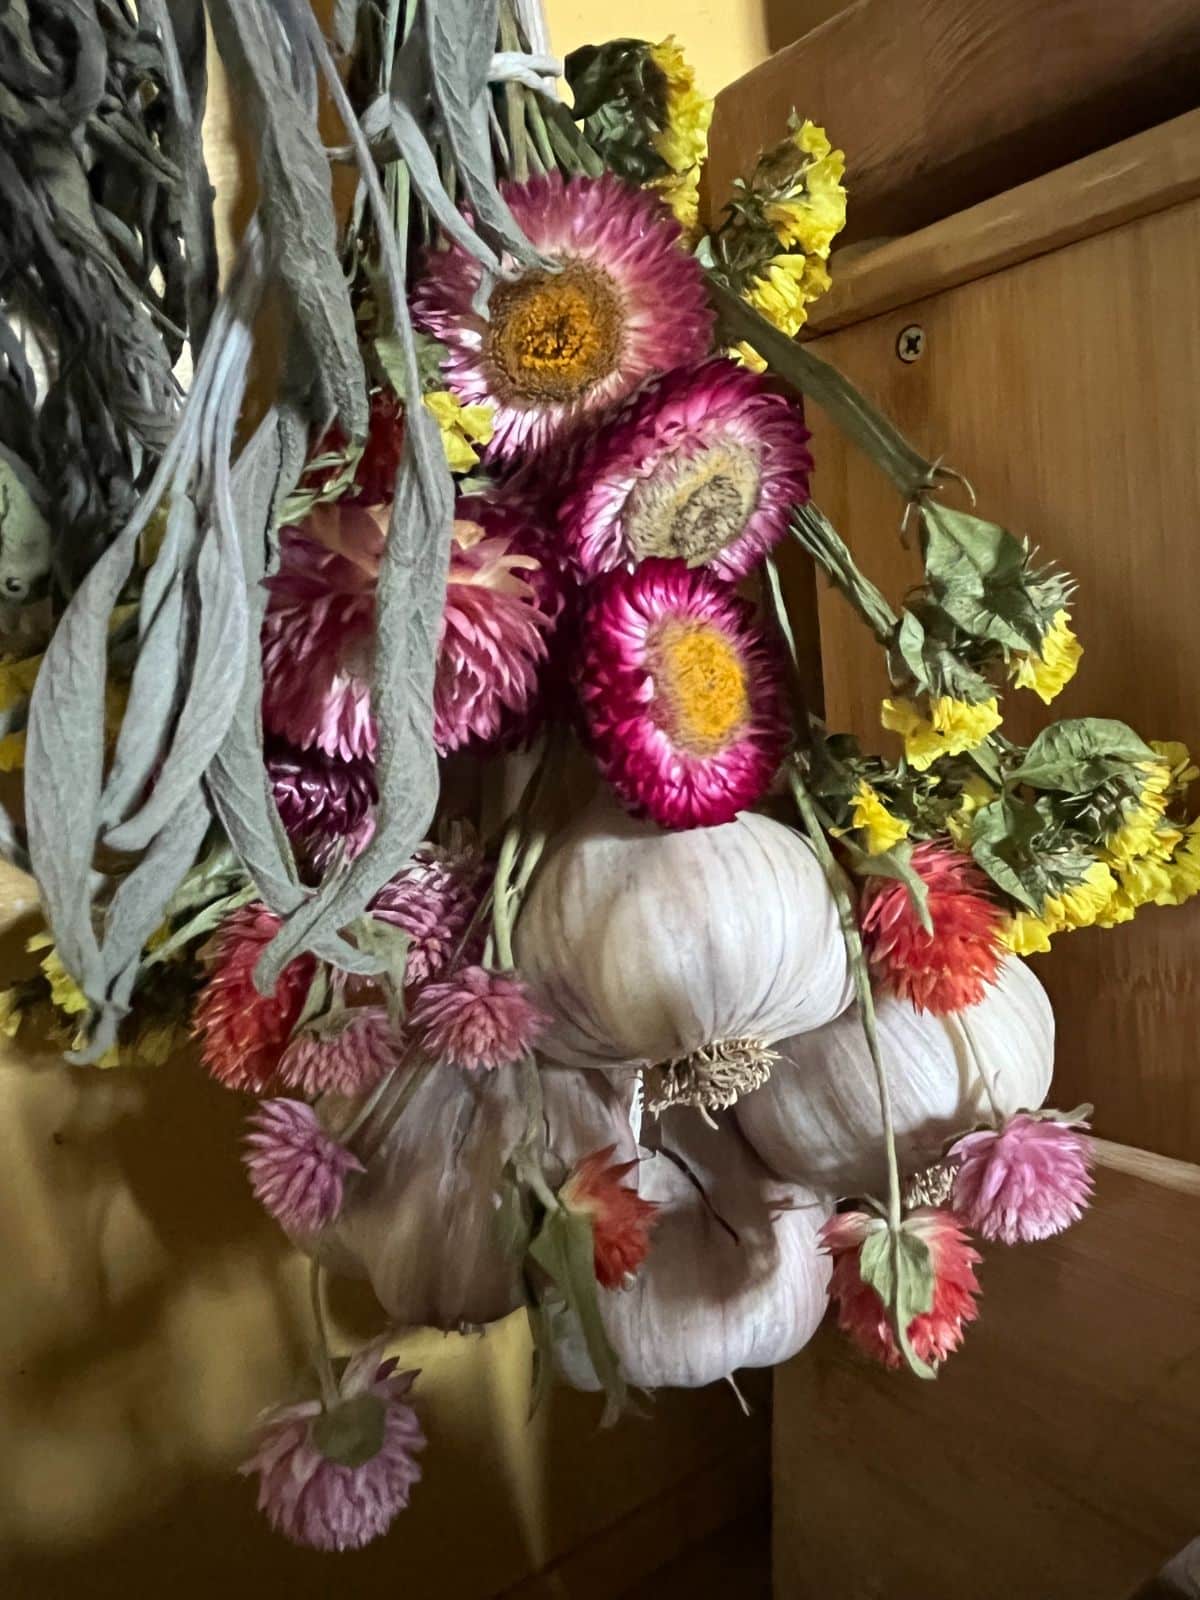
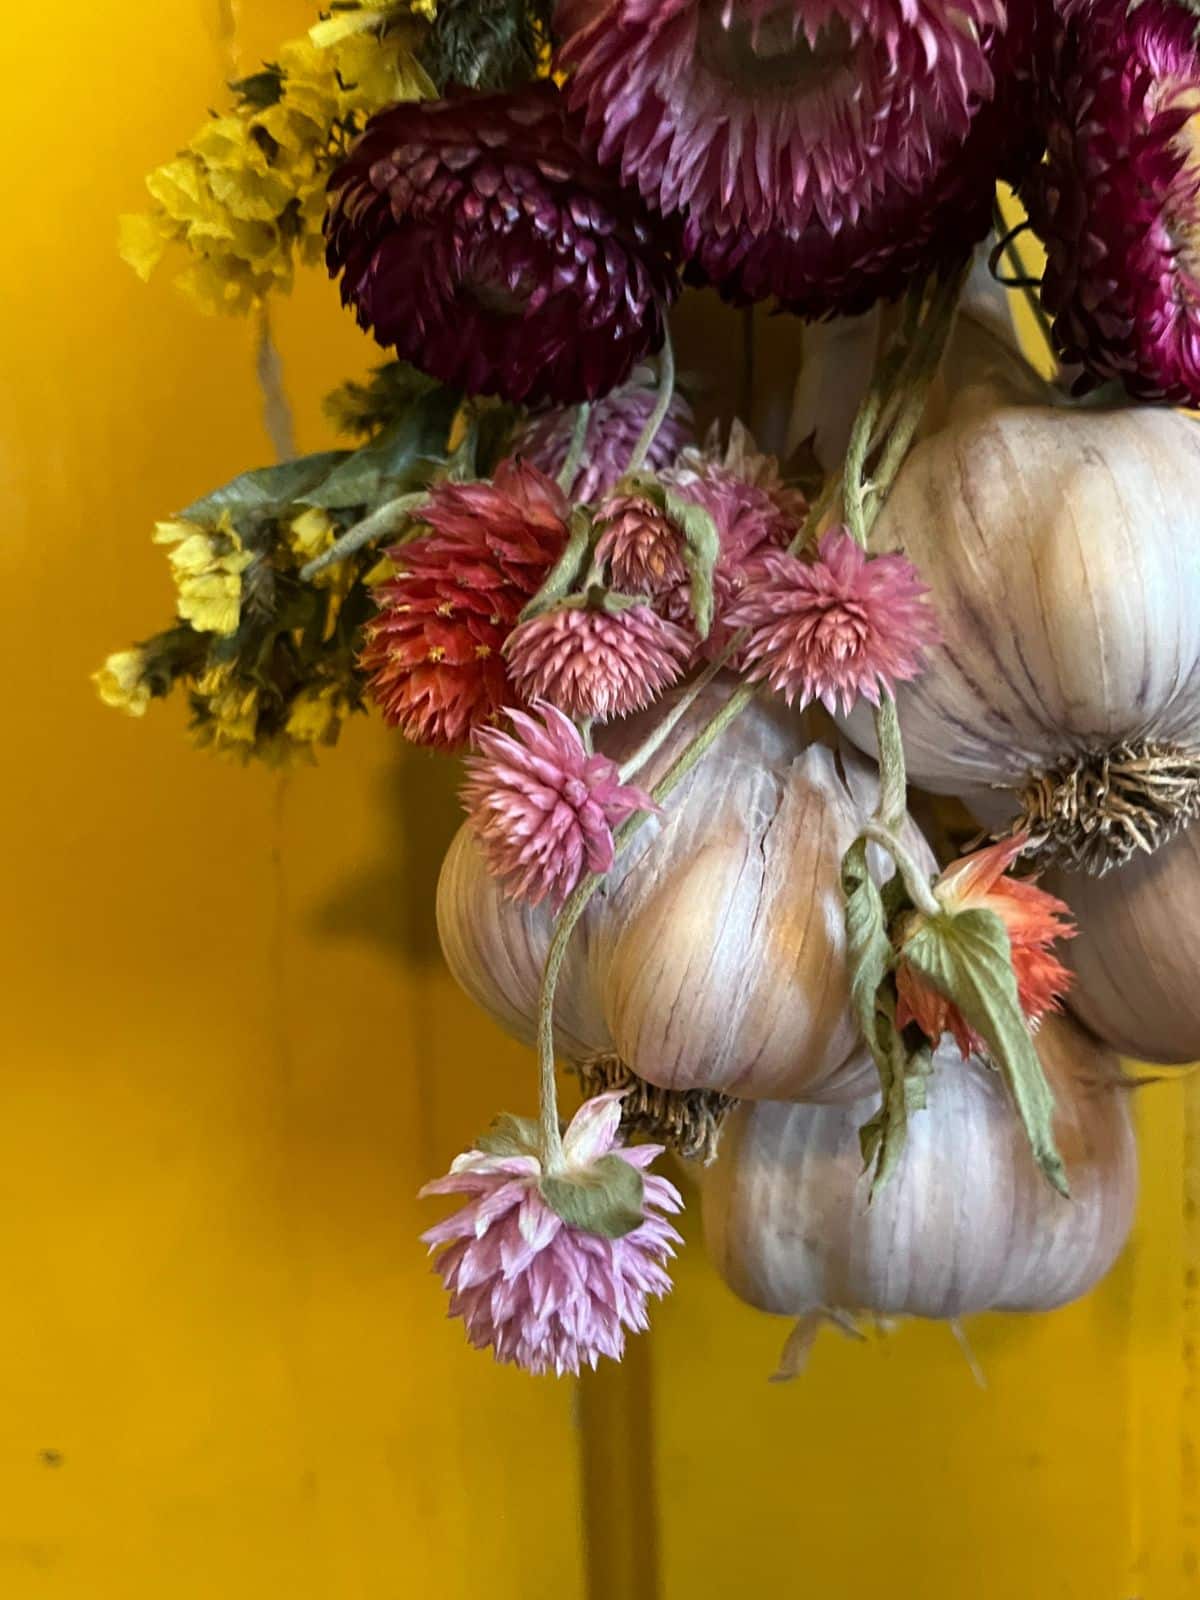
Some good choices that dry well and compliment the garlic are strawflower, statice, and gomphrena. See the suggestions below for more ideas.
Arrange the flowers into a basic bouquet. Set aside.
Step 3 – Cut a Long Length of Twine (Or String, etc.)
It’s easiest to wrap the twine or string if it is cut off the spool first. Cut a length about 3 ½ feet long. This should give you plenty to work with for wrapping and tying. If you want a tighter, more covered look, you will need to double this length.
Step 4 – Gather and Bunch the Garlic
Now gather up the heads of garlic in your hand and adjust them to what looks good to you. This usually means staggering the garlic heads (but keeping them close, almost like a diagonal stack). If you keep them all at the same length, they don’t sit as nicely.
When you do this, you will have stem tops that are at different lengths and look messy. Don’t worry about that just yet.
Step 5 – Lay Dried Flowers/Decorations
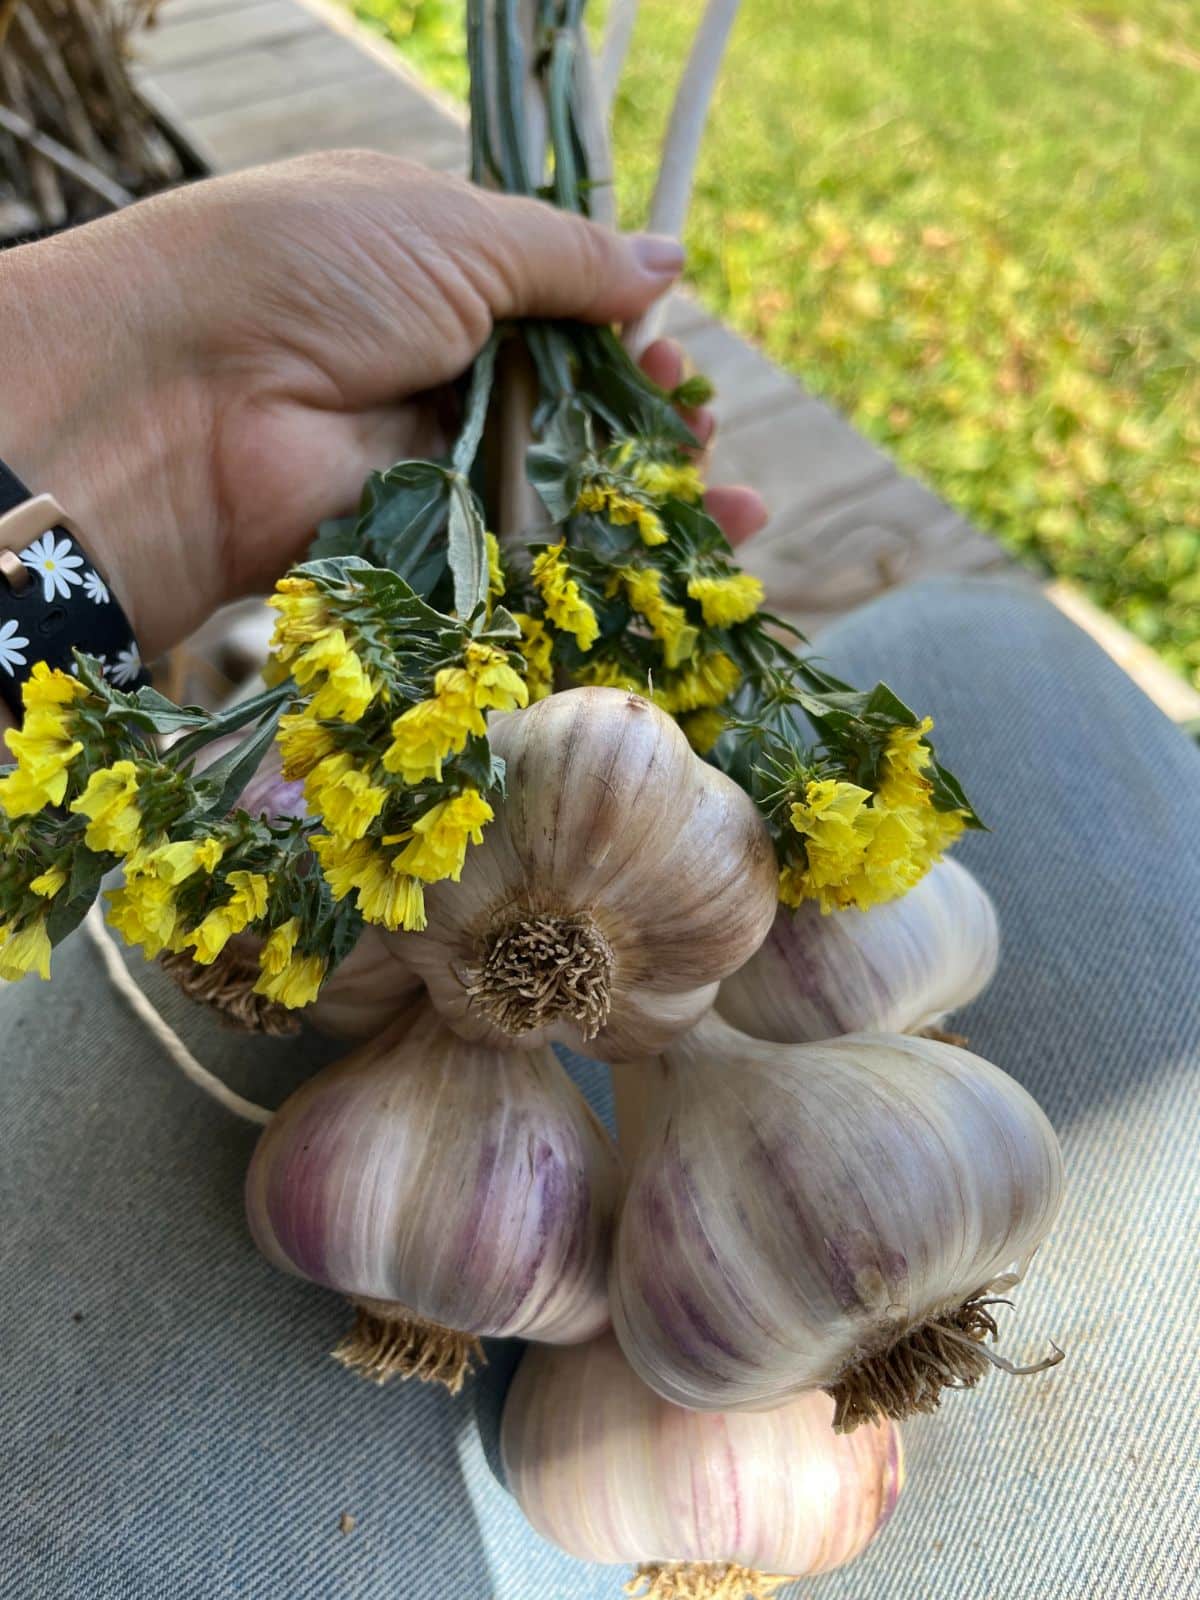
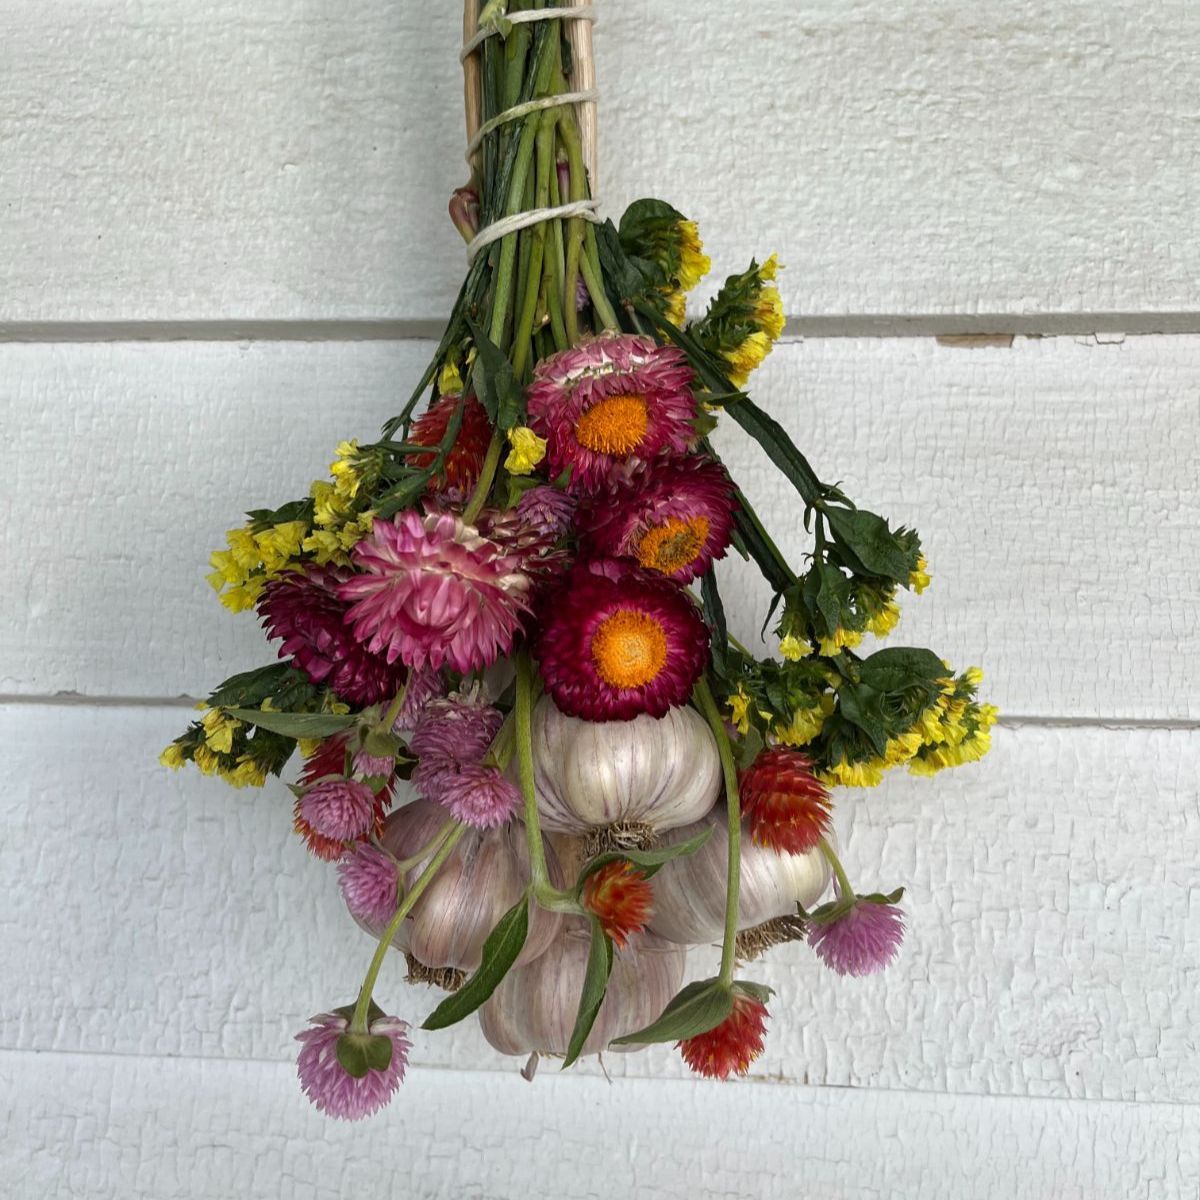
This is the time to add your flowers. Lay the flower arrangement over the top and in front of the garlic stems and heads. Adjust the stems and the lay of the flowers until the bundle looks good to you. Be creative! There’s no right or wrong here.
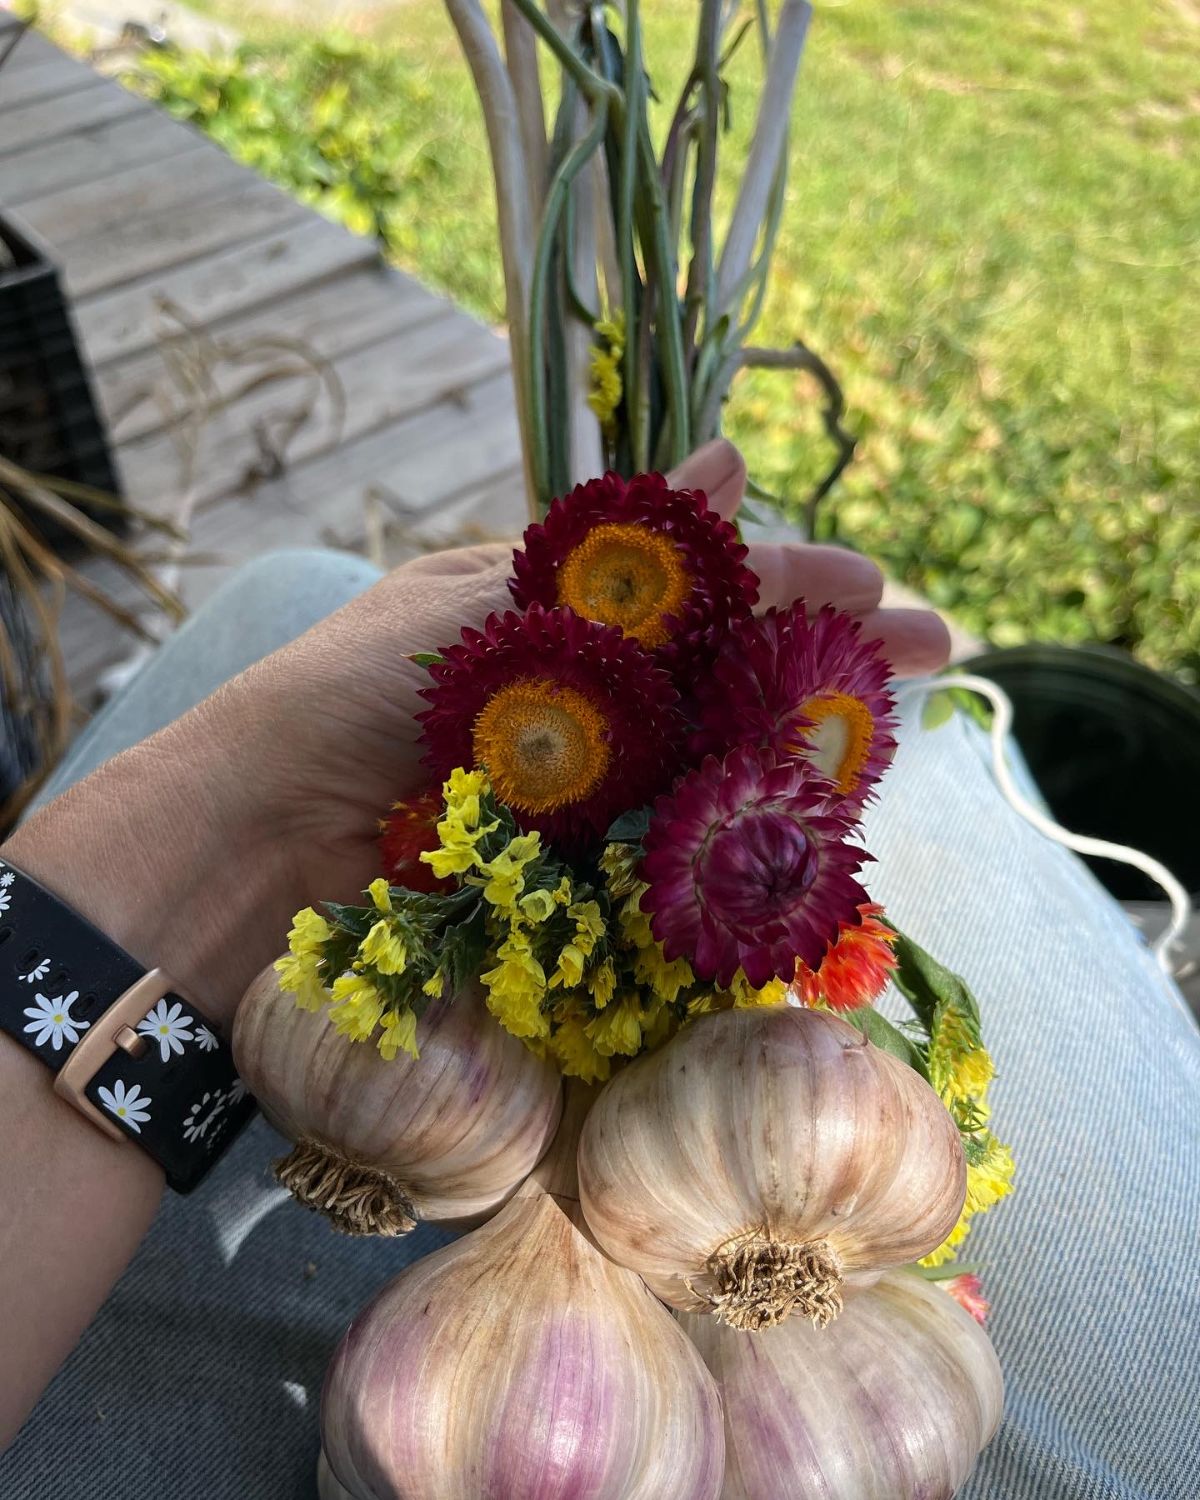
When you start using your garlic, your bundle will still look nice because the flowers will remain, even as the garlic heads dwindle.
If you prefer a simpler bundle, you can leave off the flowers and decorations.
Step 6 – Start the Wrap at the Bottom of the Garlic Bundle
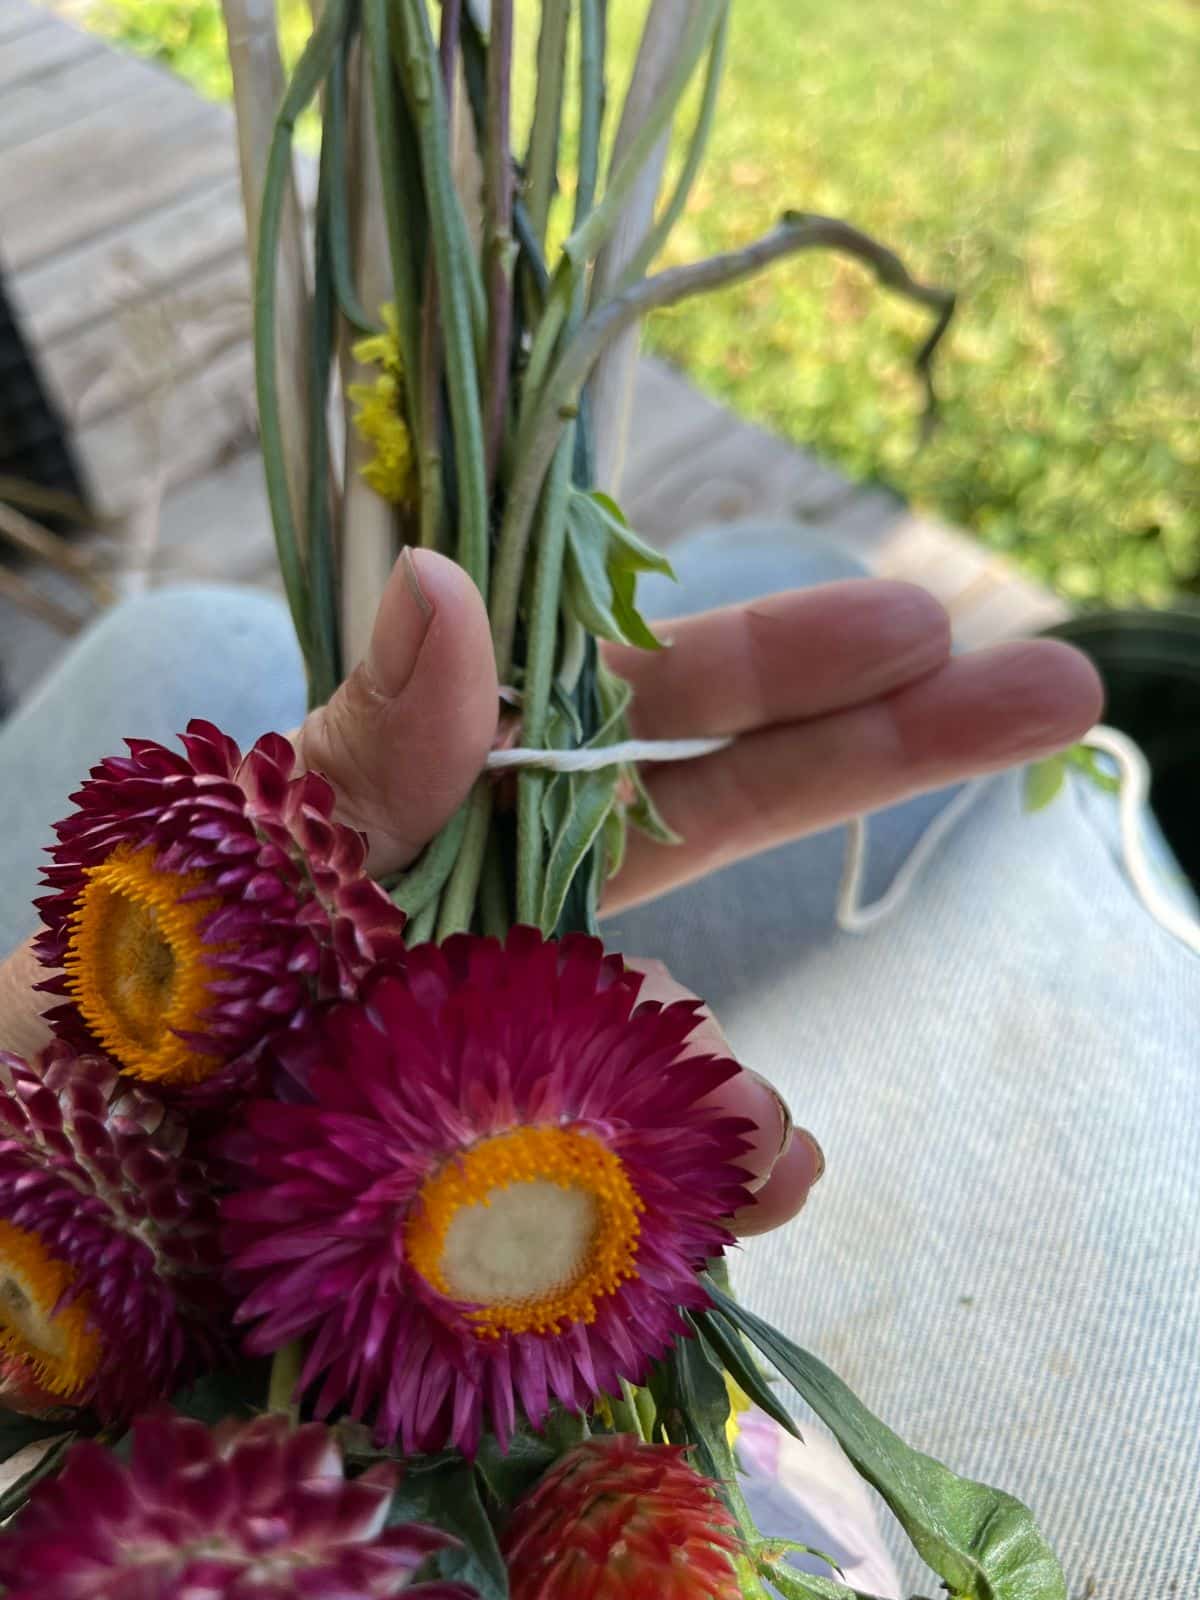
Now you’ll start tying and wrapping your bundle. Start at the bottom of the bundle, just above the heads of garlic.
Tie a small loop into one end of the twine. Wrap it once around the bundle of stems, and thread the twine through the loop. Pull tight to hold the stems together. Make one more wrap around at the base, keeping the twine pulled tight.
Step 7 – Continue Wrapping Up the Stems
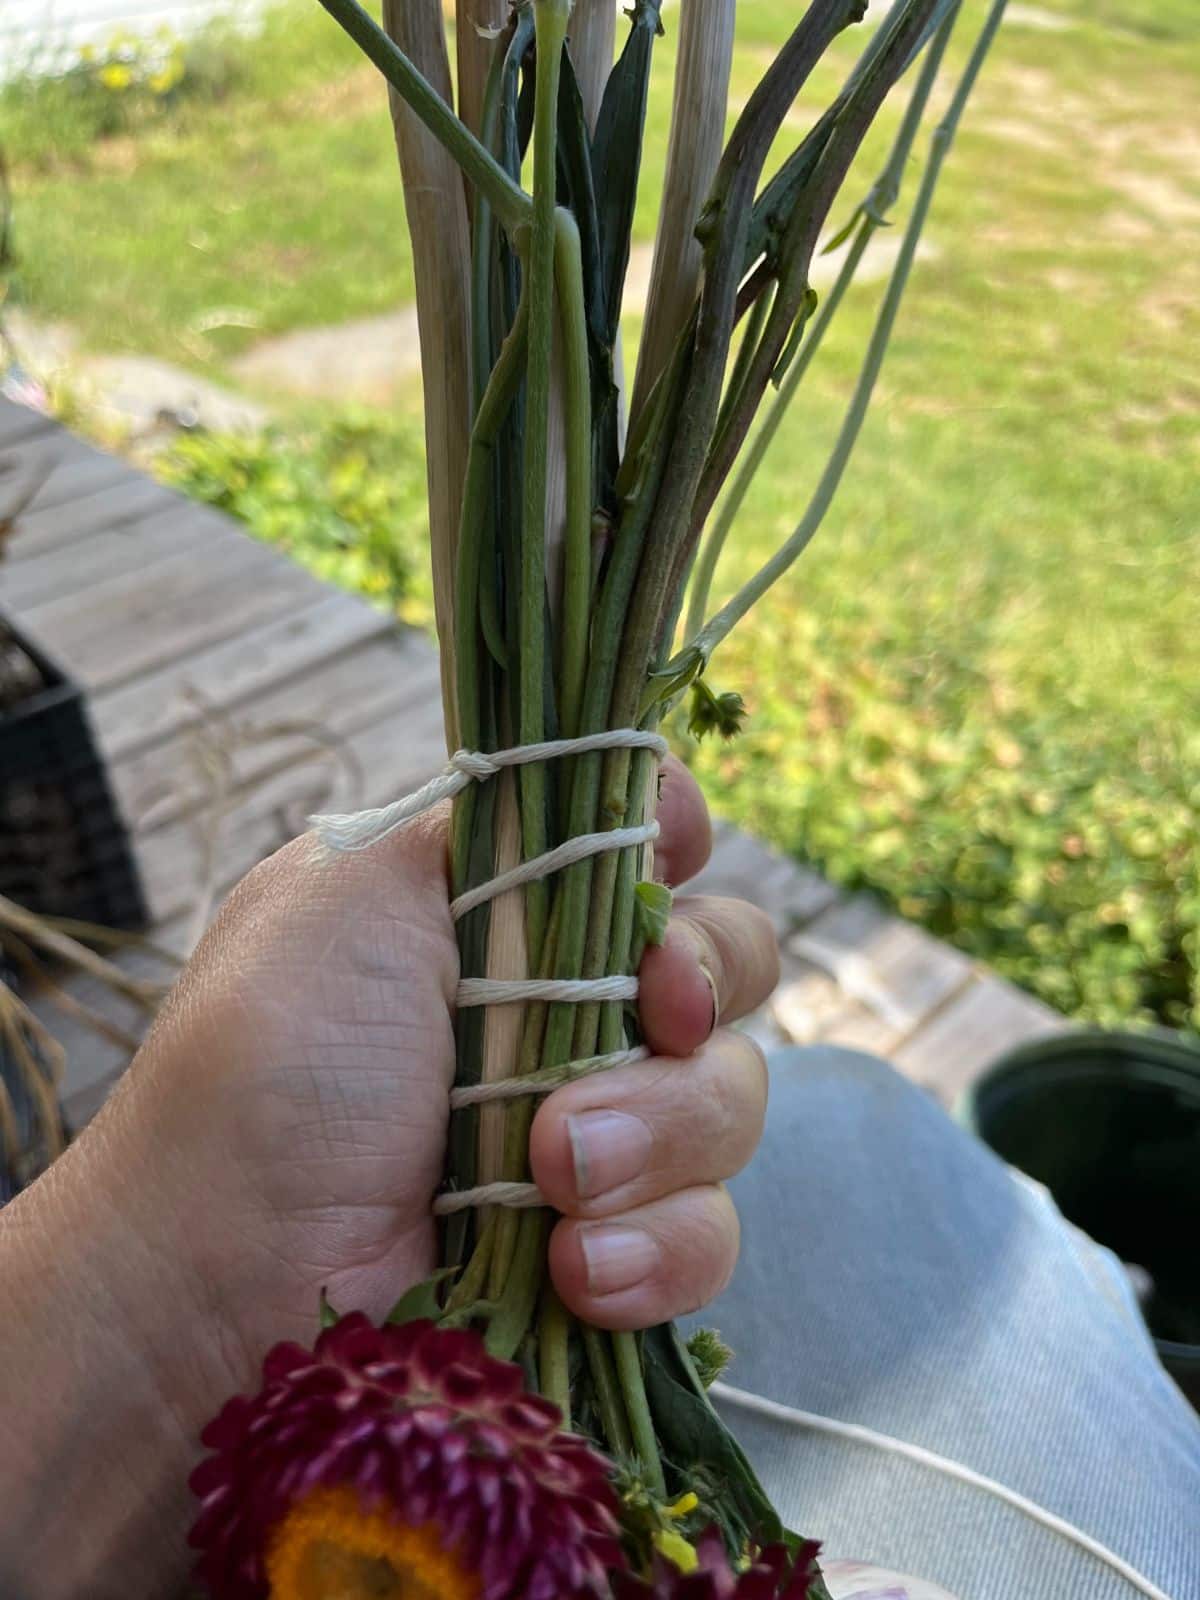
Hold the stems together in one hand and continue to wrap in a spiral, moving up the stems as you go. Try to keep the twine spirals about evenly spaced.
Keep the twine pulled tight around the stems as you wrap. Make a firm wrap. The stems and flower stems will dry down some more when hanging (especially if the garlic is still green and uncured). If your bundle is wrapped too loosely, the stalks and stems will loosen as they shrink and may fall out.
Step 8 – Finish the Wrapping and Tie Off
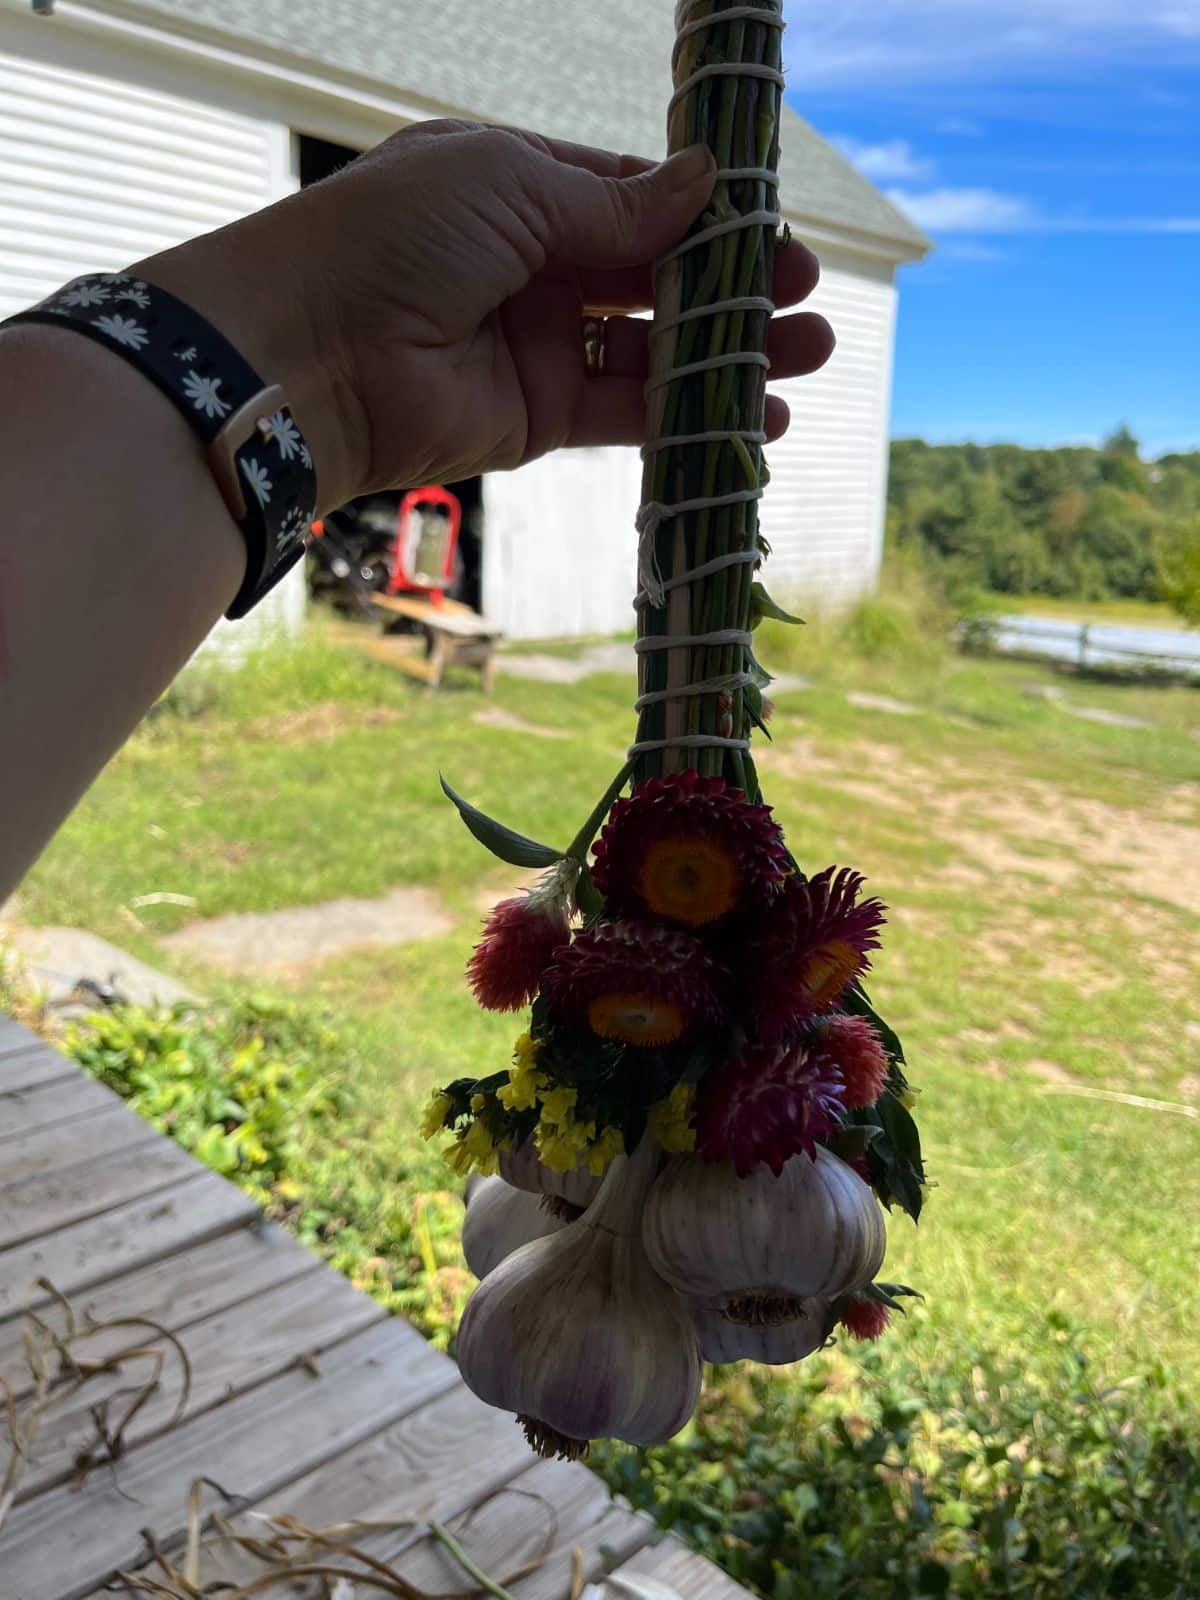
When you get to the top of the wrap (the top of the first stem you come to), make three or four tight wraps around. End in the back of the bundle. Work the twine under two of the wraps, and tie it off in a firm knot, close to the stems.
Step 9 – Make a Loop for Hanging
With the remaining length of string, make a loop for hanging. Tie off the loop by tying it back on itself or into the top strings.
If you don’t have enough twine left for the loop, just work a piece of twine under the top wraps and tie it off to form a loop.
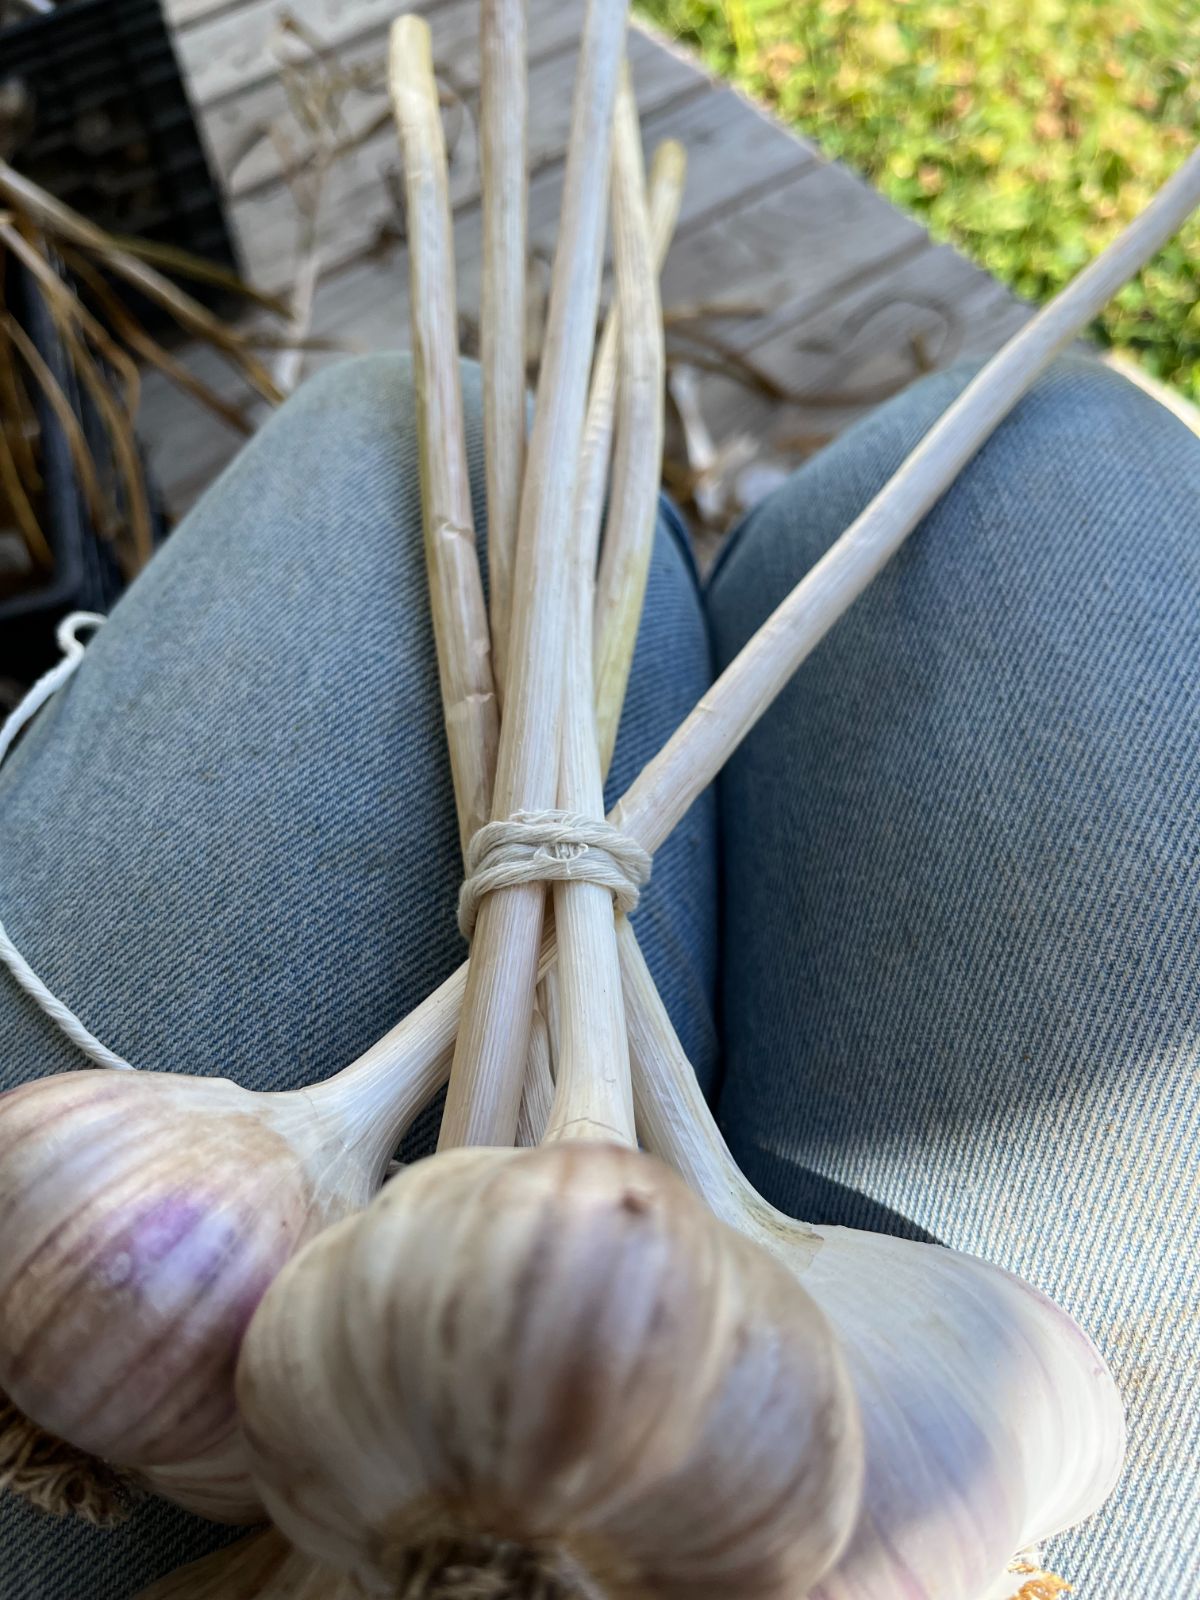
Step 10 – Do Your Final Trimming
Trim any hanging pieces of twine. Cut them close at the knots.
Trim the stems and stalks even at the top so the top is flat and the stems all end flush together.
Step 11 – Hang and Enjoy!
That’s it! You’re now ready to hang and enjoy your hardneck garlic bundle!
Other Options for Decorating Garlic Bundles
Get creative and put your own personal touches on your garlic bundles! Some other options to dress up your bundles include:
- Keep it simple and make a bundle of just garlic and twine. Basic, rustic, still beautiful.
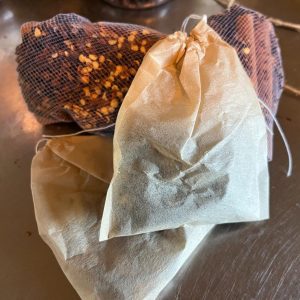
- Different wraps. Instead of twine, try raffia ribbon, baling twine, wire, or top the bunch with a ribbon made from burlap.
- Dried flowers. Good options include statice, strawflower, gomphrena, long-stem field marigolds, and any other flowers that dry well and hold up well. Just make sure they won’t be too fragile or drop a lot of seeds and pieces all over your kitchen. You won’t enjoy that.
- Dried herbs. Add bundles of dried herbs, either in bunches by type or in combinations. These can be every bit as beautiful as dried flowers. You can even let some of your herbs go to flower before cutting and drying if you want a little color. You could make your bundle quite functional if you leave the herbs in bunches that can be pulled off for cooking.
- Dried chilies or hot peppers. Dried peppers are a great compliment to the garlic, and they can be useful, too. You can string them on threads that dangle with the garlic or use floral wire to hold them. You can also cut long stalks from the plant and hang them upside down, working them just as we did with the stemmed dry flowers.
- Dried corn cobs. Peel back the husks on the corn, hang the garlic amongst the dried ears, and bundle the garlic stems and corn husks together.
- Dried seed heads. All sorts of wildflower, herb, garden, and flower seed heads can be quite striking when they dry. If they aren’t too fragile, try some as an accent in your garlic bundles.
- Combinations of any of the above. Why pick just one? How lovely (and potentially useful) would a combination of garlic topped with herbs and red hot peppers be?
Why Braid and Bundle Garlic?
Garlic that is braided or bundled stores better than garlic that is trimmed and stored in bags or bins. Garlic bundles get more airflow, which keeps the heads of garlic better, but also reduces the spread of mold, rot, and fungus that spreads more easily in bins and bags.
Bundled or braided garlic stays on the stem longer, so it has every opportunity to pull the last life out of the stems and leaves as they die back. This is the function of curing garlic prior to trimming, too. (That and the hardening of the neck of the garlic at the top of the head, which enhances storage.)
Hanging garlic braids and bundles are easy to use—just grab a clove or head and go! They are also a storage space-saver. Few of us have extra drawer or counter space, but most of us can find a wall or door for a small hook to hang.
These lovely hardneck garlic bundles make striking dual-purpose kitchen décor. In the kitchen, decorations should be as functional as they can be!
Your handmade garlic bundles also make lovely gifts. Who wouldn’t love a gift of fresh, home-grown garlic? And one that looks so nice, to boot?
Bundles as Decorative Garlic Curing Solutions (+ When You Can Use Your Garlic)
Basically, when bundled, garlic is curing as it is stored. One of the big advantages of making garlic bundles or even softneck garlic braids is that you can cure it in its bundle. In other words, you can make your decorative bundles for storage, hang them in your kitchen or panty, and skip the extra month and extra steps of curing all together.
Your garlic can be used at any time. It can be used immediately, what some might call “green” garlic, or it can be left hanging for use in the coming months. Garlic does not need to be cured in order to be used. It’s ready right out of the garden. The curing process is a storage process, not a culinary or consumption process.
When you want to use garlic from your bundle, you can take off individual cloves or cut an entire head from the bunch. It’s best to cut the head off at the stem, above the bulb of garlic. This will keep your bundle intact and the hanging flowers and remaining heads of garlic will “hide” where you’ve used some. For best results, use the bottom-most heads of garlic first.
That’s all there is to making these functional, attractive garlic bundles for your home. What a beautiful way to store and use your garlic!

Leave a Reply