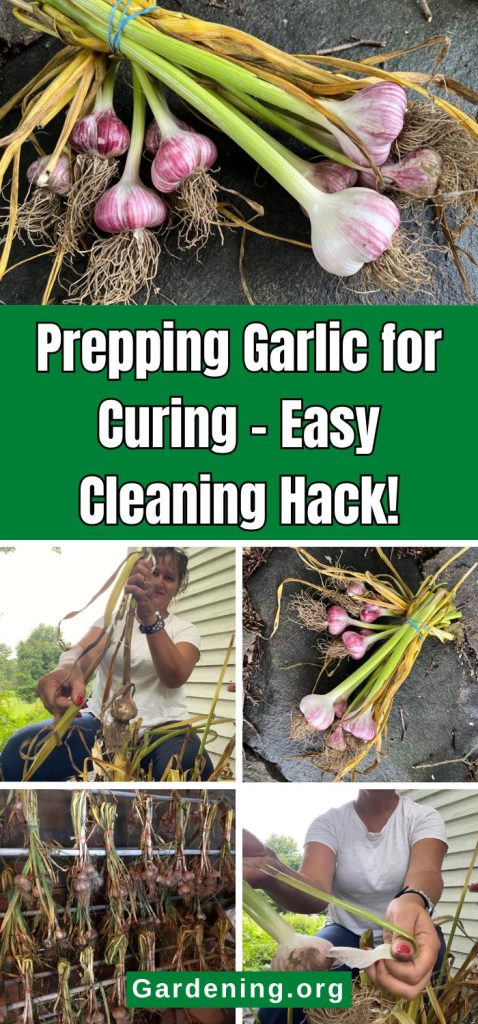
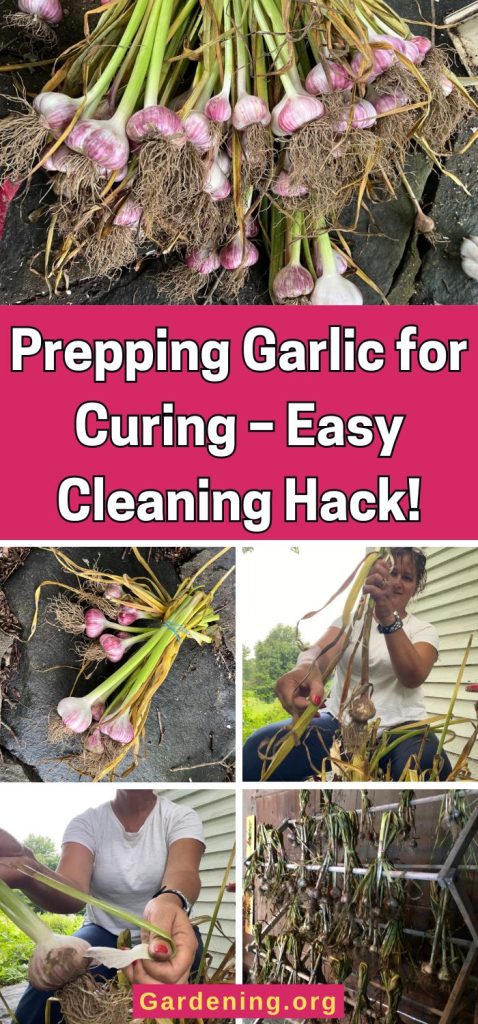
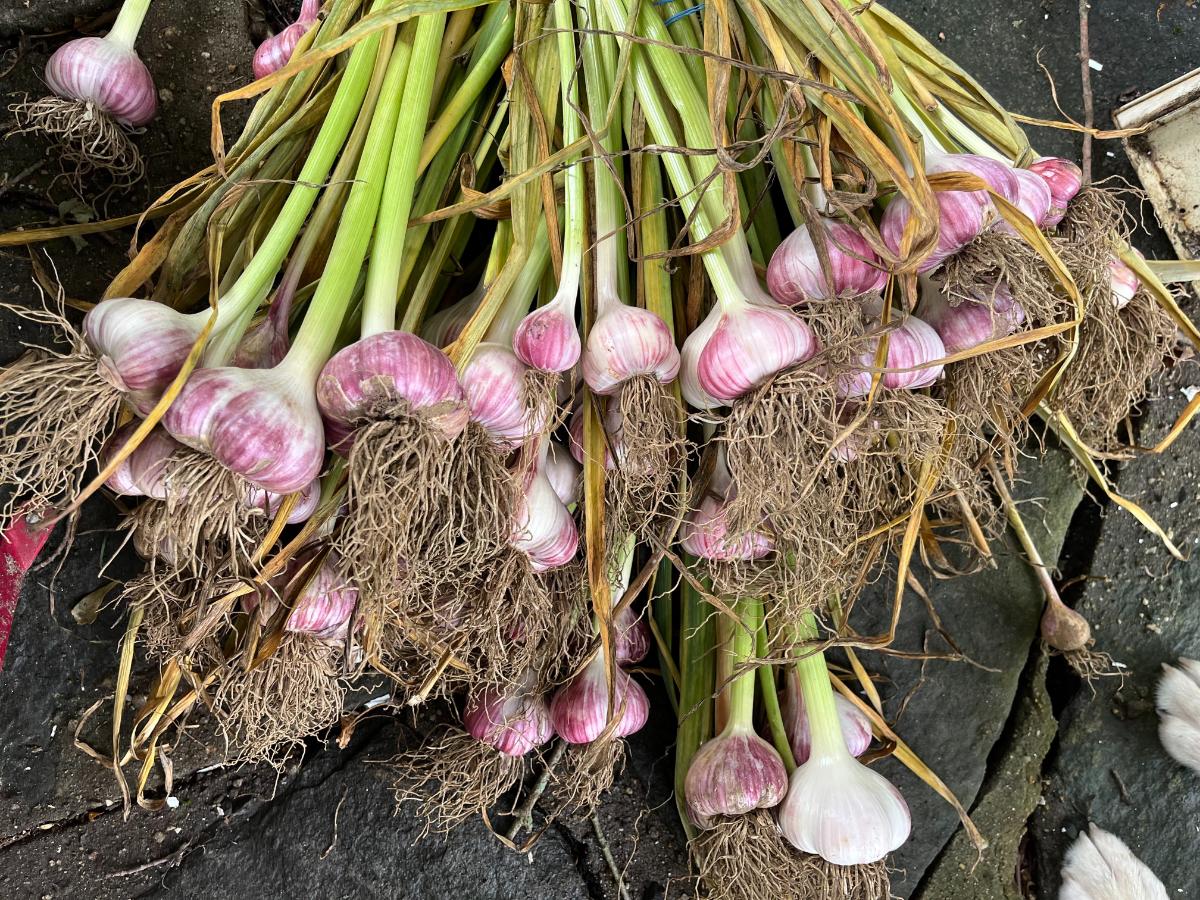
This is a simple hack that you can do after you harvest your garlic. It’s an easy way to prep the garlic for curing that will leave it clean and looking great.
Jump to:
- Do This to Cut Cleaning and Trimming Time After Curing
- The usual way to prep curing garlic leaves a dirty trail
- Soil and stains are harder to remove after the fact
- A Better Way to Clean and Prep Garlic
- Do This Garlic Prep Hack As Soon As Possible After the Harvest
- Next Step to Curing Your Garlic
- Cure for a month to a month and a half
- Trim at the neck and roots
- Learn All About Growing and Harvesting Great Garlic!
Do This to Cut Cleaning and Trimming Time After Curing
If you’ve harvested and cured garlic before, you know how hard it can be to get that garlic clean and dirt-free after it’s cured.
If you haven’t harvested garlic before and this is your first time, you’re lucky to have found this hack now and avoid that frustration!
The usual way to prep curing garlic leaves a dirty trail
The typical way to prep and cure garlic has us hanging it, usually in groups or bundles, soon after it comes out of the ground. We’re told to shake off the excess soil in the garden when it’s pulled, then ignore the remaining dirt, bundle, and hang.
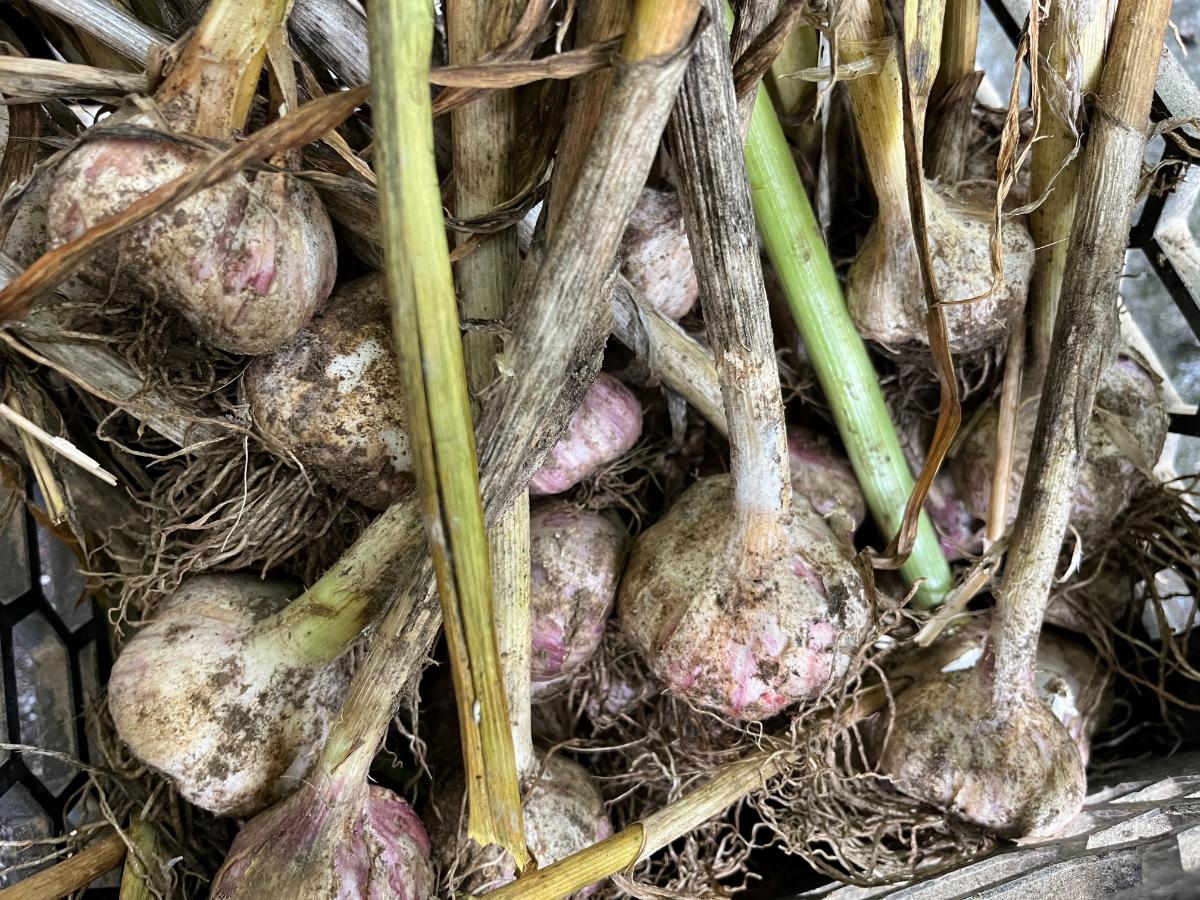
The problem with this method is that there will still be a considerable layer of soil and dirt on the outside of the garlic bulbs. Then we hang it for a month to six weeks.
Then we are told to wipe, brush or work off the dirty exterior and trim off the roots. That’s so much easier said than done.
Soil and stains are harder to remove after the fact
But after six weeks of drying, the dirt is difficult to remove. It also may have caused staining during this time.
A moist cloth will often take most of the soil and staining off, but it’s not the best idea to apply moisture to the garlic after it is cured and the skins are dry. The idea is, after all, to let the garlic bulbs form a nice, dry, papery skin that protects the cloves inside.
No one wants dirty-looking garlic, especially if you want to leave some out, sell it, gift it, or let it do double duty and hang it for a display (like with these beautiful, dried flower and garlic hanging bundles!).
Fortunately, there is a better way.
A Better Way to Clean and Prep Garlic
For nicer, cleaner bulbs with less hassle, do this instead.
This is a simple step that you will do while you are prepping your garlic and bundling it to hang and cure.
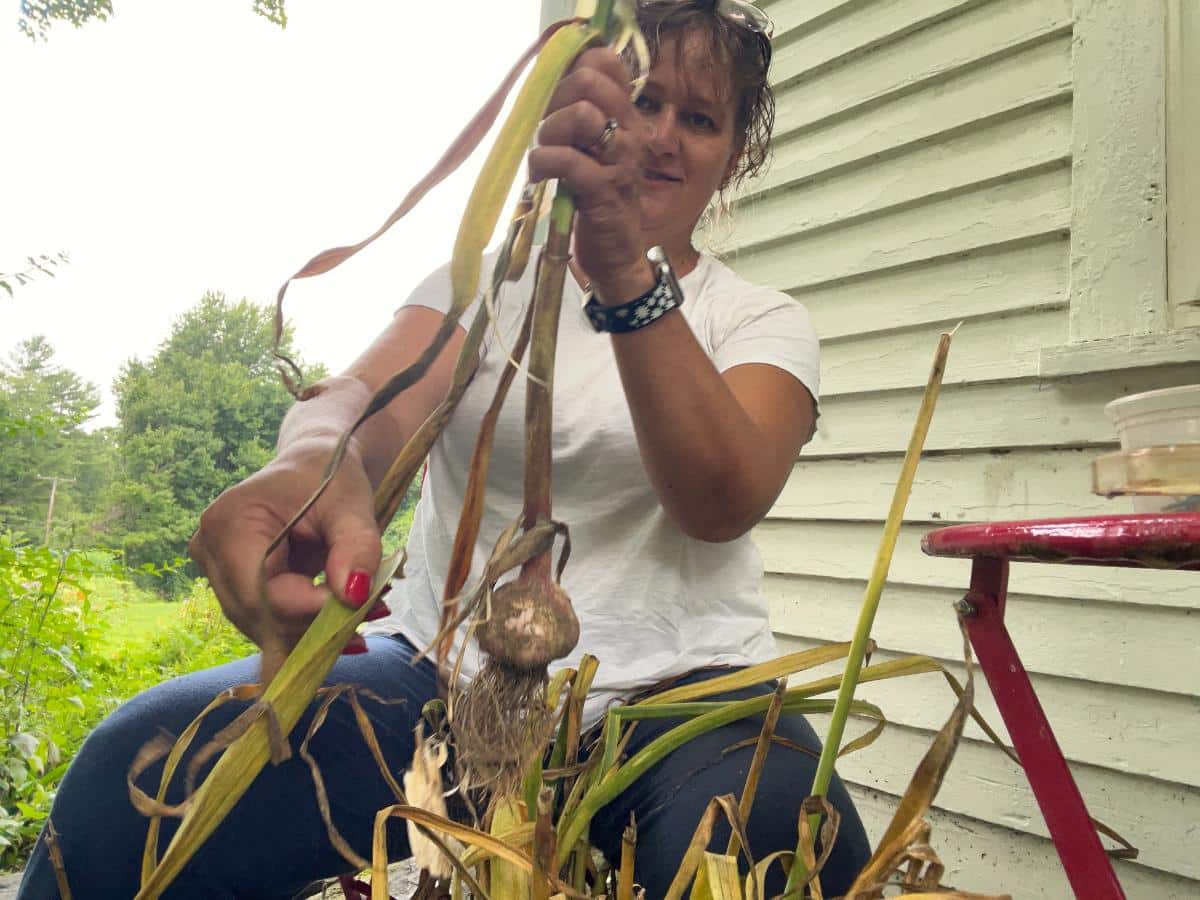
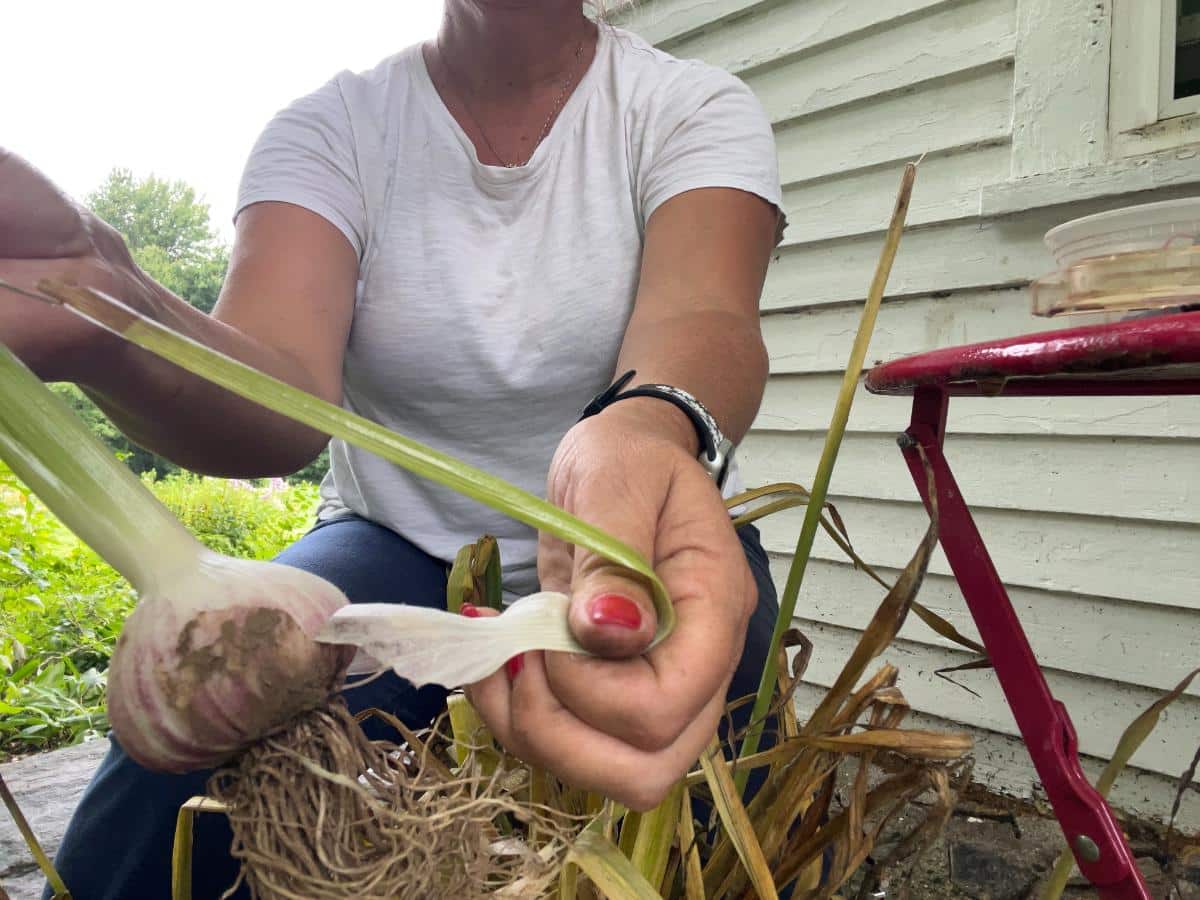
- Find the first green leaf layer on the garlic’s stem
- This is usually behind the first or second leaf because those first two leaves should be dried and brown at harvest time
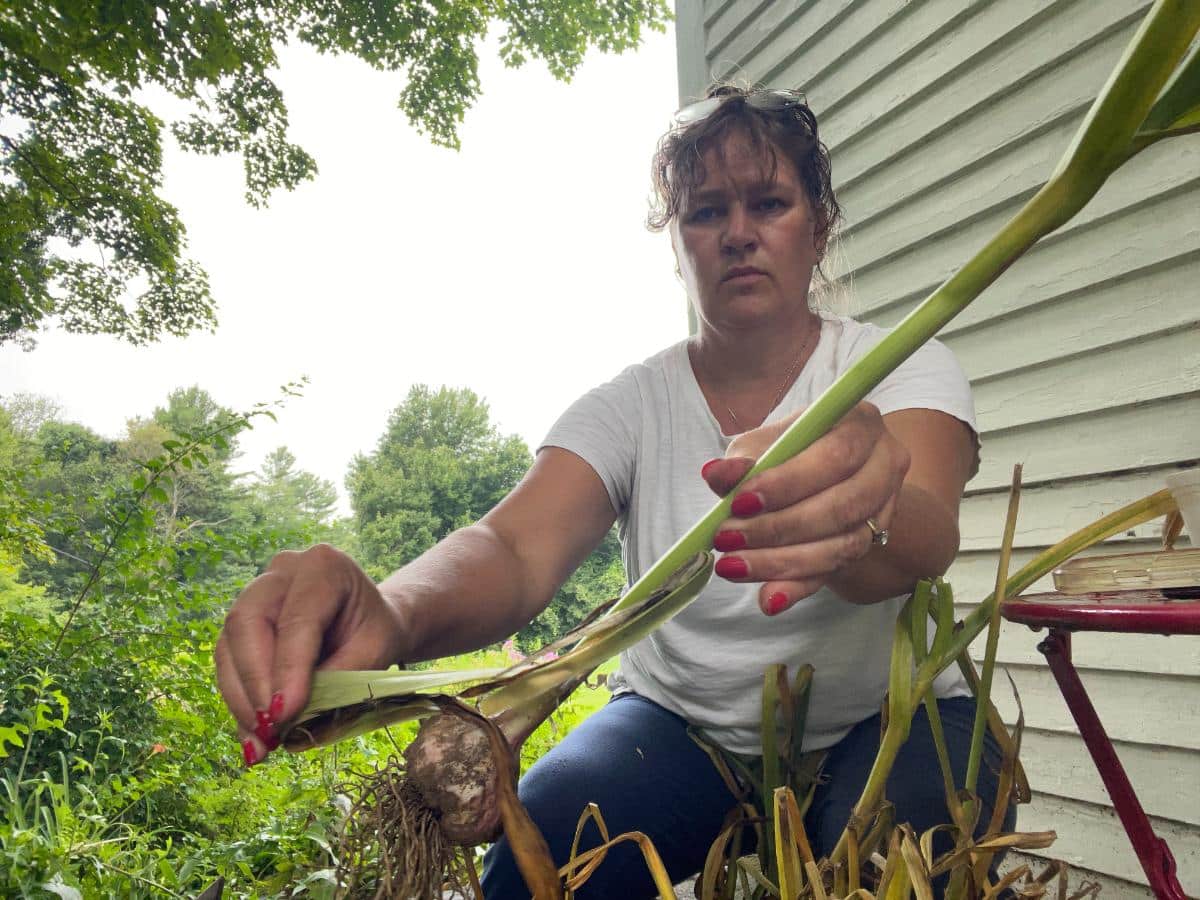
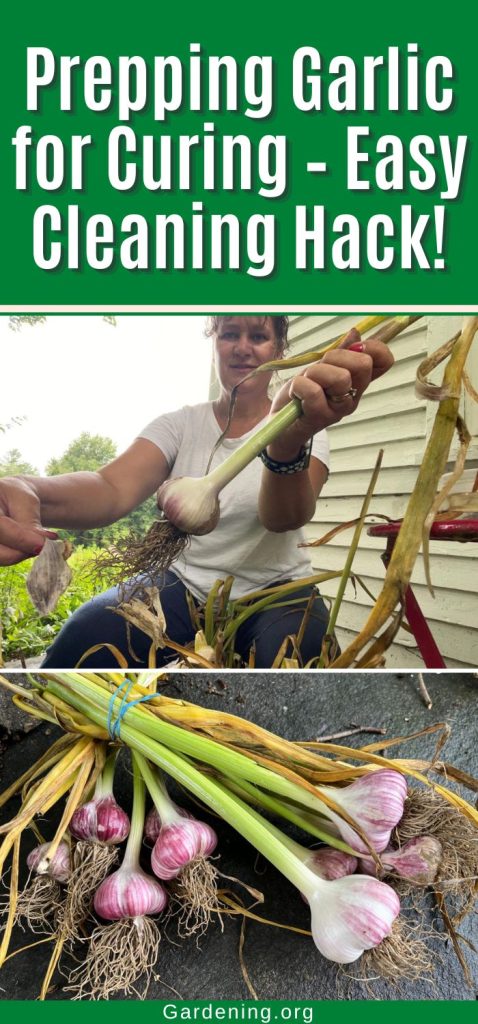
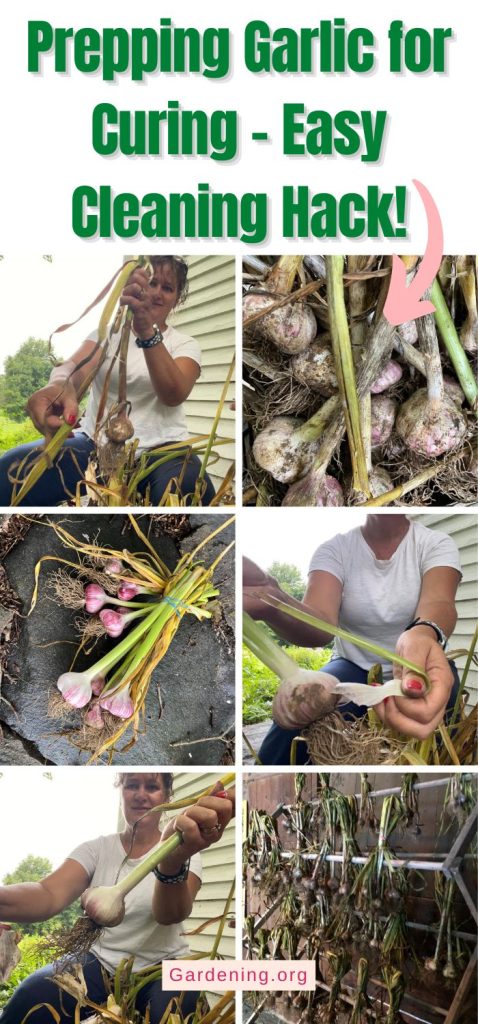
- Firmly but gently pull the leaf down all the way to the bottom of the stem and over the head (bulb) of the garlic
- The leaf will be attached to the outer layer of papery skin on the bulb
- Don't rip the leaf off until you reach the root end
- You may need to split the leaf to get it off both sides of the head of garlic, but it will split and pull easily
- Try not to take too many leaves off – you only need to remove one to get the soil off
- Don't remove too many skin/paper layers because the garlic will need the other layers of skin to protect it and preserve moisture during drying
- If the leaf rips before the whole outer skin layer is removed, just find the edge of that layer and pull it the rest of the way off
And that’s it!
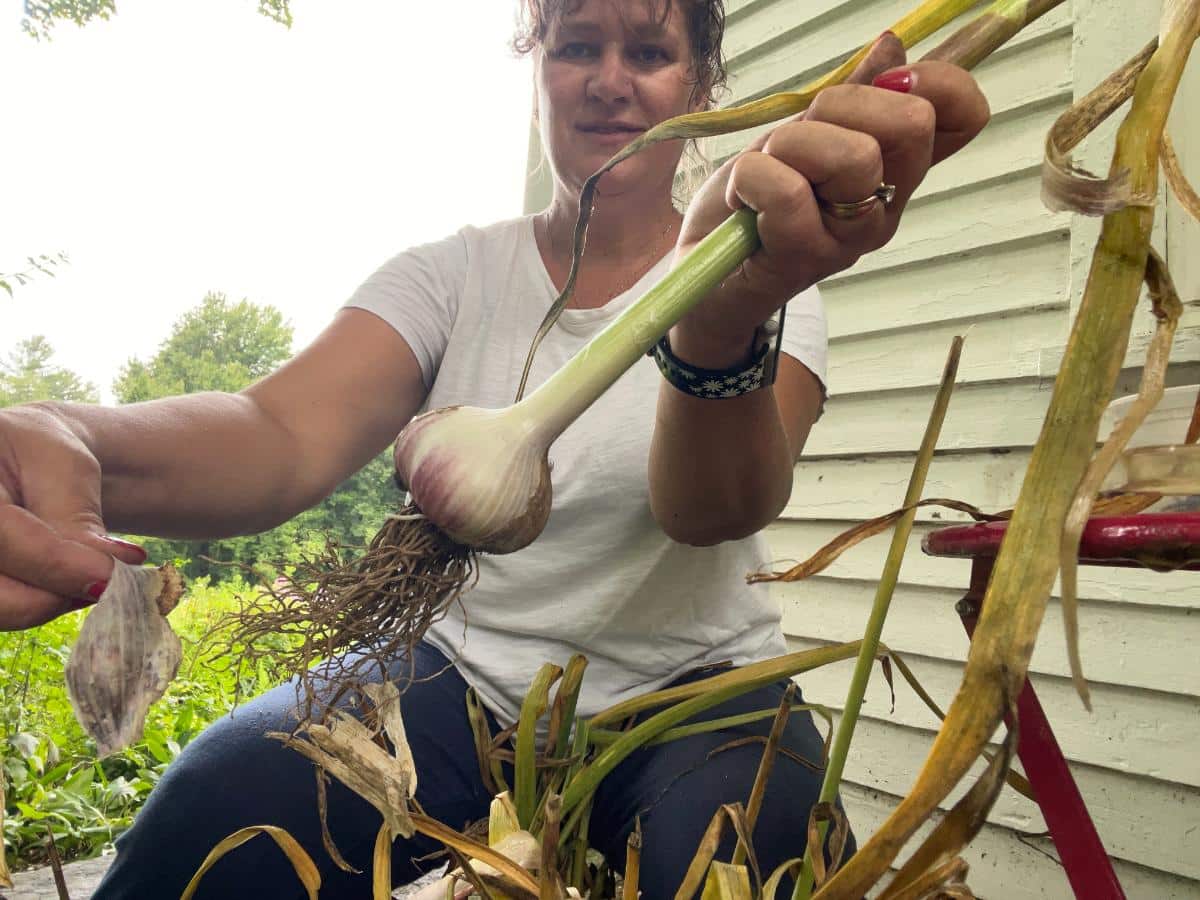
You will only be taking off the outermost layer, which will be fine for the garlic as it cures.
You will be left with a nice, clean, bright skin. After your garlic cures, you won’t have to fight with stuck on, dried on soil – they'll come off the curing rack looking great and ready for a quick trim to finish them off!
Do This Garlic Prep Hack As Soon As Possible After the Harvest
For best results and easiest peeling, do this prep as soon as you can after you harvest your garlic.
Ideally, it’s best to do it within a day of harvest.
After that, the stems start to dry, and the green starts to be sucked into the heads. The longer you wait, the drier the leaves will be and so the harder it will be to evenly peel the leaves and outside layer of “paper” off the garlic heads.
Of course, life happens, and you’ll have some leeway, but suffice it to say, the sooner, the better.
You’ll definitely want to do this within three days, but then again, you’ll want to get your harvested garlic prepped and hung to cure within that time anyway.
You can even do this in the garden at the time of harvest as you pull up your garlic plants.
Next Step to Curing Your Garlic
After you peel and prep the garlic heads, they will need to be hung to cure. This hardens the neck at the top of the bulb and seals off the bulb, making it ready for long-term storage in a cool place.
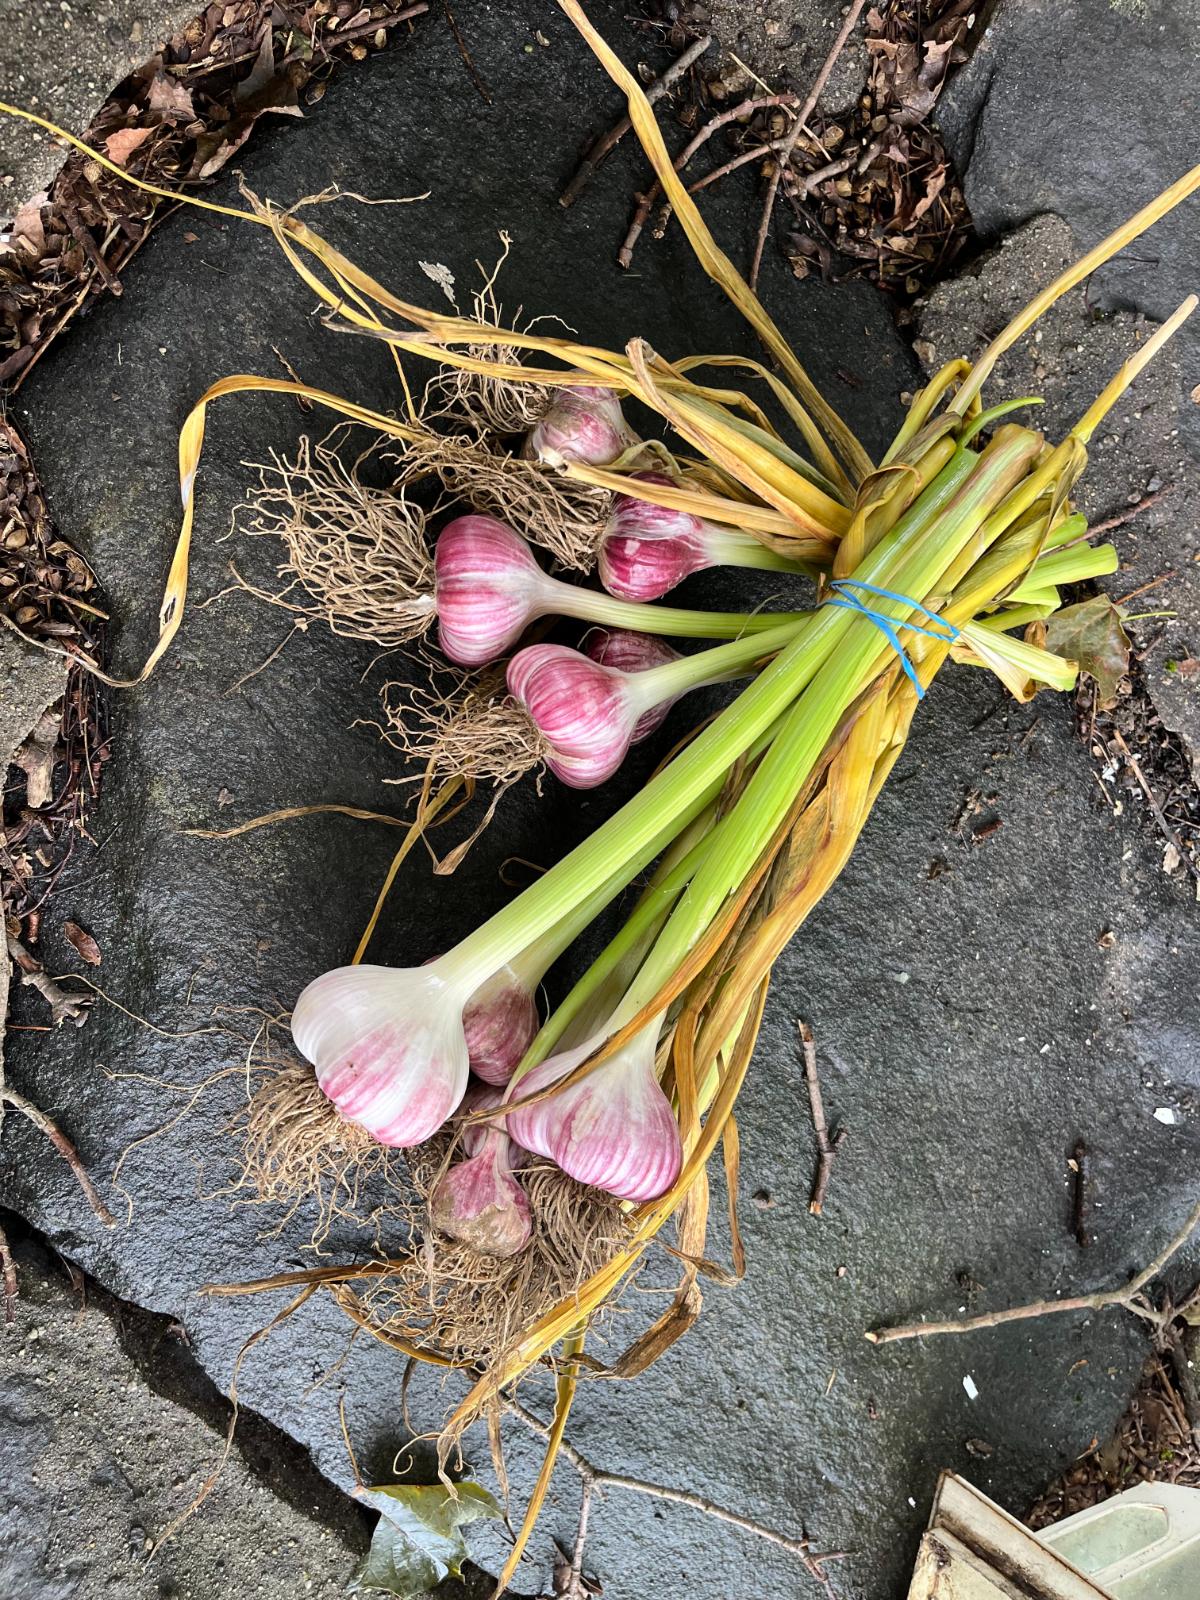
Bundling the heads of garlic by the stems works well for hanging (though you can hang individual heads if you like).
To bundle, an easy way to do it is to fold the stems over about halfway up, then tie them by coiling a rubber band around the bent stems.
Then, you can take the whole bundle and set it over your rack, wire, or twine by setting the split in the middle over the rung or wire.
Easy!
Cure for a month to a month and a half
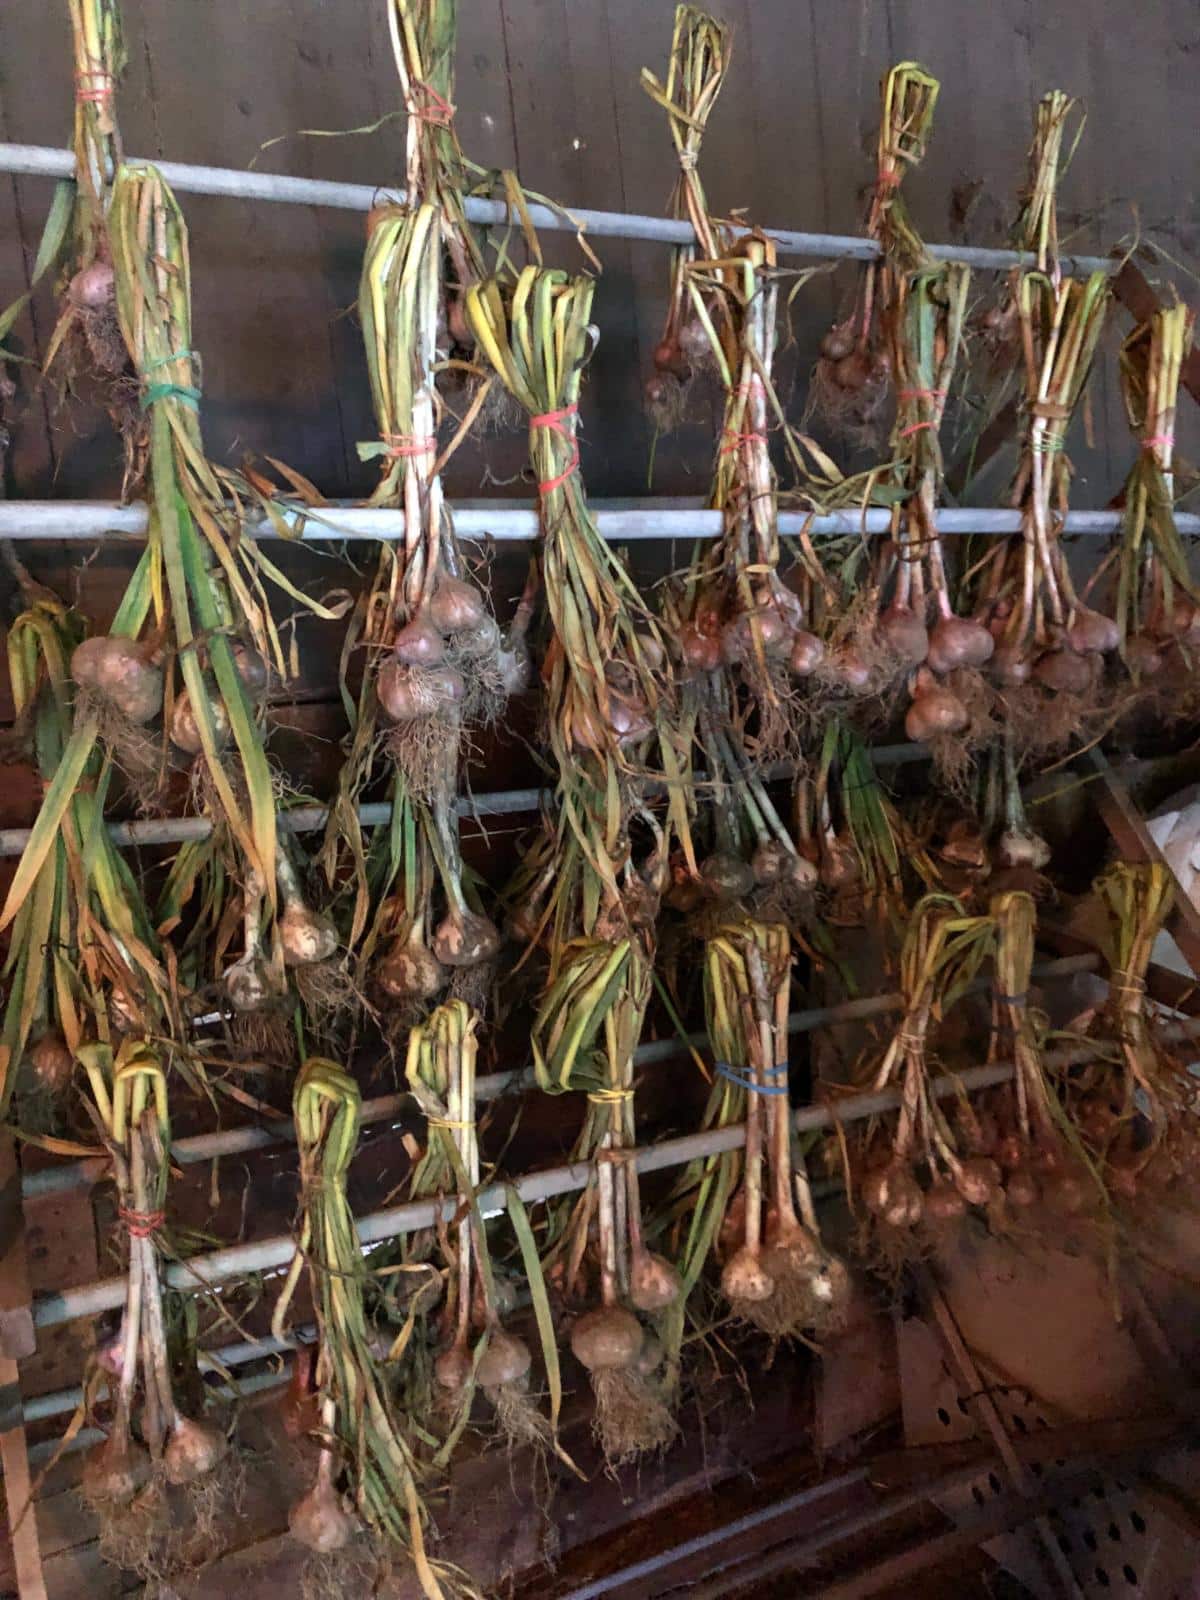
Leave the bundles there to dry and cure for the next four to six weeks. Then you can just lift them off the rack, trim, and store.
Trim at the neck and roots
To trim for storage, use a pair of handheld garden pruners or sharp scissors.
- Cut the stem about an inch to one and a half inches above the head of garlic.
- Cut the roots flat at the bottom of the bulb (don’t cut into the cloves or bulb).
- Whatever dirt and soil are remaining in the roots will easily cut and flake off when you cut the roots off.
And your bulbs themselves will already be clean and beautiful because you took the extra few minutes to pull off the dirty outer layer when you prepped them for curing!
Voila!
Learn All About Growing and Harvesting Great Garlic!
Garlic is a very easy crop to grow. It’s one of the most overlooked homegrown crops, which is ironic because it is such a popular vegetable and it is so low maintenance.
Ready to grow your own garlic? Looking to answer a garlic question or two? Need to know more about planting, harvesting, or curing?
Check out these other garlic articles!
Leave a Reply