


Popeye loves it, picky eaters turn their noses up at it and it is a quick nutrient boost in breakfast smoothies. It’s spinach, and it’s a beginner-friendly plant that is simple to grow in your garden beds and container gardens too!

Whether you’re just starting out with your first garden or you’re a seasoned green thumb who is just looking to learn a couple new tricks, we’ll cover everything you need to know to start growing spinach in your own home garden.
Jump to:
- Why grow spinach?
- Growing your own spinach from seeds
- Prepping your garden beds
- Starting your spinach seeds
- Transplanting your seedlings
- How to successfully grow spinach in your garden
- Watering
- Fertilizing
- General maintenance
- Harvesting your spinach crop
- How to store spinach
- Common pests and problems
- Top spinach varieties to try
- Conclusion
Why grow spinach?
Spinach is a nutrient-packed powerhouse, chocked full of nutrients and vitamins like A, C, K, folate and iron that your body needs to thrive. Moreover, spinach is high in fiber and can even help boost your natural immunity. So even if you don’t particularly like veggies, spinach’s high nutrient-value makes it a great mix-in to add to any dish.
Wonderful as a base for salads, spinach pairs nicely with strong flavors like raspberry vinaigrette, goat cheese and chopped nuts. For more traditional recipes, there are few dishes that beat a nice spinach and artichoke dip appetizer or a side dish of creamed spinach. But spinach is a super versatile plant and works well in so many other recipes too, such as smoothies, stir fries, soups and pasta.
But beyond its utility in the kitchen, if you love gardening or you’re just starting out, there are few plants as simple to grow and forgiving as spinach. For beginner’s who feel overwhelmed by higher maintenance plants, like melons, getting your hands dirty with a spinach crop is a great place to start!
Growing your own spinach from seeds
Spinach is a cold-season vegetable, meaning that it grows best in the cooler weather of spring and autumn than it does in summer. In fact, spinach tends to bolt during the summer heat, so it is often best to not try growing spinach during the hottest part of the year, specifically July and August.
Prepping your garden beds
Like any plant, spinach needs the right combination of soil, sunlight and water to thrive. So, before planting anything, you’re going to want to make sure your garden or containers are properly prepared.
Location
When selecting a great place for your spinach, choose an area that receives lots of bright sunlight -- at least six to eight hours is best. Because spinach does bolt when temperatures rise, it can also be beneficial to select a location that receives some partial afternoon shade as this can slow the bolting process.
Soil
Most plants require rich, well-draining soil to thrive, and spinach is no exception. Before planting, it’s always a good idea to test your soil before planting anything to see if your soil is lacking specific nutrients or is heavy in clay, sand or other materials that may affect soil structure.
Even if you don’t want to test your soil, you can never go wrong with amending your beds with a bit of compost or aged manure. Before planting, add 1 to 3” of organic compost or aged manure to your garden or containers and mix it in well into the top few inches of soil. Compost is not only jam-packed with nutrients, but it also helps improve soil structure and drainage, which will benefit your spinach in the long run.
Containers
While many gardeners choose to plant spinach in in-ground gardens or raised beds, if you’re working with a small balcony or patio space, you can still grow lots of fresh spinach. But, to do so, you want to choose the best planters to grow in.
While spinach can grow in different planter materials, such as galvanized steel drums or plastic pots, terracotta planters or fabric grow bags often work best as they are more breathable and less likely to get waterlogged.
As far as container sizes go, look for pots that are at least 6 to 8” deep and as wide as possible. A good planter size of about 18” diameter can hold three to four spinach plants. Or, if you really want to save some space, look for vertical planters, like the raised garden bed by Safstar or the Benarr wall planter system.
Starting your spinach seeds
Spinach is frost-tolerant, so you can begin planting your crop well before your last frost date. In general, spinach does best when directly sown outdoors; however, you can start it indoors too to get a head start on your harvest.
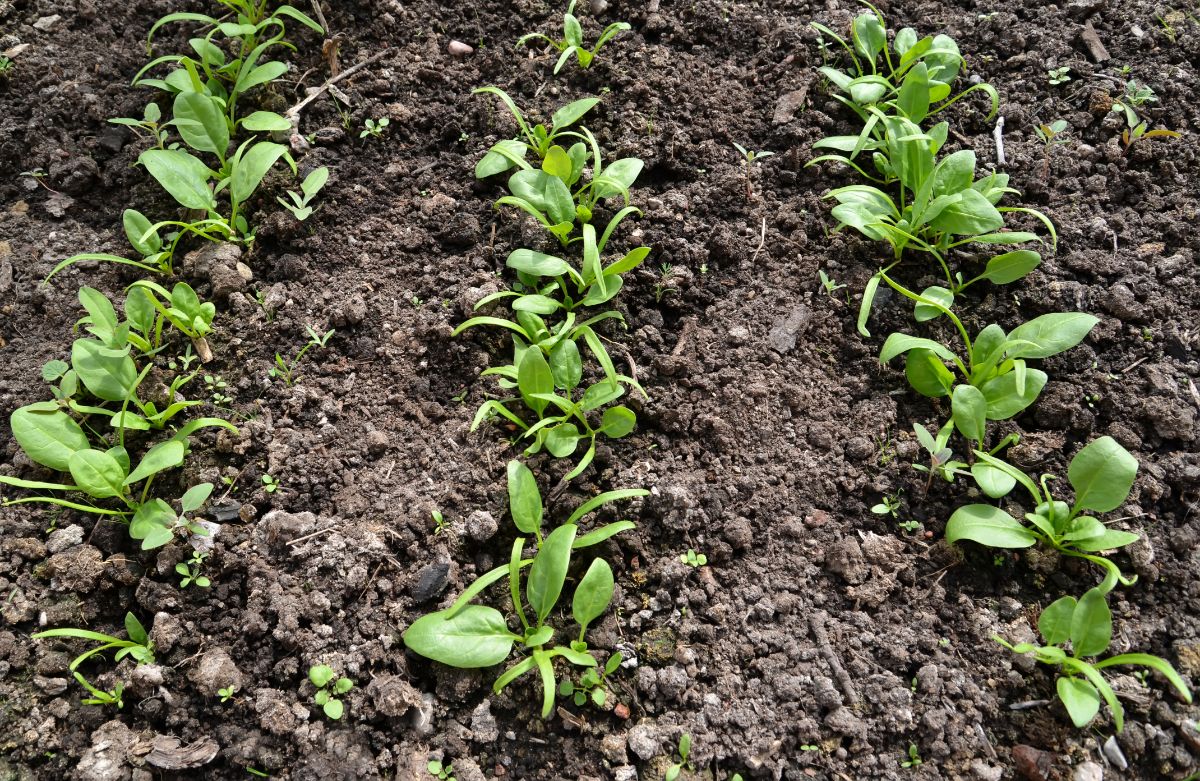
For direct sow, plant your spinach seeds outdoors as soon as the soil is workable, which can be as much as four to six weeks before your last frost date. Plant your spinach in rows spaced 10” apart and sow approximately ten seeds per foot, covering your seeds with ½” of soil.
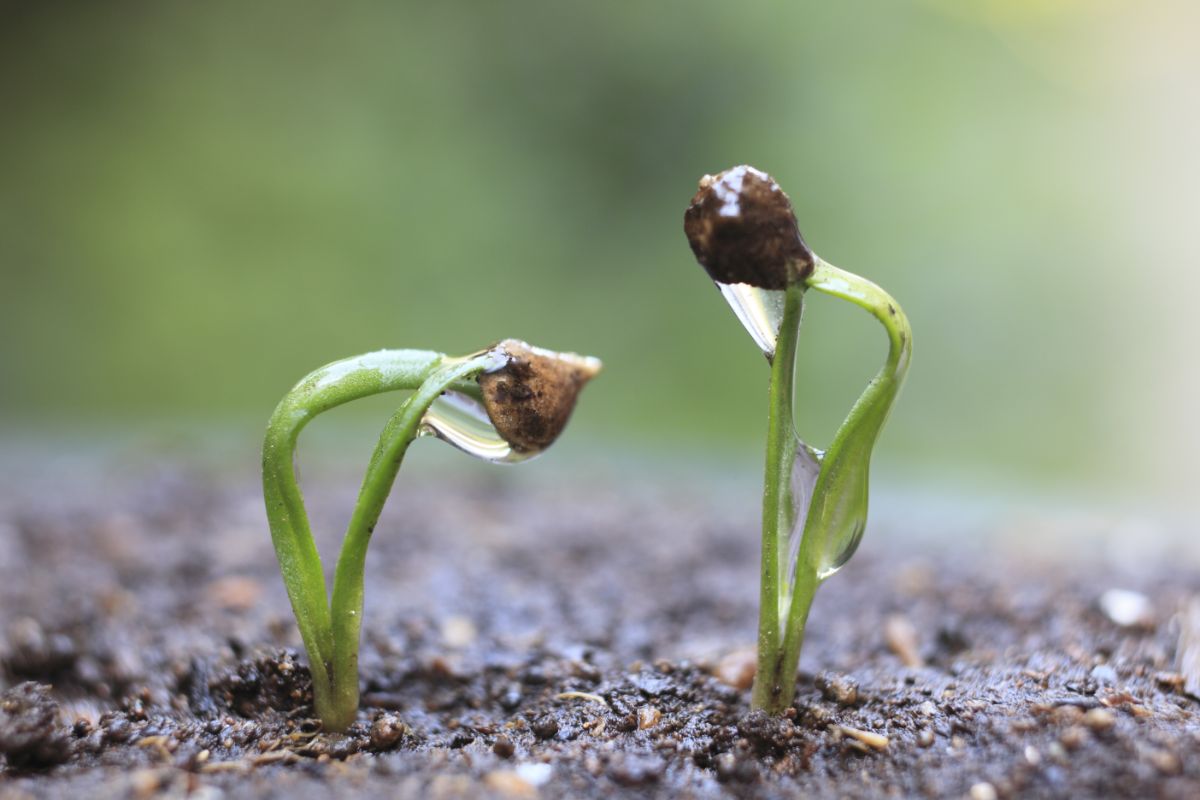
Keep your seeds well-watered until they germinate, which usually takes about five days, but can take longer in cooler temperatures or if you’re growing certain spinach varieties. Once your seedlings develop their first true leaves, thin your spinach plants out so each plant is spaced about 6” from its neighbor.
You can also start spinach indoors too, which is especially useful if you want to grow an autumn crop of spinach but don’t want to expose tender young plants to the heat of summer. For spring plantings, start your spinach plants inside about six weeks before your last frost date, while seeds for autumn plantings can be started in late summer, around the end of July.
To plant, simply sow your spinach seeds in small pots or seed starting trays, adding two seeds per pot or planting cell. After true leaves form, thin you plants out so that each pot has a single spinach plant.
Transplanting your seedlings
Once your spinach plants have their true leaves and are about 2 to 3” tall, they’re ready to transplant outdoors, which can be done as early as four weeks before your last frost date.
To avoid transplant shock, it’s always best to harden off your plants prior to transplanting as the rapid change in sunlight and temperatures can be harmful to tender seedlings.
To harden off your spinach plants, simply place your plants outdoors in dappled sunlight for about two hours and then bring them back inside. Over the next week, continue this procedure, gradually increasing the amount of time your plants remain outside and the amount of light they are exposed to. After about a week, your spinach plants should be able to tolerate at least eight hours of full sunlight. When this occurs, you know your spinach plants are ready for transplanting.
To transplant, plant your spinach in your garden, spacing each plant approximately 6” apart. For container planting, add one or more plants per pot, depending on your pot size. For an extra nutrient boost, and to help your plant settle in more quickly, try adding a handful of aged manure, compost or worm castings to your planting hole before sowing your plant.
How to successfully grow spinach in your garden

The hardest part about growing spinach is prepping your garden and getting your seeds planted; however, that doesn’t mean you can forget about your spinach plants once you’ve gotten them in the ground. Throughout the growing season, spinach, like other plants, needs regular care and maintenance to ensure it produces a nice, healthy crop of spinach leaves.
Watering
Spinach enjoys regular and consistent watering and will wilt if its soil gets too parched. For optimal growth, try to provide your plants with 1 to 1 ½” of water per week, or simply water them when the top 1 to 2” of soil is dry to the touch.
To prevent issues like mildew, water your spinach plants at their bases and keep leaves as dry as possible. If you can, consider installing a dripline system, which will do wonders for spinach and other garden plants and can streamline the watering process.
Frequent watering, particularly in the heat of summer, can also help spinach resist the temptation to bolt. For this reason, giving your spinach small daily drinks of water, rather than a deep weekly drench, is usually recommended.
Mulching your spinach plants with a few inches of organic mulch, such as compost, salt marsh hay or chopped leaves, can slow evaporation rates and reduce your plants’ watering needs too.
Fertilizing
To support its leafy growth and rich, green foliage, spinach does best when fed regularly with a balanced or nitrogen-rich fertilizer. If possible, look for organic liquid or water-soluble fertilizers and apply every two to three weeks throughout the growing season.
General maintenance
Throughout the season, keep your spinach beds well-weeded and check your plants from time to time for any signs of pest invasion. Weeding your beds helps ensure your plants have less competition for valuable nutrients in the soil and works to increase air flow, which can help prevent issues like mildew. Moreover, checking your plants regularly for signs of pests is an important part of general garden care and can guarantee that pest issues never get out of hand.
Beyond weeding and pest control, spinach does need to be watched for signs of bolting. When your plants begin to bolt, pull them out of your garden or use their leaves immediately as bolting will change the flavor of your spinach and reduce yield significantly. To slow down the bolting process, try moving potted plants into afternoon shade, or companion plant your spinach with taller plants that may provide additional protection from the sun.
To lengthen your spinach harvest, you can also try succession planting seeds every two weeks throughout spring, and don’t forget to plant more seeds in late summer for an autumn spinach harvest.
Harvesting your spinach crop

Spinach is ready to harvest when leaves are a usable size, which means you can harvest full-grown spinach plants, or you can pick them when they’re still babies for more tender leaves. Baby spinach leaves are ready to harvest when they are about three to five weeks old, while spinach plants take about 45 days to fully mature. You’ll know your spinach leaves are mature when they begin to form a rosette-like shape towards the center of the plant.
When you’re ready to harvest your plants, get a clean, sharp pair of garden shears or a pairing knife and get to work. If you just want a few leaves, snip off the outer leaves of your plant and only gather what you need, allowing your plant to continue to grow fresh leaves from its center. If, however, you want to harvest an entire plant, just cut your spinach off at the base and the remaining plant will likely regrow more leaves for a subsequent harvest.
How to store spinach
The nutrient content of spinach begins to rapidly decline after harvesting, so it’s always best just to snip off as much as you plan on using right away. That said, if you want to store spinach in your fridge, you certainly can.
To store spinach in your refrigerator, first pick off any brown or mushy leaves, and then wash and dry your spinach. Next, wrap your leaves up in a paper towel, place it in a Ziploc baggy or air-tight container and pop it into your crisper drawer. Stored in this manner, spinach should last for about seven to ten days.
Freezing

If you’ve produced more spinach that you can eat quickly, you can always freeze it too! Frozen spinach is super easy to use; just grab what you need from your freezer and stir it into soups and sautés for a quick flavor boost.
Before freezing your spinach, you’ll want to blanch it first, which helps lock in texture, color and flavor and keeps your frozen spinach from turning an unappealing brown. To blanch, simply add your spinach to a pot of boiling water and allow it to cook for two minutes.
After blanching, strain your spinach and press as much water out of it as you can. Next, place your cooked spinach into muffin tins or simply spread it out evenly on a baking sheet and place it in the freezer for an hour or two. This process, known as “flash freezing,” will help ensure your spinach doesn’t form a solid lump in the freezer which will be difficult to use.
Once your spinach is nice and frozen, remove it from the freezer and bag it up in Ziploc bags, removing as much air as possible from the bags to prevent freezer burn. A vacuum sealer can also be used for this and can make this process easier.
Finally, place your sealed spinach in your freezer, where it should remain fresh for up to six months.
When you’re ready to use your spinach, just select as much as you need and stir it into soups or other dishes. There is no reason to defrost your frozen spinach before use.
Common pests and problems

Spinach’s great taste and tender leaves make it a popular lure for many garden pests. However, though there are plenty of critters that would love to munch on your leafy greens, you’re more likely to encounter problems from these common spinach pests and pathogens:
- Downy mildew
Downy mildew presents as irregular patches of yellowing on spinach leaves. As the infection progresses, those patches turn brown, making for an unappetizing handful of spinach come harvest time!
The best defense against downy mildew is to ensure it doesn’t occur in your garden in the first place by watering your spinach plants at the soil line and providing adequate spacing between plants for proper air flow.
If your plants do get struck with a bad case of mildew, try spraying them down with a neem oil spray or try out an organic fungicide spray instead.
- Slugs and snails
Evidence that slugs and snails have been munching on your spinach is usually pretty obvious. If you don’t see the snails themselves, look out for silvery trails of slime, ragged holes in your spinach leaves or leaves and stems that have been chewed down to nubs.
To prevent slugs and snails from ravaging your spinach crop, try placing “slug pubs” full of beer or old orange juice around your plants. For another option, attract birds to your yard by installing some bird houses, feeders and a bird bath or two. They’ll make short work of your slug problem!
- Flea beetles
Flea beetles are tiny black beetles that, as their name suggests, are known for their habit of jumping quite dramatically when disturbed. Signs of flea beetle infestations include tiny holes in spinach leaves, often with a characteristic brown edge around the hole margins.
Companion planting with alliums (garlic, chives, leeks and onions), marigolds and dill works well for controlling flea beetle populations. For another option, try dusting your plants with kaolin clay or covering them with floating row covers for added protection.
- Cutworms
Cutworms are small caterpillars of moths and live in the soil where they enjoy munching on plant roots and tender seedling stems. Often, cutworms will saw plants off right at the soil line with their powerful mandibles so, if you find your spinach plants cut off at the stems, cutworms are likely to blame.
BT Thuricide, which is made from a naturally occurring soil-dwelling bacteria, works well against cutworms and is approved for use in organic gardens. To prevent cutworms at the outset of the season, try planting with thyme, tansy and sage too.
Top spinach varieties to try

Seed catalogs are bursting with lots of fun spinach varieties, and spinach-like plants, to grow in your home garden. For the purposes of this article, we can’t cover every one, but we have selected some of our all-time favorites to share. Maybe you’ll find your new favorite green here too!
Best cold-hardy spinach for early plantings
- Bloomsdale
- Great of winter (Gigante d’inverno)
- Auroch
Best bolt-resistant spinach varieties
- Oceanside
- Bloomsdale longstanding
- Catalina
Best spinach to try for unusual leaves
- Beaujolais (featuring purpleish arrow-shaped leaves and magenta stems)
- Galilee (arrow-shaped leaves)
- Chinese multi-color spinach (not a true spinach, boasts red and green leaves)
Best spinach-like greens to try for something different
- New Zealand spinach
- Purple orache
- Tatsoi
- Malabar spinach
- Claytonia
Conclusion
Once, spinach might have seemed like a boring green, but that’s not the case anymore. This nutrient-packed veggie works well in so many dishes, is great for beginning and seasoned gardeners alike and, if you find green spinach bland, there are plenty of odd-ball spinach varieties to try instead. So, this season, when you’re planning your garden, why not leave a space for some spinach? You won’t regret it!


Leave a Reply