Dahlias can be left in the ground over winter, but depending on where you live, this might not be an option. For me, cold winters coupled with clay soil means it can be a risk to leave them.
Instead, I dig them up and store them over winter before planting them again in the spring. Over years of doing this, I have crafted my own method that yields excellent results. Let me show you how I do it.
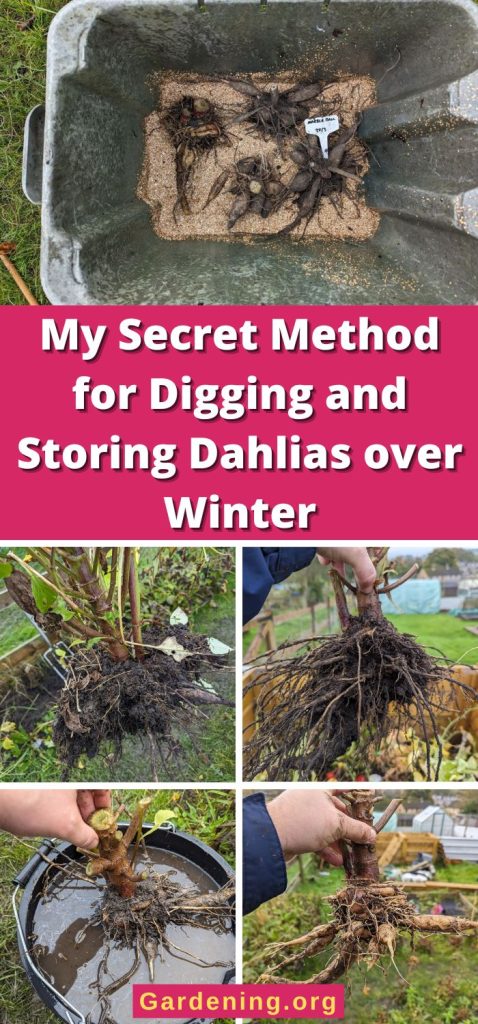
Digging Dahlia Tubers
The first step is obviously digging your Dahlia tubers up. This isn't too tricky, but there are a few critical steps to take to minimize the risk of damaging your tubers.
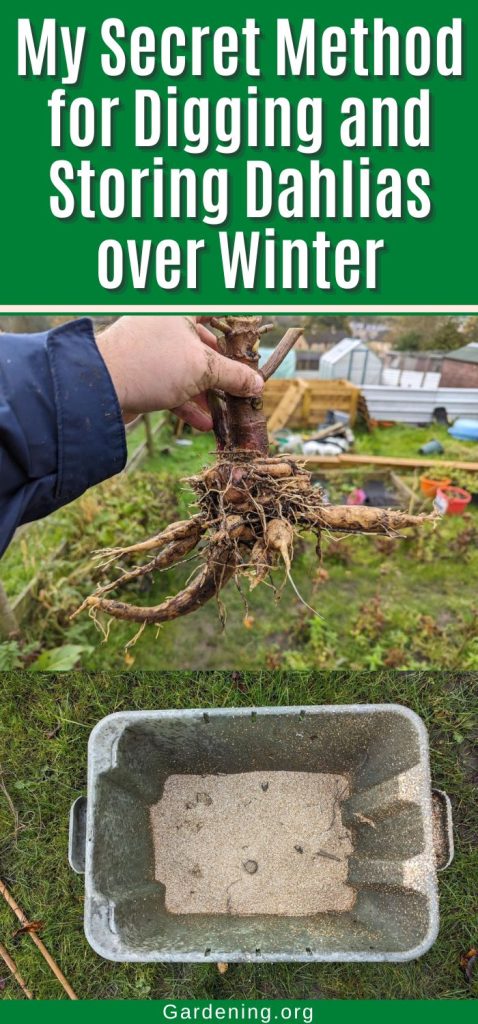
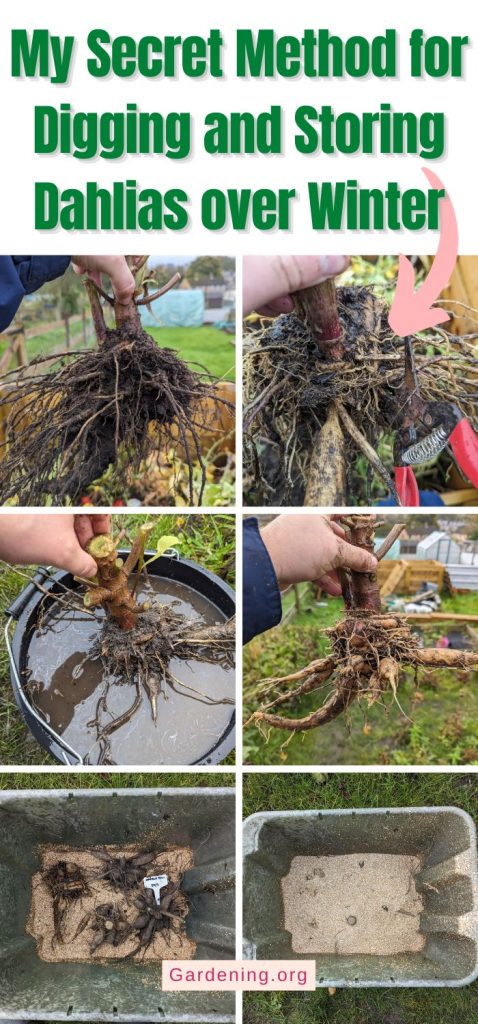
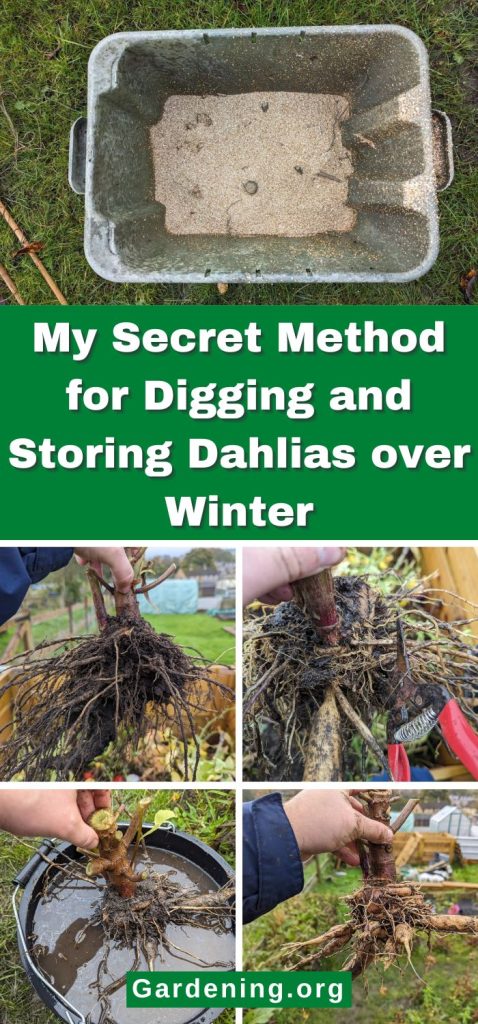
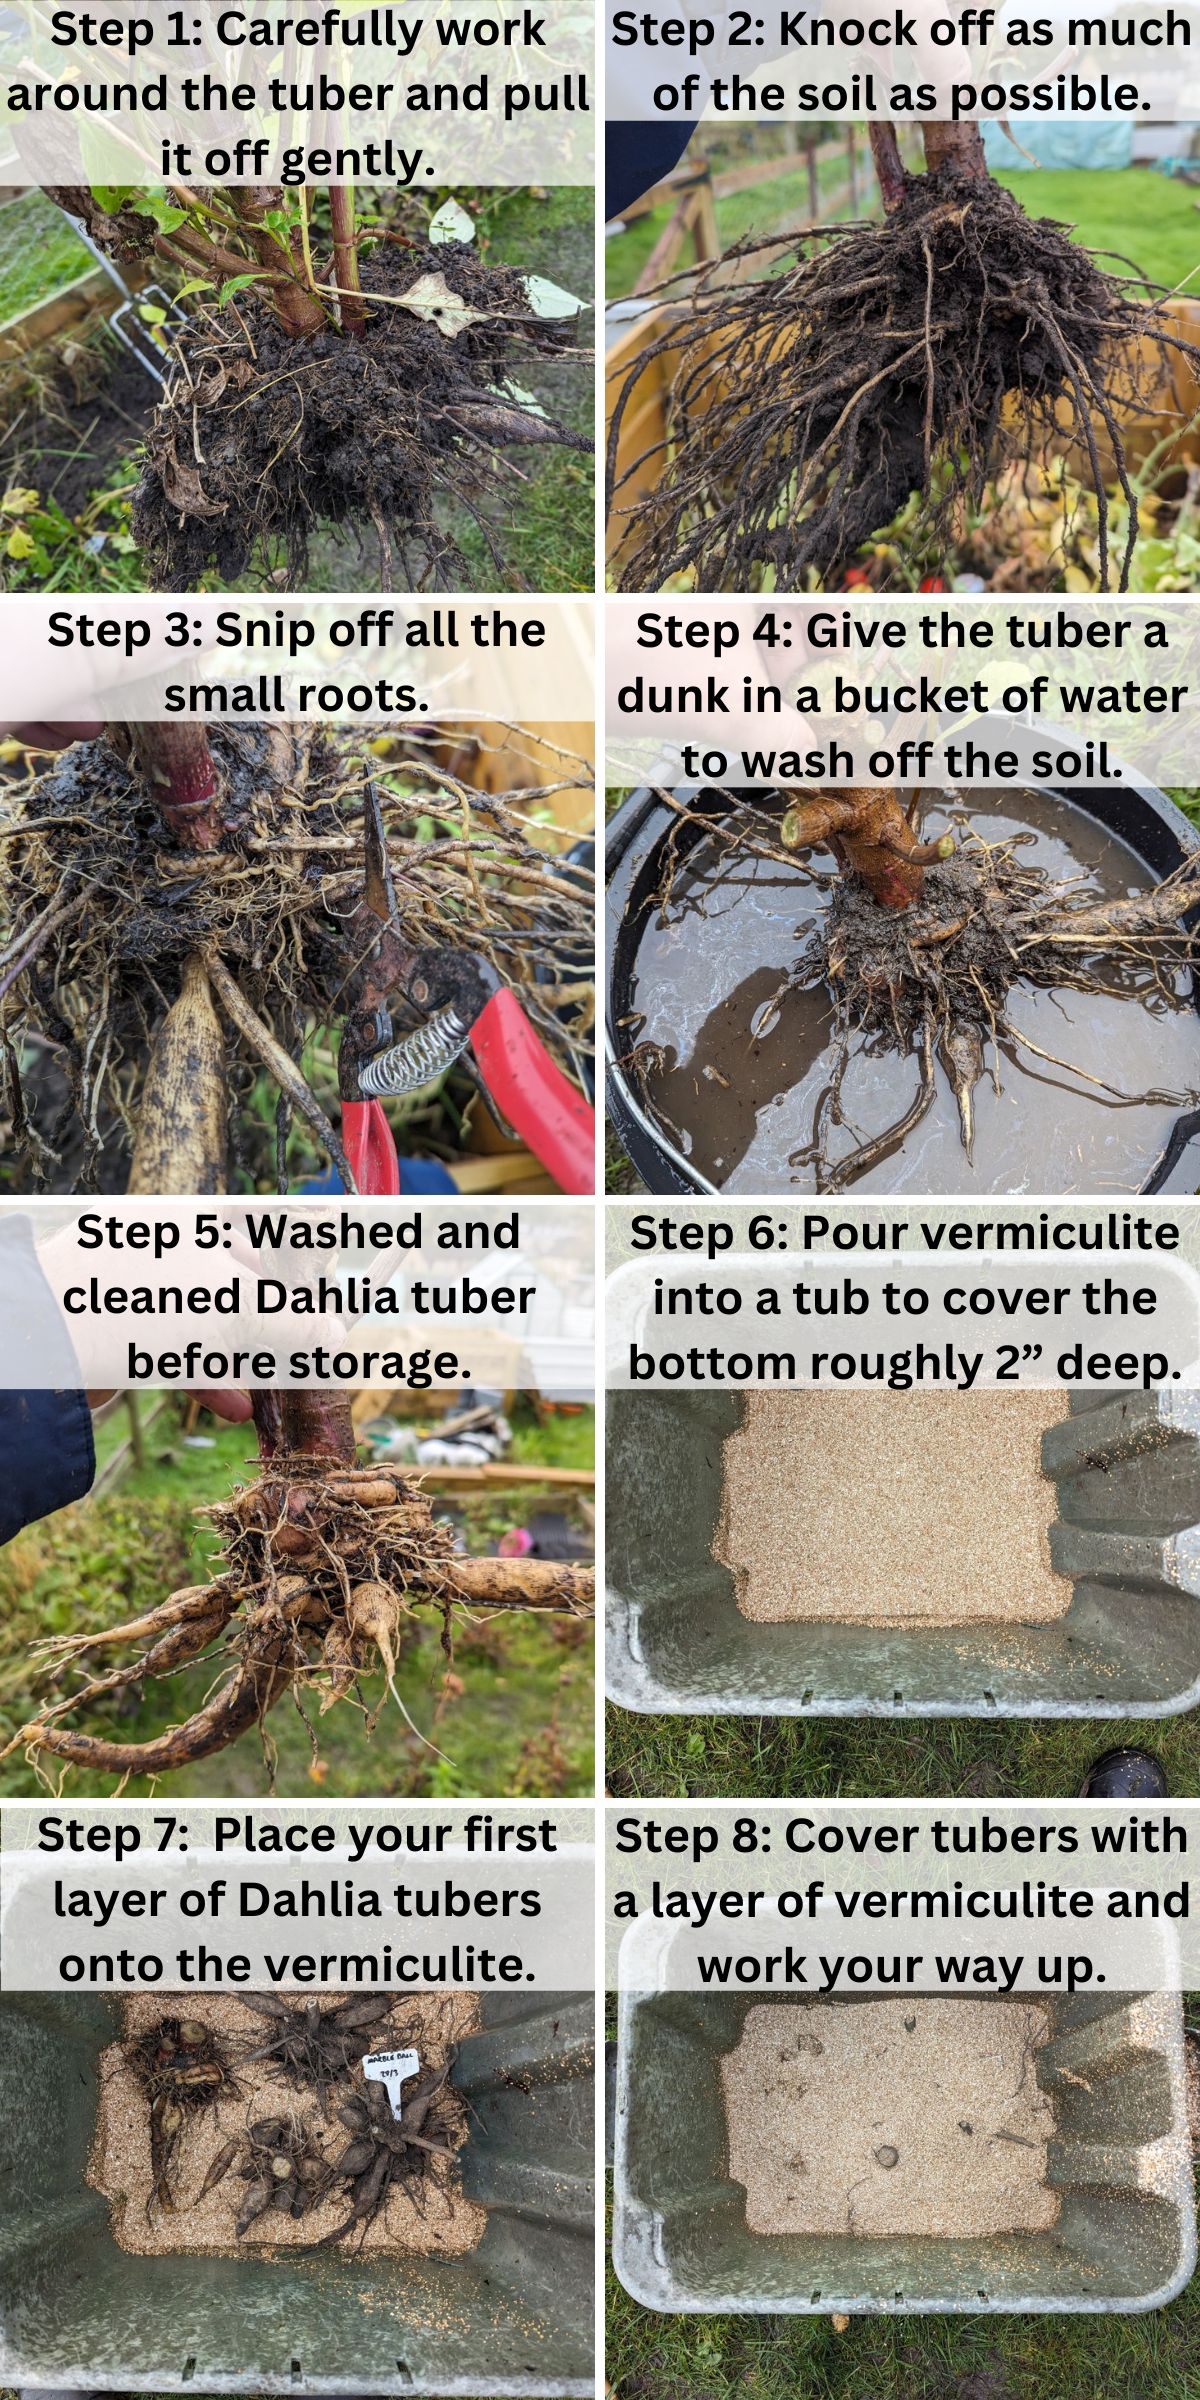
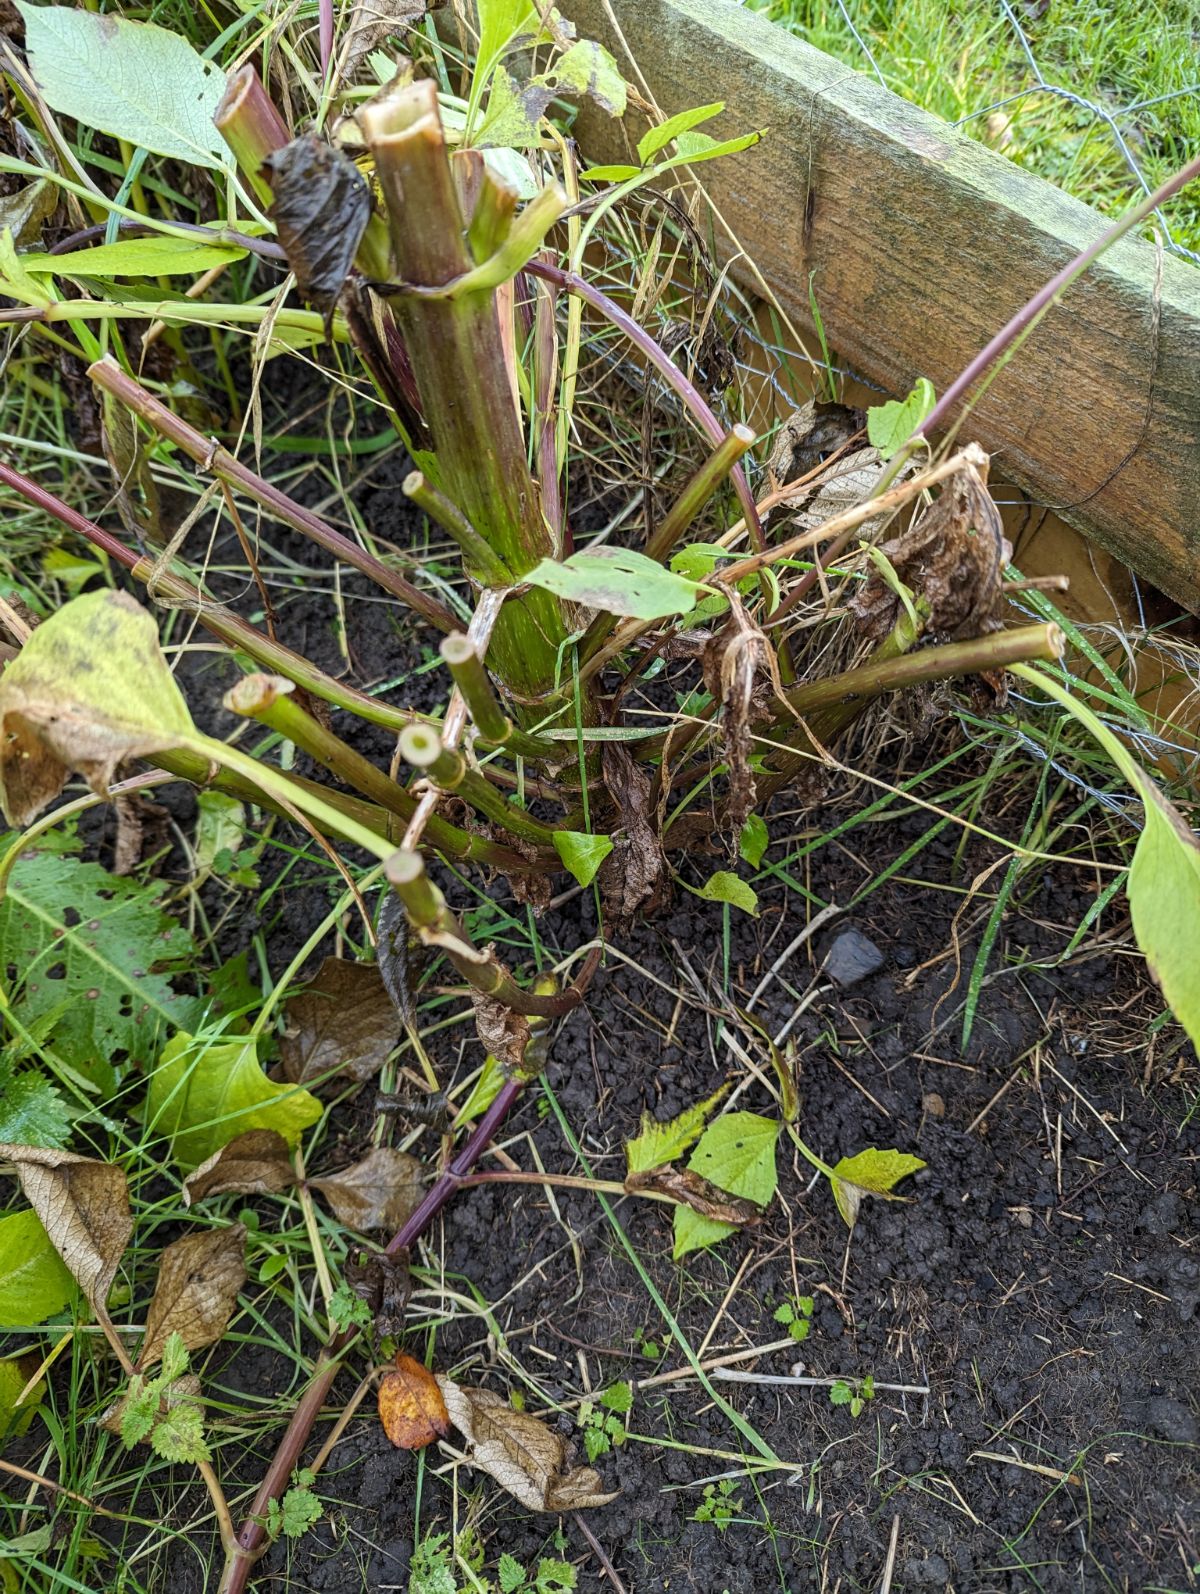
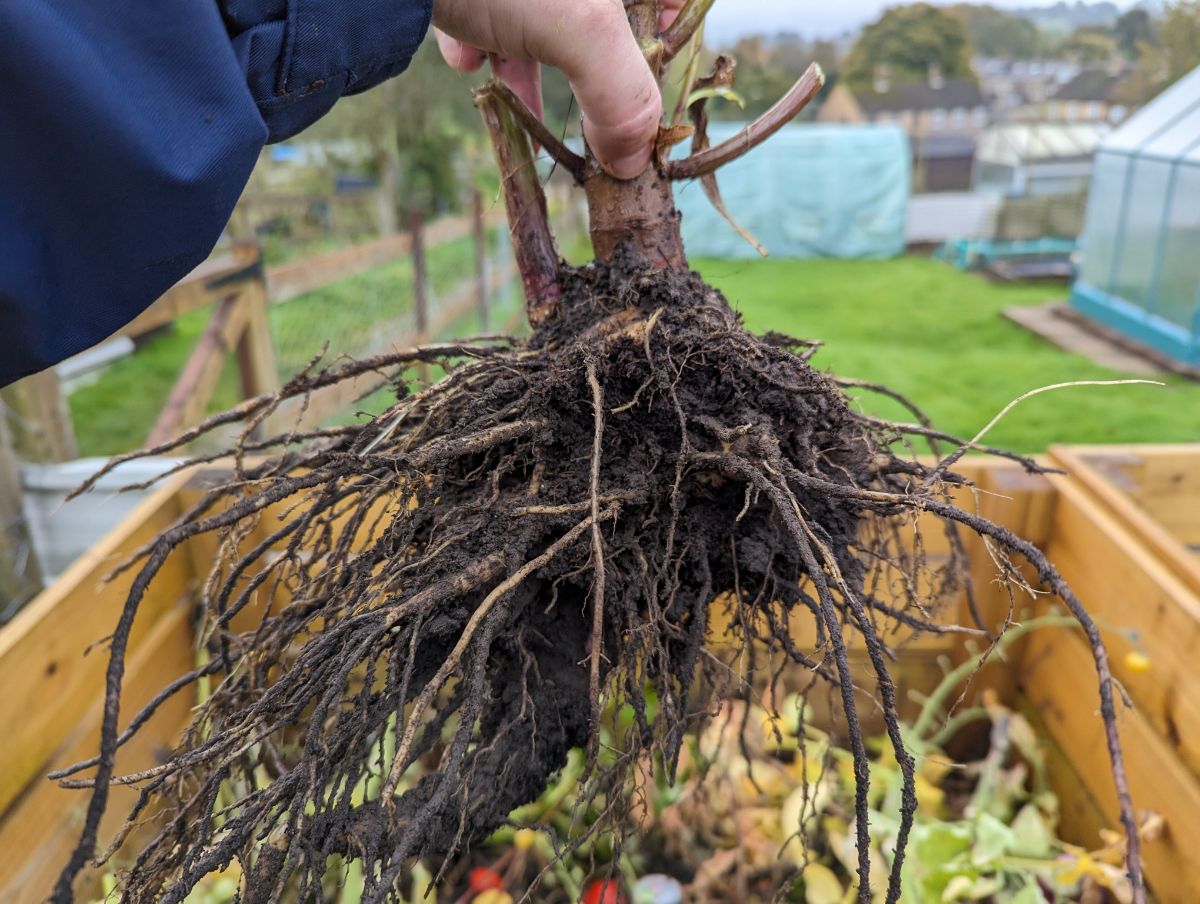
You want to start by cutting all of the stems back, leaving a good 7-10” inches of main stalk. This makes it much easier to see what is happening but leaves enough of the stem for you to hold onto when pulling the tuber up.
Now, you want to take a garden fork and start gently lifting the tuber. Start a distance away from the tuber so you don't skewer it with your fork prongs.
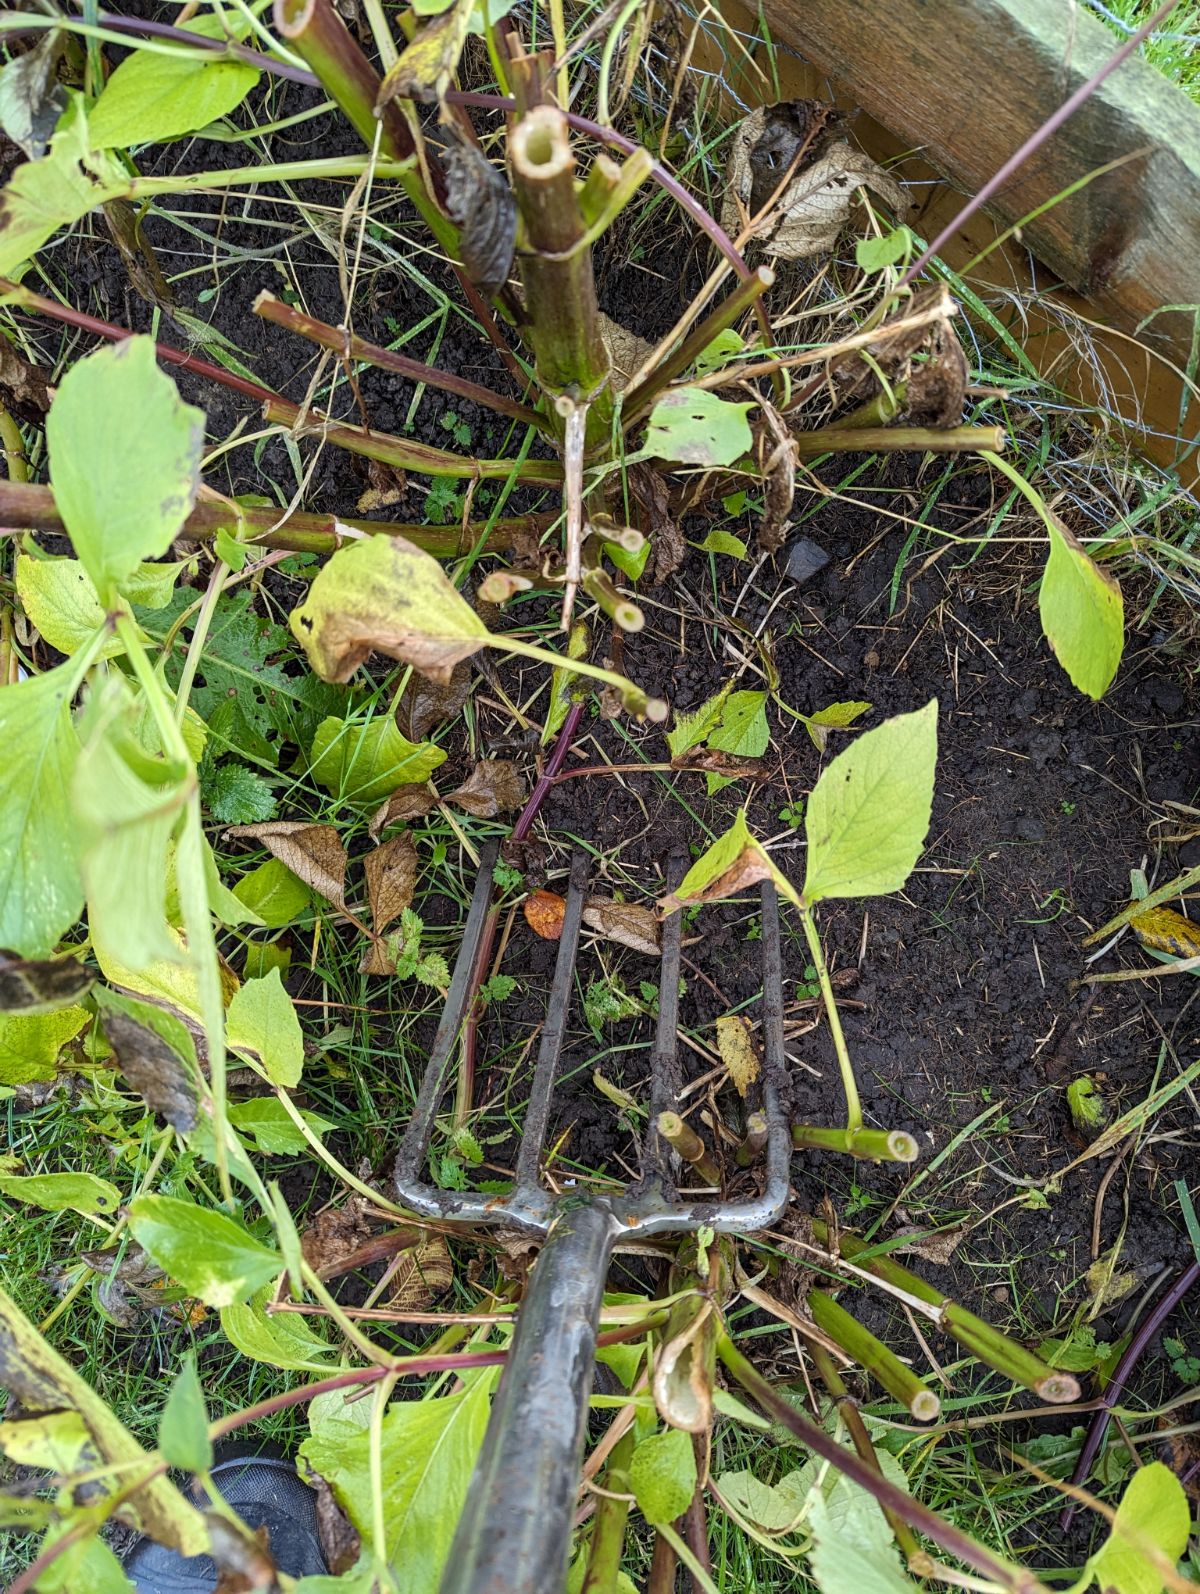
Work your way around the outside of the tuber, gently lifting. If you are too aggressive here, you will find that man of the tubers will snap and break.
You will be able to feel when the tuber is ready to be pulled, as there will be little resistance when trying to lift it. It is at this point that you can pick it up by the main stem.
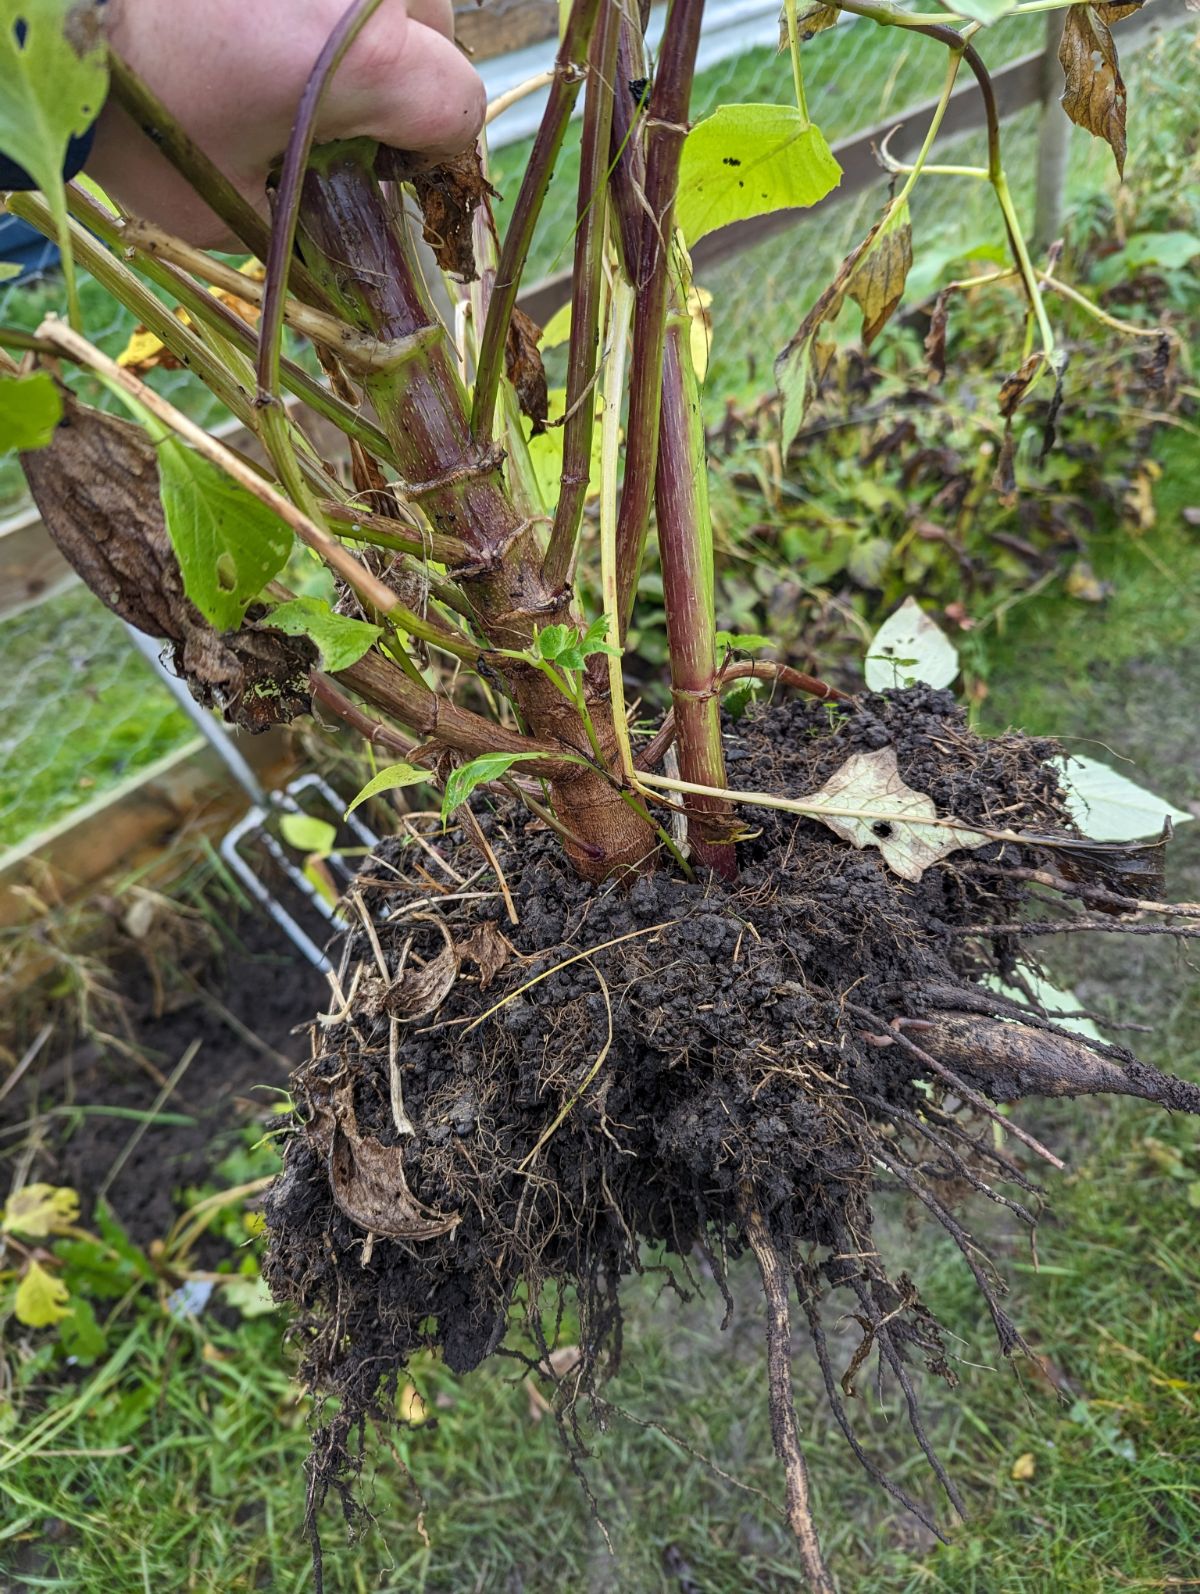
Depending on your soil type, you might have a lot of soil around the tubers (like me) or very little. You want to knock off as much of this soil as possible.
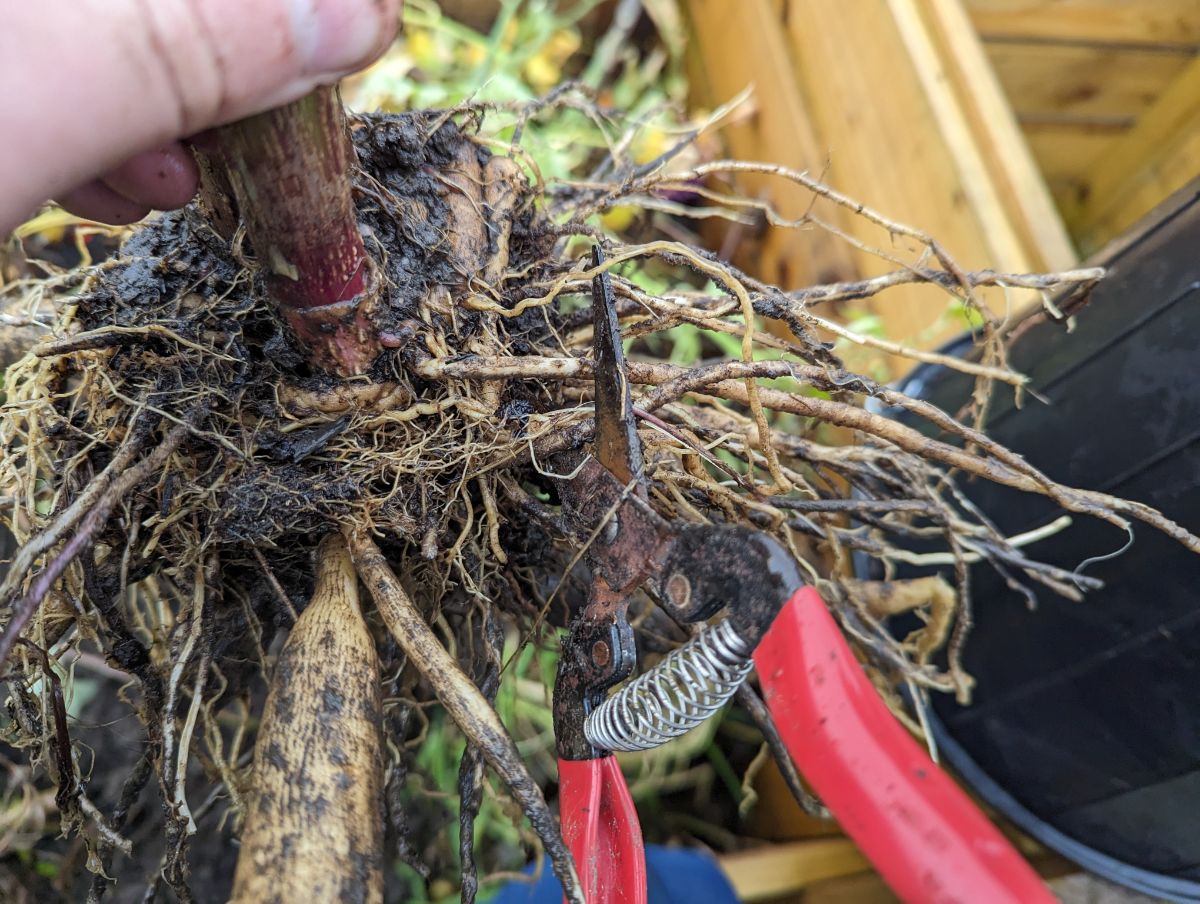
Once you have removed a lot of the soil, you get your first proper look at the tuber. As you can see on mine, there are a lot of small roots; I will snip all of these off as they will rot in storage.
I then like to give the tuber a dunk in a bucket of water to wash more of the soil off. I don't aim for perfectly clean, as that would take too long, but I want to remove as much as possible.
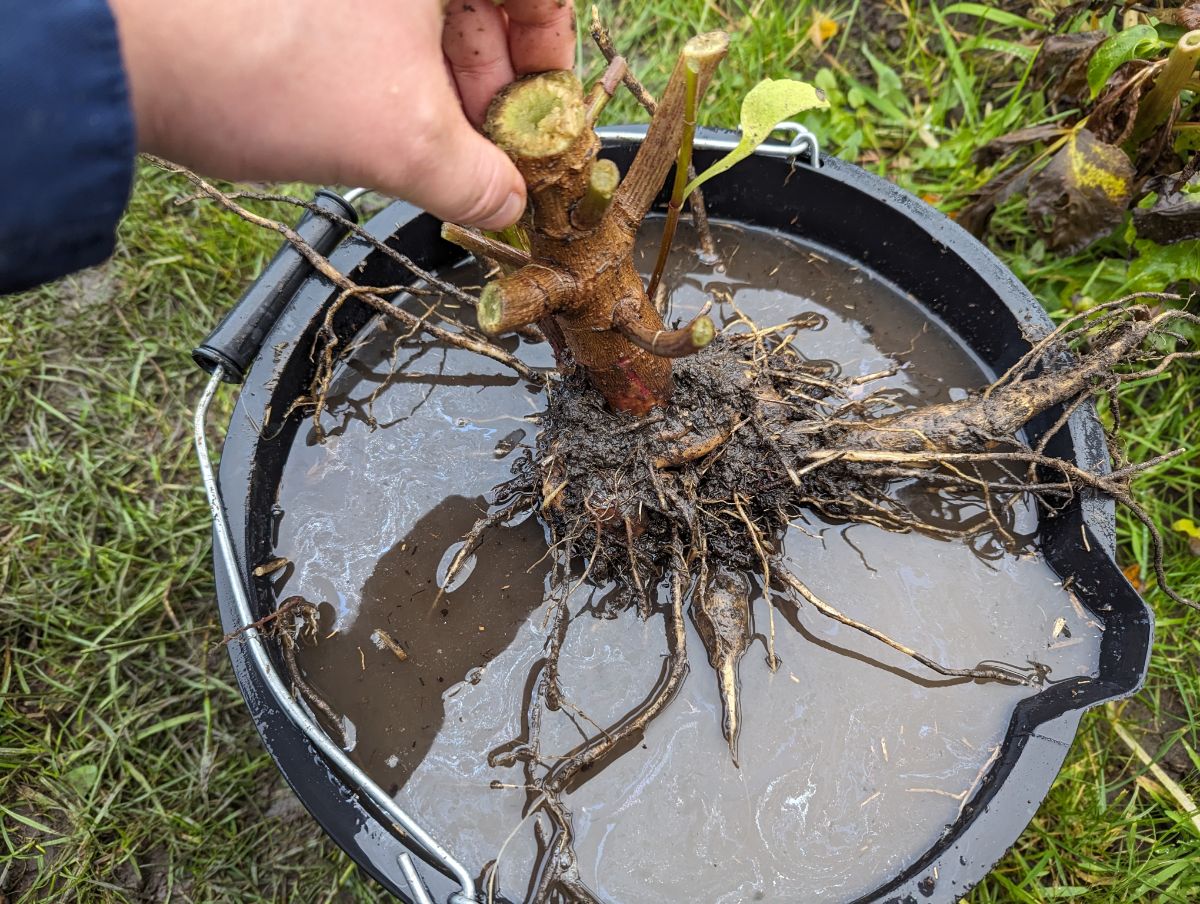
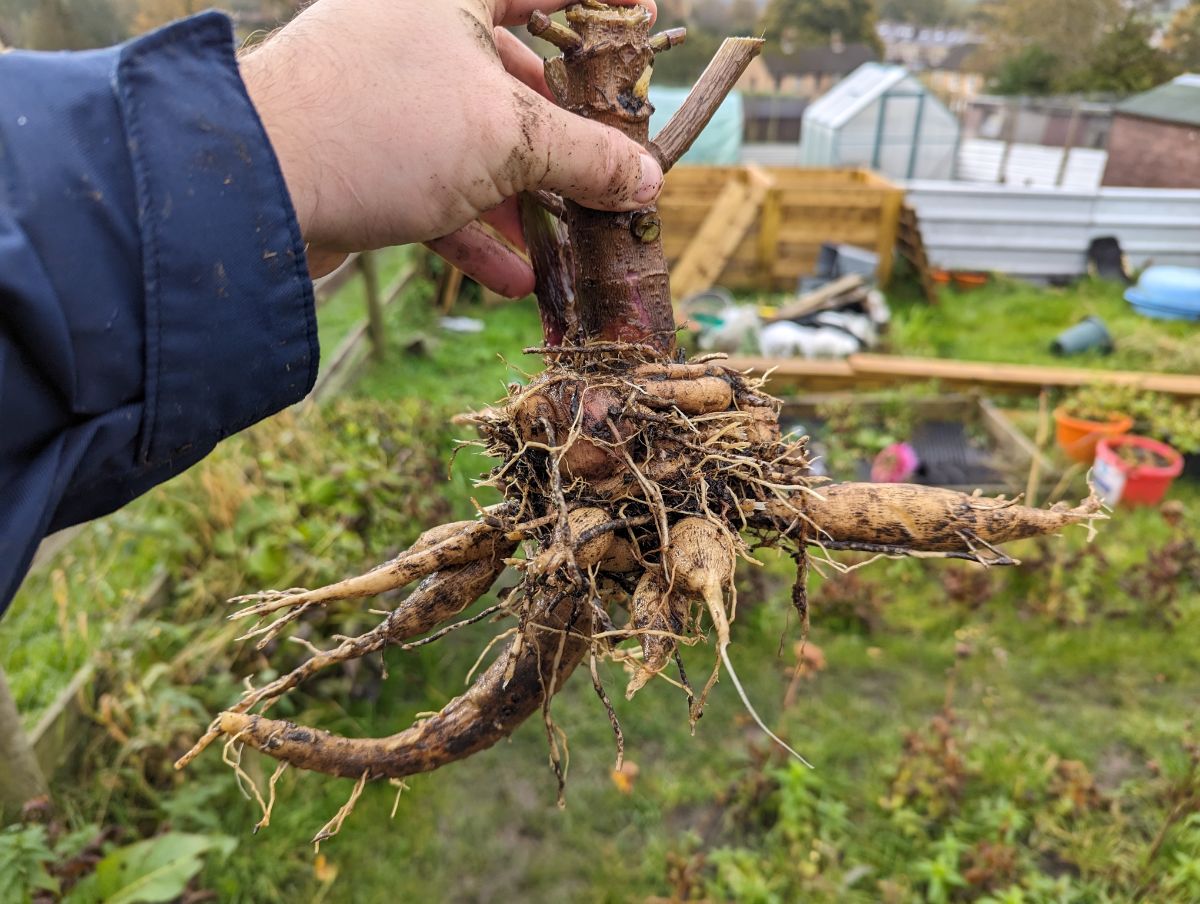
The washed and cleaned tuber below.
If you find any damaged tubers, then you also want to remove them at this point. They will rot in storage, and this will spread to the rest of the tuber and maybe even other tubers you are storing with them!
Storing The Tubers
Now, we can move on to the over-winter storage. The first thing you need to do is allow your tubers a little time to dry.
I leave them in the greenhouse for roughly 24 hours. You dont want to leave them much longer than this as they will dry out too much, and you risk doing more harm than good.
Once dried, you need to select your storage method. Everyone has different ideas, but this is what has worked really well for me.
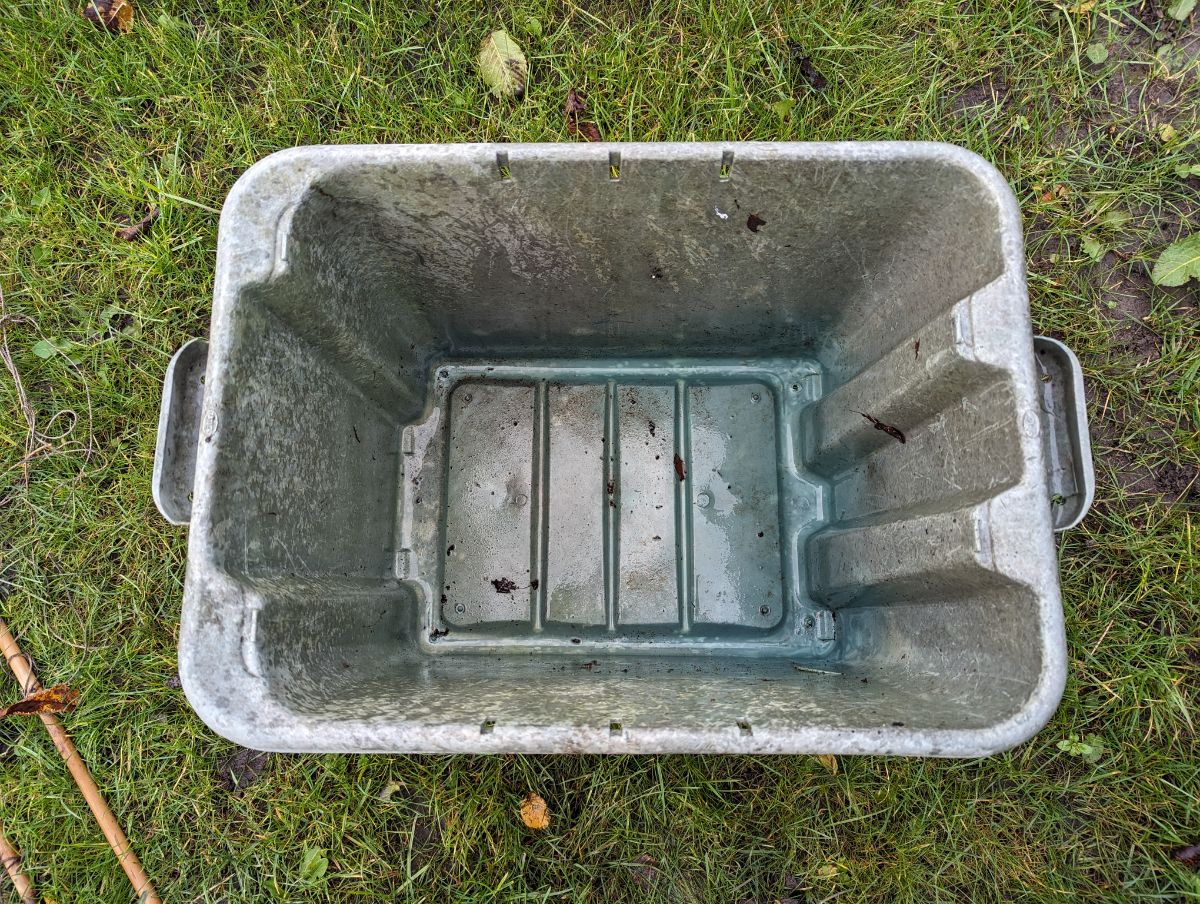
I use a large plastic tub and my secret ingredient - Vermiculite.
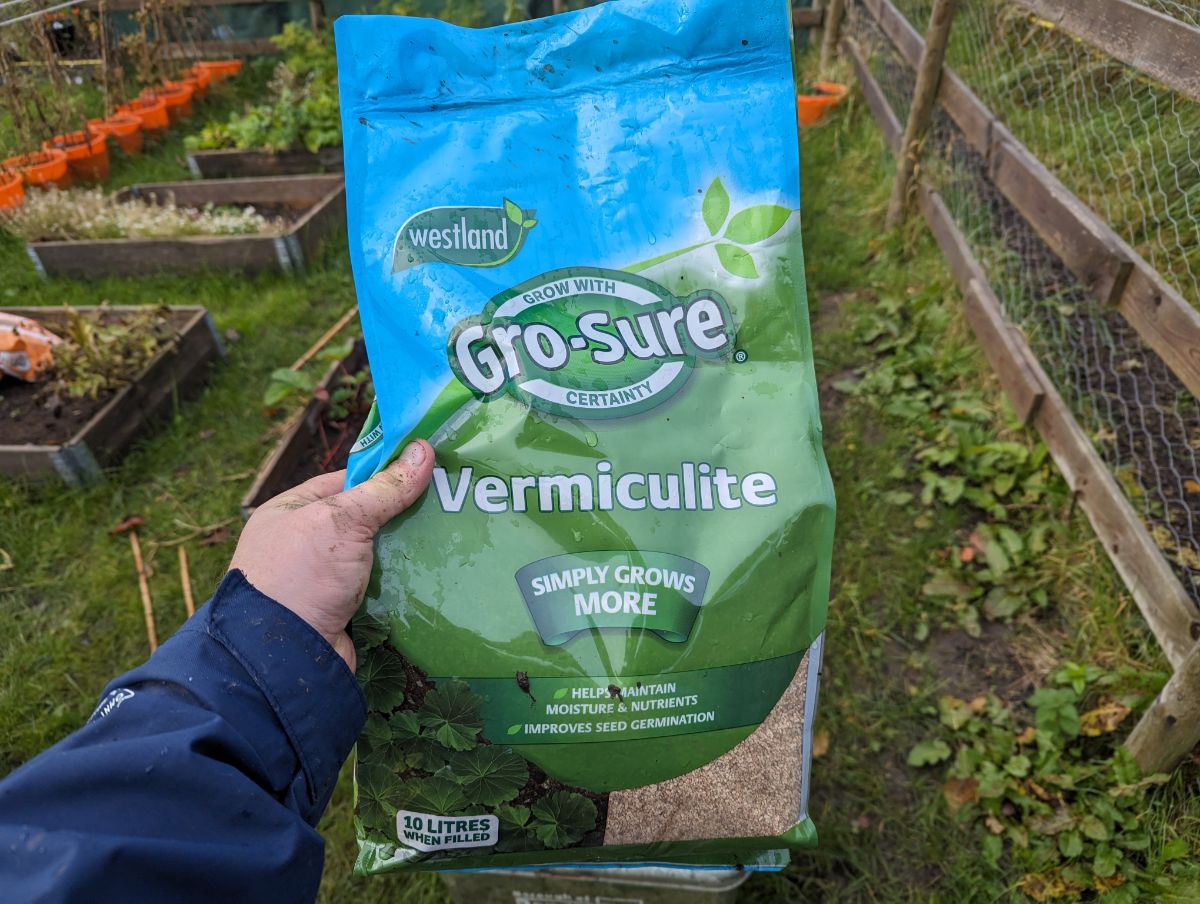
Pour some vermiculite into your tub to cover the bottom roughly 2” deep.
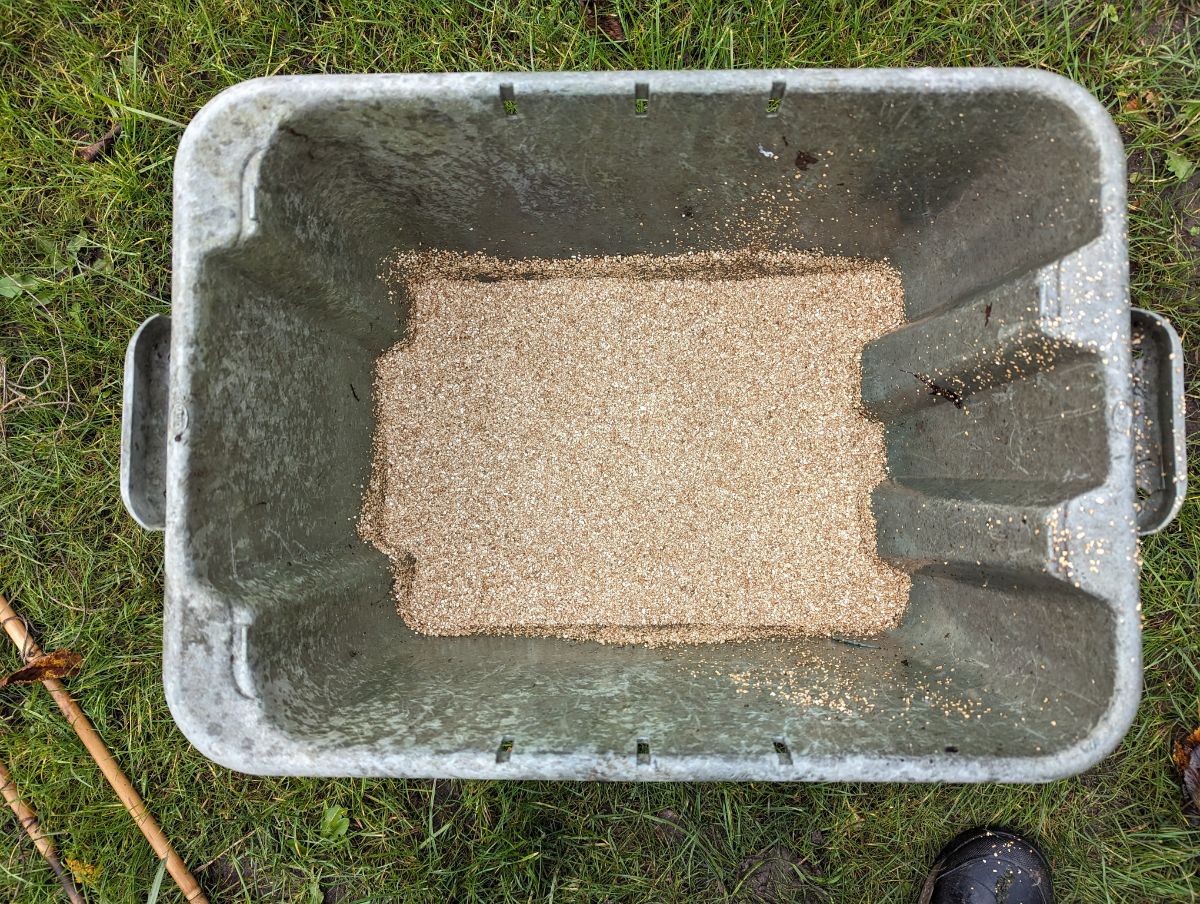
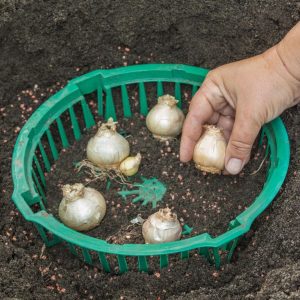
Then, we want to place our first layer of Dahlia tubers onto the vermiculite.
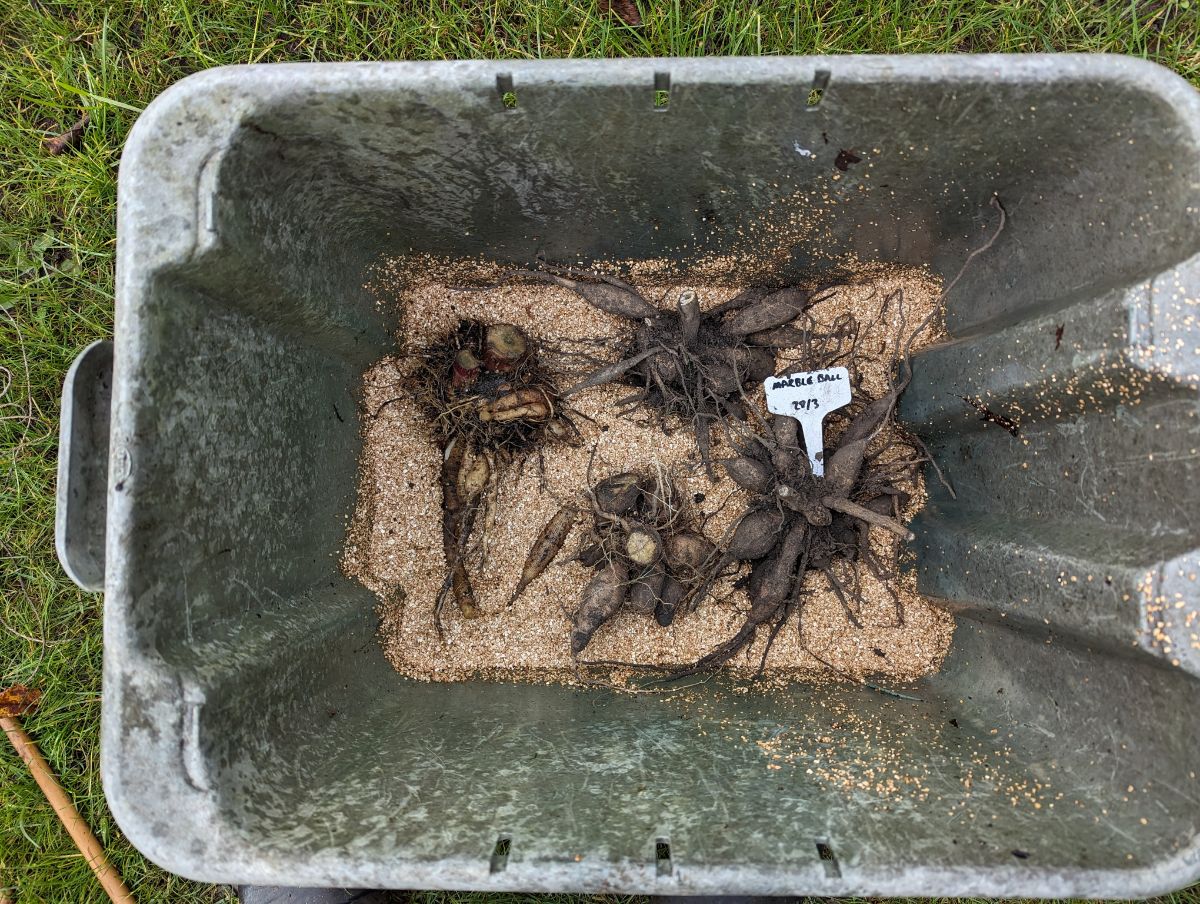
Now, you want to completely cover these tubers with another layer of vermiculite.
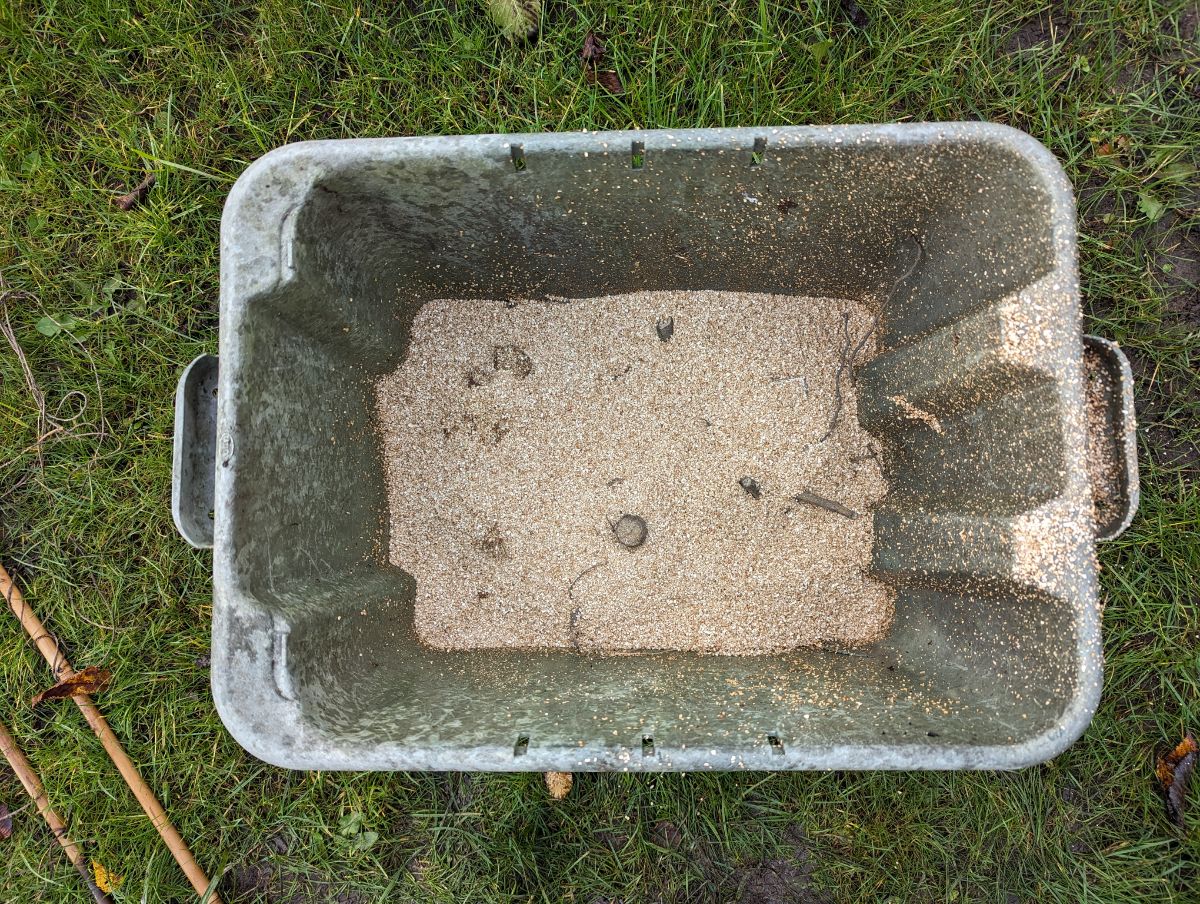
You can then add another layer of tubers and again cover with vermiculite, working your way up to the top.
You might think this is an expensive method, but remember, once you have the vermiculite, you will be able to use it year after year.
I cover the top of the container with a layer of cardboard and store it away for the winter.
You want to store it in a cool, dry spot. It doesn't want to be too hot as this will make your tubers dry out and die, but it must never freeze as this can also kill the tubers.
Every now and again, I will take the lid off the box and have a quick look to see how the tubers are doing. If they are starting to wrinkle, then they are too dry. Give them a quick misting spray with some water.
If any are rotting, then remove them immediately and dispose of them; otherwise, the rot will spread to other otherwise healthy tubers.
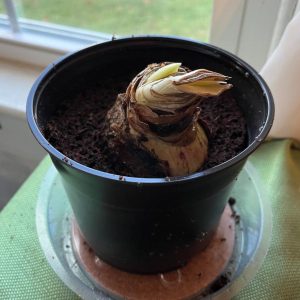
Then, when spring comes around, you can remove the tubers from storage and plant them back in the ground.

Coleen
Do you have to discard the tubers that have broken off?
Mary Ward
If they are whole, then no (they would look something like a strange, short carrot). There's a good chance they have eyes of their own and they can be planted as individual plants in the spring. If they are cut or chopped, then they will rot, so throw those out.
If you're not sure, make a second container with them so that if they do rot, they don't affect the healthy tubers.
Richard A Kunz
Thanks, what about begonia’s?
Mary Ward
Begonias can often be brought in to grow as houseplants for the winter, then move back outside in the spring. Or you can overwinter them in pots when they're dormant, keeping them in an unheated space.
Sara Williams
Hi, I have started work in a private garden and the retiring Head Gardener instructed that the dahlias should be wrapped and stored in newspaper and hung in nets in a shed . Is this a good way to store them as I think they will dry out too much?
Mary Ward
We'll assume that method has worked for the gardener in the past, but that does sound like they would be at risk of overdrying. It's a fine balance, though. If you do it, I'd be generous with the paper wrapping.
Some people also layer in sawdust, shavings, or sand.
Lenora Ayers
Thank you for this helpful tip but I am curious where you store them because we only have a detached unheated garage.
Mary Ward
If your garage doesn't freeze, they can store there but if it does, find the coolest (above freezing) space in your house--a corner of the basement, or unheated closet.
Keith Ramsey
How do you properly split group of tubers for another plant in the dpring
Mary Ward
Each carrot-like tuber is a potential new plant, but you need to look towards the top to see if there are buds or eyes on the root section--kind of like eyes on a potato, but very small. They can be hard to see. Some people say they are easier to see in the spring. YOu would want to make a clean cut near the stem and above the tuber section, making sure you don't cut the eye.
Melanie
I would not dip them in the same bucket of water - this will spread the increasingly rampant viruses dahlias are facing such as mosaic virus and crown gall. Use a hose to wash them.
Mary Ward
You make a good point and spraying with a strong hose is a good way to clean the dirt, too. Keeping in mind that these all came from the same garden bed, though, there probably isn't much disease being introduced that isn't already there.
Keith Ramsey
How do you properly split a group of tubers for another plant in the spring?
Mary Ward
Each carrot-like tuber is a potential new plant, but you need to look towards the top to see if there are buds or eyes on the root section--kind of like eyes on a potato, but very small. They can be hard to see. Some people say they are easier to see in the spring. YOu would want to make a clean cut near the stem and above the tuber section, making sure you don't cut the eye.
JackieJackie Ofner
I live in 8B. Tubers are three years old. I have not lifted them and they came back great. Is there a timeframe when I must dig and separate ???
Mary Ward
You probably live in a location where dahlias are hardy over winter. People in warmer climates do not need to dig their dahlias, as they will survive the coldest average temperatures in that location. Lucky you! That makes life much easier! Dahlias are hardy to USDA zone 8, which is an average low winter temp of 10 to 20 F (-12.2 to -6.7 C). If that is your lowest winter temperature range, you don't have to dig up your dahlias. That said, you'd be amazed to see how large a clutch of tubers can expand over even one growing season, so you might want to dig some to divide and expand your plantings. It's recommended to divide dahlias when you see their production decline, and/or at least every two to three years (though clumps can get large and hard to manage so some growers even in warm locations recommend digging and dividing every year to keep them manageable).