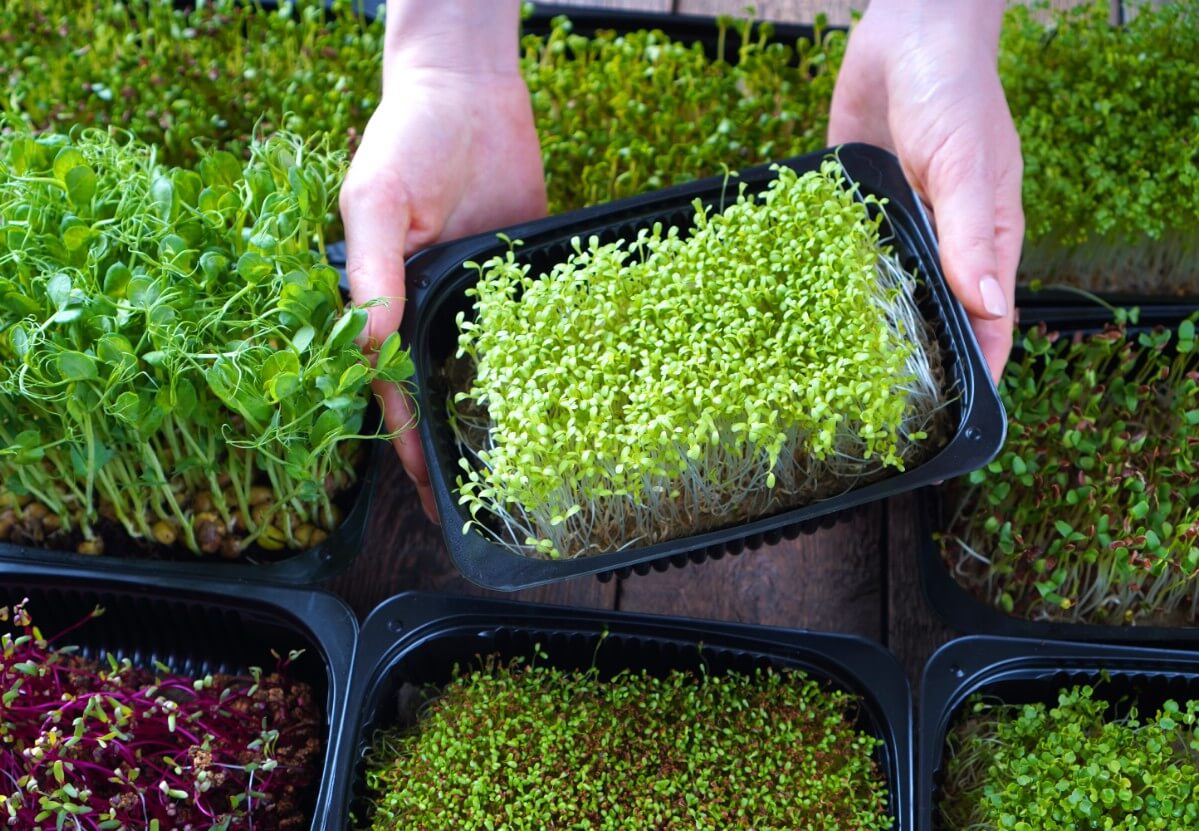
Every year after planting the garden, there are leftover seeds. After all, many of those packets contain 100-plus seeds, and there's no way they'll all fit in the garden. Can you imagine 100 radish plants?! Instead of letting those precious vegetable seeds go to waste, use them to grow microgreens. Growing microgreens is extremely easy, plus microgreens are packed with flavor and nutritional value. And, they are a wonderful addition to salads, sandwiches, and burgers.
Microgreens are ready to harvest in as little as 10-15 days, making them a perfect quick-producing necessity for every gardener. All you need is some seeds, some soil, and a container. Super easy and so rewarding. Best of all, you can grow them indoors, and really almost anywhere. No need for a giant garden to grow nutritious microgreens!
What Are Microgreens?
Microgreens are vegetable seedlings. That's it. The seedlings are harvested as greens long before the plant reaches maturity. Microgreens are usually grown in soil, but there are hybrid and alternative methods often used in place of soil.
Microgreens vs. Sprouts: What Is The Difference?
Sprouts are seeds grown in water; after they sprout and grow a couple of inches, the entire plant, including the seed, is eaten. Microgreens are usually grown in soil, and the seed is not eaten, only the greens.
Benefits of Growing Microgreens
- They grow easily in a small space.
- It's an excellent use of leftover vegetable seeds that might otherwise go to waste.
- The growing time is very short -- you can have harvestable microgreens in as little as 7-10 days.
- It's inexpensive, especially if you're using leftover seeds.
- Microgreens can be grown anytime, regardless of the weather.
- They're healthy, delicious, and nutritious!
But, Don't I Need Specialty Microgreen Seeds?
This is a little secret of the microgreen seed packaging world – microgreen seeds are just vegetable seeds. They aren't special in any way. Microgreen seed suppliers take some of the effort out of the process, though, which is nice. For example, choosing the best varieties and combining vegetables with similar grow times so the seedlings will be ready simultaneously. However, you can easily do this with your own collection of leftover seeds. Plus, it's super fun to make your own combinations based on the vegetables and flavors you like.
What Seeds Produce Good Microgreens?
Not all seeds are good candidates for microgreen growing. Basically, any vegetable with edible tops and any greens is a good choice.
The Best Seeds For Growing Microgreens
- Lettuce
- Kale
- Radishes
- Mustard Greens
- Arugula
- Beets
- Carrots
- Spinach
- Broccoli
- Cabbage
- Peas
- Carrots
- Amaranth
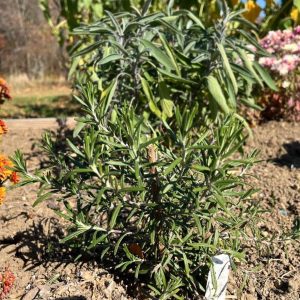
- Herbs (basil, parsley, coriander,
- Cucumber
- Squash
- Beans (Fava, Adzuki, Chickpea, Mung)
Seeds To Avoid: All nightshade foliage is toxic: Tomatoes, peppers, eggplant, okra
How Do I Make A Good Microgreen Mix?
Microgreens can be grown as a single seed type; for example, a tray of just radish greens or beet greens. Or, you can mix various kinds together for a robust microgreen assortment. It's up to you which ones you grow and whether to mix the seeds or just plant a single type.
The key to a good microgreen mix is combining seeds that will sprout around the same time. Since the growing time is so short, 10-15 days, a seed that takes two weeks to grow doesn't work well mixed with other faster-sprouting ones. This isn't to say don't plant the slow-sprouters, just plant them together in a separate group.
Below is a general guide for which seeds grow best together based on days to maturity. The days to harvest for each vegetable type are approximate, and not every variety will follow this formula. For example, one variety of peas may sprout in 7 days, while others take up to 14. It's beneficial to check the particular variety to be certain. Feel free to mix and match to see what grows best for you.
- 6-12 Days – Arugula, Broccoli, Brussel Sprouts, Cabbage, Cauliflower, Collard Greens, Watercress, Kale, Lettuce, Radish
- 12-14 Days – Amaranth, Beets, Swiss Chard, Chia, Mustard, Peas, Kohlrabi,
- 14-20 Days – Borage, Carrots, Celery, Cilantro, Nasturtium, Oregano
- 20-25 Days – Basil, Dill, Parsley, Sorrel
Microgreen Supplies: What Do I Need?
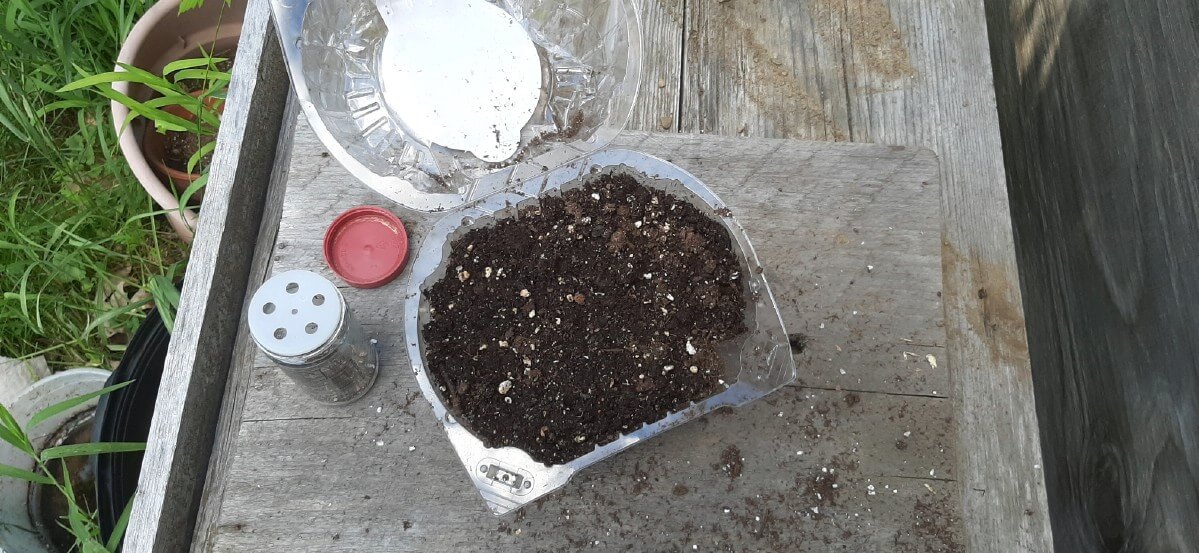
For the most basic growing arrangement, you need a shallow tray or container with drainage holes, potting soil, and seeds; that's it. Growing microgreens is a very low-effort DIY project. You can make it as easy or complicated as you like. Personally, we always go the easy route!
Shallow Tray
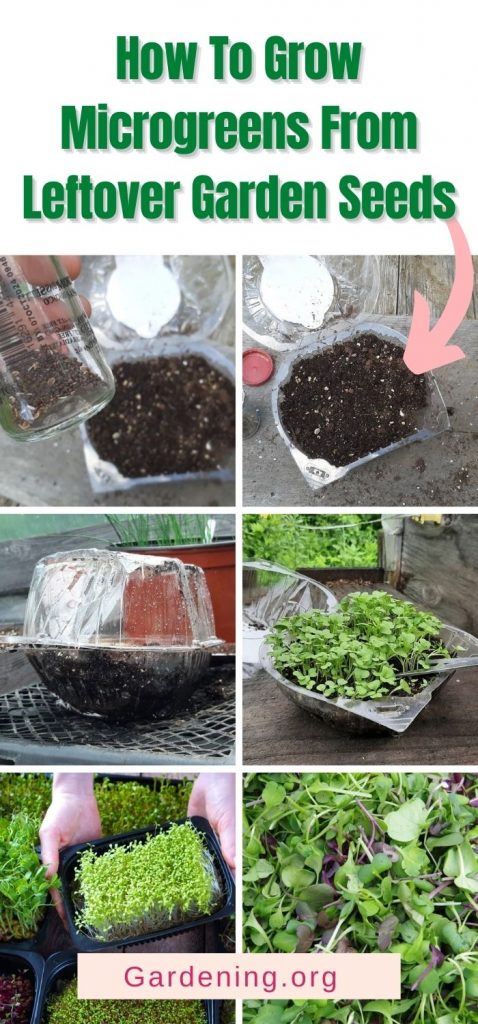
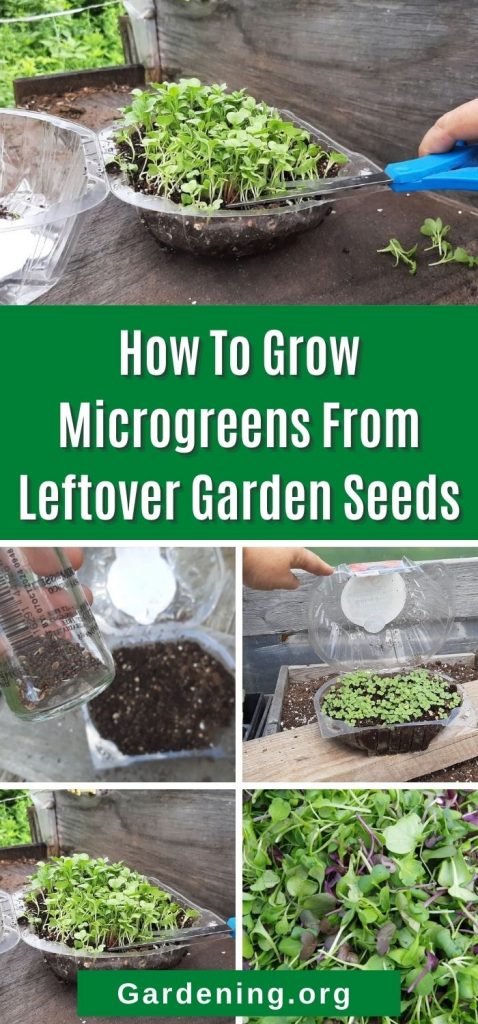
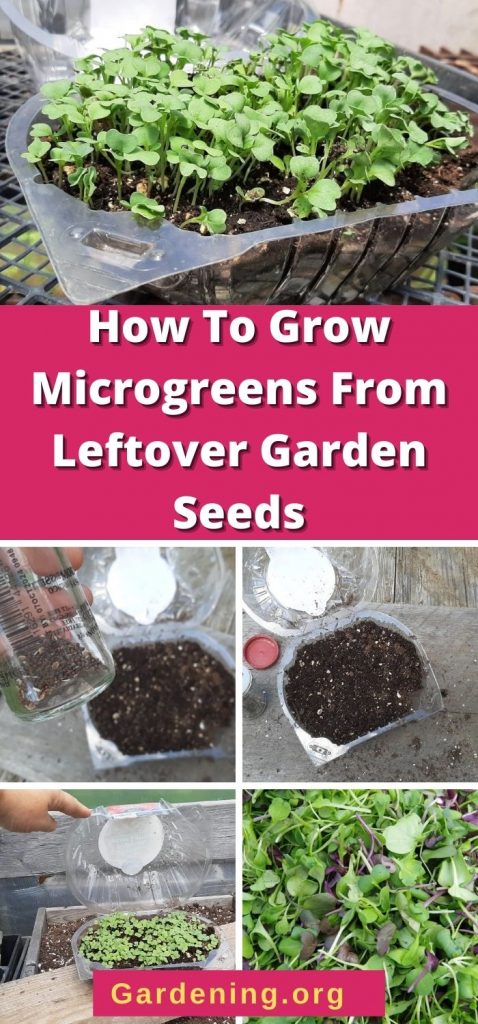
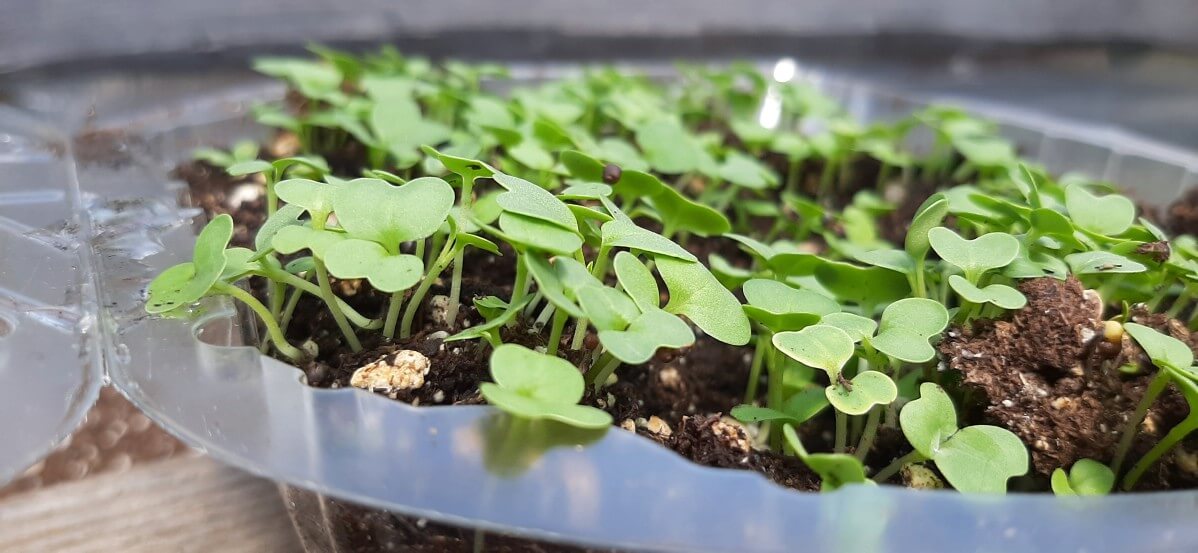
Because these greens are only growing 2-3 inches tall, they don't need much soil. You can grow microgreens in any container, including deep pots, but it's a waste of potting soil, so there's no point to it. You can use an actual seed-starting tray or any container you have lying around. We love repurposing the plastic clamshells that some types of lettuce come in. The lid is a built-in humidity dome.
Just make sure whatever container or pot you choose has drainage holes, or you make them. For the plastic clamshells, I poke a few holes in the bottom with a pair of scissors. Another bonus to using the clamshells is that they are also reusable for microgreens. Clean them out between grows, and you can reuse them many times.
Potting Soil
A basic vegetable potting soil mix is fine. There's no need to get fancy. Again, the seeds will only be utilizing this soil for a few weeks at the most. Don't use dirt from the garden, though. It will work but will take longer since the dirt is generally heavier; plus, it may transmit diseases to your seedlings. The easiest thing to do is use up any leftover potting mix you have from starting seeds earlier in the year.
Seeds
What do you have leftover from the planting season? In our household, there are always radish, pea, lettuce, Asian greens, and beet seeds. It varies from year to year.
Water Mister
A small spray bottle to mist the soil and greens with water each day. The least expensive plastic water mister from the discount or dollar store will work just fine.
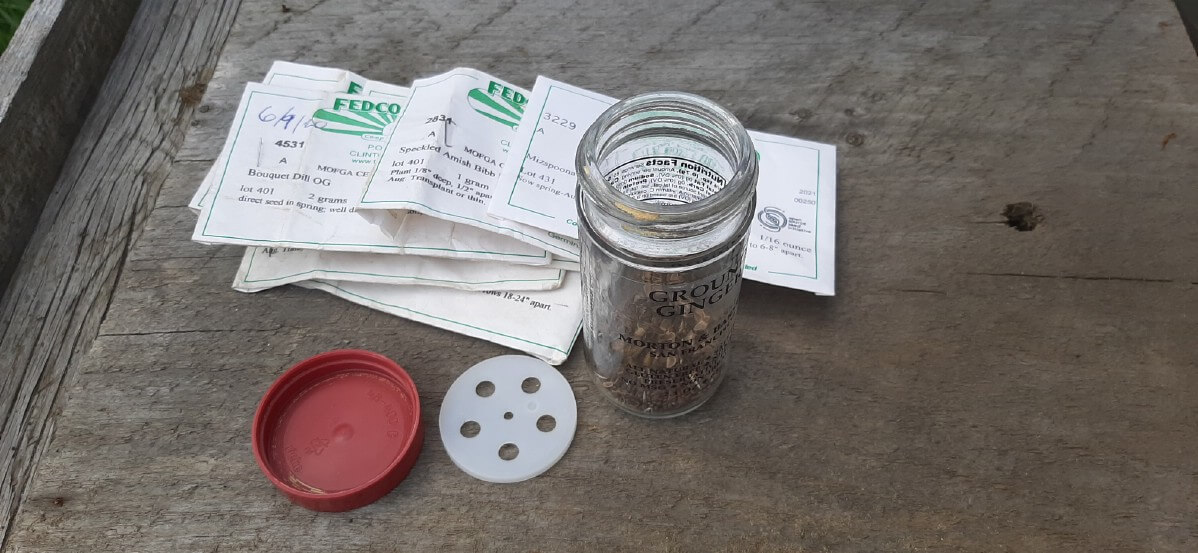
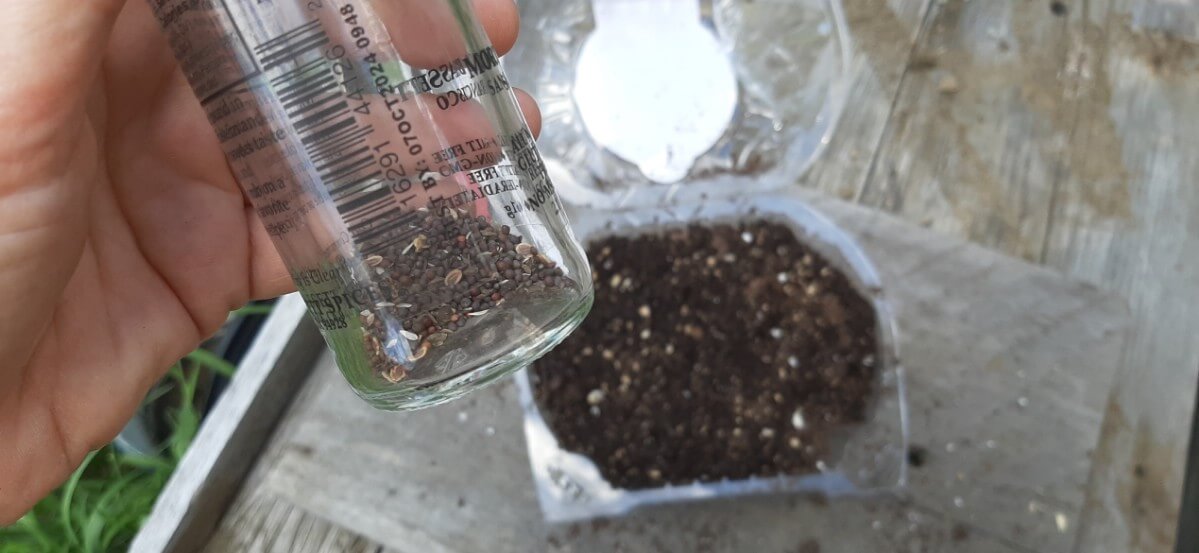
Seed Dispenser (optional)
You can just sprinkle the seeds over the soil, but a seed dispenser is ideal for the evenest distribution. We use a repurposed glass spice bottle. This is actually perfect because you can premix the seeds in the bottle. Plus, the plastic covering over the opening helps the seeds come out more evenly than doing it by hand.
Grow Mats (optional)
There are fiber grow mats that can be used in place of soil. These grow mats or grow pads are usually made of wood fibers or hemp. Some people prefer these pads because they eliminate the need for, and potential messiness of, using soil.
Step By Step, Growing Microgreens At Home
What You Need:
- A shallow tray with drainage holes
- Seeds
- Potting soil
- Spray bottle water mister
- Seed dispenser (optional)
Steps to grow microgreens
- If your tray or container doesn't have drainage holes, poke a few in the bottom.
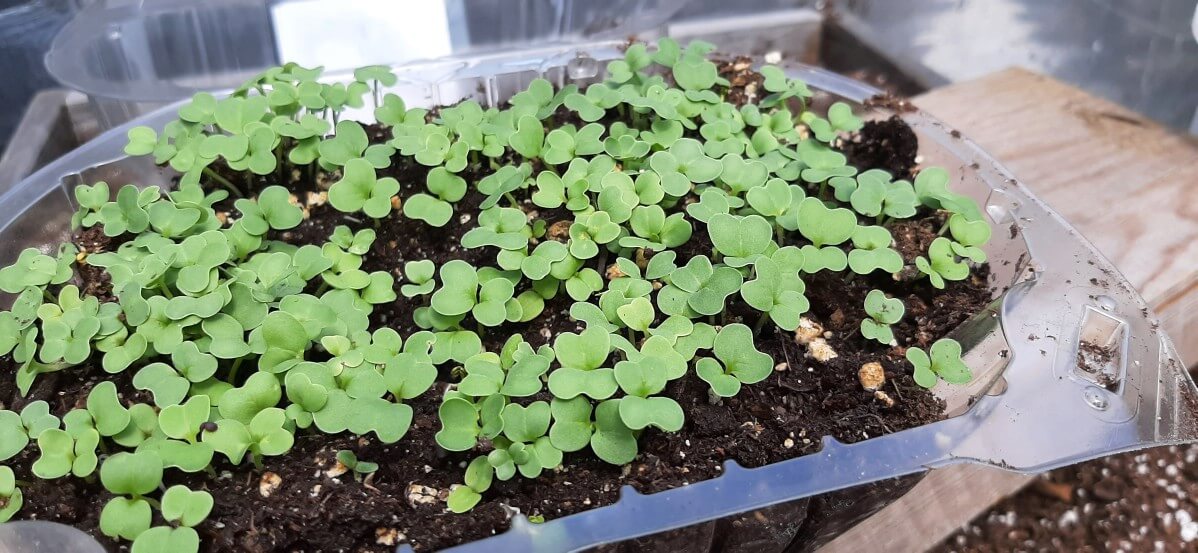
- Fill the tray with 1.5-2 inches of potting soil.
- Wet the soil thoroughly. It should be moist but never soggy.
- Evenly scatter the seeds across the soil surface. Don't worry if it looks a little crowded. You don't want them super dense, but the seeds will grow to fit the space.
- Cover the seeds very lightly with potting soil (⅛-inch) – they need light to germinate, so don't cover them heavily.
- Spray the top of the soil with water just so it is damp.
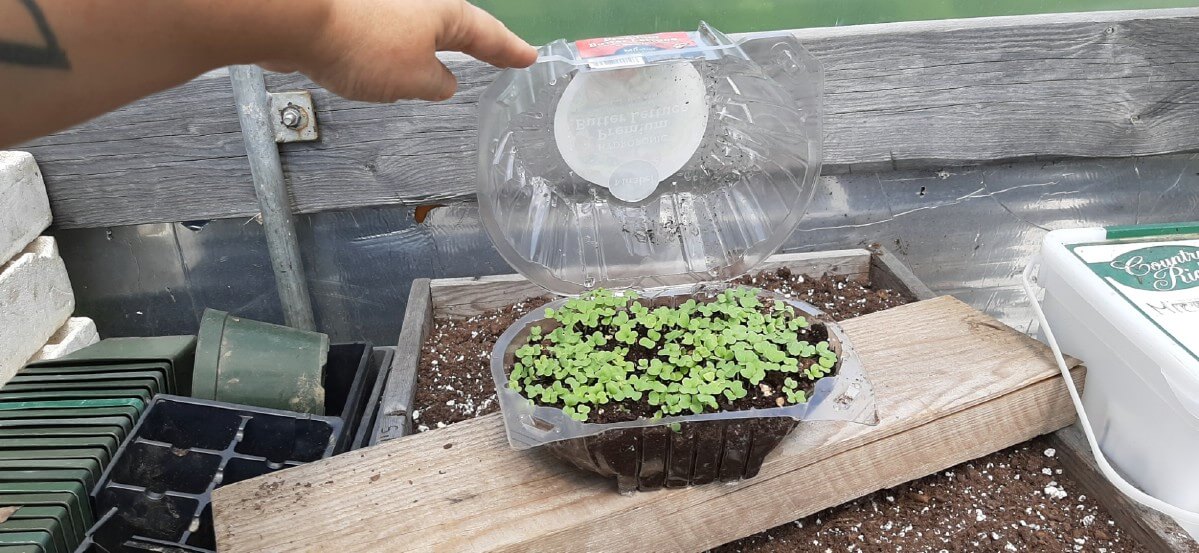
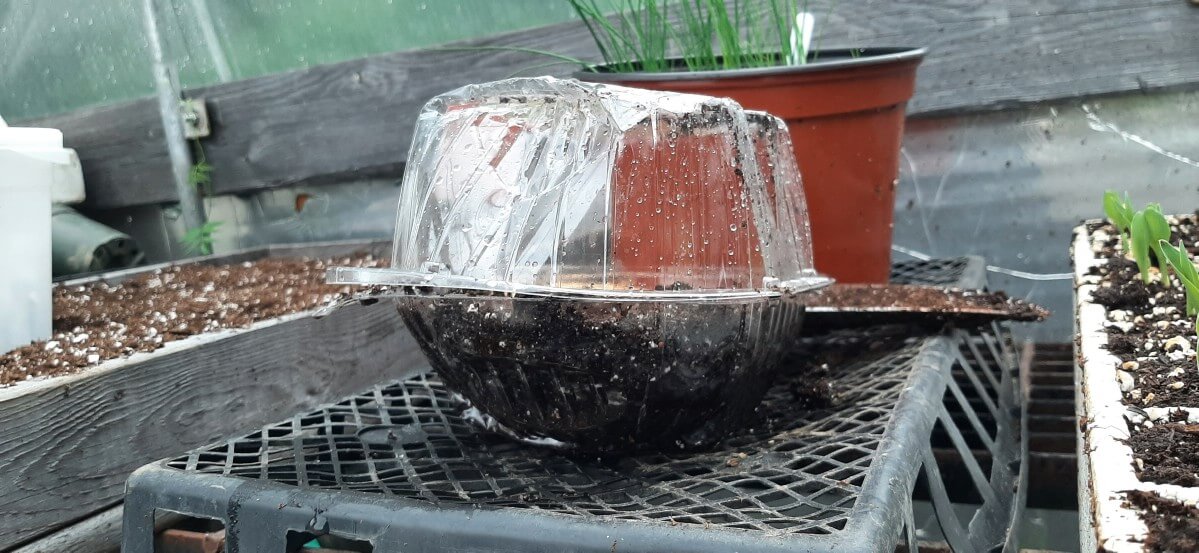
- Cover the tray with a plastic bag to increase humidity. Ensure there is a small vent in the side for airflow (the plastic bag shouldn't be airtight). Or, if you're repurposing a plastic clamshell, pull the cover dome over it but don't secure it.
 A repurposed plastic clamshell has a built in humidity hood.
 - Place the container in a warm, bright location. A windowsill works great. Microgreens require between 6-8 hours of sunlight per day.
- Mist the soil with water every day. The soil should be evenly moist at all times.
- Once the seeds sprout, remove the plastic bag or humidity dome.
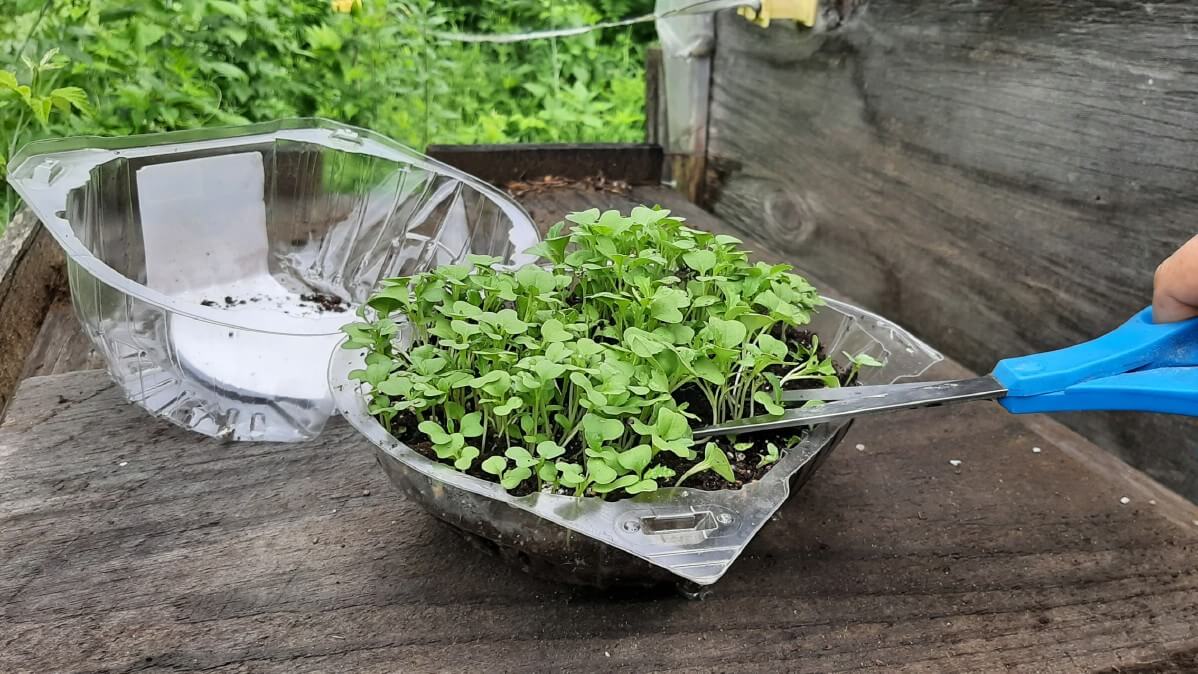
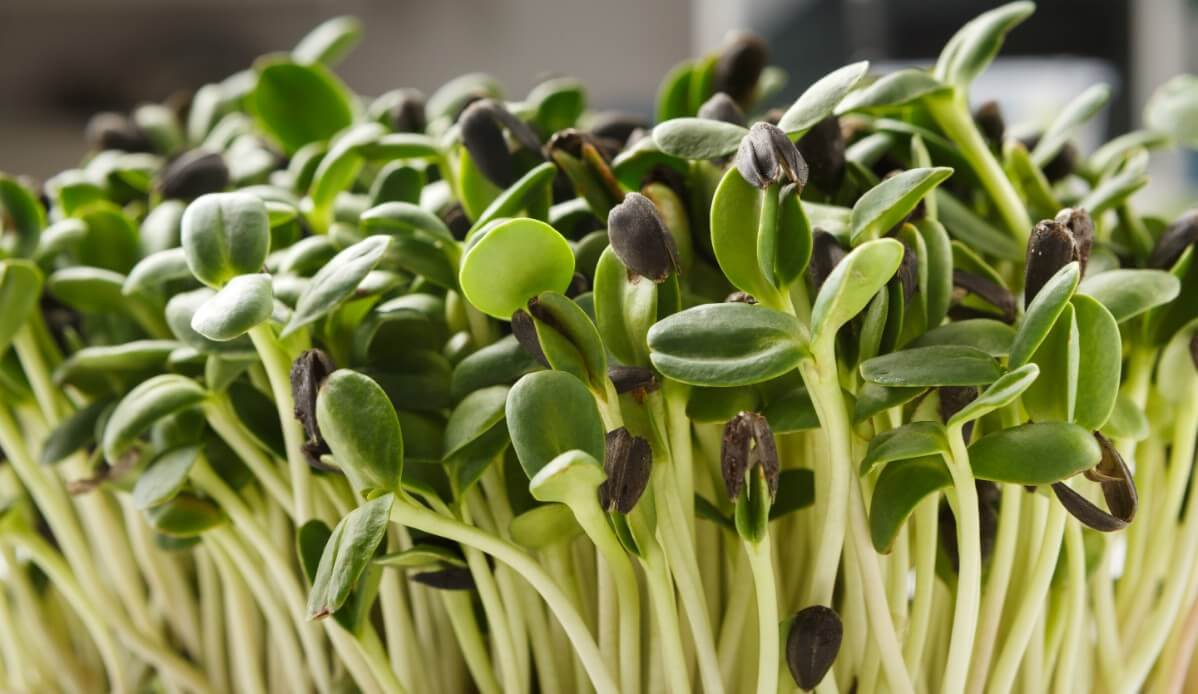
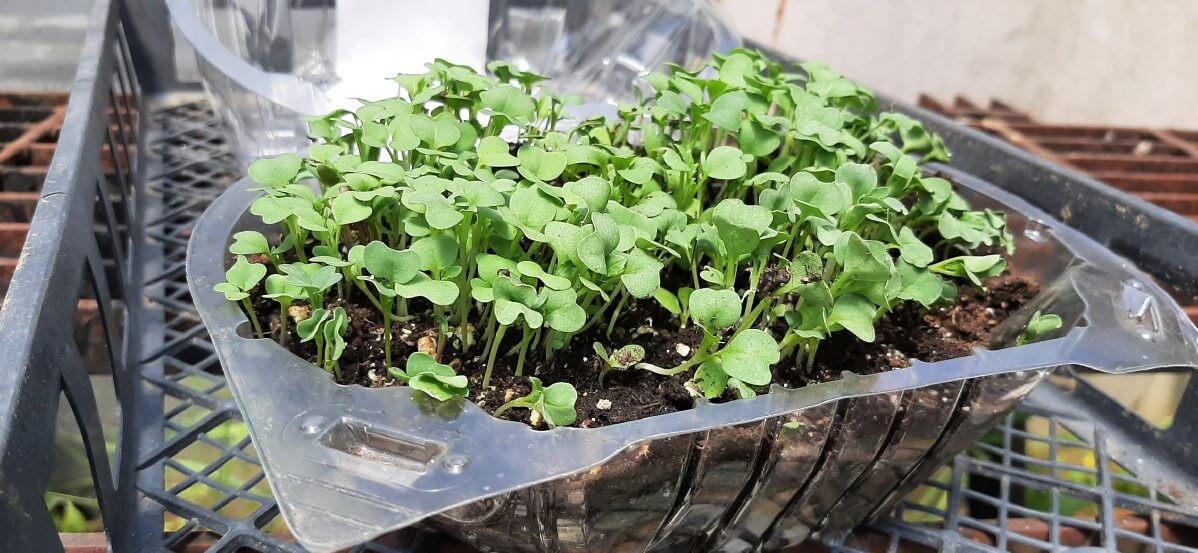
- In 2-3 weeks, depending on the seed mix, the greens are ready for harvesting! The ideal size is between 2-3 inches.
 A repurposed plastic clamshell has a built in humidity hood.
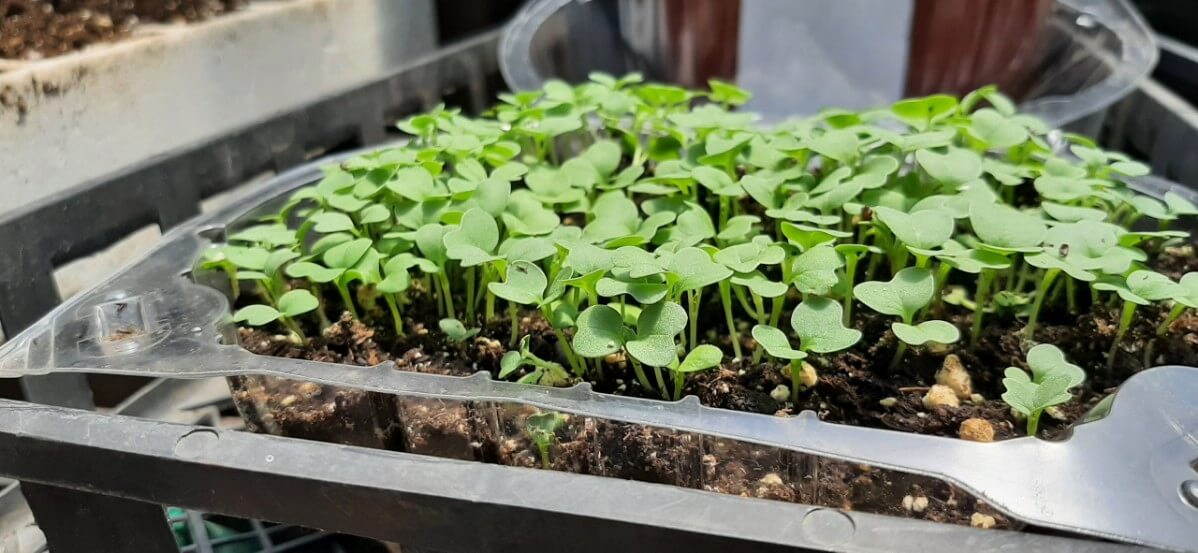
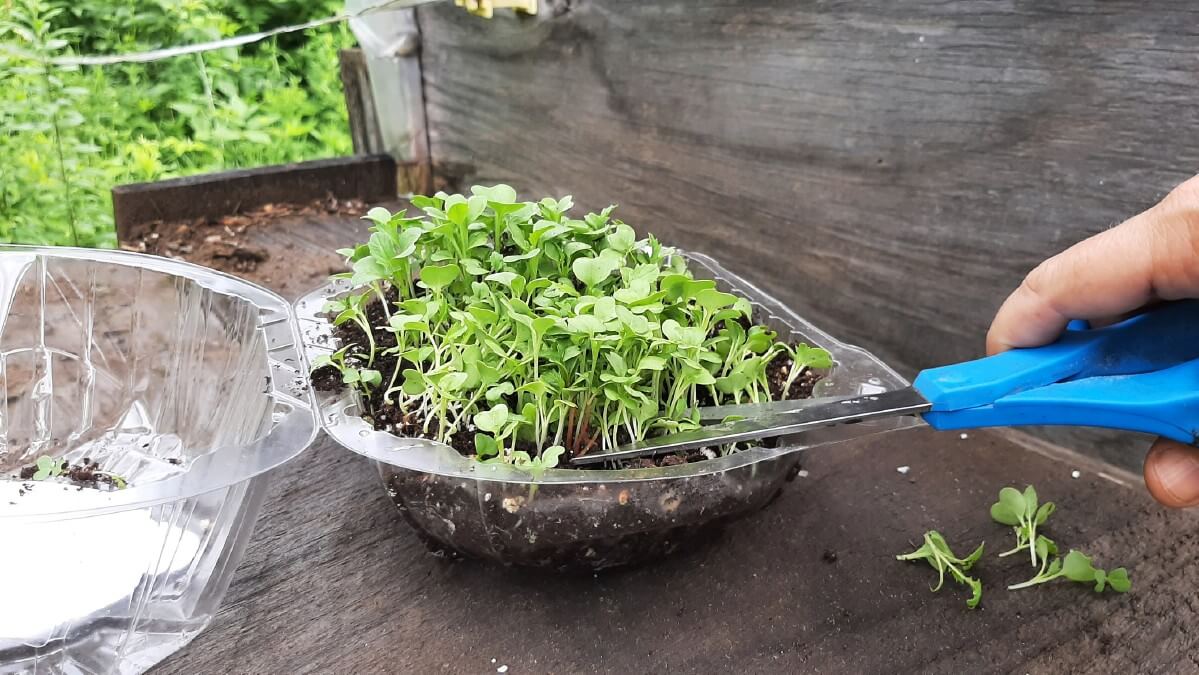
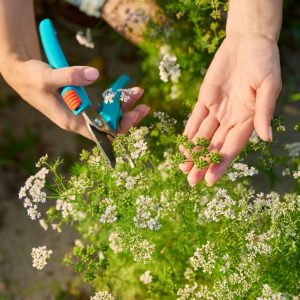
- Use scissors to cut the microgreens at the soil level.
- Keep watering it every day, and more microgreens may grow, though they won't be nearly as robust as the first seedlings.
Do I Need To Soak The Seeds Before Planting?
This depends on the type of seed. Some seeds benefit from soaking prior to planting, while with others, it isn't necessary. Soaking seeds is simple enough; place the seeds in a cup of cool water for 6-8 hours. Drain the water away, then plant the seeds the same as directed in the instructions above.
Seeds That Need Soaking – Beets, Swiss Chard, Nasturtium, Peas, Beans
Growing microgreens is a fun undertaking with an delicious reward. It is the ideal way to use up extra garden seeds, and prevent them from going to waste. Next time you have some extra vegetable seeds, don't stash them away or let them sit around; discover how easy it is to grow microgreens in your home.

Leave a Reply