Pollinator gardens and wildlife habitats offer a lot of benefits to birds, pollinators, and other animals. But if you’re already growing native plants for pollinators and you still want to do more to give back to the natural world around you, you may want to install a dead hedge in your garden or yard. These innovative structures are easy to build and maintain, and beyond helping birds and wildlife, they can reduce yard waste and improve your soil too.
If you’ve ever thought about creating a dead hedge or if you’ve never heard of this structure before but your interest is piqued, this guide can help. Below, we’ll explore the benefits of creating a dead hedge as well as the simple steps you need to take to build your very own!
Jump to:
What is a dead hedge?
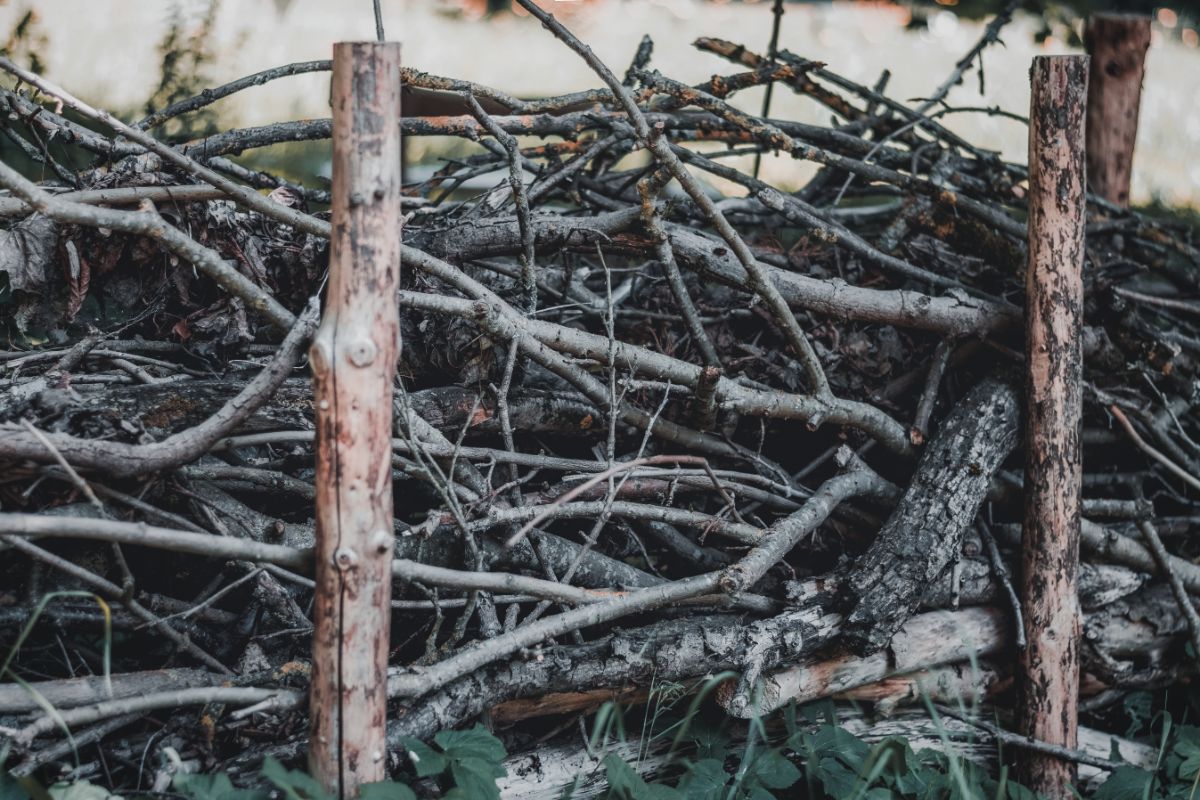
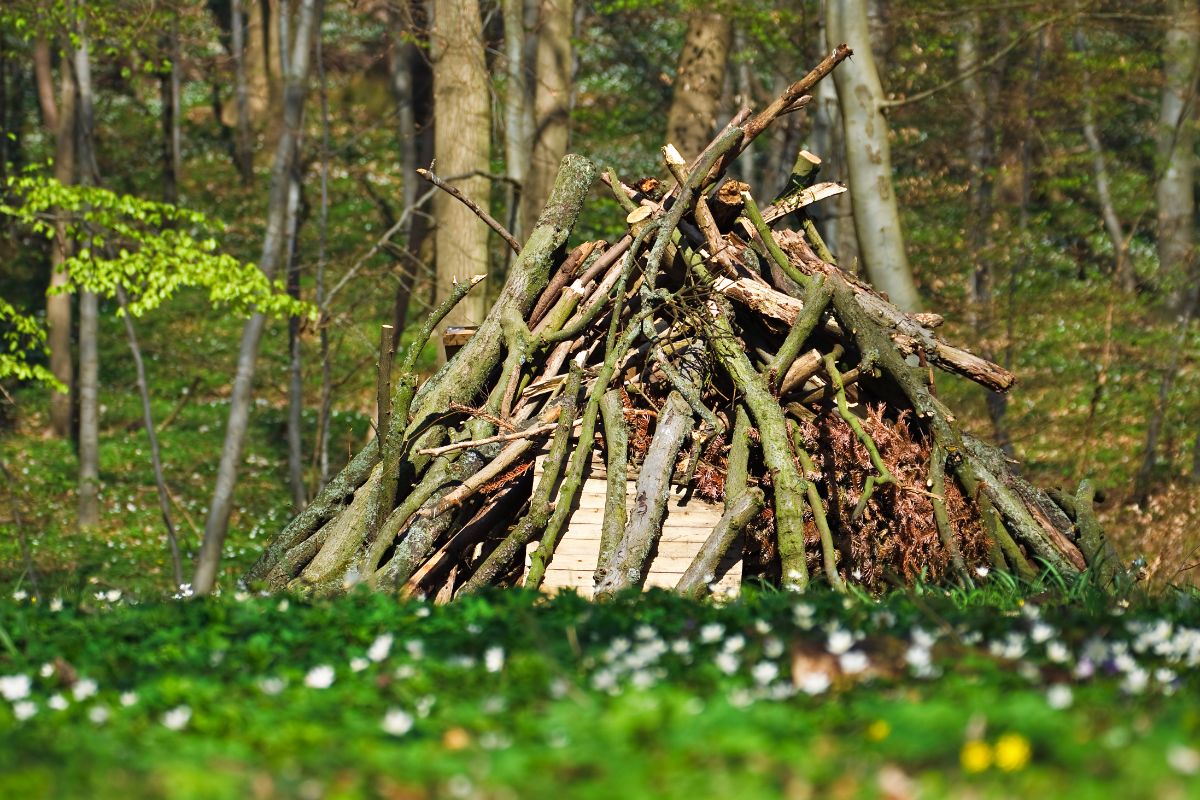
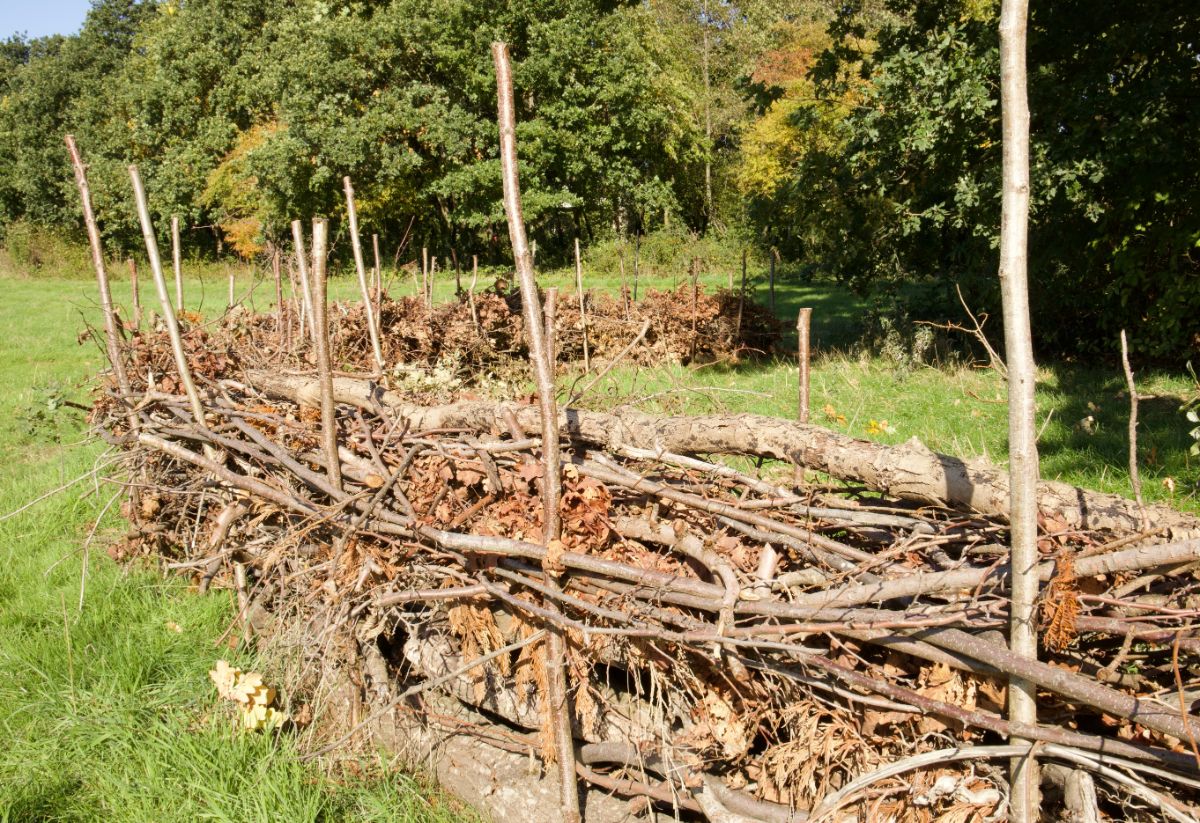
In nature, plant matter breaks down slowly over time, enriching the surrounding soil and providing a habitat for insects and other critters. Dead hedges are modeled after this natural process, and they also work to improve soil and build habitat. But they are manmade creations.
Dead hedges can be small structures, or they can stretch throughout your property. Formed slowly over the course of years, dead hedges are built by weaving branches, sticks, twigs, and other yard debris in between vertical wooden stakes. Since they’re built over time, dead hedges can be used to dispose of garden waste, but they also provide an important habitat for birds and other wildlife, which use these structures for shelter, nesting, and a foraging spot for insects.
Why build a dead hedge?

Still “on the fence” about building a dead hedge? Well, dead hedges aren’t just easy to create; they also offer a lot of benefits to the home gardener. Beyond being simply attractive structures, some of the main perks of dead hedges include the following:
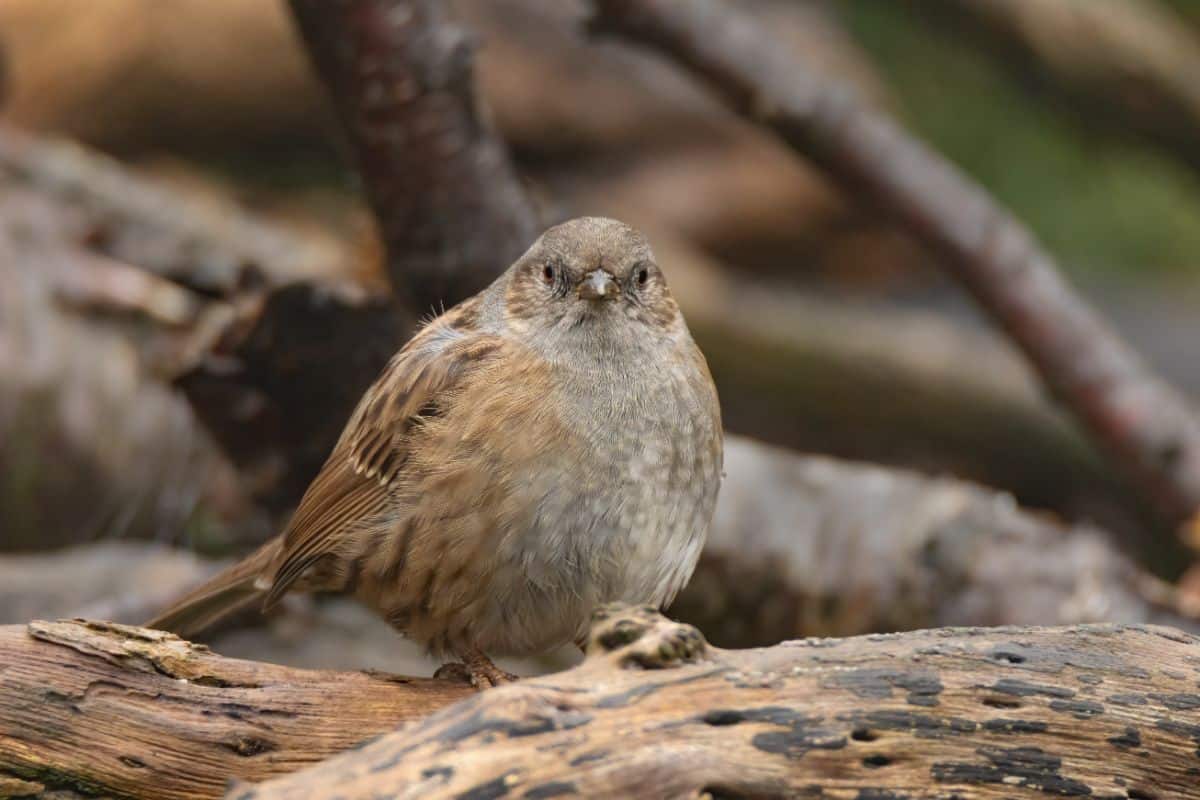
- Provides shelter for birds and wildlife. Birds like robins and wrens use dead hedges for nesting, and they often perch on the twigs in dead hedges while hunting for insect prey. Hedgehogs, toads, chipmunks, and other wildlife may also use dead hedges for shelter, and they can duck into dead hedges whenever predatory birds pass by overhead.
- Attracts beneficial insects. Fireflies and other insects may also shelter in dead hedges and use them as hunting grounds for smaller insects. As dead hedges break down over time, they can also be a breeding ground for worms and beneficial microbes, and they increase the biodiversity of your landscape.
- Reduces waste. Sticks and other pieces of yard debris are often thrown in the trash, but there’s no reason to do that when you have a dead hedge on your property! Dead hedges repurpose a wide range of garden waste, and this redirects natural materials out of landfills.
- Creates a tidier garden. Any time your prune shrubs, trees, and vines, you’ll end up with a lot of old plant matter that can look unsightly when kept in piles or raked into a corner of your yard. But with dead hedges, you’ll always have a place to put yard waste, and since dead hedges look so attractive, you may find yourself tidying up your garden more often, so you’ll have more material to build your hedge with!
- Improves soil. As the twigs and old plant matter in dead hedges break down, they reincorporate nutrients back into the surrounding soil. This creates richer soil, and it also improves the soil structure, resulting in looser soil that drains well and won’t impede plant root growth.
- Adds garden privacy. Dead hedges can be built around the perimeter of your property or near a roadway to add privacy or buffer road noises. Even better, since dead hedges are so flexible, you can build them to different heights and thickness levels depending on your needs.
- Hides eyesores. Dead hedges can be used like makeshift fences, but they can also be wrapped around unsightly areas of your property, like utility boxes. This can improve the look of your garden and boost your home’s curb appeal too!
- Delineates space. Beyond using dead hedges as fencing, you can also employ them to divide up your garden into dedicated spaces. Building a dead hedge near a patio or around a bench can separate sections of your garden from each other and make your entire garden design feel more deliberate.
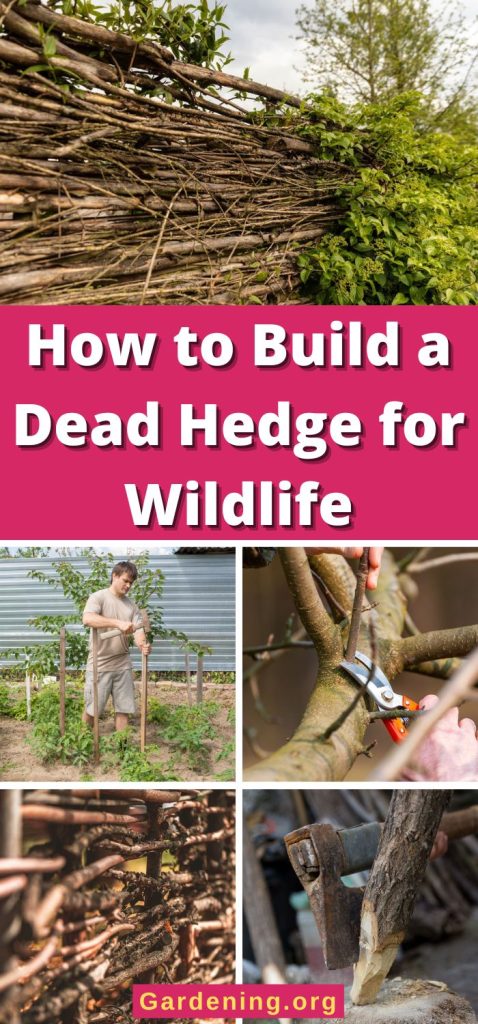
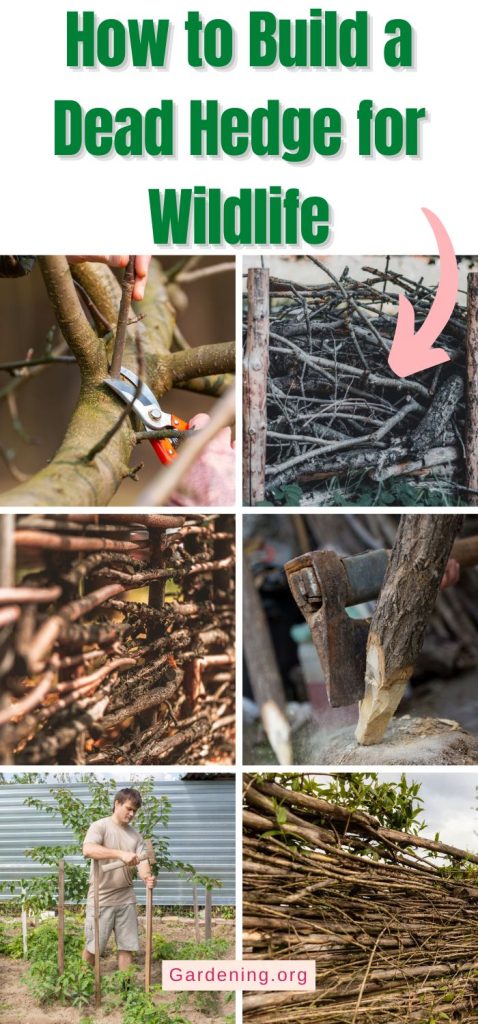
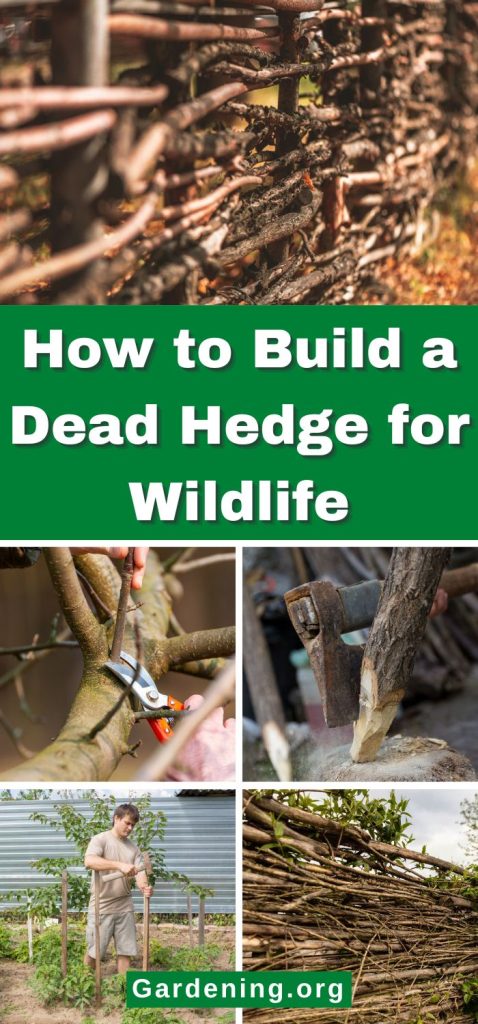
Building a dead hedge in 7 easy steps
Even if you don’t think you’re good at DIY, you can easily make a dead hedge in an afternoon. The beauty of dead hedges is that these structures can also grow over time, much like the natural world around them. So even if you just start small with a mini hedge, your hedge can spread in your garden as you accumulate more building materials throughout the seasons.
1. Gather your materials.
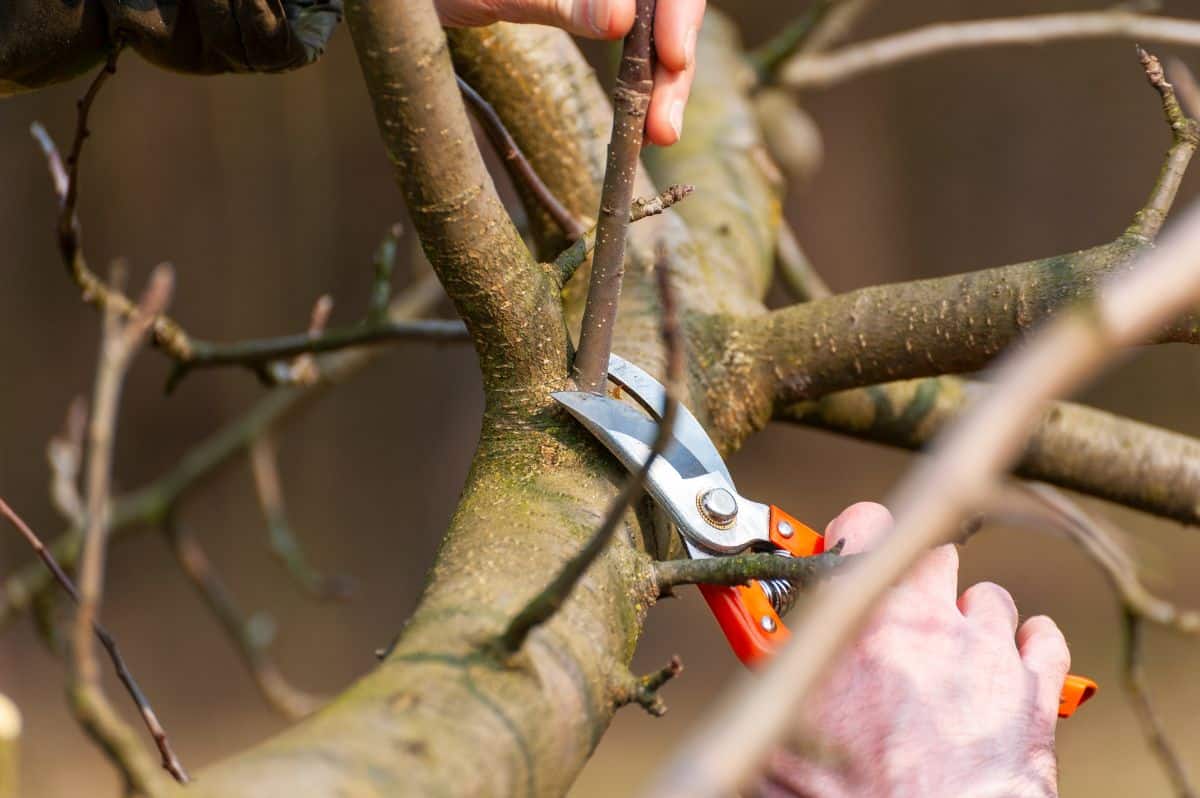
Before you start building a dead hedge, you’ll need to gather some natural materials to work with. A good time to build dead hedges is in fall or spring, after doing a thorough garden clean up. Pruning plants and shrubs can also leave you with lots of twigs, sticks, and branches to use in your hedge building.
How much yard debris you’ll need to create a dead hedge will depend on the size of the hedge you’re looking for. Both new and old wood will work for dead hedge building, but you’ll need sturdy, freshly cut branches to use as vertical stakes to hold your hedge together. Beyond that, smaller twigs and pieces of wood, vines, long grasses, and other natural debris left behind after cleaning up your yard can be used to build dead hedges too.
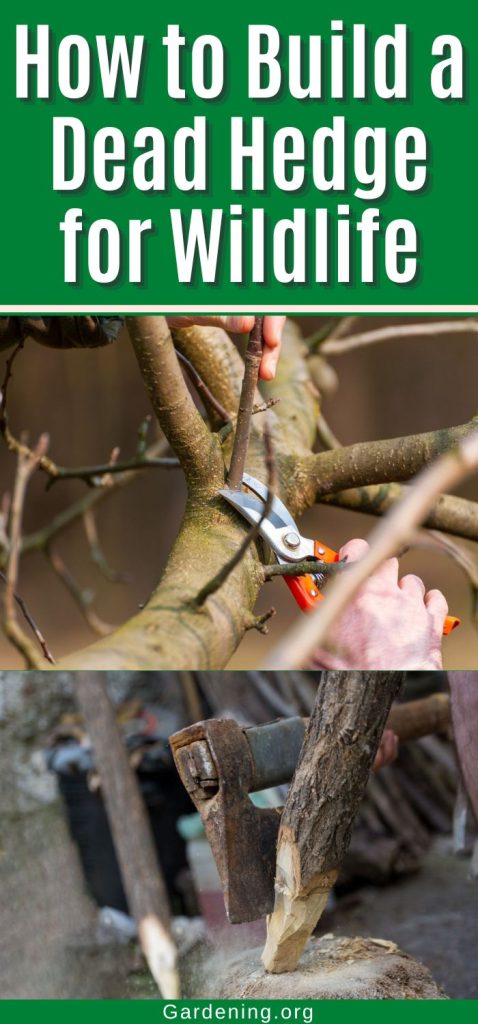
2. Cut your stakes.
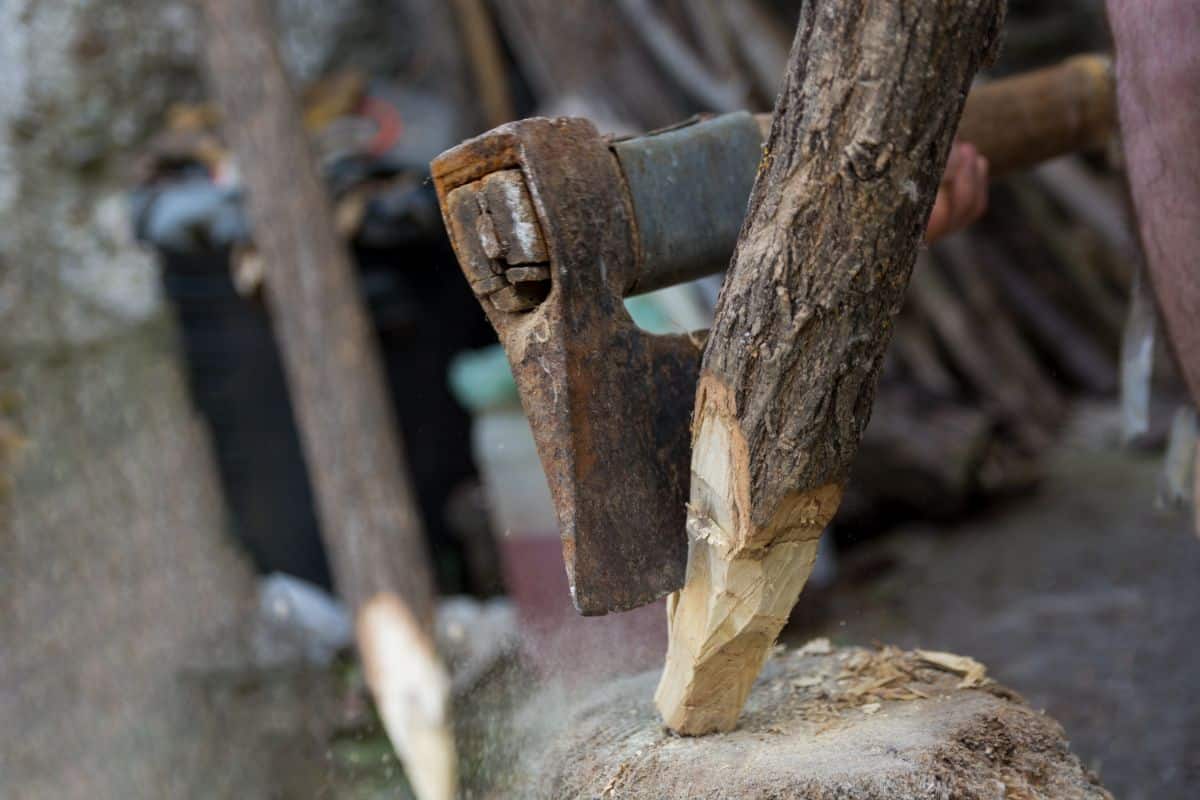
The most important part of building a dead hedge that will last are the vertical stakes that form the framework of your hedge. Most often, freshly cut branches are used for staking, but you can also simply purchase sturdy bamboo poles or wooden stakes for your supports. If you’re working with wild harvested branches, it’s a good idea to sharpen one end of each branch before getting started, as this will make them much easier to drive into the soil.
The length of your wooden stakes or branches will determine the height of your hedge, so select branches accordingly. If you want a tall hedge, cut longer branches. Vertical wooden stakes will eventually break down, but you can always replace them later on with new stakes to keep your hedge going for years and years.
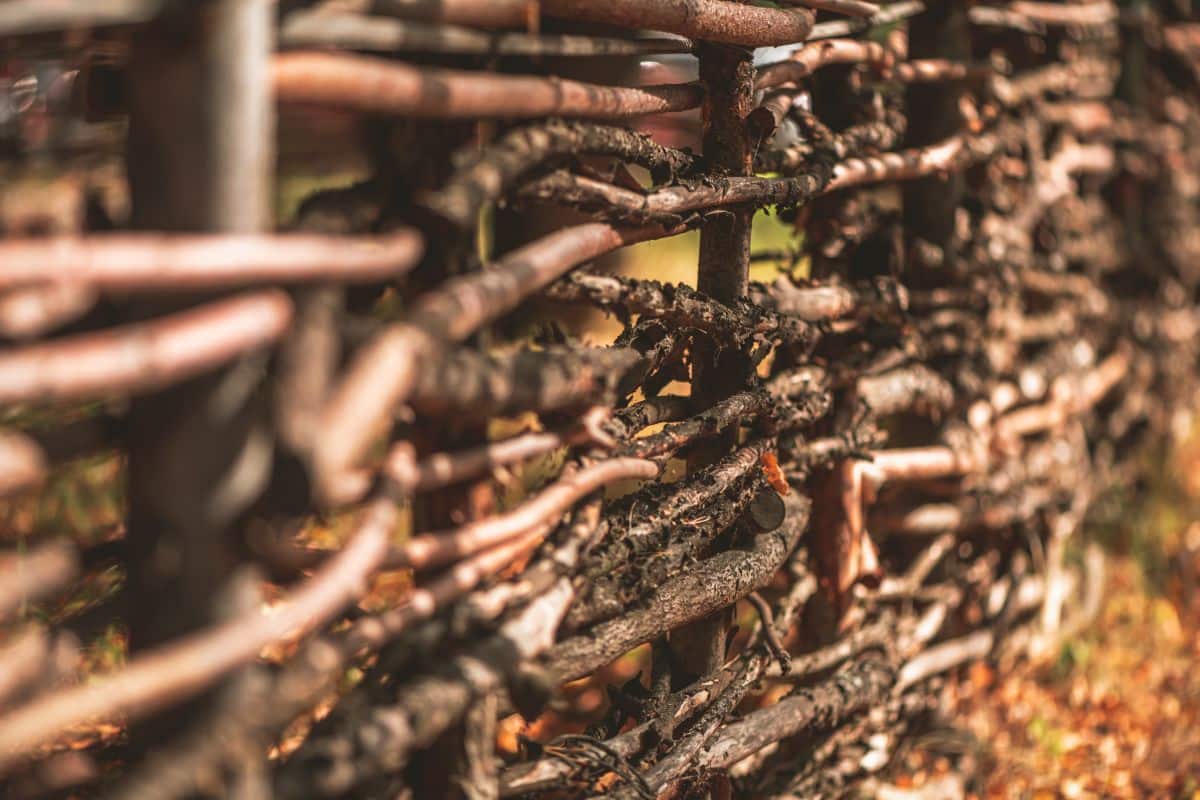
3. Install the stakes.
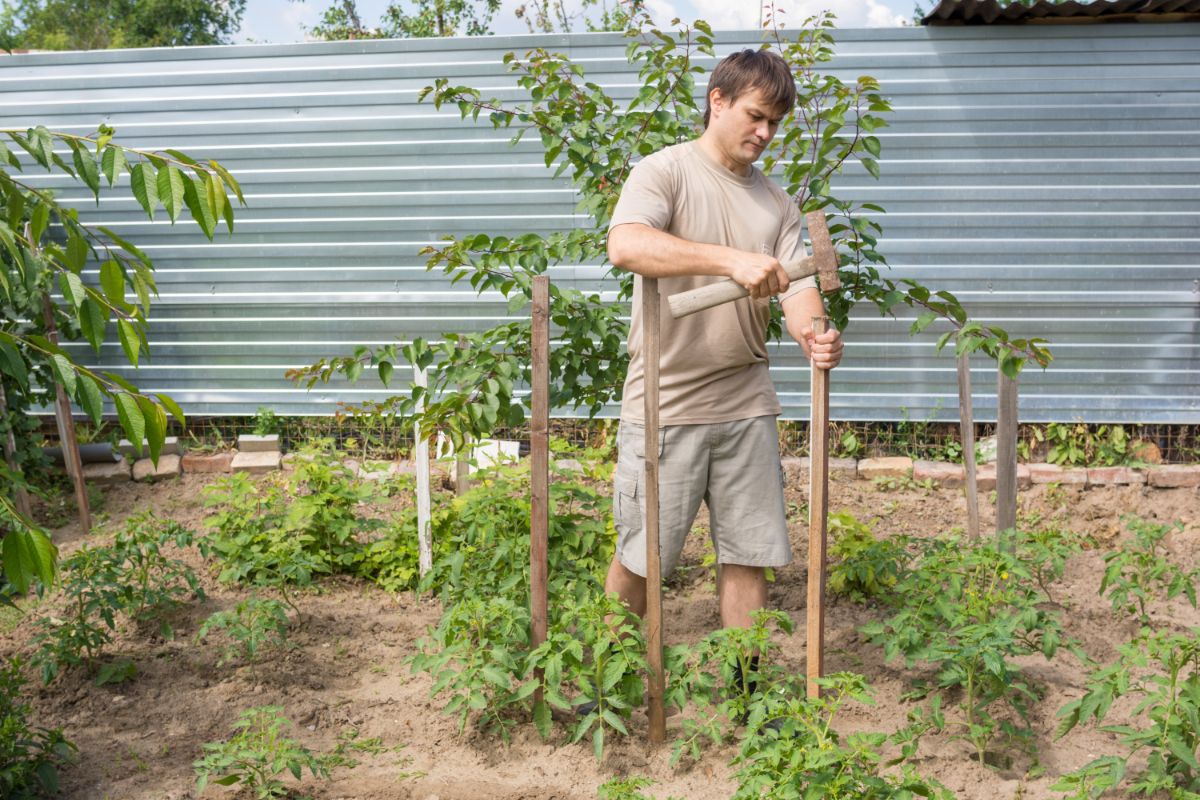
Once your stakes or branches are prepared, drive them into the soil with a hammer or wooden mallet along the path you’d like your hedge to follow. You’ll need to install two rows of stakes in perpendicular lines to form the backbone of your hedge. These pieces will eventually hold smaller sticks and twigs in place.
How far you space your stakes apart will depend on the look you’re going for but, in general, the two opposite rows of stakes should be spaced about 1 ½ to 2’ apart. Within each row, individual stakes should be placed roughly 3 to 5’ from each other. If you intend to use smaller twigs and branches to build your hedge, you may want to place your stakes closer together.
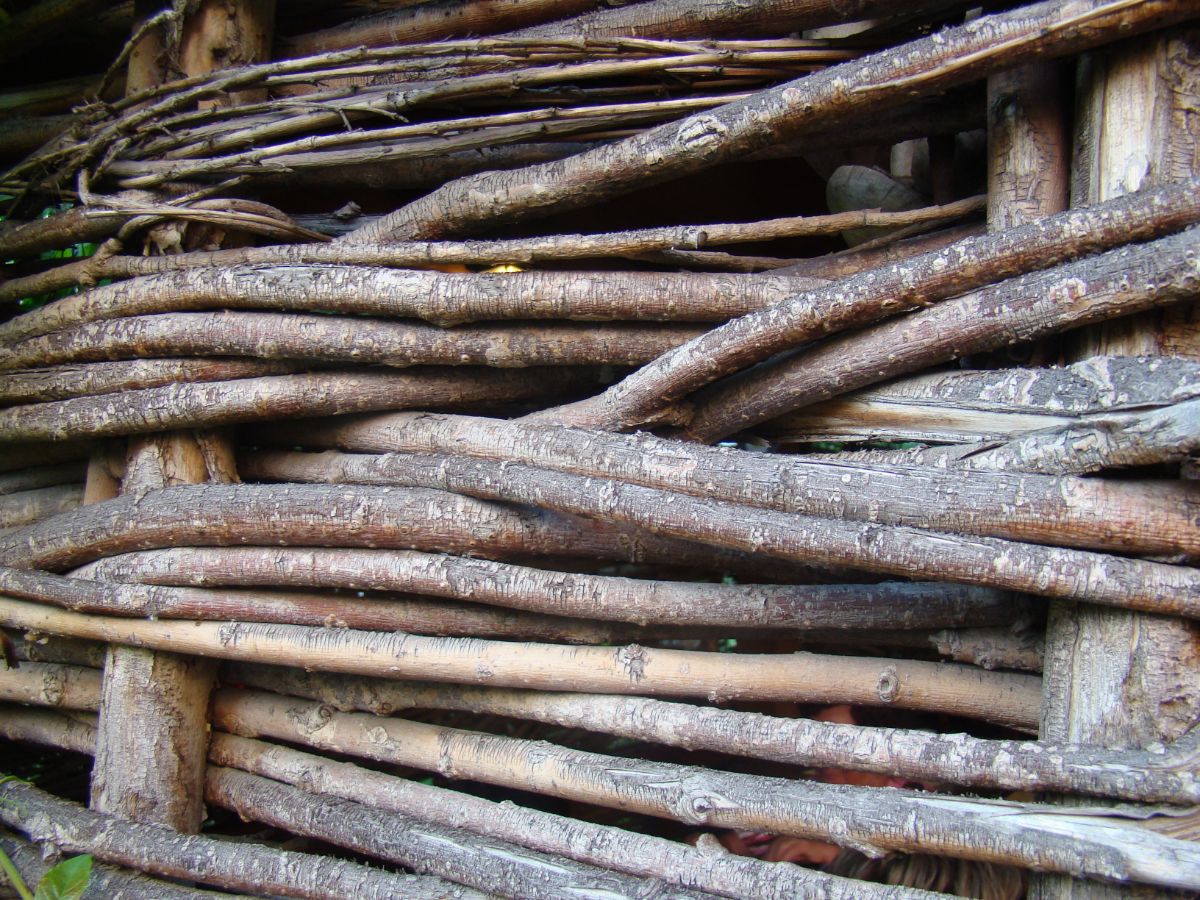
4. Start building.
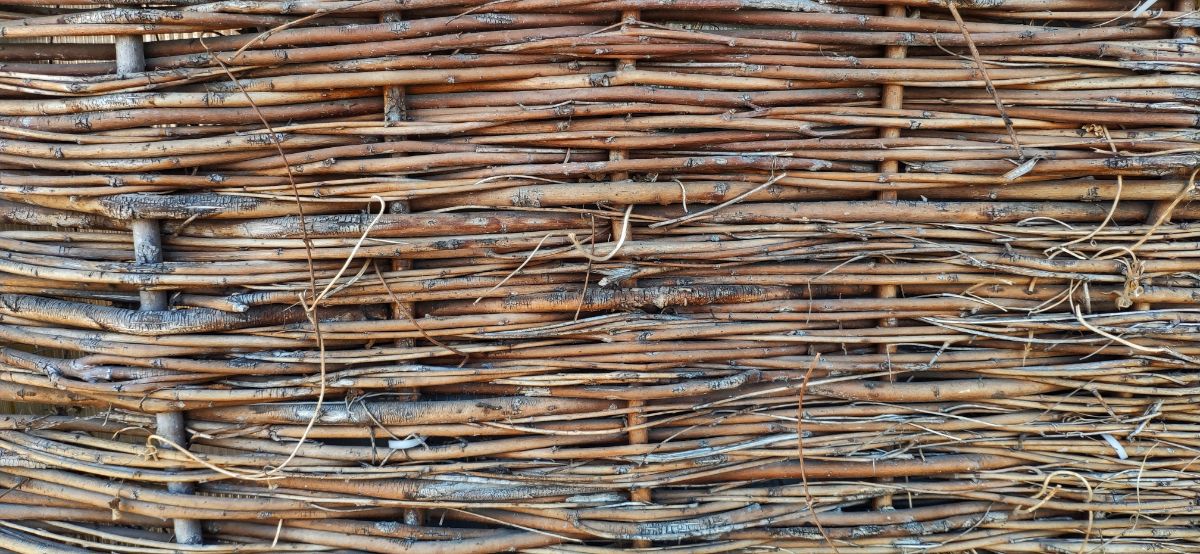
After installing the stakes along the edges of your future dead hedge, it’s time to start weaving the interior of your hedge together. Start out with longer branches and twigs and weave them in between the dead hedge stakes, starting out with large pieces and weaving smaller twigs in between them. Small logs, dried grasses, and other natural materials can also be worked into your hedge, but aim for materials of the same approximate size if you want to make a hedge with a relatively uniform appearance.
As you work, you’ll notice that some smaller twigs and pieces may poke out of the sides of your hedge. That’s perfectly fine! There’s no need to clip these twigs away as they will serve as natural perches for birds and other wildlife.
5. Be consistent.
Dead hedges can be built in a single day if you have a lot of materials on hand. But most dead hedges are built slowly over the course of a season or even several years. Part of the beauty of dead hedges is that they are, in a way, a living structure that continues to grow as you need it to.
As you accumulate more materials for your dead hedge, weave those branches in between your dead hedge stakes to create a taller hedge. If needed, you can also expand your hedge by adding additional stakes and snaking your hedge throughout your garden space. Adding new materials to your hedge will replenish older twigs as they begin to decay and keep your hedge strong and sturdy for years.
The only real concern with dead hedges are the vertical stakes that hold the whole structure together. If you started out with new wooden stakes, they should last for a number of years. But if you notice that your vertical stakes are starting to decay, add more additional stakes beside the old ones to maintain the integrity of your hedge and prevent sections of it from collapsing.
6. Add some vines.
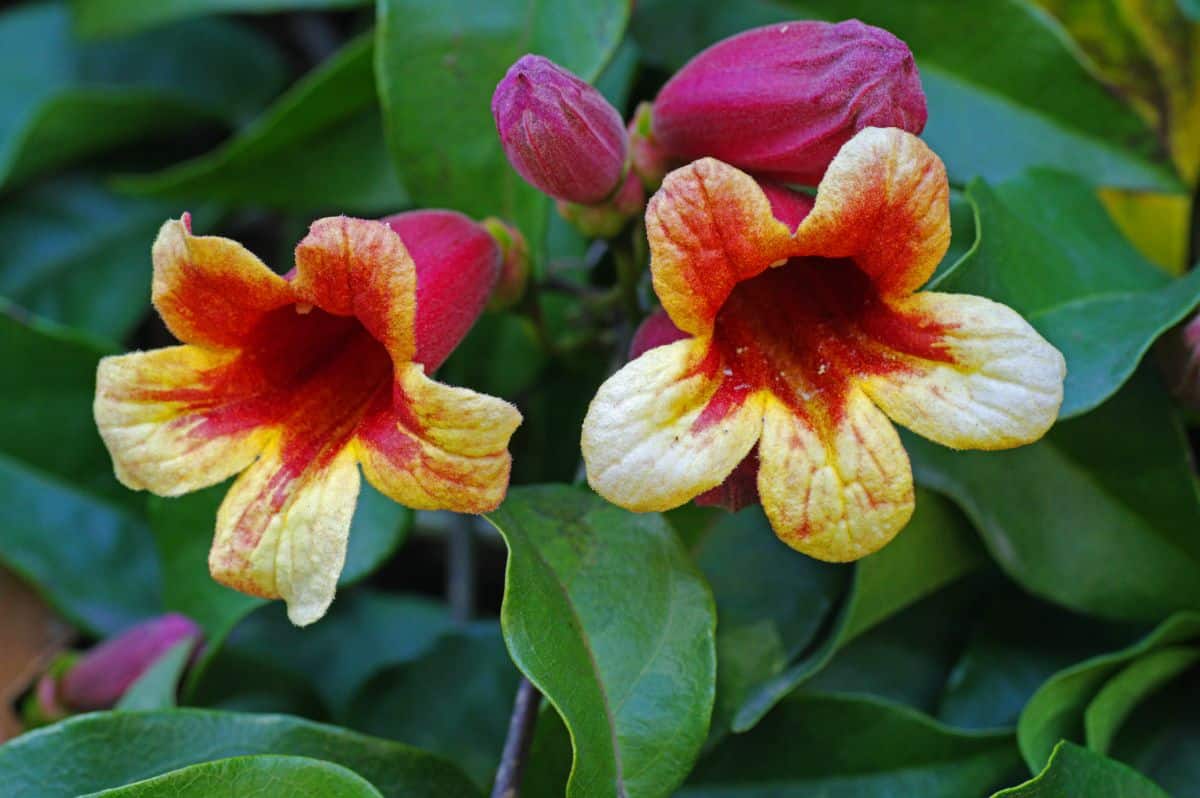
If you prefer a more rustic look, you may want to leave your dead hedge as is. However, if your goal is to attract wildlife, you can add additional foraging spots and shelter by growing vining plants near your hedge. If those vines happen to sport nectar-rich flowers, it’s an added bonus as the blooms will also attract pollinators, like butterflies, beetles, and moths.
Native vines, like Virginia creeper, coral honeysuckle, and crossvine, will offer the most benefits for wildlife, but you can also try out ornamental vines like moon flowers and morning glories. Sow seeds or plant starts near the base of your dead hedge and allow the vines to creep their way up the rough edges of your hedge and snake their way along its top. This will create a more natural look and add even more color and interest to your dead hedge design.
7. Plant wildflowers.
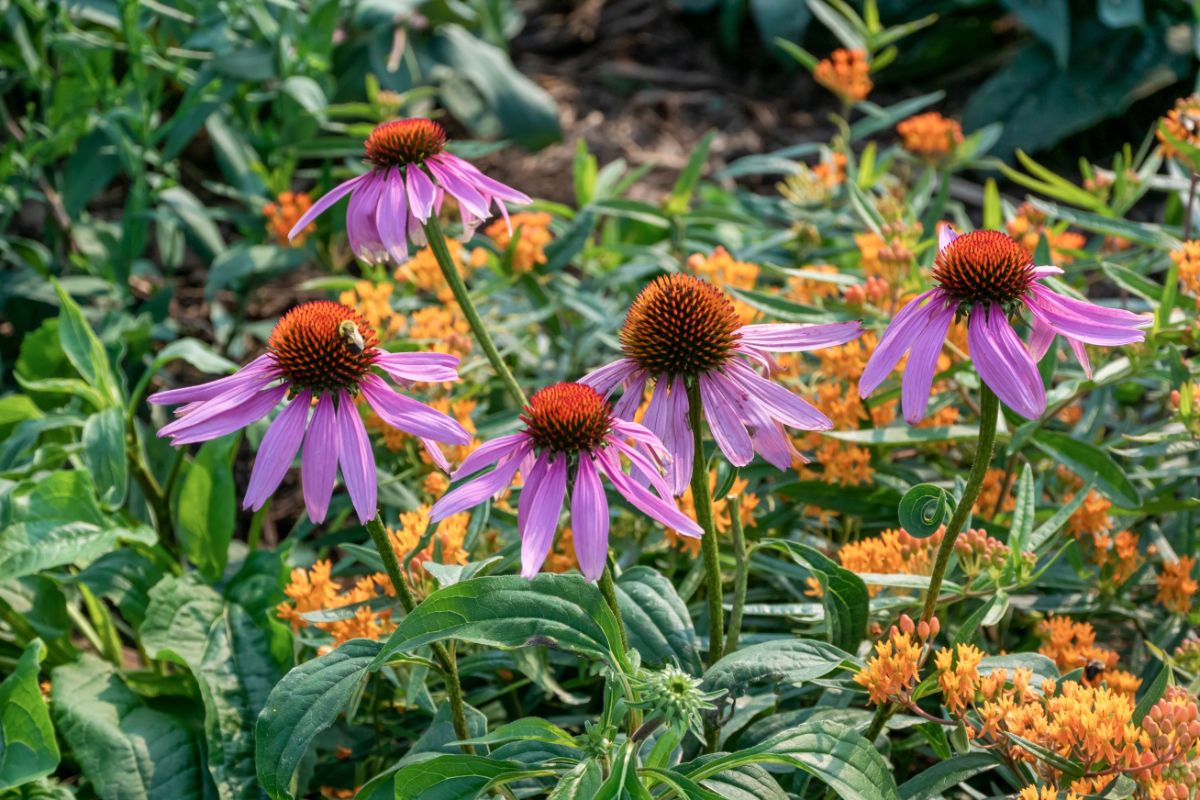
In addition to vines, any flowering plants grown near your dead hedge can help lure in pollinators and other wildlife and increase the activity around your hedge. Wildflowers and native plants are the most obvious choices for growing near dead hedges, but you can also plant flowering herbs and ornamentals near your hedge and watch as birds, insects, and other wildlife come to visit.
When selecting plants to grow near your dead hedge, consider the amount of light that your hedge receives. If you built your hedge in a shady section of your yard, you’ll want to select shade-tolerant plants. However, if your hedge is located in full sun, you can grow a variety of ornamentals nearby, or you may even be able to grow a few veggie plants.
Plants that are rich in nectar and pollen will provide the most benefits for wildlife, while plants with large seed heads or winter berries will be irresistible for wild birds. For the best results, grow an assortment of different plants with different colored flowers and bloom shapes to draw in a variety of beneficial insects and pollinators. It’s also a good idea to select plants that bloom at different times of the year so that your dead hedge will look charming no matter the season!
Making a brush pile
While dead hedges have a lot of aesthetic appeal and they’re easy to make, if you don’t want to build a dead hedge this year, there is an alternative: brush piles. Heaping small logs, twigs, branches, leaves prunings, and other plant matter together in a loose pile in a corner of your garden can provide many of the same benefits for wildlife as dead hedges, but they’re even easier to make.
Brush piles made of yard waste are essentially cold compost piles, and they will slowly break down into rich compost that you can use in your vegetable and ornamental beds. But before that yard debris decomposes, it can provide shelter for small animals and attract insects for hedgehogs, birds, and other wildlife to snack on.
While you can simply heap plant matter into a pile, brush piles will be more attractive to wildlife if you leave some open spaces towards the bottom of the pile by using larger logs and twigs at the base. This will make it easier for small animals to bury deep inside for shelter or nesting. Then small twigs, leaves, grasses, and other items can be gathered on top to give your brush pile more height and mass.
If you want to attract the most wildlife to your brush pile, it’s best to locate your pile in an out-of-the-way corner of your property where human activity is minimal. Growing wildflowers or placing a small water feature nearby will make brush piles even more alluring to small animals. And don’t forget to opt for organic gardening methods whenever possible to make your brush pile even more of a safe haven for the wildlife around you.
Frequently asked questions
Dead hedges provide shelter, nesting spots, and a place for foraging for birds, rodents, and other wildlife. On top of that, dead hedges can add a lot of privacy to garden spaces and help delineate parts of your landscape design. As the materials in dead hedges break down, they also contribute to soil health and make a rich compost too!
Small rodents, like mice and chipmunks, may take up residence in brush piles. Hedgehogs, amphibians, reptiles, and insects will also use brush piles for shelter and a safe place to raise their young. Additionally, since brush piles can attract insects, birds will often use them as foraging spots too!
Yes. Loosely formed brush piles can make a secure nesting spot for an assortment of birds, including wrens, blackbirds, and catbirds. Birds will also use brush piles as hunting grounds when searching for beetles, larvae, and other insect prey.
Dead hedges are ideal for wildlife as they have plenty of nooks and crannies for birds, rodents, and insects to burrow into. But if you want to grow a living hedge for wildlife, native shrubs are usually the best hedging options. What plants are native to your growing region will vary, but some common selections include hawthorn, holly, hazel, alder, and evergreens.
The particular bird species that will nest in your brush pile or dead hedge will depend on where you live, but some common dead hedge visitors include sparrows, warblers, wrens, and catbirds.
Wildlife habitat gardens need three main things: food, shelter, and water. Dead hedges are one excellent shelter source, but you can also grow evergreen trees or install bird houses and solitary bee hotels for wildlife. Bird baths, bird feeders, and native plants are also must-haves if you want to attract birds, pollinators, and other animals.
Summary
If you’re looking for ways to expand your wildlife habitat garden or you just want a budget-friendly fence or privacy screen, building a dead hedge is always a good idea. These attractive yet low-maintenance structures are so easy to build that even beginning DIYers can throw them together in a weekend. But the impact they make in garden landscapes is unmistakable.
Today, industrialized agriculture and urban sprawl are threatening and fragmenting habitats, which has resulted in the decline in bird and pollinator populations. But backyard gardeners can make a big impact and help wildlife populations bounce back. Creating a dead hedge is just one way to do that, but dead hedges work best when used in conjunction with other pollinator gardening elements.
If you’d like to learn more about gardening for wildlife, we have many more guides to explore. To get started, be sure to check out our piece on pollinator gardening and explore the best plants for bees, butterflies, and hummingbirds too!


Leave a Reply