• Skip to primary navigation
  • Skip to main content
  • Skip to primary sidebar
Gardening
menu icon
go to homepage
  • Edible
  • Flowers
  • How To
  • Ornamental
  • Tips
  • Perennials
  • Berries
  • Fruits
  • Herbs
  • Mushrooms
  • Nuts
  • Vegetables
  • Composting
  • DIY Projects
  • Pests
  • Plant Diseases
  • Propagation
  • Seed Starting
  • Weeds
  • Homesteading
  • Canning
  • Preserving
  • Recipes
  • Indoor Gardening
  • Houseplants
  • Indoor Plants
  • Lawn
  • Shrubs & Trees
  • Succulents & Cactuses
  • Uncategorized
  • Privacy Policy
search icon
Homepage link
  • Edible
  • Flowers
  • How To
  • Ornamental
  • Tips
  • Perennials
  • Berries
  • Fruits
  • Herbs
  • Mushrooms
  • Nuts
  • Vegetables
  • Composting
  • DIY Projects
  • Pests
  • Plant Diseases
  • Propagation
  • Seed Starting
  • Weeds
  • Homesteading
  • Canning
  • Preserving
  • Recipes
  • Indoor Gardening
  • Houseplants
  • Indoor Plants
  • Lawn
  • Shrubs & Trees
  • Succulents & Cactuses
  • Uncategorized
  • Privacy Policy
×
Home » Ornamental Garden » Flowers

How to Plant a Bulb Lasagne for Spectacular Blooms

Last Modified: Oct 26, 2023 by Daniel Berry · This post may contain affiliate links · Leave a Comment

How to Plant a Bulb Lasagna for Spectacular Blooms pinterest image.

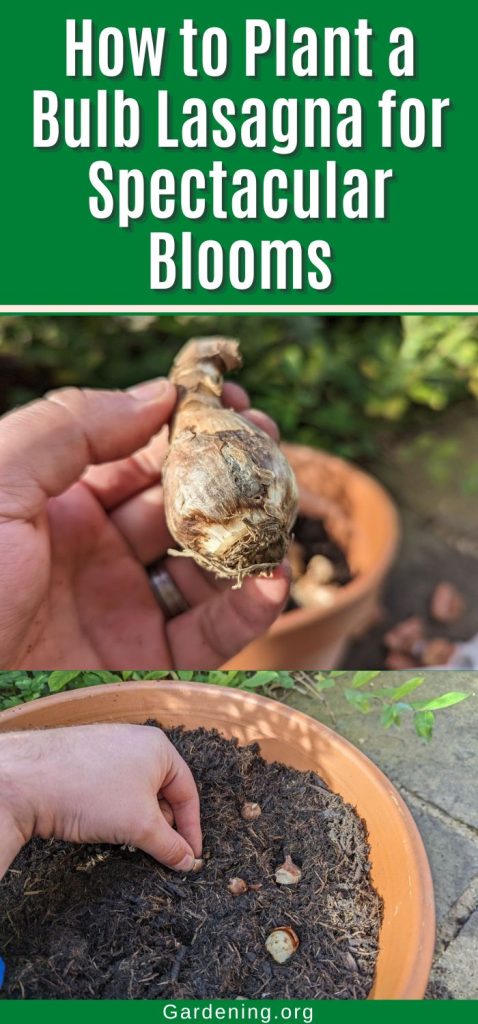
One job that I always look forward to every year is the planting of spring bulbs. It is a time full of hope for what is to come, and one of my favorite methods of spring bulb planting is the bulb lasagne.

How to Plant a Bulb Lasagna collage.
This layering or lasagna method is simple to do, once you understand the idea behind it.

This is a layering method where you plant multiple different bulbs at different depths in the same pot.

The idea is that you plant the largest and latest flowering bulbs at the bottom of the pot and then work your way up.

bulbs for a bulb lasagna container
Here is a layout of the bulbs used in this example, and their order.

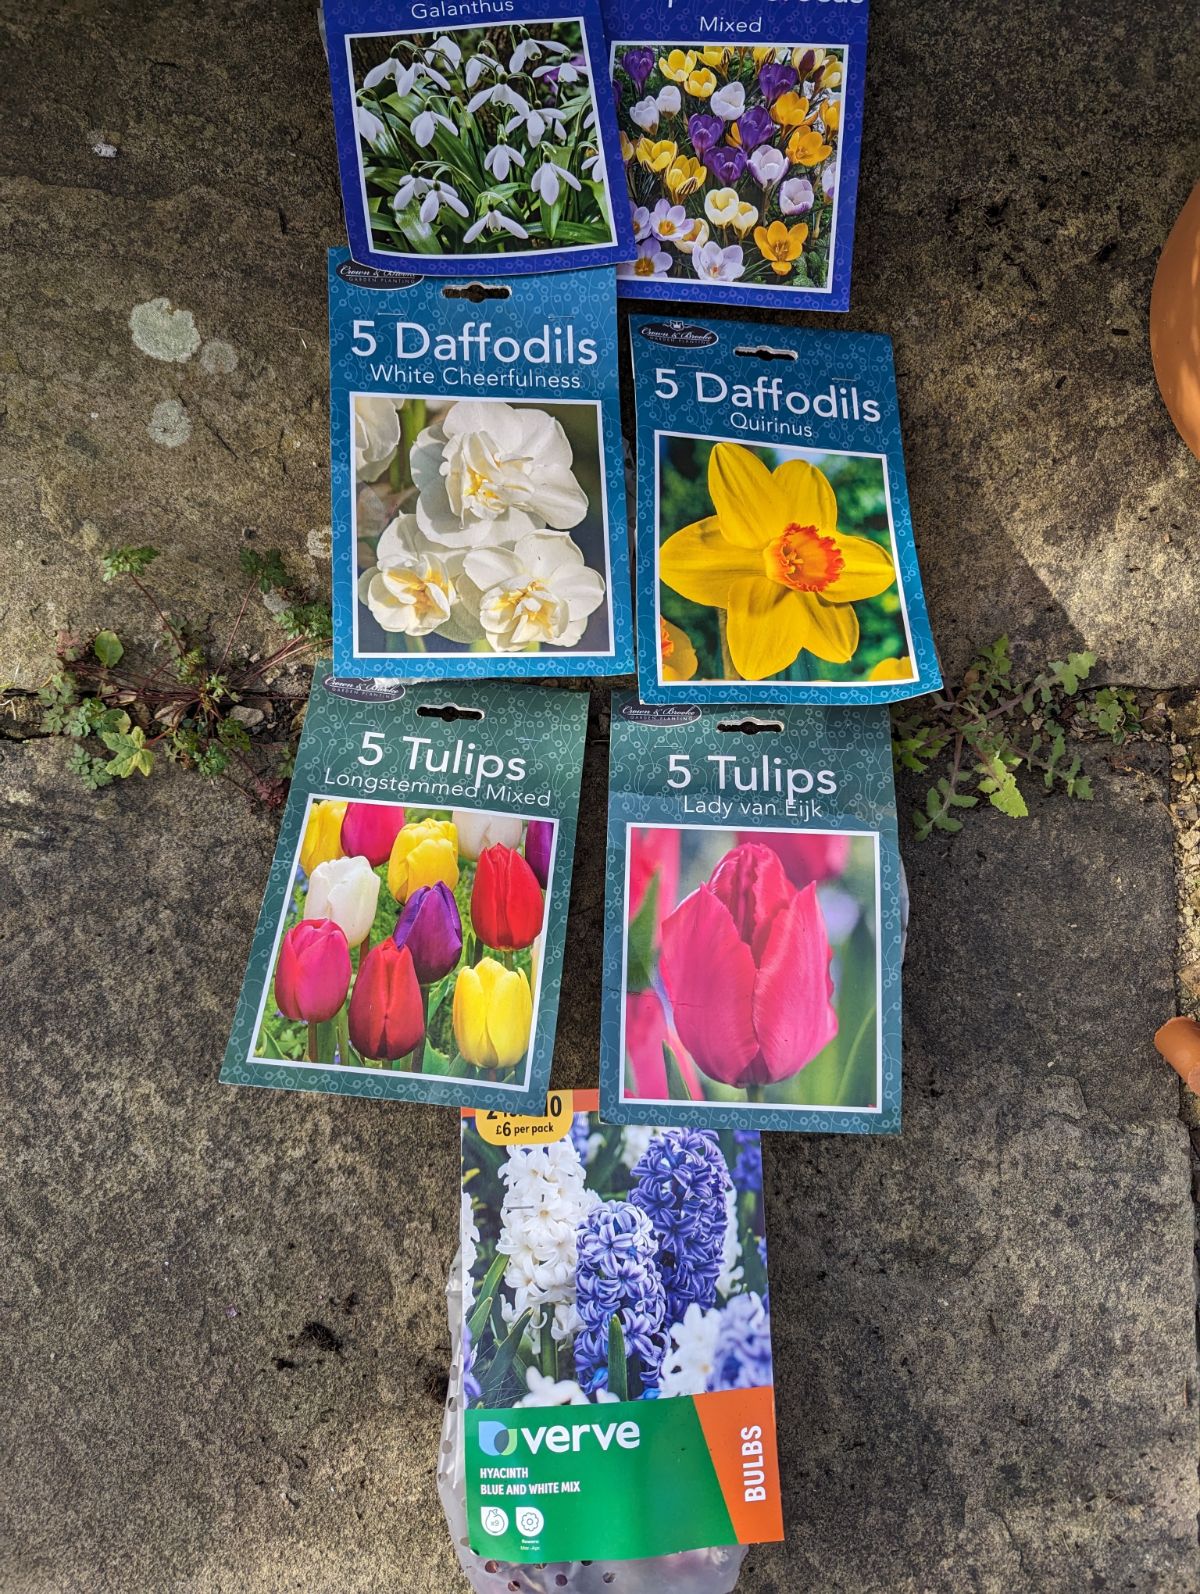
Here, you can see the layout I have gone for. Starting with Hyacinths, then Tulips, followed by Daffodils, and finally snowdrops and crocuses on the top layer.

There are lots of different arrangements you can make, but this is a very popular one.

Why not plant up a few separate lasagnas and experiment with different bulbs to see which combinations work well for you?

No matter what combination you choose, the end result is a wonderful display that lasts for months as different flowers come into bloom at different times.

What is even better is that this method is straightforward, and as long as you have a deep pot, then anyone can do it, let me show you how.

Jump to:
  • But won't The Bulbs Block Each Other?
  • How To Plant Up A Bulb Lasagne
  • Planting Up
  • Can I Leave The Bulbs In For Next Year?

But won't The Bulbs Block Each Other?

This is a very common concern when people first hear of this method, but it doesn't happen.

Spring bulbs are very good at working their way to the surface no matter what is above them.

The bulbs will divert their growth to grow around the layer above them while making their way to the surface.

How To Plant Up A Bulb Lasagne

To start with, you want to select a large enough pot to accommodate all of your bulb layers. Depth is more important than width here.

Use a pot that is around 20-25 inches deep. This will give you enough depth to fit all your layers while leaving plenty of soil at the bottom for your larger bulbs to root into.

Then, we need to talk about drainage. As this pot will be outside over winter, it is likely to see a lot of rain, so we need to ensure there is adequate drainage.

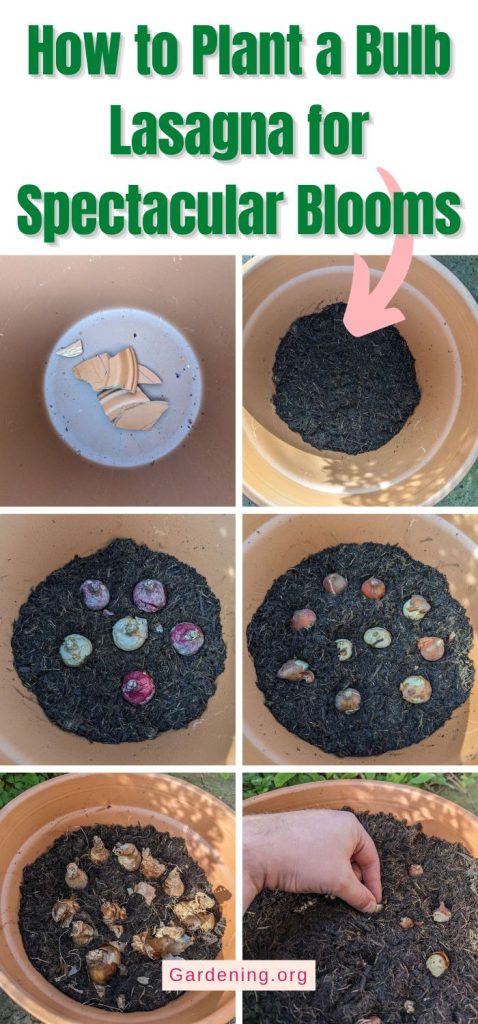
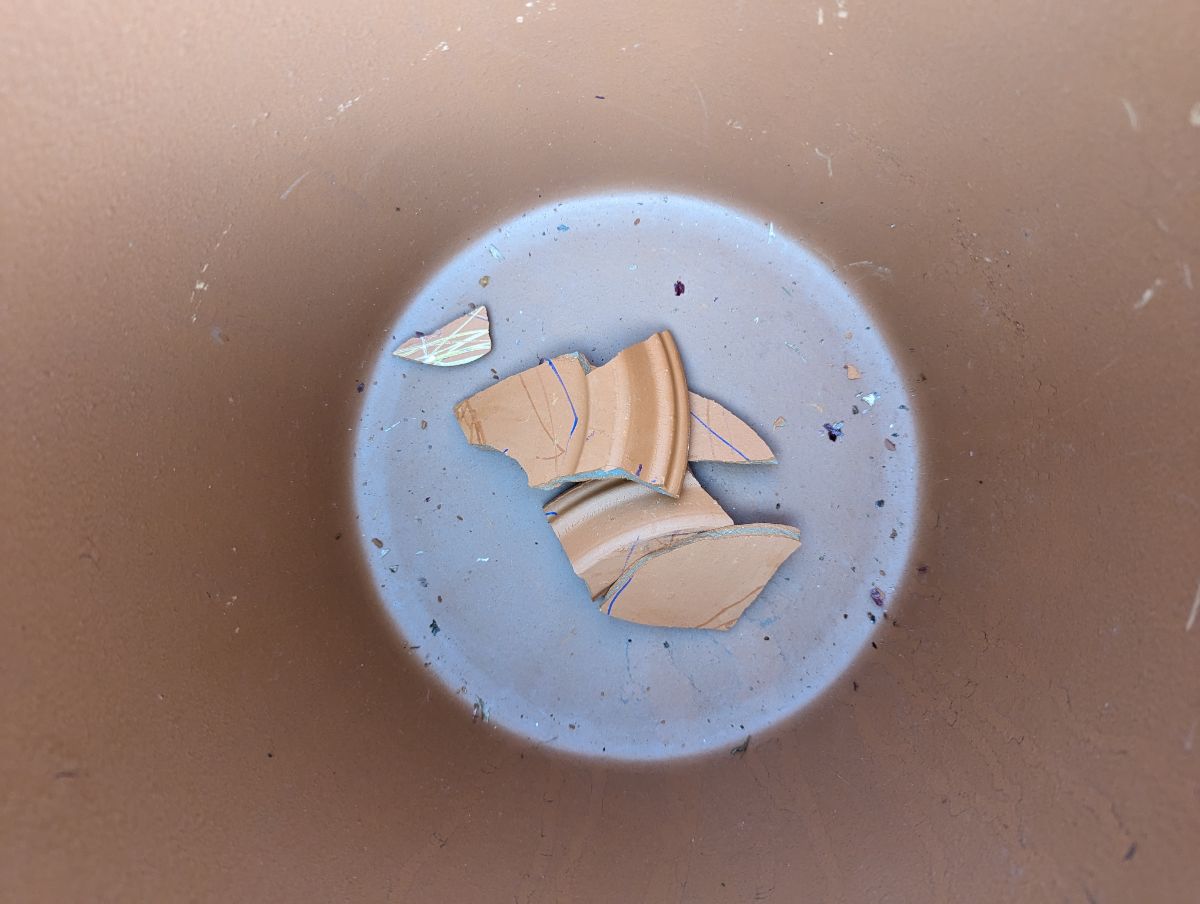
I am using a terracotta pot, which has a large hole in the bottom. To stop your soil from falling out of this hole while still allowing water to drain, you want to cover it.

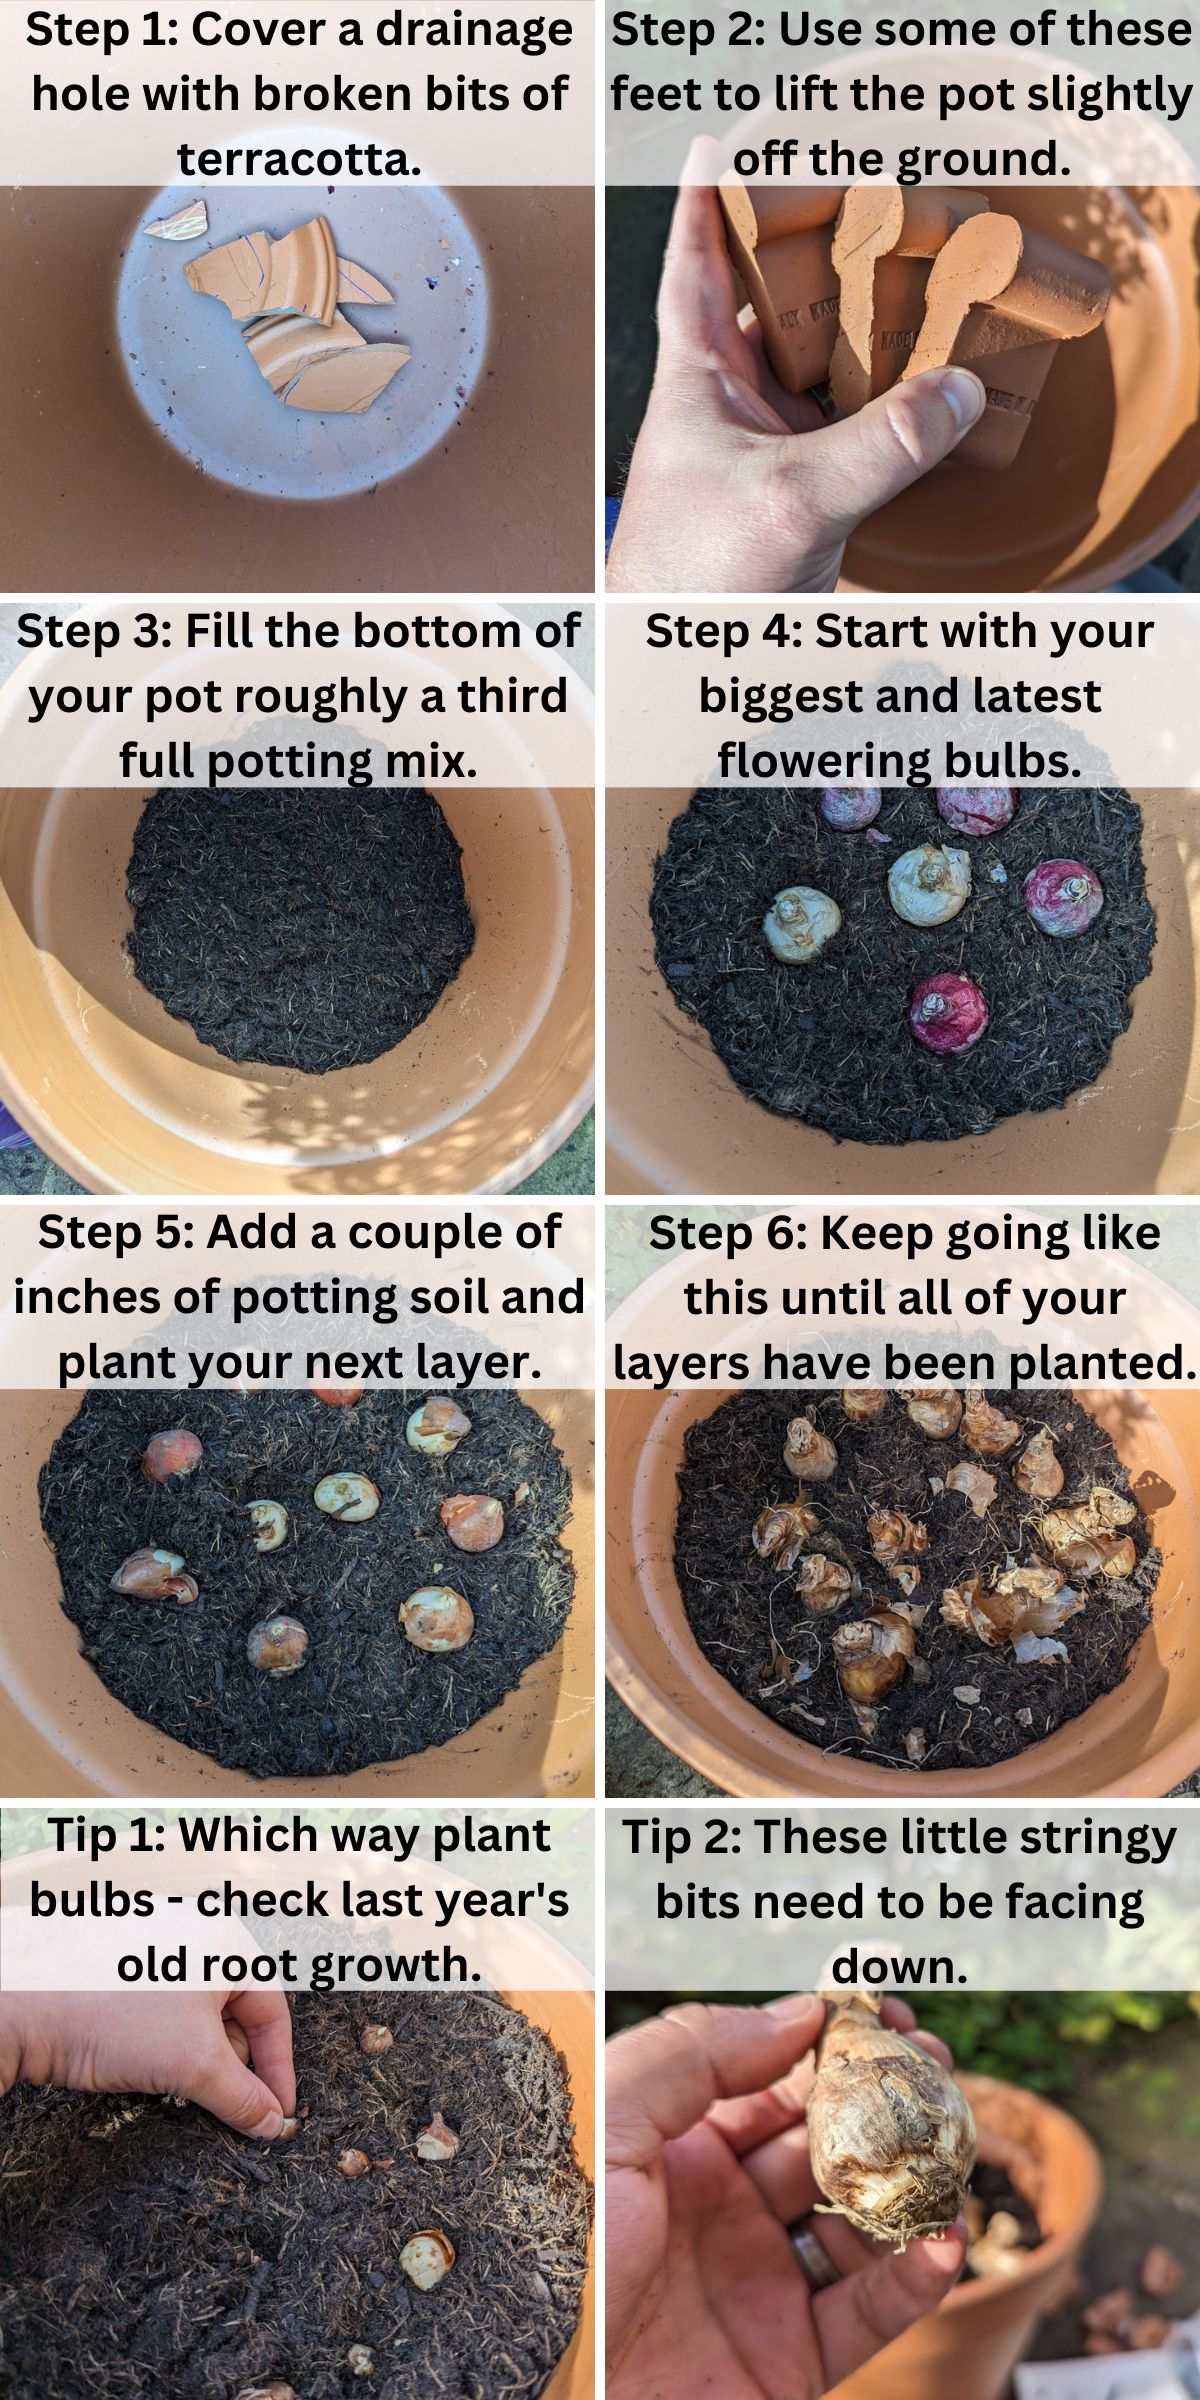
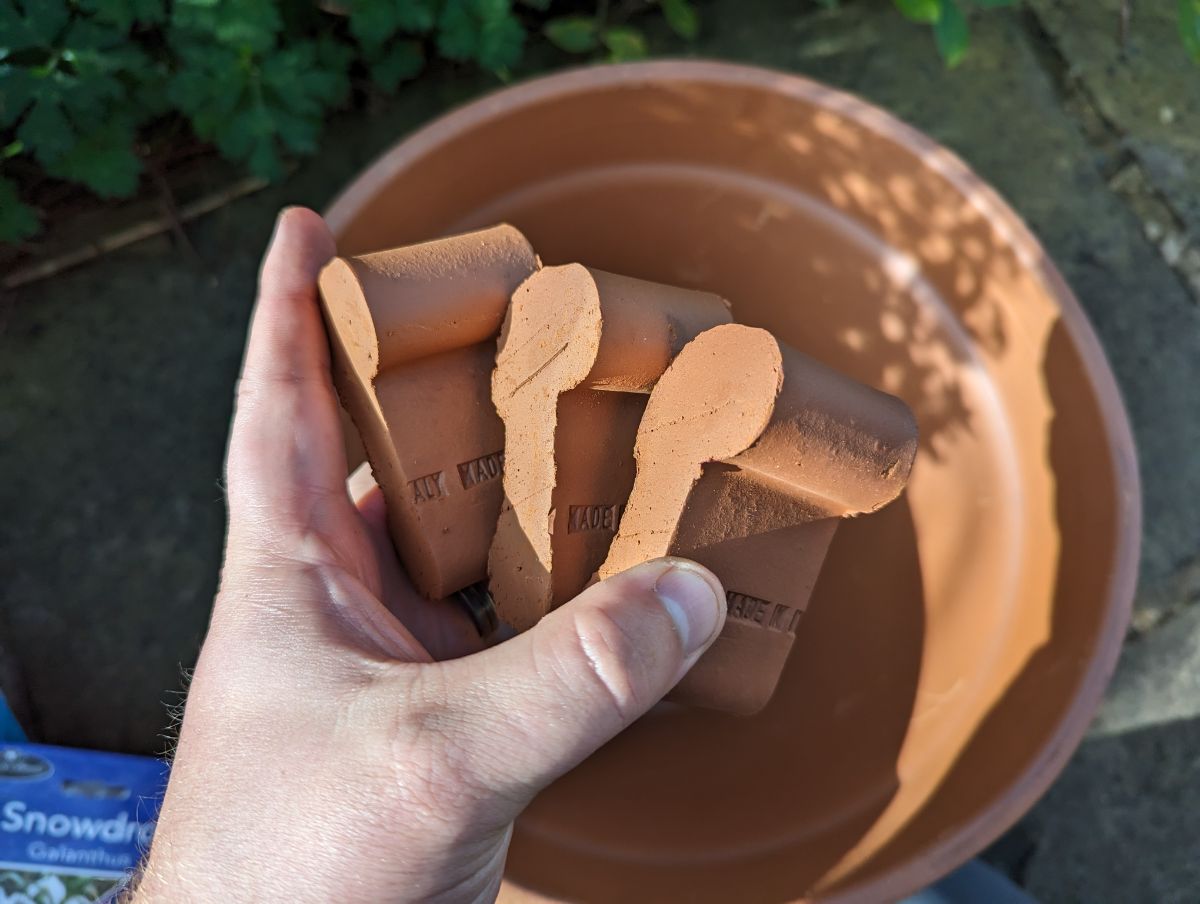
Broken bits of terracotta are commonly used for this, but anything large enough to cover the hole while still allowing water to drain will work well.

Broken terracotta pot pieces in a container for drainage
Broken pot pieces will help to preserve drainage in the container.

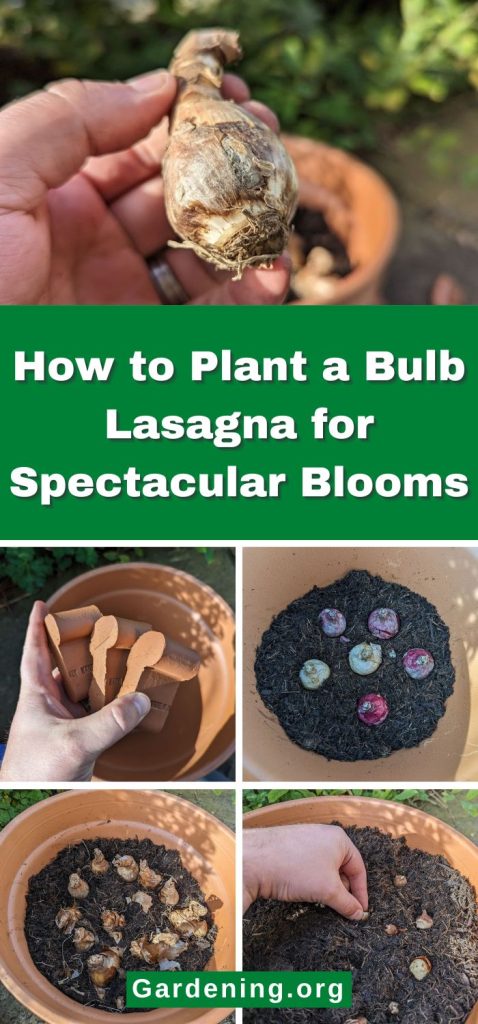
You will also need to ensure the pot is up away from the ground to allow water to drain away. If using a terracotta pot, then buy some of these feet to lift it slightly off the ground.

Pot feet for a terracotta container
These pot feet will keep the container lifted off the ground so it can drain.

Planting Up

Fill the bottom of your pot roughly a third full with a high-quality potting mix; you then want to plant your first layer of bulbs.

Bottom up planting a bulb lasagne
This is a bottom-up planting, starting with your largest bulbs.

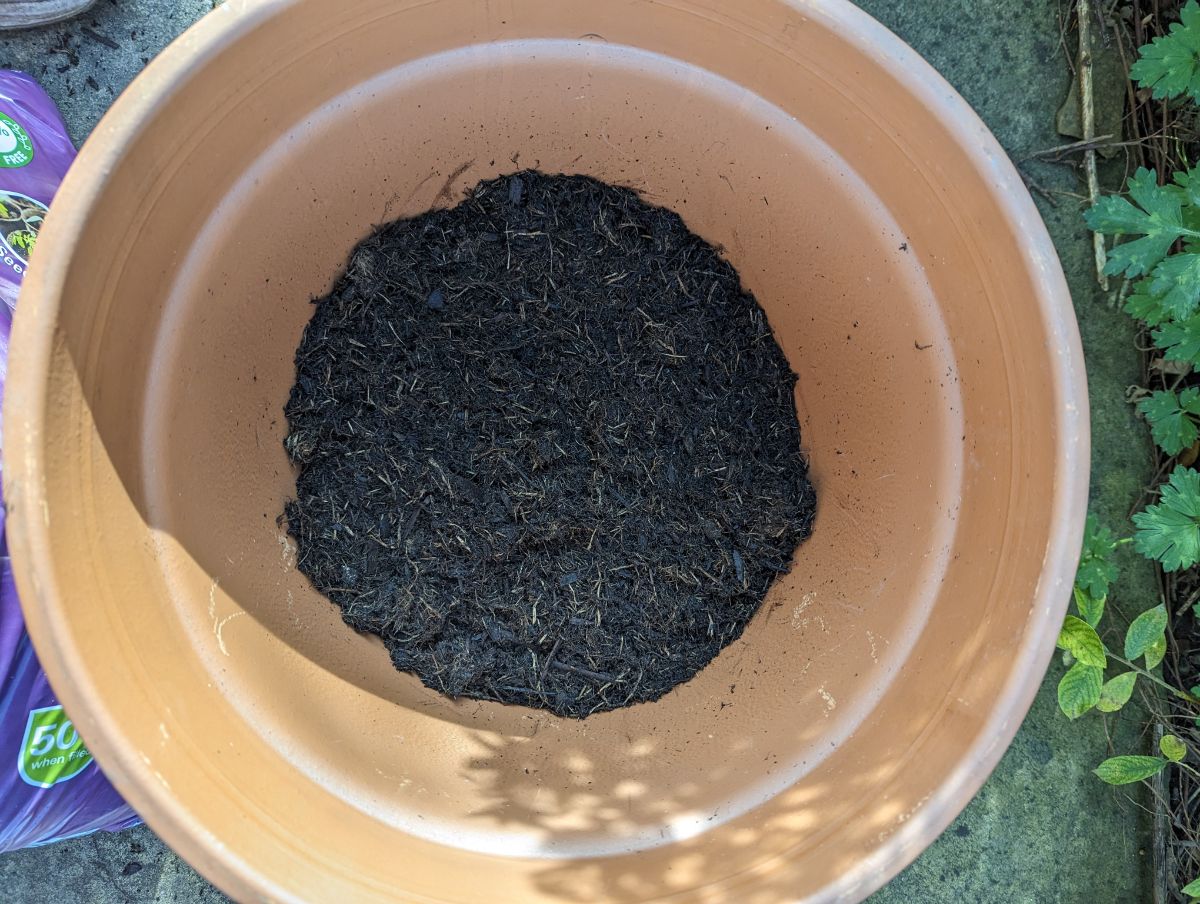
These will be your biggest and latest flowering bulbs. In my setup, these are hyacinths.

Large bulbs set inside the pot away from the side
Keep the bulbs away from the very side of the pot so they have some soil to insulate them.

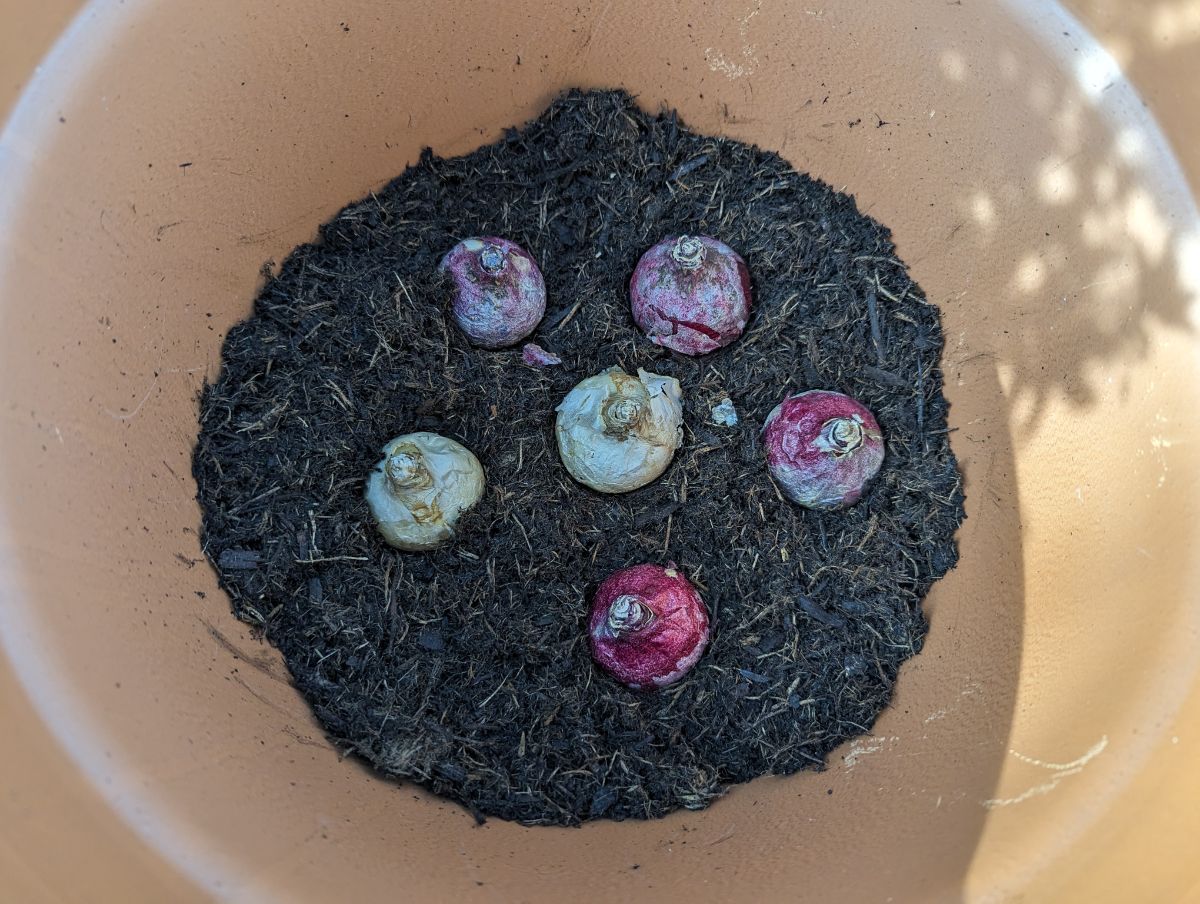
Notice that I have not planted the bulbs right up to the edges of the pot. This is just to give them a little extra insulation on those really cold nights!

Then, cover the bulbs with a couple of inches of potting soil and plant your next layer.

Covering the bottom bulb layer with soil
Cover with soil in between the layers.

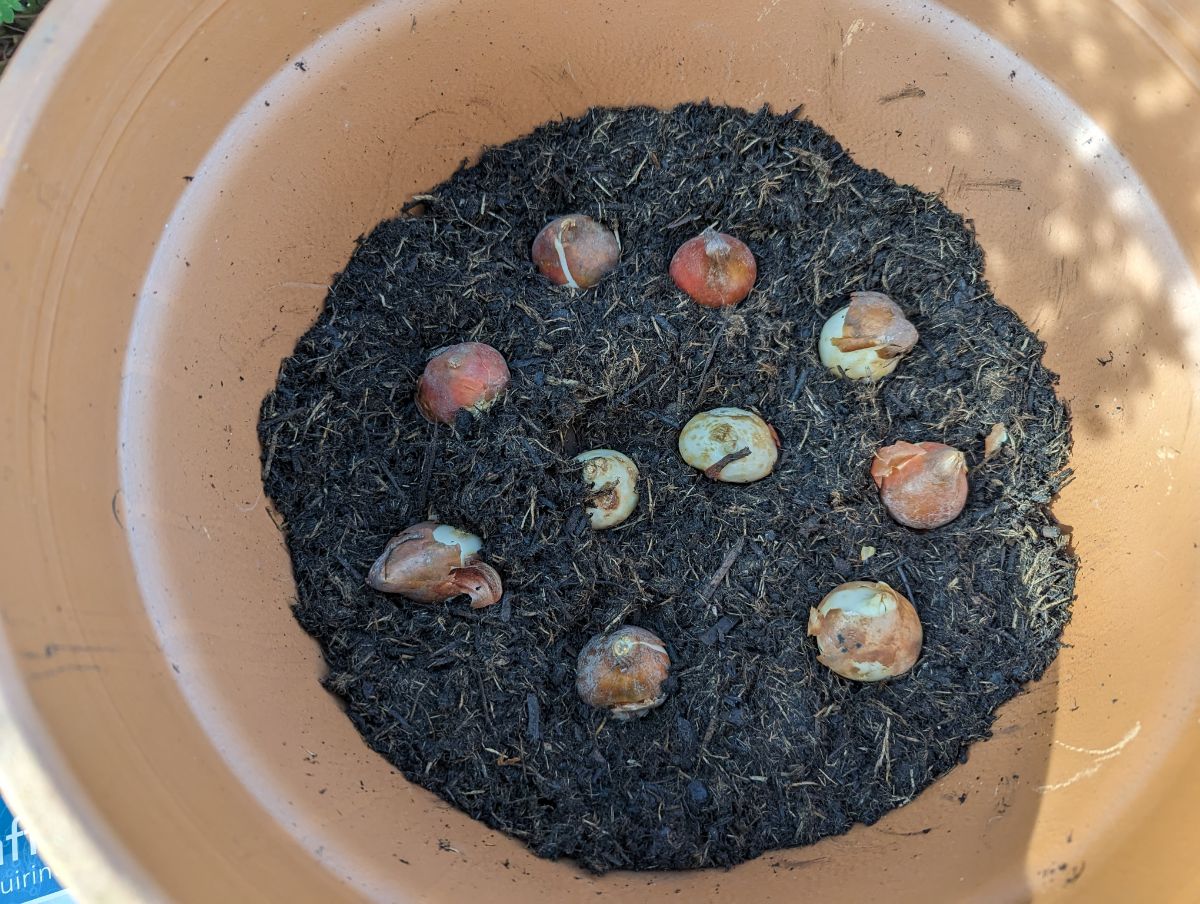
You can see that as I work my way up the layers, the bulbs are getting smaller and smaller.

Keep going like this until all of your layers have been planted.

Repeated bulb layers in a bulb lasagne
Repeat the process, layering and covering, until all your bulbs are planted.

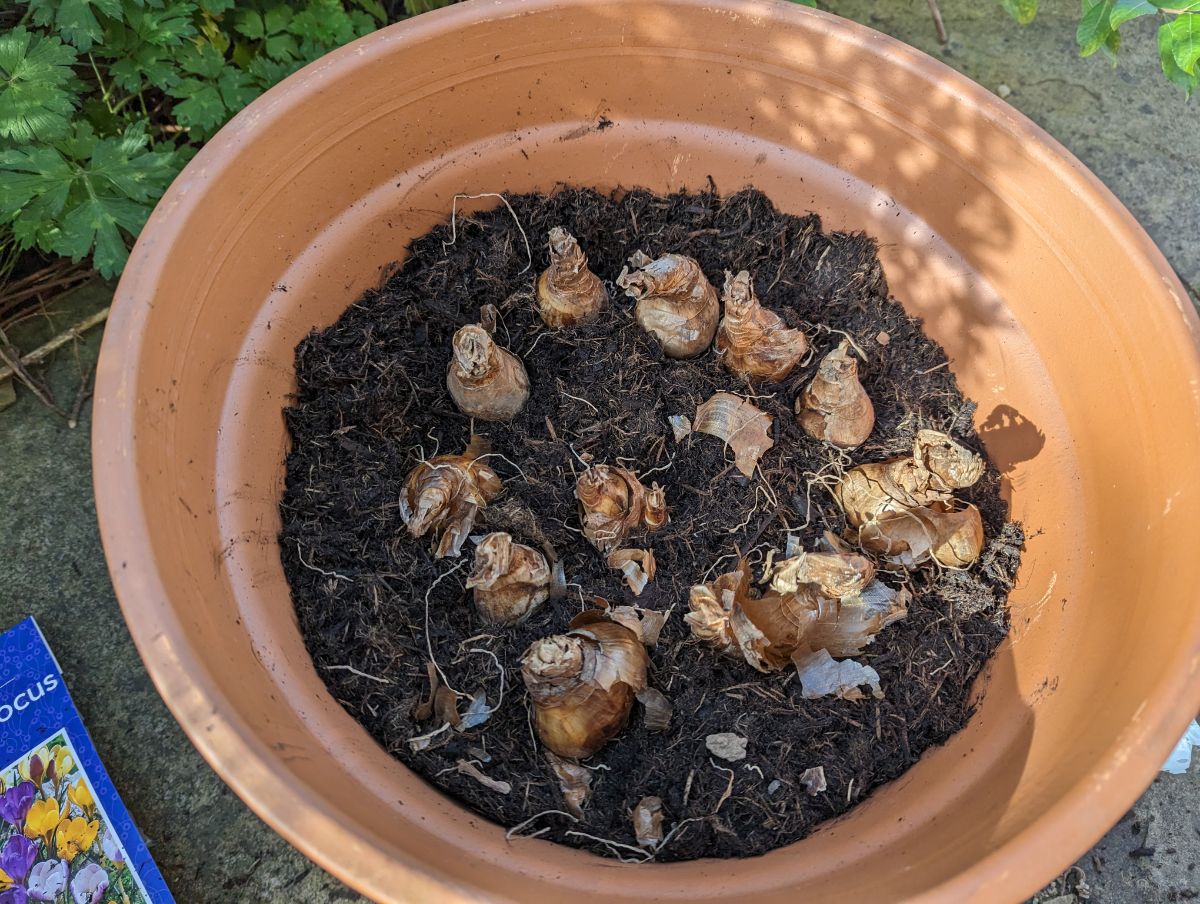
And here is my final layer; as you can see, by the time we get to snowdrops and crocuses, the bulbs are much smaller than the hyacinths we started with.

Crocus and snowdrop bulbs on the container top layer
End with the tiniest, shallowest growing bulbs.

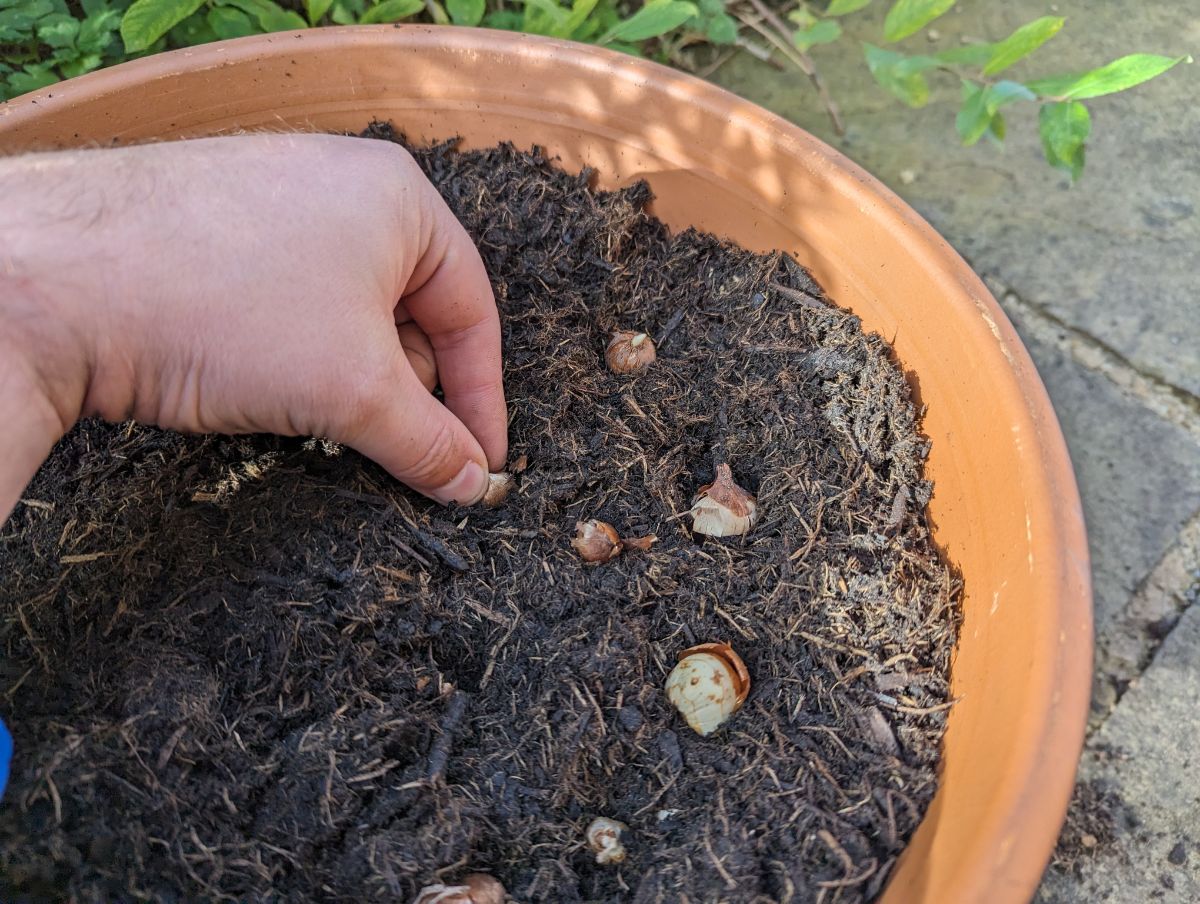
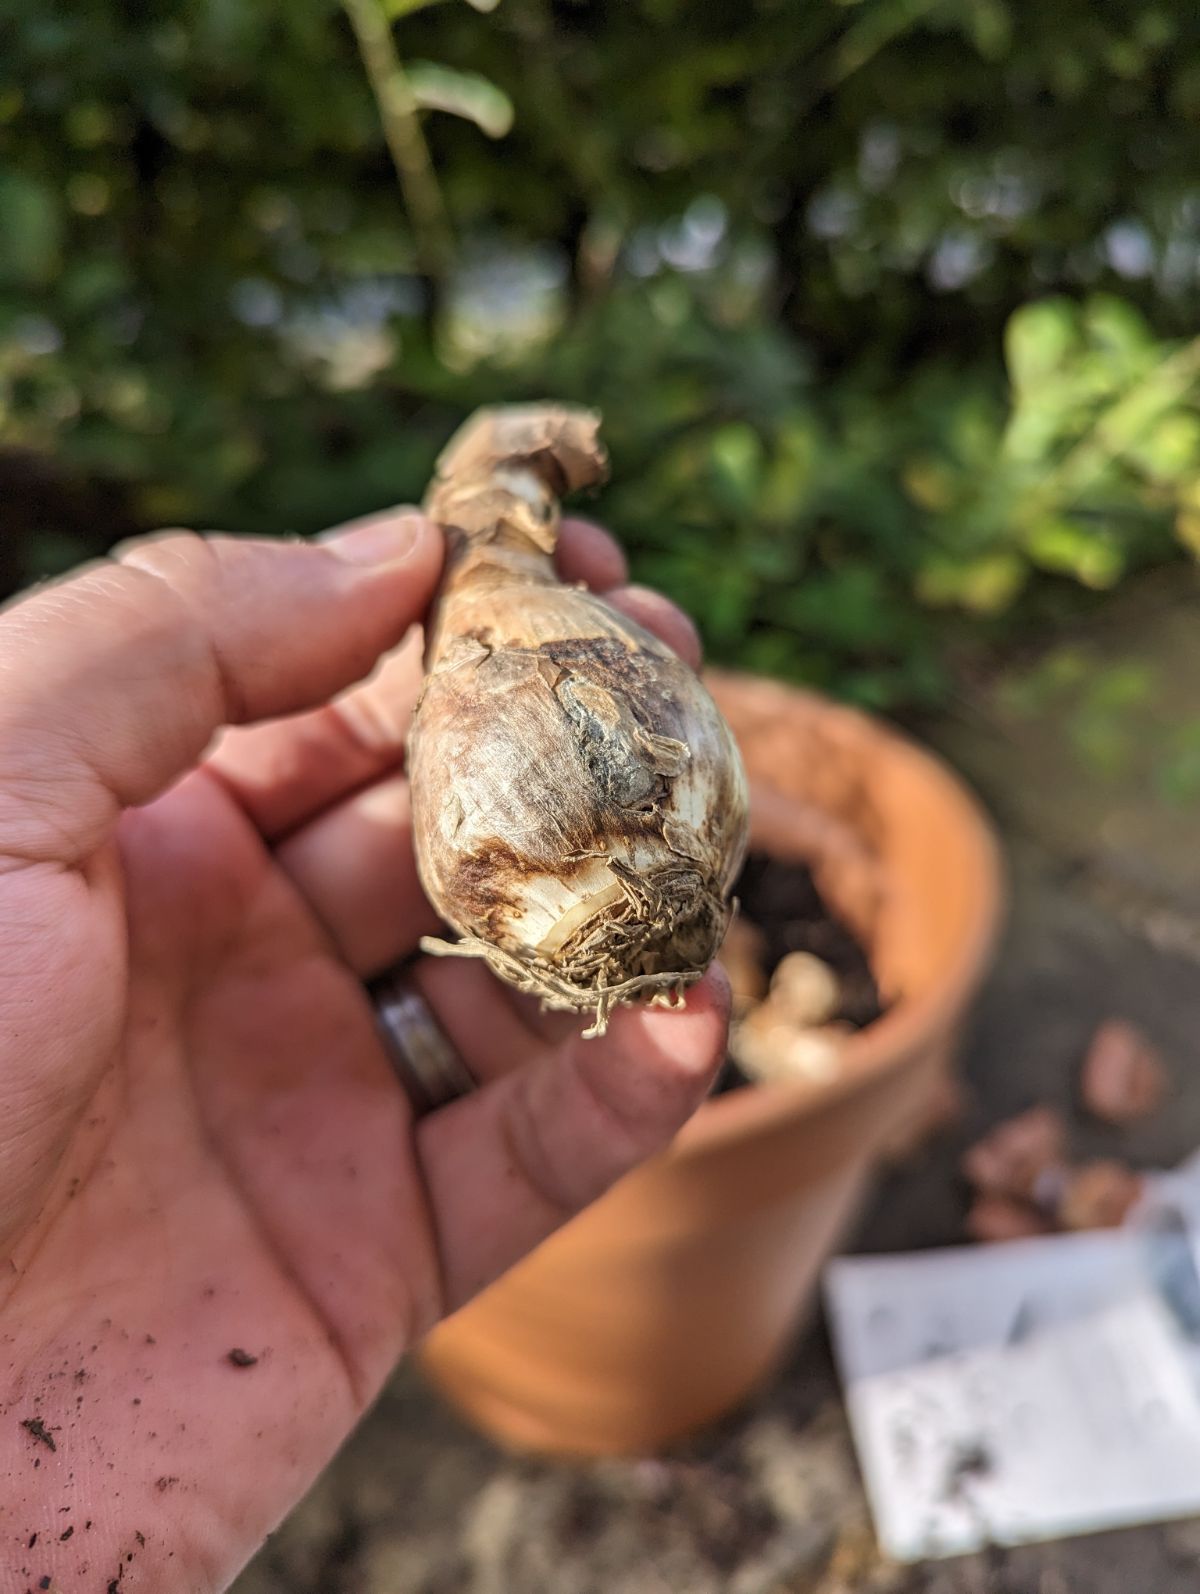
A handy little tip if you are struggling with which way round to plant your bulbs is to look for last year's old root growth.

These little stringy bits were the roots last year and need to be facing down, with the neck facing up.

Old roots on a dormant bulb
Look for old root growth, which will tell you which end to place down.

That's all there is to it! Give your pot a good watering if there is no rain, but apart from that, just leave it be and dream of the spring display you will soon be enjoying!

Can I Leave The Bulbs In For Next Year?

Yes, you can, but the display will never be as good as it was in the first year. The reasons for this are twofold.

Firstly, these bulbs are really packed in, and as such, they will use up the nutrients in the soil quickly. While you can help improve this situation with soil amendments, it will never be as good as planting them in fresh potting soil.

Secondly, many of your bulbs are at their peak when purchased; they are large, strong bulbs harvested at the perfect time to give the best display possible.

In their second year, they will not look as good as they look to divide and multiply.

Tulips are particularly bad for this and never look quite as nice in their second year.

Whether you stick with the bulbs already in your pot and just accept that the flowering won't be quite as prolific in the second year or start anew is up to you.

You can also plant the old bulbs in your garden and let them naturalize, and buy a fresh batch for next year's pot!

More Flowers

  • Annuus Soraya in full bloom.
    The Best Sunflower Varieties for Flowers, Seeds, and More!
  • A gardener is planting pansies in a planter.
    Top 20 Cold Hardy Annuals for Super Early Spring Containers
  • Pericallis ‘Senetti Blue Spoon’flowers
    23 Trendiest Annuals to Plant in 2025 (With Photos)
  • Adorable mouse in the garden under a green leaf.
    10 Deer and Rodent Resistant Bulbs You Should Plant to Overwinter

Sharing is caring!

1.1K shares
  • 986

Reader Interactions

Leave a Reply Cancel reply

Your email address will not be published. Required fields are marked *

Primary Sidebar

Gardening site avatar

Hi, Fellow Gardeners! Welcome to the world of gardening. Enjoy the growing guides and growing tips our team of professional gardeners carefully selected.

May Gardening:

  • Pea brush is used as support for peonies.
    Using “Pea Brush” to Support Perennials -- Easy and Free Flower Support!
  • Tomatoes groing in hanging planter.
    17+ Vegetables You Can Grow in Hanging Baskets
  • A glass jar of picked beets on a table.
    18 Best Fruits and Vegetables to Grow for Canning and Preserving
  • Different types of vegetable transplants hardening off before planting.
    Does Hardening Off Make Garden Transplants Frost Hardy?

Recent

  • Beautiful blooming pink bleeding hearts close-up.
    Bleeding Hearts Full Growing Guide
  • 9 Corn Growing Mistakes You’re Making Right Now
  • 14 Potato Growing Mistakes That Will Ruin Your Harvest
  • Bluebell plant in full blue bloom.
    Bluebells Full Growing Guide (Plant, Grow, and Care)

gardening.org is a participant in the Amazon Services LLC Associates Program, an affiliate advertising program designed to provide a means for sites to earn advertising fees by advertising and linking to Amazon.com. As an Amazon Associate, we earn from qualifying purchases.

Footer

About

  • Privacy Policy

Contact

  • [email protected]

As an Amazon Associate, I earn from qualifying purchases.

Copyright © 2023 Gardening LLC.