
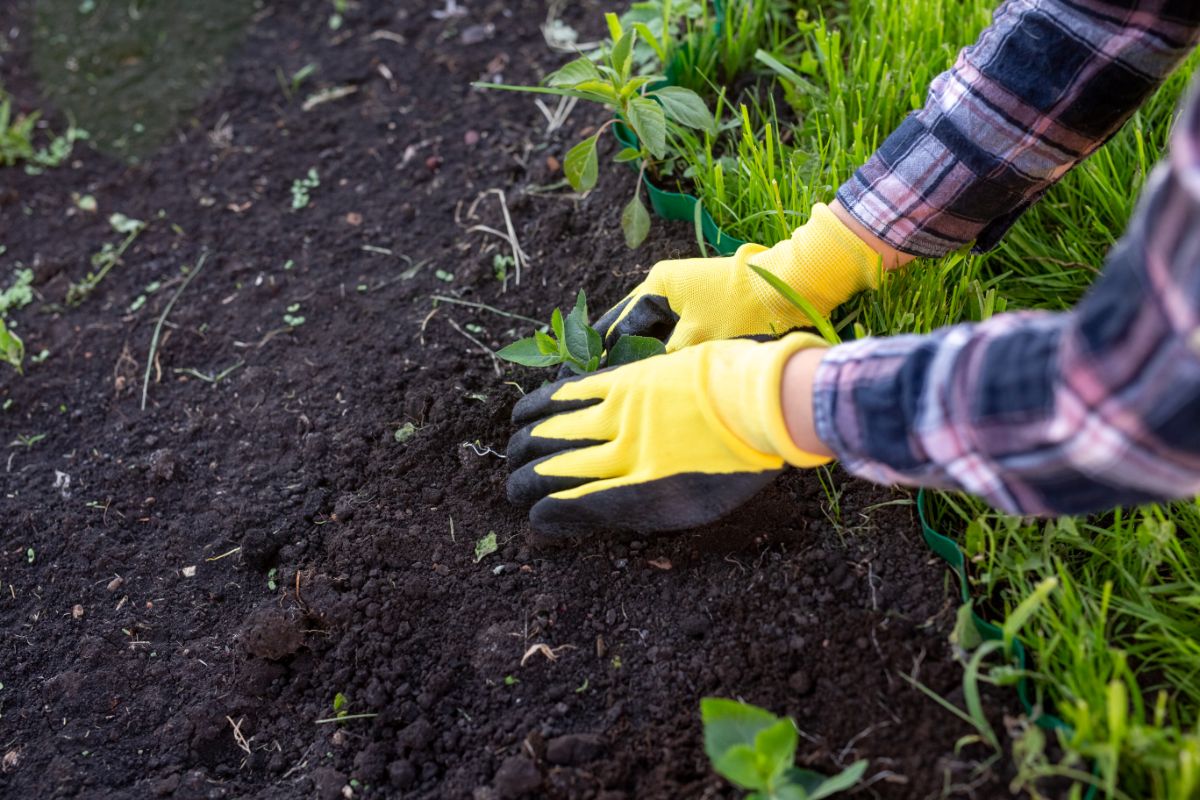
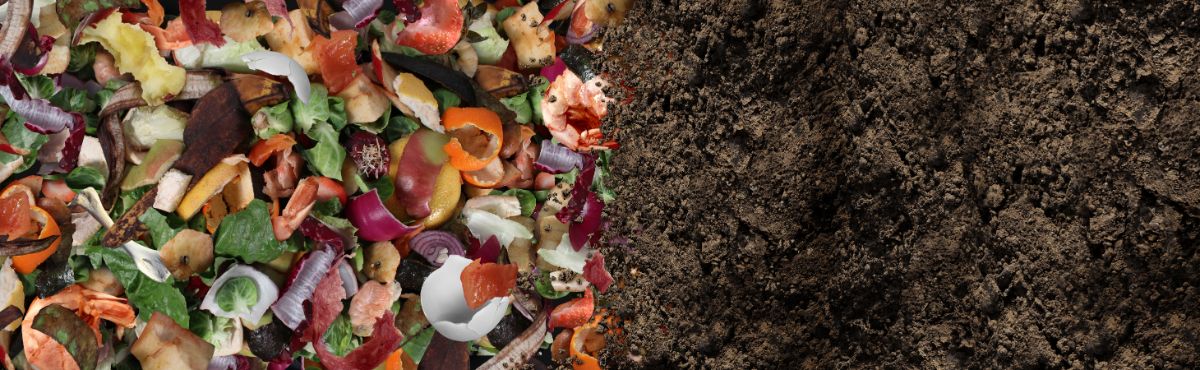
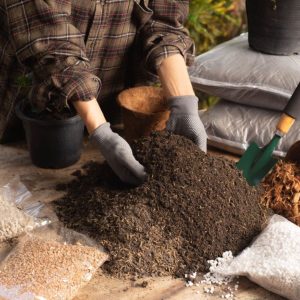
Whether you’re looking to enrich your garden soil or simply reduce the amount of food waste you throw away every week, there are plenty of great reasons to begin composting at home this season. While store-bought, bagged compost contains many of the essential nutrients plants need, homemade compost can be even more nutrient-dense, and because you made it yourself, you know exactly what went into it and can relax in the knowledge that you’ve made a quality product.
In this article, we’ll cover the basics of outdoor composting, including the most popular methods, tips to make compost quickly, and even how to create your own easy, budget-friendly outdoor compost bin. Read on, and you’ll be composting like a pro in no time.
Jump to:
Why compost?
You can learn a lot from composting, such as how beneficial microorganisms work, the elements that make up a healthy soil structure and the natural, cyclical, interconnectedness of the food chain and nature in general. But beyond its capacity to teach us so much, composting has very real and tangible benefits for your garden and your houseplants:
- Compost is jam-packed full of the nutrients plants need. Compost contains an impressive mixture of nutrients and minerals that plants need to grow healthy and strong. Not only that, but properly made compost contains macro- and micronutrients that synthetic fertilizers are often lacking. This makes compost an essential component of any successful garden.
- It’s a slow-release soil amendment. Unlike many fertilizers, compost slowly releases nutrients into the soil as it breaks down, providing enrichment and sustenance for plants throughout the growing season. This means fewer applications and less work for you and a more steady stream of nutrients for your plants.
- Compost reduces the need for chemical fertilizers. This is particularly important if you are growing an organic vegetable or pollinator garden where delicate pollinators can be affected by synthetic fertilizers. Because it is all natural, you can rest easy knowing exactly what goes into your garden and the produce you grow.
- It helps to neutralize soil pH. Aged compost has a pH of between 6 and 8, but tends towards a neutral pH of 7.0. Amending your soil with compost can help balance the pH of your soil, making it more suitable for most plants, which tend to prefer soil with a relatively neutral pH.
- Compost is plant-safe. Unlike synthetic fertilizers, when properly aged and applied, compost will not burn your plants. This means that you’ll have to worry less about dosing your plants correctly and you won’t need to deal with the disappointment of a garden that has been overly fertilized.
- Beneficial microorganisms love it. Healthy garden soil is a pretty active place and is teeming with beneficial bacteria, fungi and other microbes that can help improve plant health. One way this occurs is when microorganisms naturally break down organic matter in the soil making it more bioavailable for plants to absorb.
- Compost helps plants naturally resist pests and pathogens. Compost works to strengthen and feed plants, which in turn strengthens plants’ natural immunity making them better able to resist pests and pathogens without the use of synthetic pesticides.
- It improves soil-structure, drainage and water retention. Yes, compost contains the nutrients plants need, but it can also change and improve the very structure of your soil. Compost helps soil retain water, which can be particularly helpful during the heat of summer or if you live in a region where droughts are common. Water retention can be a particular issue if you have sandy soil, but compost can help improve drainage and air flow when added to dense, heavy clay soils as well.
- Compost is versatile. Unlike many fertilizers, compost can be used indoors or outdoors, in produce gardens, cut flower gardens and even on your houseplants. What’s more, compost can be used dry or steeped in water to make a liquid fertilizer, known as “compost tea.”
But beyond the benefits for your garden and houseplants, composting at home has several distinct environmental perks as well. For this reason, creating your own compost is a great way to make your home more eco-friendly and reduce your carbon footprint.
- Composting at home is a perfect way to make greener choices. A recent study found that over ⅓ of all food produced worldwide annually is wasted. That amounts to over 1.3 billion tons of food waste. Composting at home allows you to redirect the kitchen scraps and food waste your family produces back where it belongs: to the earth, where it returns nutrients back to the soil and the plants that need it. While reducing plastic and choosing greener products are also important steps to greener living, composting is another important component of an eco-friendly lifestyle.
- It reduces methane emissions from landfills. When food and other organic matter wind up in landfills, they don’t decompose properly. This is because landfills are very compacted down and are often covered, which reduces airflow and creates an anaerobic environment where organic matter doesn’t break down properly. In this environment, organic matter begins to produce methane, a potent greenhouse gas that is 25% more damaging to the atmosphere than carbon dioxide.
- Composting reduces the need for synthetic chemicals. Adding compost to your garden naturally feeds your plants with chemical-free, organic matter. This means you won’t need to resort to chemical fertilizers to keep your plants happy. Even better? Because compost helps boosts plants’ natural immunity, it reduces the need for synthetic pesticides as well.
How does composting work?
While there are several different composting methods, such as bokashi and vermicomposting, which function differently, the most common composting techniques rely on the same key elements.
Hot and cold composting, the two most common outdoor composting methods, rely on a specific ratio of nitrogen to carbon-rich organic matter, which is combined with moisture and aeration to produce finished compost. But it doesn’t happen just by magic.
Under the correct conditions, beneficial microbes that naturally occur in the soil will begin to break down the organic matter in your compost pile. The more optimal the conditions in your pile, in terms of organic matter, moisture and temperature, the faster these microbes will work and the sooner you’ll produce finished compost.
The primary difference between hot and cold composting methods, which we’ll discuss in a minute, is that hot compost piles are aerated, which increases the temperature of the pile and thus the activity level of the composting microbes.
The importance of nitrogen and carbon in your compost pile
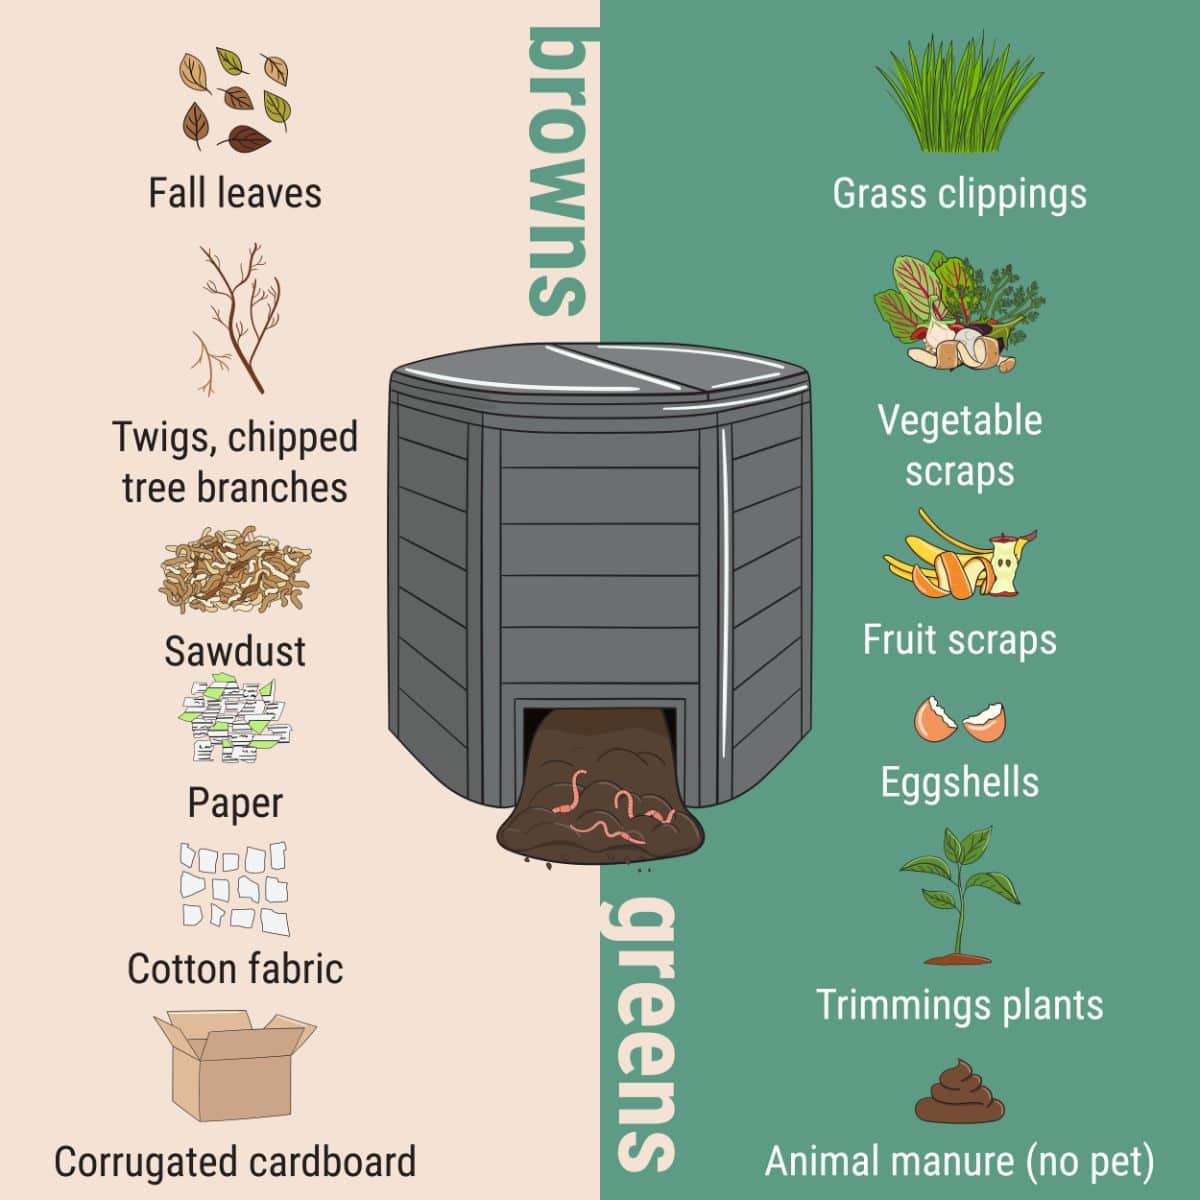
Both nitrogen- and carbon-rich organic matter are needed to create a functioning compost pile. Of course, in nature, all organic matter break downs down eventually, but if you don’t have enough nitrogen or carbon in your pile, things won’t work properly and you’ll end up with a pile that either takes forever to decompose or begins to emit unpleasant odors.
The secret to great compost is getting the proper ratio of nitrogen to carbon in your pile. For an efficient and productive pile, aim for three parts carbon-rich items to one part nitrogen-rich items and ensure that those items are either layered or well-mixed together.
But what do “nitrogen- and carbon-rich items” mean?
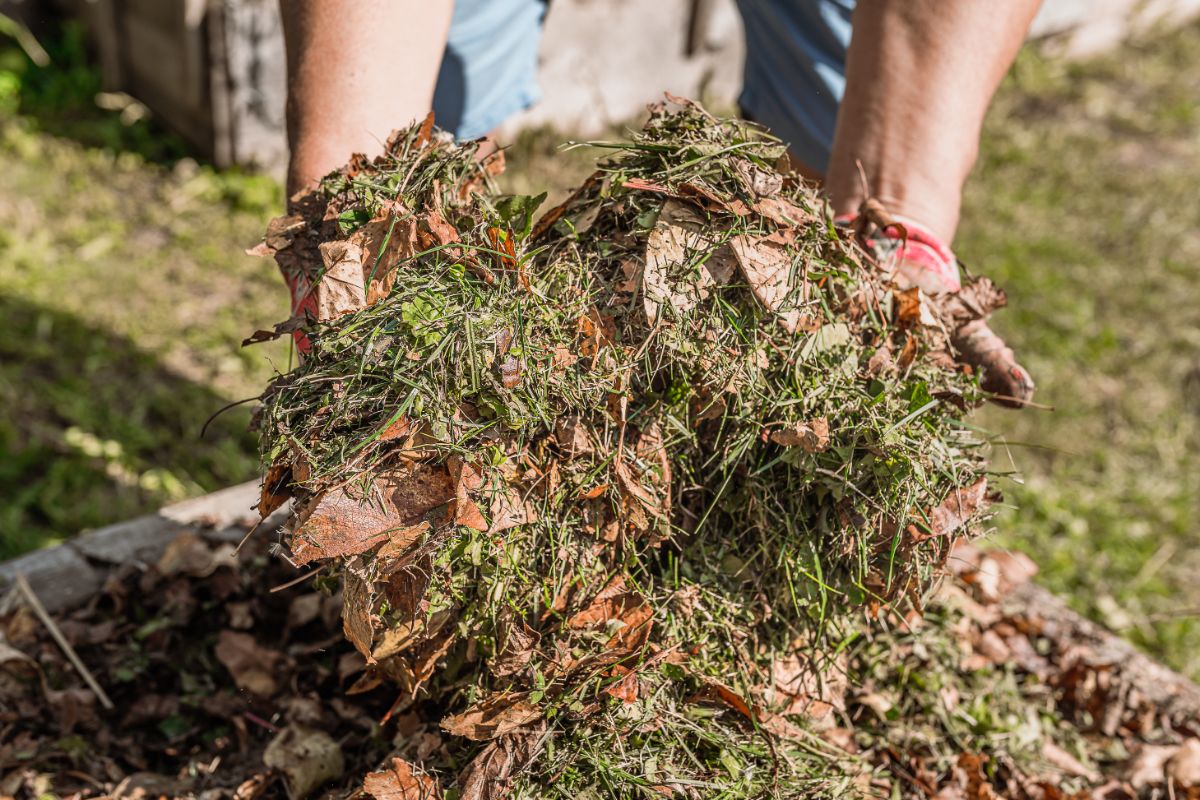
Nitrogen-rich organic matter, also known as “green” material, includes more “wet” items, such as:
- Kitchen scraps, including vegetable and fruit peelings, loose leaf tea, corn cobs and fruit pits.
- Fresh grass clippings.
- Green leaves.
- Weeds and other fresh yard waste (more on this later.)
- Cut flowers from an old bouquet.
- Chicken or rabbit manure (more on this later too!)
- And hair or pet fur when you clean out your brushes.
Carbon-rich organic matter, or “brown” material, on the other hand, includes “drier” items, like:
- Dried autumn leaves.
- Old sticks or other dry yard waste.
- Bits of wood and sawdust.
- Coffee grounds and filters.
- Shredded newspaper or paper without colored inks.
- Shredded cardboard.
- Paper bags.
- Pizza boxes.
- Pine needles (in limited quantities as they can be acidic and change the pH of your soil.)
- Wood ash (in limited quantities as it is very alkaline and can also change the pH of your soil.)
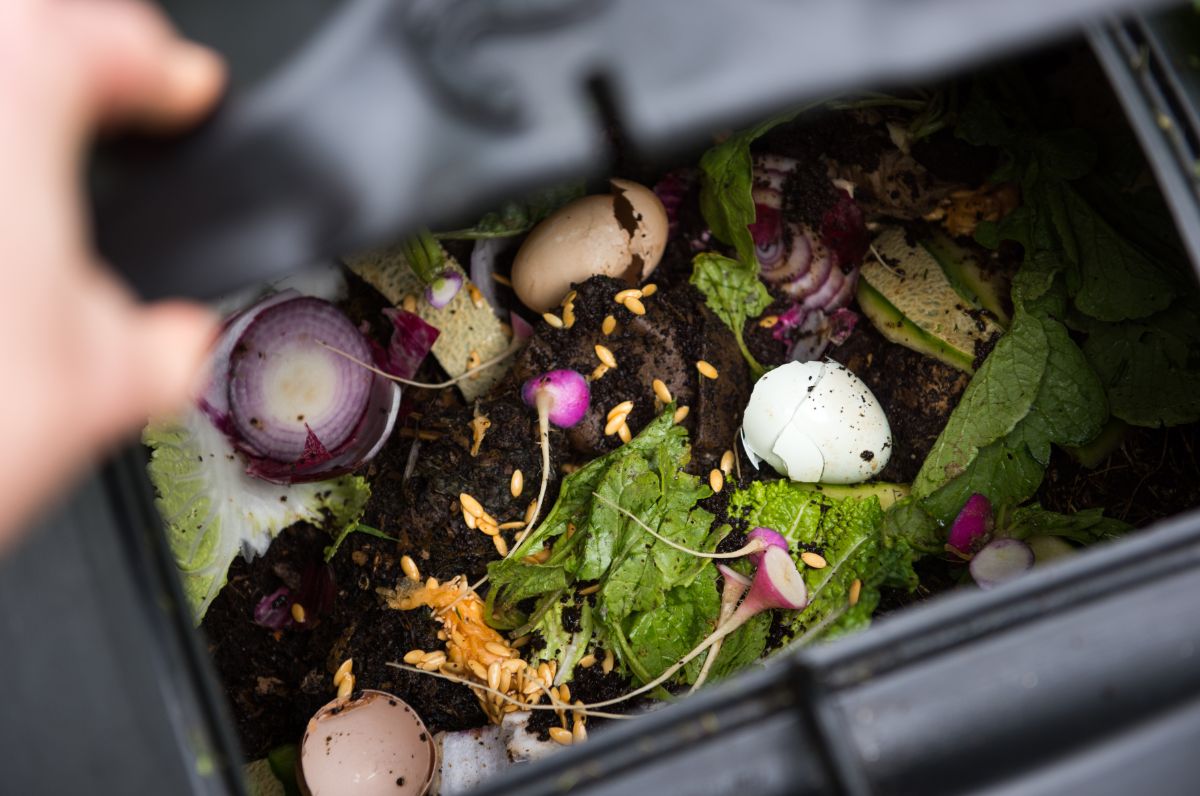
What can be composted?
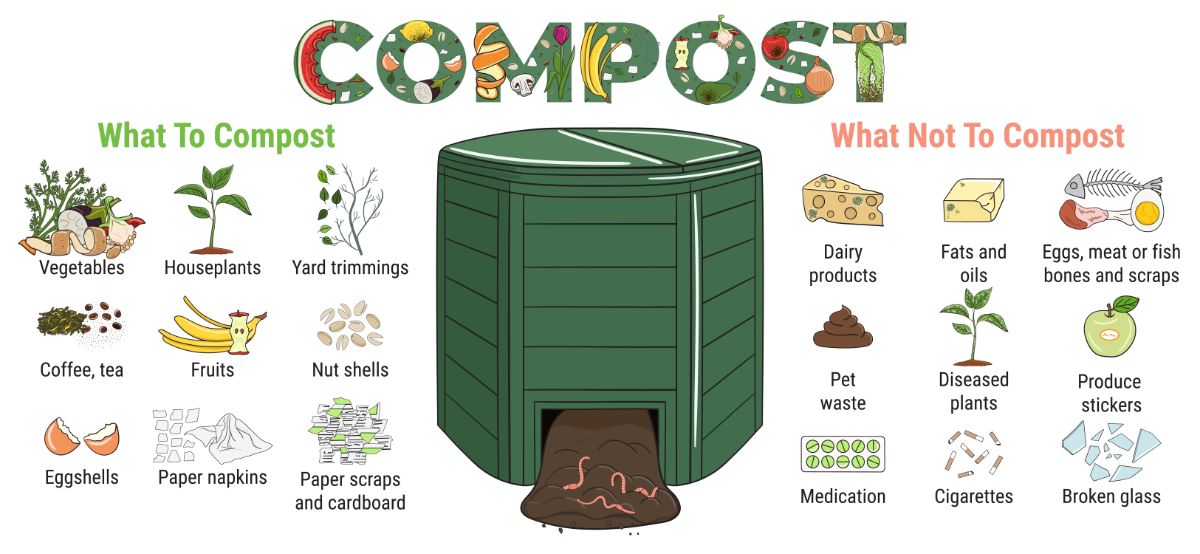
Almost all organic matter can be composted. All of the items listed above, including kitchen scraps and yard waste, are excellent additions to your compost pile. Cooked foods, as well as raw ingredients, are all compostable. While some may argue that cooking oil is not appropriate in compost heaps, just avoid composting large quantities as it can slow the composting process down a bit.
What can’t be composted?
While almost all organic matter is compostable, there are a few exceptions. Human and household pet manure should never be added to your compost pile as it can contain harmful pathogens that can find their way into your produce.
That said, if you do want to compost pet waste, you can, just make a dedicated pet waste compost pile and only use that compost far away from any space where you intend to grow food crops. For a more tidy system, there are several pet waste composters on the market that can make composting a breeze too.
Cooked meat and dairy are generally not recommended for compost piles as they can attract unwanted pests, but that shouldn’t be a problem for a well-maintained and protected compost pile. Raw meat, however, should not be composted as it, too, can contain harmful pathogens.
For health reasons, avoid composting glossy paper or colored inks, coated cardboard, treated lumber and dryer lint (as it often contains microplastics from synthetic fabrics).
Diseased plant material from your garden should also not be composted to avoid transmitting pathogens to next year’s garden. Similarly, weeds should only be composted with hot composting, not cold composting, as hot compost piles alone achieve temperatures high enough to kill off weed seeds.
Outdoor composting for beginners
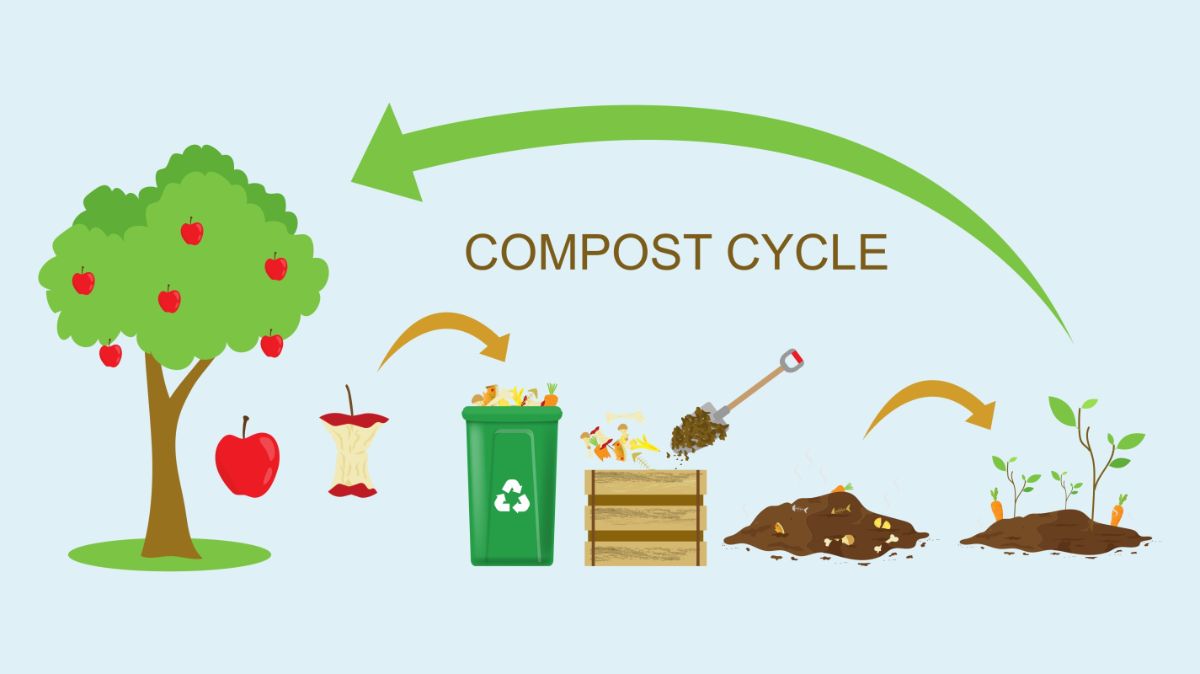
Composting may look complicated, but it really isn’t. Everything in nature eventually becomes compost, but the secret to successful composting at home comes down to creating the best environment where organic matter can decompose quickly and efficiently.
While there are indoor composting methods, such as vermicomposting and bokashi, most gardeners and homeowners opt to compost outdoors for a variety of reasons. Some of those reasons include:
- Location, location, location. The best compost pile is one that is located correctly. That means that it is in a location where it can be easily accessed when necessary, such as when you want to dispose of scraps from the kitchen or when you need to harvest compost for your garden. Since outdoor piles can be located right next to your garden, it makes using your finished compost that much easier.
- Outdoor composting can be done on a larger scale. Indoor composting methods are great; however, they are usually confined to small containers, such as buckets and tubs, which take up little room indoors. Outdoor compost piles, on the other hand, can be as large as you like. And, of course, larger piles produce more compost.
- The “ick” factor. While indoor composting methods, when properly done, are very tidy and produce no odors and don’t attract pests, they are not for everyone. Perhaps you don’t like the idea of keeping worms indoors (as is the case with vermicomposting) or maybe you just don’t want your old kitchen scraps composting inside. Whatever the reason, outdoor composting may be just the solution for you.
Once you’ve decided you want to start composting outdoors, you’ll next need to choose which method will work for you: hot composting or cold composting. Both methods have the pros and cons and simple tricks to make sure they produce the quality compost that your garden and houseplants crave. Read on for the difference between these methods and how to set up your own composting system.
Hot composting
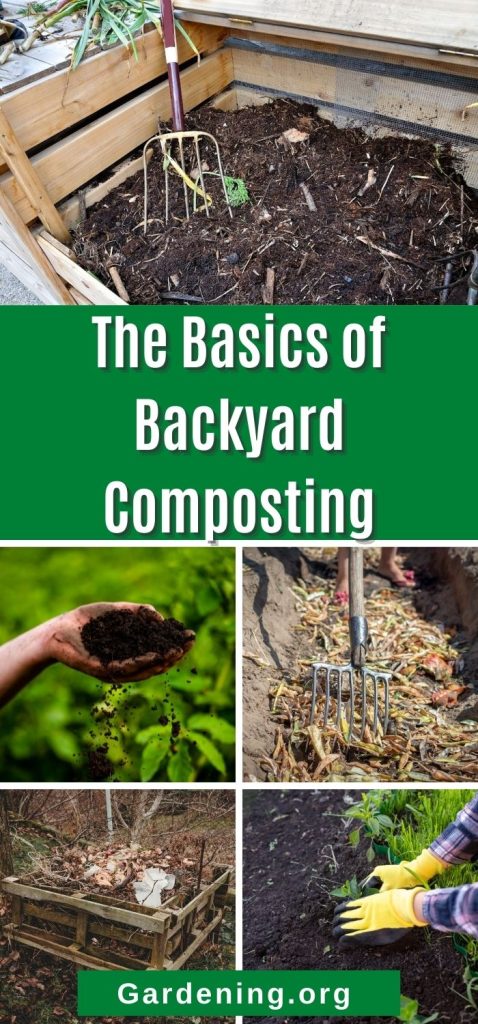
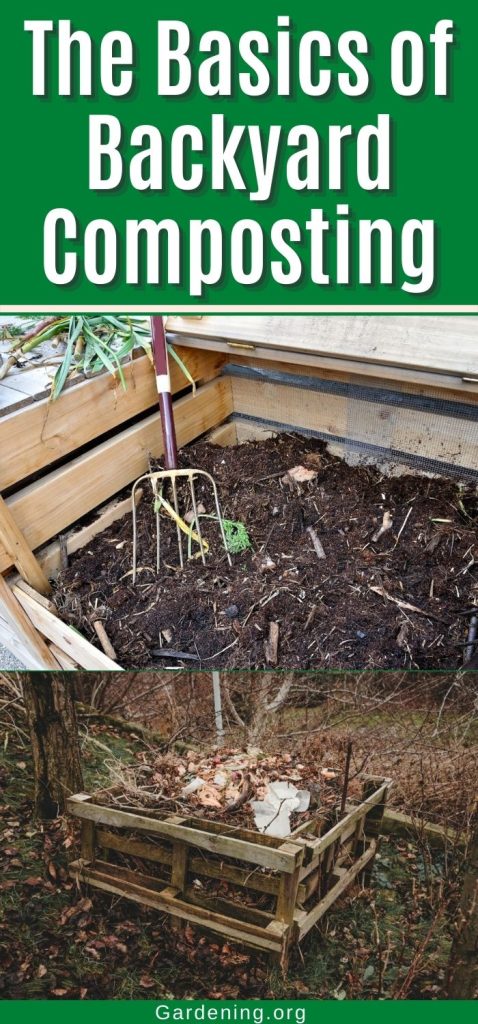
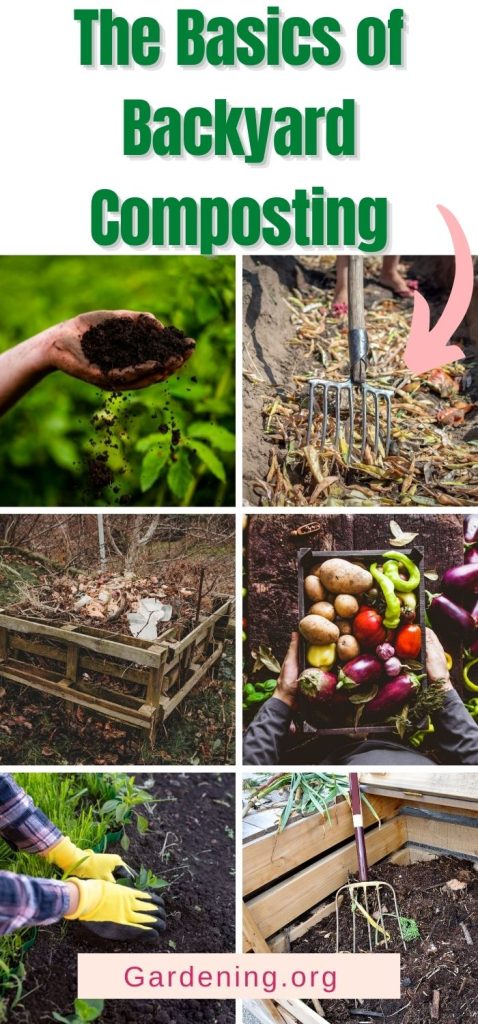
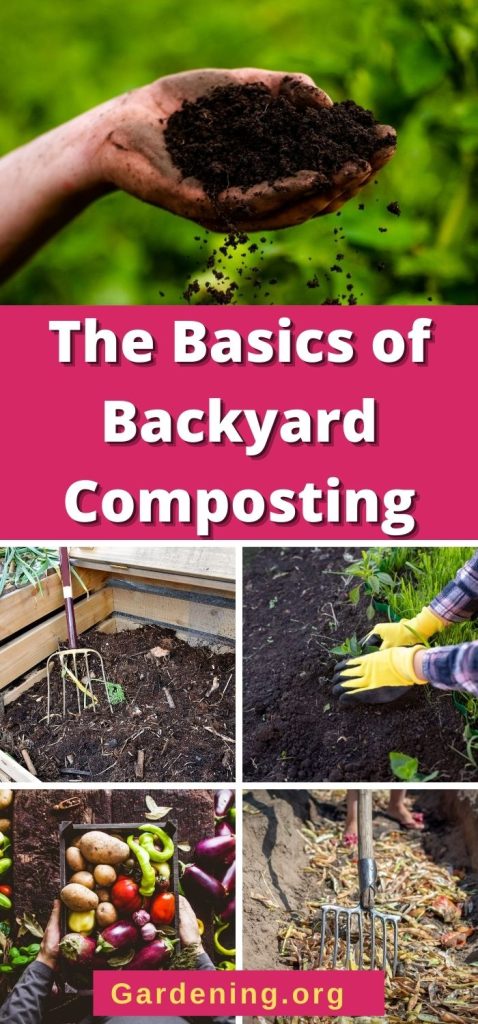
When most people think about composting, they think about hot composting. Hot composting occurs outdoors. It involves the turning and aerating of compost that people tend to think about when they envision composting. Aeration is the secret to hot composting by which this method produces dark, rich, finished compost in as little as four weeks.
Choosing a location
To begin hot composting, you’ll first want to select a location for your pile and decide what sort of setup will work for your space. Your pile should be located in a flat, sunny location near a water source, like a hose, to help maintain proper moisture levels. To increase the usability of your pile, consider locating it near your garden so you don’t need to move your finished compost very far.
Selecting the right hot compost bin
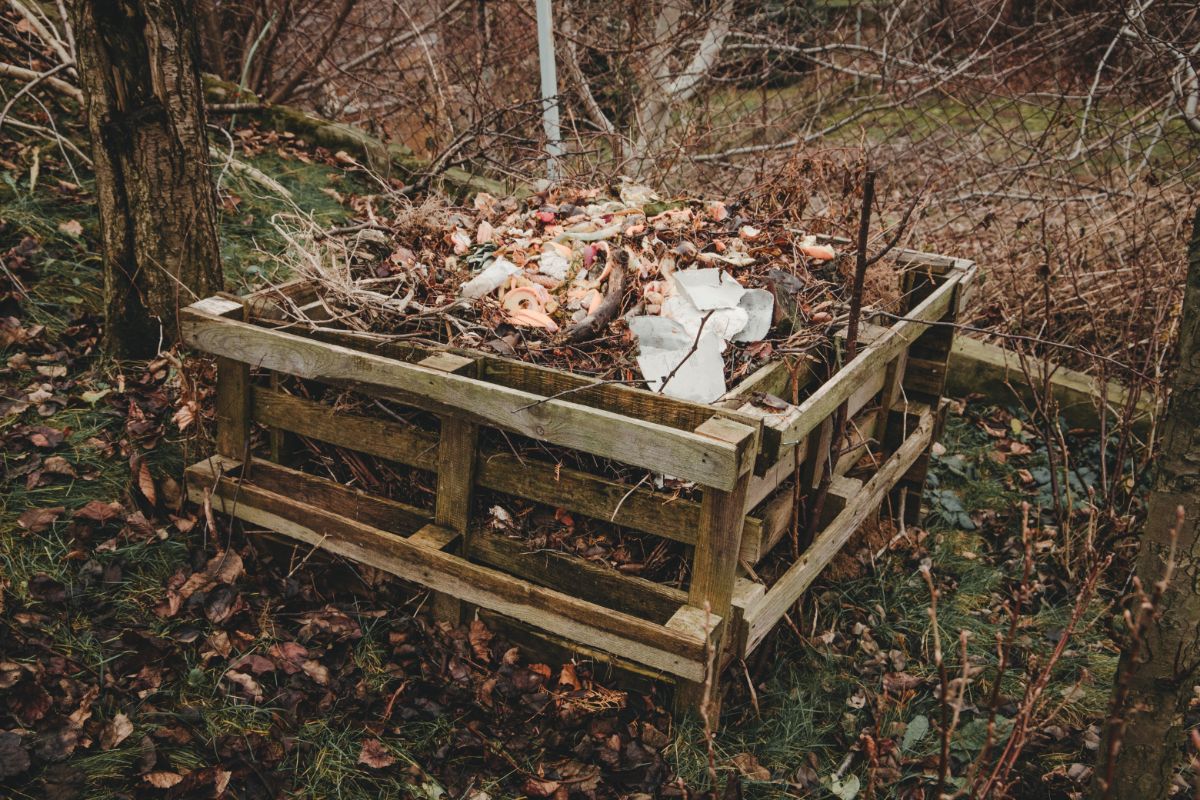
Once you’ve chosen your location, you’ll next want to decide what sort of bin (if any) you would like to use. Hot compost piles can be created just by loosely mounding compost in a big heap, ideally 4’ square. This minimalist setup will produce great compost and won’t cost you any money; however, it offers no protection against garden pests and may attract unwanted digging in your compost heap.
To limit pest action, instead consider building your own contained compost bin or buying a premade composter. We’ll talk about building your own compost bin in a bit; however, for a premade option, you have several excellent choices:
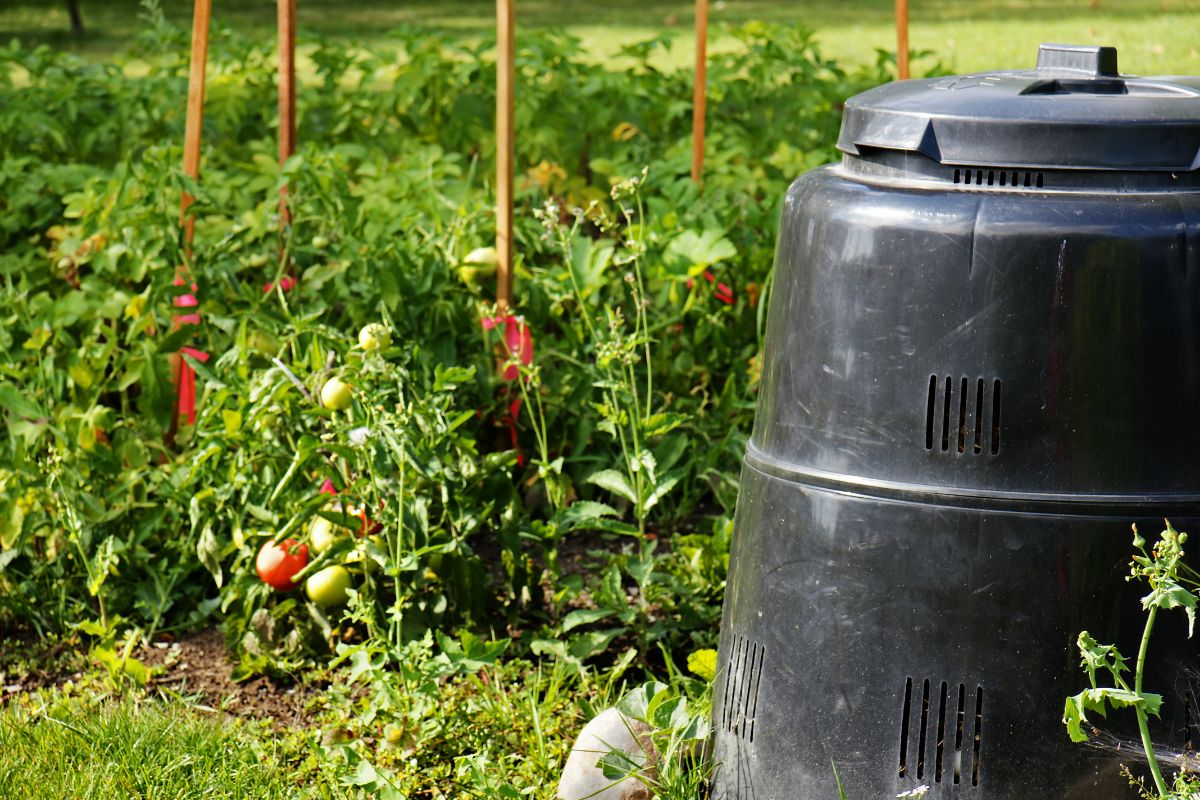
- A compost tumbler is an ideal compost bin if you are working with a small space, and you don’t like turning your compost. Compost tumblers take all the work out of aerating your pile as they allow you to quickly and easily tumble compost to aerate it. These bins are also perfectly-sized for use on an outside patio, deck or driveway. Both single and double compost tumblers (for greater volumes of compost) are available for purchase online.
- An alternative to compost tumblers are premade stationary compost bins. These bins produce more compost; however, they do need to be aerated by hand.
Getting started with hot composting
After selecting your location and compost bin (or lack thereof), you’re ready to start composting. Simply begin adding organic matter to your compost pile at a rate of three parts carbon-rich material to one part nitrogen-rich material, making sure to layer your composting ingredients.
To speed up composting time, ensure your compost pile remains consistently moist, with approximately the consistency of a wrung-out sponge. While the kitchen scraps in your pile may provide enough moisture, you can add additional water with the help of a garden hose, so make sure you build your pile near a reliable water source. While some rain is okay for your pile, if a period of heavy rain is expected, try covering your pile with a tarp or with the lid of your composter if your composting system has one.
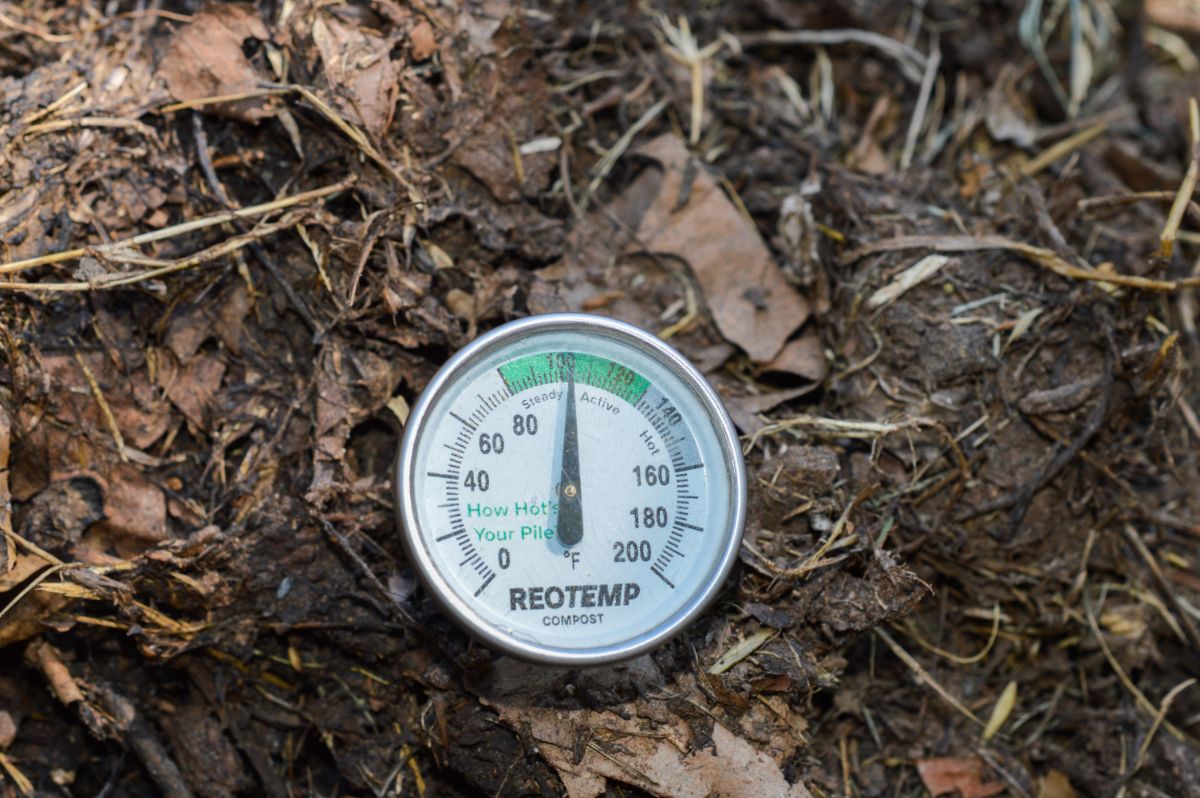
Once you’ve started building your pile, the real work begins: aeration. Aerating your pile is what gives hot composting its “oomph.” Aeration helps increase the temperature of your pile, creating the ideal environment that beneficial microorganisms need to efficiently produce finished compost.
An ideal temperature for a hot compost pile is between 141 and 155°F. This is the optimal temperature for beneficial microbes, and by monitoring your temperature pile with the help of a compost thermometer, you can keep track of when your pile needs to be turned. Try checking the temperature of your pile every day or two. If you notice that temperature drops below this range, it’s time to turn and aerate your pile.
To aerate your pile, use a pitchfork, shovel or spading fork and gently move your compost around. To make things a bit easier, it can help to have two piles or compost bins so that you can simply turn your compost from one pile or bin to the other and then back again, ensuring thorough aeration. If you’re using a compost tumbler, just give it a couple spins and you’ve aerated your compost.
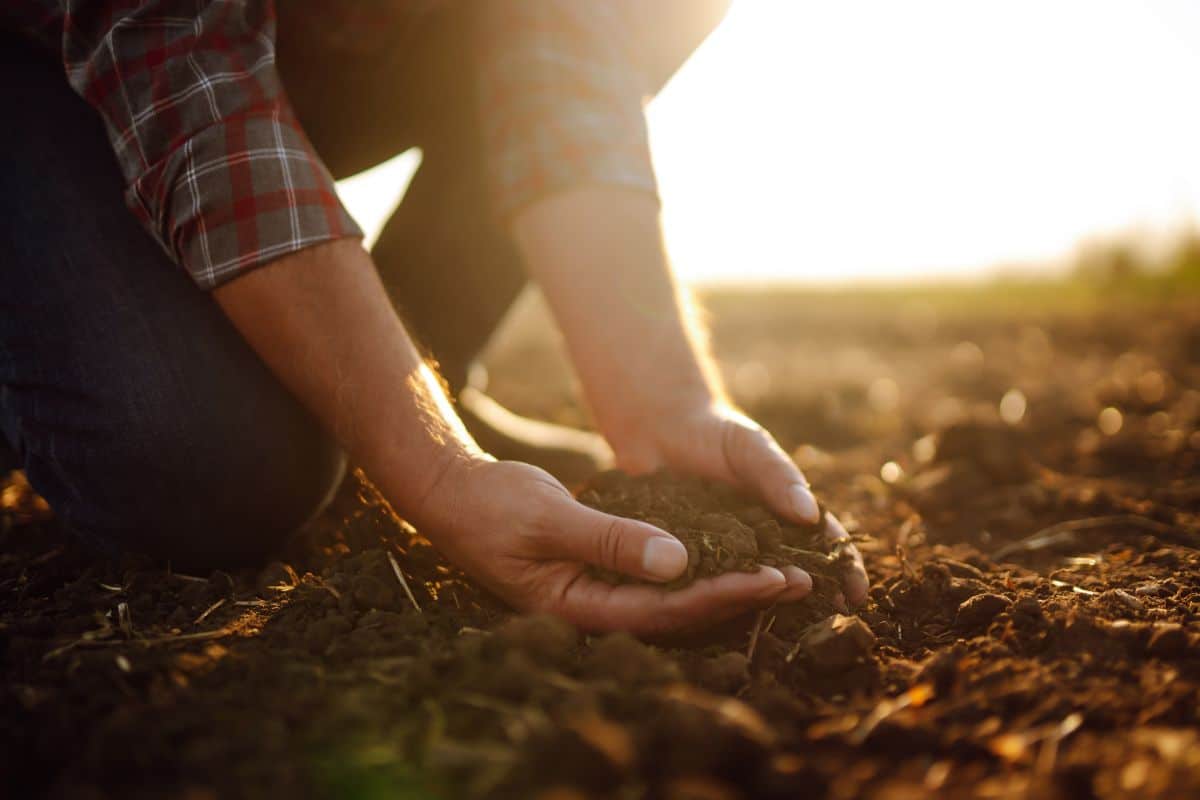
How do I know my compost is finished?
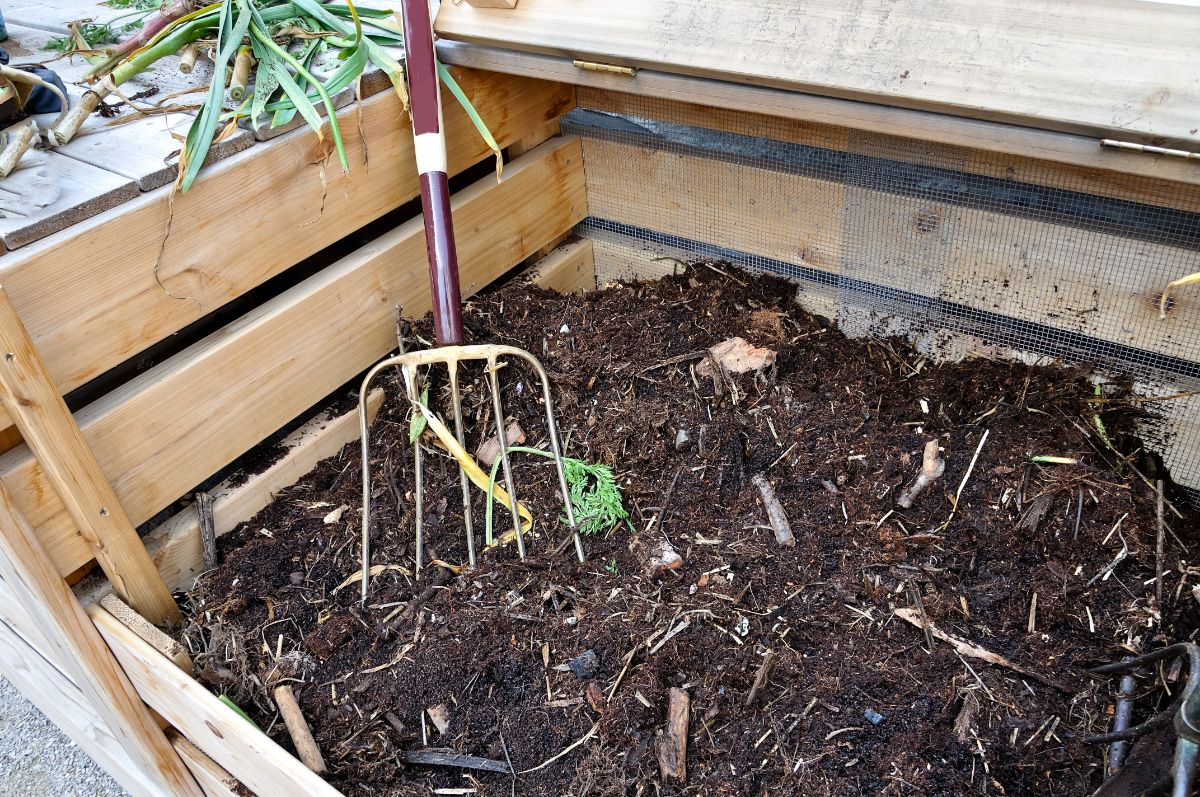
When your hot compost pile is finished, the temperature of the pile will begin to drop. This is because the organic matter in the pile has been thoroughly processed by the microorganisms and, in the absence of a steady food supply, the microbes begin to die off.
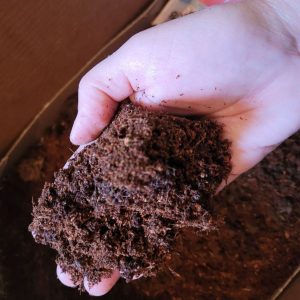
In as little as four weeks you will be left with a finished compost, which should look like dark, rich soil and have a slightly earthy smell to it. Because of the hot temperatures used during this method, your finished compost should be free of weed seeds and be ready for garden use. If you notice any uncomposted bits of kitchen waste or yard debris, simply pick those items out and try composting them again.
What makes hot composting so great?
Besides the speed of this composting method, hot composting is the only composting method that achieves temperatures high enough to kill off weed seeds. While you may not want to compost weeds for a variety of reasons, it can be comforting to know that your homemade compost is not at risk of sowing weeds seeds in your garden beds.
Beyond that, hot composting also achieves temperatures high enough to kill off most garden pests and pathogens. Again, while it is often best not to compost heavily diseased plant matter, this composting method can make short work of overwintering pests, providing you with a garden-safe, rich compost in a matter of weeks.
Cold composting
Similar to hot composting, but without much of the work, cold composting is also known as “passive composting,” because it does not require any turning.
Just as with hot composting, you’ll want to choose a proper location for your pile in a sunny spot and near a reliable water source. The same ratio of three parts carbon-rich matter is layered with one part nitrogen-rich material and the moisture level of your pile is maintained at approximately the consistency of wrung-out sponge. And that’s it.
As all organic matter will eventually decompose in nature, any kitchen scraps or yard waste added to your cold compost pile will eventually degrade. That said, as cold compost piles do not achieve the temperatures hot compost piles do, any diseased plant material or weeds with seeds should be excluded from your compost heap to prevent any unwanted pests or weeds from cropping up in next year’s garden.
Although you don’t need to aerate cold compost piles and you certainly don’t need to monitor their temperature levels, any amount of aeration you do will speed up composting time. Left alone, cold compost piles can take a year or more to produce finished compost, but by aerating your pile from time to time, you can cut that time down significantly.
Just as with hot composting, you’ll know your cold compost pile is finished composting when you’re left with a pile of dark, rich compost that smells a bit earthy. Any recognizable pieces of food scraps or yard waste should be removed for further composting and then your finished compost can be used directly in your garden or in your houseplant pots.
Selecting the right cold compost bin
As with hot composting, you can simply mound your cold compost into a loose pile, ideally 4’ square, or you can make a DIY bin to reduce pest activity. However, unlike with hot compost, there are more cold compost bins to choose from as their shape is not limited by the need to aerate the compost within.
A great compost bin option for cold composting is the Garden Composter Bin, which has a handy door at the base to allow for easy access to your finished compost. It is also open at the bottom to encourage beneficial microbes in the soil to migrate into your compost heap.
The Zodight Composter is another excellent, budget-friendly option that boasts easy assembly and simple design. Finally, the Subpod In-Ground Composting System will work well for cold compost, even though it is often associated with the vermicomposting method. This is a particularly great choice if you live in a neighborhood where obvious compost piles or bins are frowned upon.
What makes cold composting so great?
While it takes longer to produce compost, the obvious perk of cold composting is how easy it is to do. The speed at which your cold compost pile produces compost is really up to you. You can choose to work your pile a lot, or just a little bit, or not at all. This is a great, stress-free method and is particularly useful if you tend to travel a lot or simply don’t have the time or energy to work a hot compost pile.
Trench composting
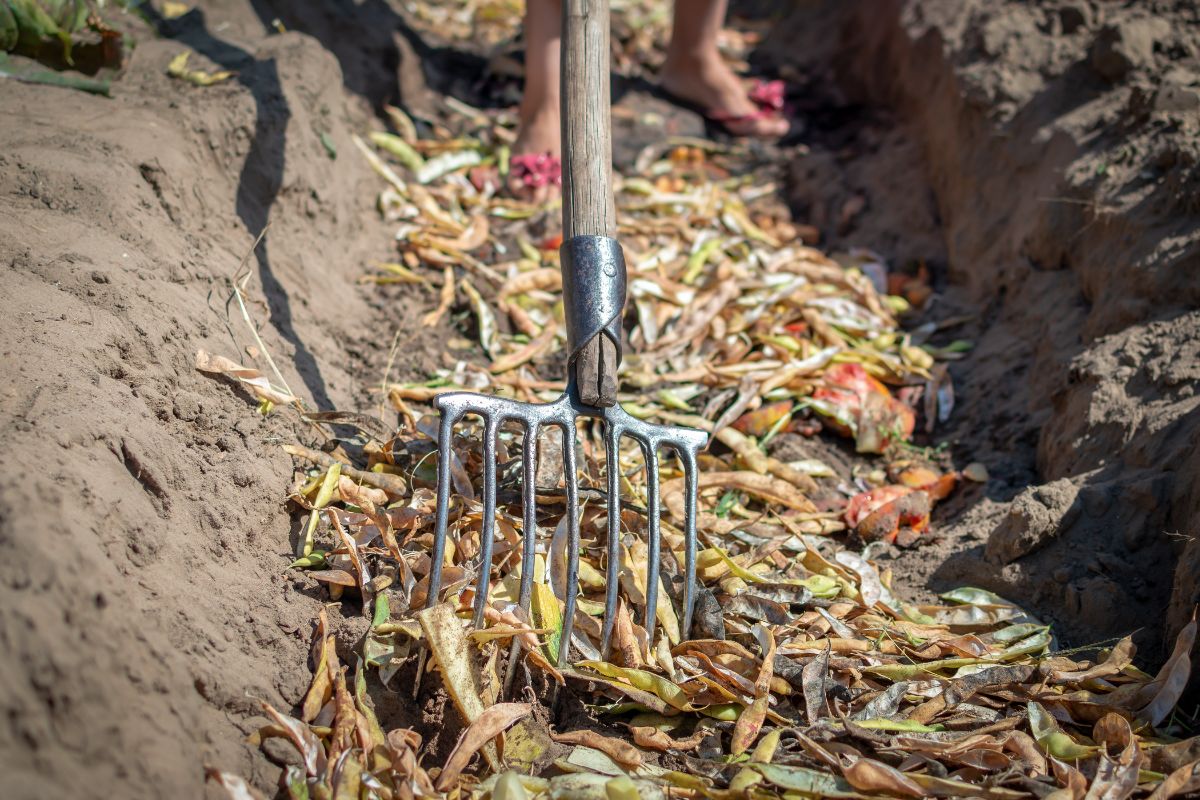
Trench composting, or in-ground composting, is really a variant of cold composting and is possibly the easiest composting method around.
To begin trench composting, all you need to do is dig food scraps and yard waste directly into your garden beds or around the base of established plants and trees. Food waste should be dug into the soil at a depth of at least 10” to 12” to deter pests from digging. After digging in your food waste, cover your hole or trench back up and wait. As your kitchen scraps degrade, they will slowly enrich your soil and feed your plants. One of the major perks of this method is that organic waste only needs to be handled once, reducing the amount of work and time you need to devote to composting.
As the name implies, organic matter can be dug into your garden in long trenches or, alternatively, in holes. If you opt to dig scraps directly into the soil at the base of plants, take care not to damage delicate plant roots in the process.
If you’re worried about pests digging up your old food scraps, consider using the bokashi method in conjunction with trench composting. Bokashi acidifies food scraps and pickles them, making them far less appealing to pests and predators who otherwise might be drawn to them. If you opt to bokashi your food scraps before trench composting them, don’t use them near established plants and don’t plant anything above your bokashi scraps for at least two weeks to allow their pH to neutralize so you don’t burn your plants.
Make your own simple DIY backyard composting system
While there are many premade compost bins on the market that are well-suited to both hot and cold composting, you can make your own outdoor compost bin inexpensively out of a few simple supplies. And not to worry if you don’t consider yourself to be super “handy” at DIY, it’s quick and easy to make too!
What you’ll need:
- 4 untreated wooden shipping pallets
- Hardware cloth
- Screws, at least 2 ½” to 3” long
- 6 galvanized steel corner braces
- A garden gate latch (optional)
- 2 garden gate hinges (optional)
- A power drill
- Staple gun and staples
- Wire cutters
- Shovel
A note on safe supplies
Wooden shipping pallets are great for upcycling projects, but not all shipping pallets are created equal. Some shipping pallets are heat-treated (HT), but others are treated with a chemical called methyl bromide (MB), which is a toxin and is not safe for use in gardening or around produce. When selecting pallets, look for heat-treated pallets, which will be marked with a “HT,” and avoid any pallets marked “MB” to be safe.
If you’re on the hunt for upcycled shipping pallets, ask around at big box stores as they will often happily give away pallets for free. If all else fails, check online classified ads or post in your local Facebook group. There are plenty of free pallets around, you might just have to do a little digging to find them.
How to make your own DIY compost bin
Once you’ve gathered your supplies, you’re ready to begin building your own compost bin. All you need is a little elbow grease and a few hours on a sunny afternoon.
Step 1: Select your site
As with premade compost bins, you’ll need to find a suitable place to locate your DIY compost bin. Choose a sunny location near a water supply, like your garden hose. Try to pick a flat area; however, if it’s not perfectly flat, use your shovel to smooth the area out a bit, taking the time to remove any large rocks or high spots. Don’t worry if your location isn’t perfectly level; a few irregularities are okay.
Step 2: Add your hardware cloth
Adding hardware cloth to your bin isn’t required, but it will keep your compost heap tidier, make turning your compost a bit easier and help keep garden pests out of your compost.
To begin, using your wire cutters, cut four pieces of hardware cloth to fit each of your four pallets. Next, staple the edges of your hardware cloth to one side of each of your pallets. Take care with the edges of your hardware cloth as they are sharp! You may want to wear gloves for this part.
Step 3: Screw your pallets together
Using three corner brackets, screw two pallets together to form an L-shape, adhering the brackets on the inside edge where the pallets meet. If you’re using hardware cloth, locate the side of your pallets with hardware cloth towards the inside of your compost bin.
Next, attach the third pallet to the opposite side in the same manner, with the hardware cloth towards the inside, using the remaining three corner brackets and screws to form a u-shape. This is the frame of your compost bin.
While some may choose to use an additional pallet to form the base of their compost bin, this is not necessary and not really recommended. You’ll want your compost heap to touch bare earth to encourage microorganisms to migrate into your heap, so a bottom isn’t really needed.
Step 4: Attach your door
If you’re using the garden gate latch and hinges, attach your hinges to one side of your remaining fourth pallet and then screw the hinge in place on your u-shaped compost bin to create a door that swings open and shut. Next, attach the garden gate latch to give yourself a door that shuts firmly against pests.
If you don’t want to use a latch and hinges, that’s fine too. Just use a bit of sturdy nylon twine to tie one end of your fourth pallet to your u-shaped compost bin for a budget-friendly door.
At this point, you can choose to add a tarp or some corrugated plastic to the top of your bin to protect your compost from rain, but this is optional.
And that’s it! You’ve made a simple, but effective homemade compost bin, ready for creating garden-ready compost.
FAQ
Can I keep composting during the winter?
Yes and no. Depending on where you live, you can keep composting outdoors all year long. However, if you live in a cooler climate, outdoor composting cools to a stop when temperatures fall below freezing (32°F). You can, of course, keep adding kitchen and yard scraps to your pile, but they won’t begin composting until temperatures warm up a bit.
If you want to keep actively composting all year long, consider combining your outdoor hot or cold composting system with an indoor composting method, such as vermicomposting or bokashi.
How do I keep pests out of my compost heap?
Choosing to buy or create a DIY pest-proof compost bin with hardware cloth is the single best way to keep pests out of your compost heap.
Another great option is to use bokashi to pre-compost your food scraps before adding them to your outdoor pile. Bokashi pickles food scraps, making them acidic and undesirable to garden pests.
Additionally, every time you add food scraps to your pile, always remember to cover them up with a layer of brown, carbon-rich material, like straw or leaves. And, as meat and dairy tend to attract pests more than other food items, opt to exclude them from your compost heap.
Help! My compost pile stinks. What do I do?
A smelly compost pile means one thing: too much nitrogen. To remedy this smelly situation, add more brown, carbon-rich ingredients and refrain from adding additional water to your pile until it dries out a bit. Turning your compost heap can also help reduce unwanted odors as well.
It’s been months but my compost pile doesn’t seem to be decomposing. What’s wrong?
While a smelly pile means too much nitrogen, a dry pile that refuses to decompose means too much carbon-rich material. Add more nitrogen-rich items to your pile and check moisture levels, adding more water if your pile seems parched.
Yikes. There are mushrooms in my compost heap. Is that a problem?
Not at all! Mushrooms are actually a welcome addition to your pile and mean that your pile is working correctly. Mushrooms help break down organic matter and speed the composting process along so don’t worry about removing them, they won’t hurt anything.
I want to compost but I’m afraid what my neighbors will say.
Perhaps you live in an HOA or you just have neighbors that aren’t keen on composting. Whatever the reason, it doesn’t mean that you have to give up on composting. Try a subterranean composting bin or a compact tumbler system. If all else fails, opt for an indoor composting option, like vermicomposting or bokashi.
Conclusion
Composting at home is the best way to ensure you have lots of nutrient-rich, organic compost at the ready for your houseplants and garden alike. By making your own compost, you will not only save money, but you’ll also have the peace of mind that comes from knowing exactly what goes into your compost, and your garden too.
While composting may seem complicated at first, there’s no mystery to it. All organic matter naturally becomes compost in nature; however, by better understanding how that process works, we can learn how to harness it to create our own compost quickly and efficiently.
Whether you choose to hot compost or cold compost your kitchen and yard waste, or you opt for another method entirely, the incredible benefits of composting cannot be overlooked. Not only are you sure to enrich your garden soil and grow bigger, healthier plants in turn, but you’ll also be taking great leaps towards a more eco-friendly home and a healthier planet too.
References:
“Compost Fundamentals.” Washington State University. 27 May 2022. 2022.
“5 Facts About Food Waste.” World Food Programme. 27 May 2022. 2 June 2020.
“The Problem with Landfills.” Environment Victoria. 27 May 2022. 26 June 2013.
Dave Schepis
I have been composing for 20 years my compost garden is 8 foot buy 36 with two side piles I add to for a year or two and a second one that is raw homemade dirt. I wish I could put pictures here somehow.
Mary Ward
That's impressive! You must have a pile full of black gold!