Vermicomposting, or composting with worms, is an excellent alternative to traditional composting.
Composting at home is a surefire way to increase the produce yield of your garden while reducing your carbon footprint by repurposing old kitchen scraps. But while you may have heard about cold composting and hot composting, there is an alternative to traditional forms of composting that is easy on your budget and small and space-friendly.
With traditional composting great heaps of organic matter are composted in homemade piles or composting centers. It’s great, but takes time and space.
Vermicomposting is a simple composting method that can produce large volumes of nutrient-rich, garden-ready compost in an efficient, tidy and effective manner in a very short period of time.
If you’re ready to begin vermicomposting, read on for tips and tricks on how to build your own worm farm that will make short work of kitchen scraps and yard waste for years to come.
Jump to:
- What is vermiculture and vermicomposting?
- What makes vermicomposting so great?
- The benefits of using worm castings on your plants
- Getting started with vermicomposting
- Choosing a pre-made worm bin
- DIY, Build-Your-Own Worm Bins
- How to make your own indoor worm farm
- Choosing the right worms for your worm bin
- Adding your worms to your worm bin
- How to compost with your homemade worm farm
- Best foods to feed your worms
- Foods to avoid feeding your worms
- Maintaining proper moisture levels
- How to harvest your finished worm castings
- Using worm castings in your garden
- FAQ
- Conclusion
What is vermiculture and vermicomposting?
Vermiculture is the process of raising worms for a particular purpose, whether that be for composting or bait. Vermicomposting, or composting with worms, refers specifically to using worms to compost kitchen waste, yard scraps and other organic matter to produce nutrient-dense worm castings which can help enliven houseplants and garden beds.
Vermicomposting can be done on a small scale at home with a simple worm bin small enough to fit under a kitchen sink. Conversely, once you learn the skills necessary to keep a thriving worm bin, vermicomposting can be scaled up to produce large quantities of worm castings and even extra worms to sell to other beginning composters.
What makes vermicomposting so great?
While all composting methods have their perks, vermicomposting stands out as an exceptional composting method for several distinct reasons.
One of the most obvious benefits of composting with worms is that worm bins can be as compact as you need and are a perfect solution for people who want to begin composting but who live in a small space or apartment.
While worm bins can be as large as you like, a small storage tote is the perfect size for a worm bin and can handle all the kitchen scraps a typical family produces in a single week. Even better, when properly maintained worm bins produce no odors and are well-suited to keeping under the kitchen sink, or in an out-of-the way location, such as a laundry room.
Beyond their small size, worm bins are also great solutions if you want to keep composting all year long. Traditional composting methods, like hot and cold composting, are generally done outside and slow to a stop during the winter months when temperatures drop. This is because hot and cold composting rely on beneficial microorganisms to break down organic matter; however, these microorganisms stop functioning when temperatures sink below freezing (32°F).
As vermicomposting can be done inside, you won’t have to worry about halting composting during the cold half of the year. Worm bins need to be fed in December just as much as in July, so just keep composting, and your worms will keep doing the work.
If you ever had an ant farm as a child, you likely understand one of the other major draws of keeping a worm bin. While worms may seem “creepy and crawly” to some, worm bins can be fascinating science projects for adults and children alike.
Testing out what foods your worms like, how to amend worm bin conditions to encourage breeding and more can provide interesting opportunities to hone your composting skills while observing the curious habits of your own composting worms. If you have children, encourage them to utilize your worm bin as well, and they are sure to learn a lot about composting, beneficial microorganisms and gardening in the process.
The final major benefit of vermicomposting is the clearest perk of all: the worm castings. Worm castings or the nutrient-rich waste worms produce as they consume and break down organic matter, are invaluable for gardens and houseplants. But what makes worm castings so special?
The benefits of using worm castings on your plants
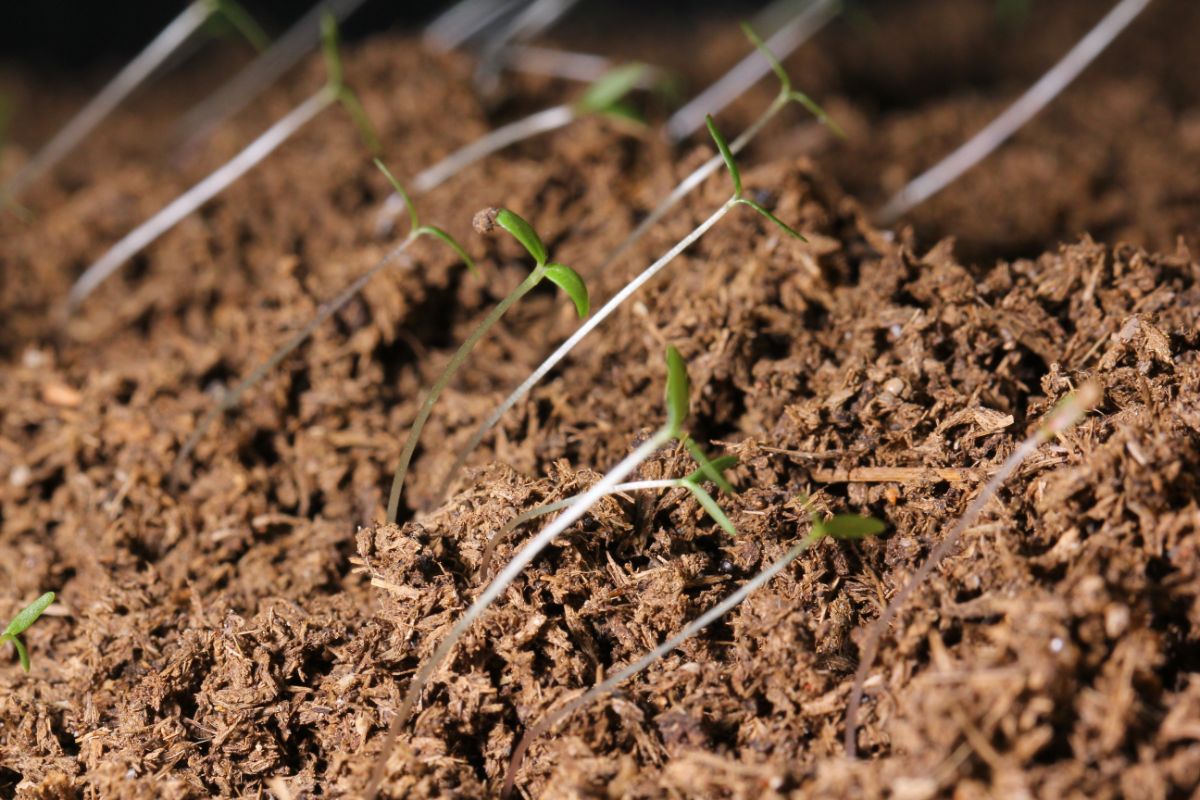
Worm castings, or the waste worms produce while composting food scraps and yard waste, function as nutrient-packed soil amendments that can boost plant growth, helps plants to naturally resist pests and pathogens and improve soil structure.
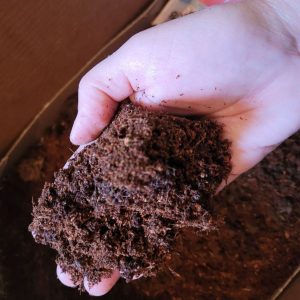
While at first glance worm castings may seem indistinguishable from the soil in your worm bin, with a little practice, you will soon be able to recognize their dark-brown, rich coloration and tightly-formed oblong shapes. Worm castings can be mixed into houseplant soil or used as a top dressing or soil amendment in gardens where their true benefits are hard to miss.
Thanks to their high humic acid content, worm castings stimulate plant growth more than any other organic product on the market today. Additionally, as they have been predigested by worms, the nutrients they contain, particularly nitrogen, are in their most usable forms for easy absorption by plants.
Offering a neutral pH of 7.0, worm castings can help balance out your soil, while enriching it with minerals like phosphorous, calcium and magnesium, as well as trace elements like zinc, cobalt and boron that plants need to grow. With an NPK ratio of 3.2-1.1-1.5, worm castings are a relatively balanced fertilizer; however, they do contain a higher quantity of nitrogen, which can promote vegetative growth and can be particularly useful for leafy greens.
Unlike other manures, such as chicken manure, worm castings will not burn your plants and can be applied immediately to planters and gardens without the need for additional aging or composting. Containing a mixture of beneficial bacteria, enzymes, leftover plant matter and worm cocoons, worm castings contain 50% more humus than naturally occurs in topsoil.
This high humus content works to remove toxins and harmful fungi and bacteria from your garden soil, which in turn helps promote your plants’ natural resistance to soil-borne pests and pathogens. What’s more, worm castings can even fix heavy metals in organic waste, preventing your plants from absorbing more of these elements than they need to grow.
As if that weren’t enough, worm castings can also promote water penetration and water retention in your soil, which can be particularly helpful in times of drought.
Between their high nutrient content and their ability to improve soil structure, it’s no wonder that bags of premade worm castings fetch high prices at garden centers and home improvement stores. By starting your own worm bin at home, you can provide your garden with an endless supply of worm castings inexpensively and reliably for years.
Getting started with vermicomposting
Vermicomposting at home can be incredibly simple. Before you get started, you’ll want to pinpoint how much time, space and money you would like to devote to worm composting, as well as to determine how much worm castings you would like to produce.
Choosing a pre-made worm bin
In order to choose the right worm bin for your situation, you’ll want to decide how much kitchen and yard waste you’re looking to compost on a regular basis, how much worm castings you would like to produce, and whether you’re interested in setting up a worm bin outdoors or indoors.
If you’re only looking to repurpose your family’s kitchen scraps and you aren’t interested in producing a high volume of worm castings, a simple indoor worm bin is probably all you need. That said, if you want to compost a large quantity of yard waste or you’re interested in creating enough worm castings to sell or give away to friends and family, you may want to choose an outdoor bin option, depending on your climate and grow zone.
Indoor Worm Bins
If you want to begin an indoor worm bin, there are a lot of options to choose from. You can, of course, create your own simple worm bin, which we will talk about in a bit, or you can purchase a premade option, which can take all the guesswork and labor out of maintaining a healthy bin.
When it comes to premade options, such as the Worm Factory 360, the Maze Worm Farm, and the Living Composter, you will generally find worm bins that consist of multiple layers. The beauty of these designs is that they are self-sorting, meaning that the worms will naturally separate themselves from the completed compost, so you don’t have to do the work and you don’t have to handle your composting worms at all if you don’t want to. This can be a selling point for anyone squeamish about touching creepy-crawlies, as you can produce lots of worm castings without touching a single worm.
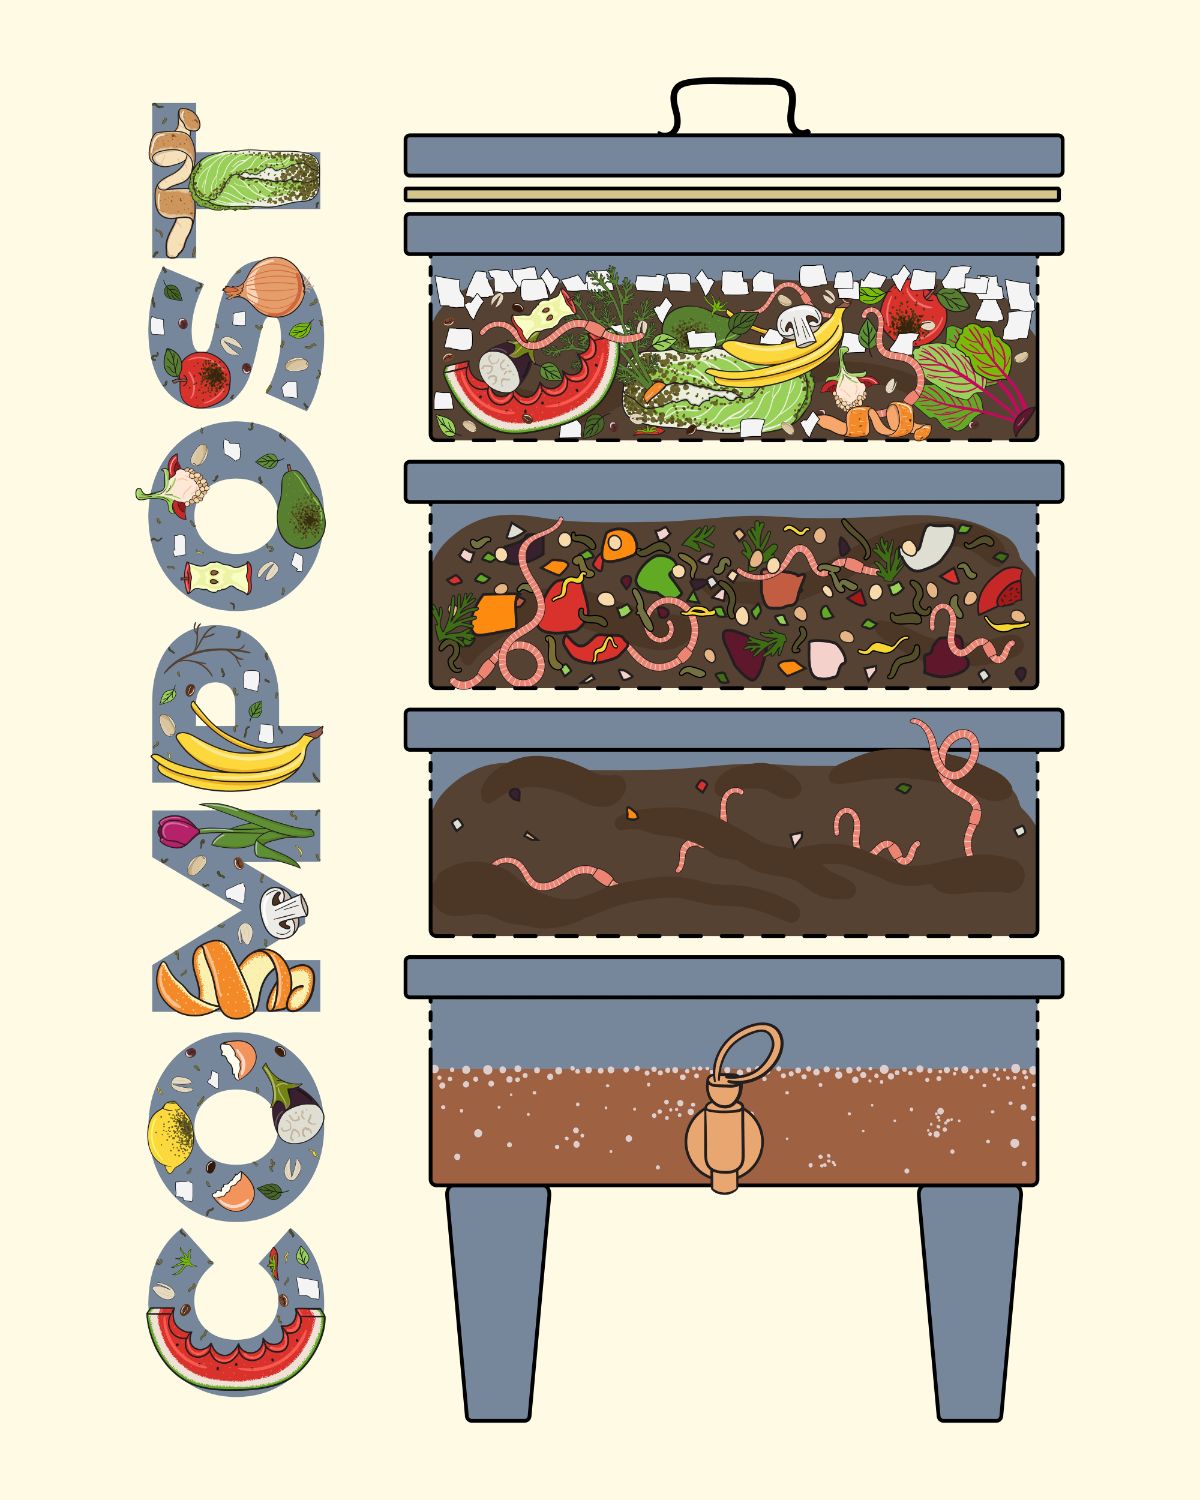
These composting systems work by adding worms, substrate, and your initial food scraps to the bottom bin of the composting system. As the worms consume the food waste, they naturally convert it into worm castings.
When you’re ready to add new food scraps, you add them to the bin on top of the active bin your worms are in. As your worms finish processing the food scraps in the lower bin, they will move up into the second, higher bin through mesh or holes in the bottom of the second bin.
Eventually, all the worms will move to the second bin and the lowest bin will be full of worm-free, finished compost. At that point, you can simply harvest your worm castings and continue to add fresh kitchen scraps to the higher bins to encourage the worms to move upwards. When the worms are in the top bin, just swap that bin towards the bottom of your worm tower and allow the process to repeat.
All three of the premade worm bins listed above are great options; however the Worm Factory 360 offers a spigot at the base which can make harvesting nutrient-rich worm tea a breeze. For a more chic, modern look, the Maze Worm Farm and Hot Frog Living Compost offer a great composting system in a cute and tidy package.
Outdoor Worm Bins
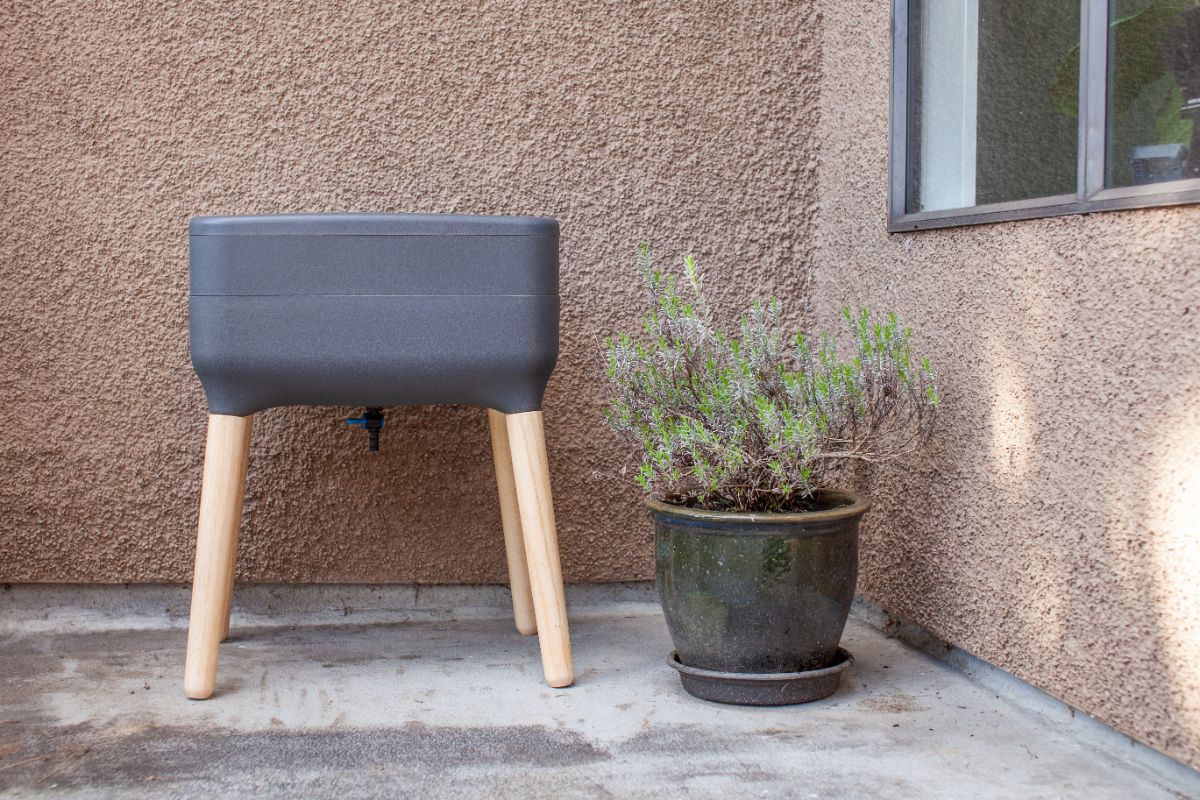
If you’re looking to produce a higher volume of worm castings, or the thought of keeping worms indoors is simply not your thing, an outdoor worm bin may be just what you’re looking for.
As with premade indoor composting systems, there are several great options on the market. The Worm Café and Can-O-Worms composters work similarly to the Worm Factory 360, in that they are self-sorting composters with multiple stacking bins and a spigot at the base to harvest worm tea.
The Hungry Bin Worm Farm is a markedly different option in which organic matter is added at the top of the bin, while a special lever at the base of the unit allows you to dump out finished compost without disturbing the worms at the top of the bin.
DIY, Build-Your-Own Worm Bins
If you’re into DIY, you can of course make your own outdoor worm bin by creating a simple 6-sided structure with a floor and a roof, out of upcycled wood, old shipping pallets or cinderblocks. If you’re using shipping pallets or upcycled wood, opt for heat-treated shipping pallets (marked HT) and non-painted, non-treated wood to ensure your worms stay healthy.
Your DIY worm bin will essentially look like a box-shaped structure with a removable lid at the top for easy maintenance of your worm bin and extraction of the finished compost.
The thing to remember if you’re intent on keeping your worms outdoors is that worms are living creatures with specific care requirements. Although composting worms are quite resilient, they need a temperature range of between 55°F and 85°F to thrive. Temperatures above or below this range can be harmful, or even fatal, to outdoor worm bins.
If you live in a temperate region, temperature control should not be much of an issue with an outdoor worm bin; however, if you live in an area with harsh winters and scorching summers, you’ll need to be a bit craftier with your outdoor worm bin.
In such regions, a subterranean worm bin is your best option. While you can make a DIY bin from an old trash can or storage tote buried beneath the soil (ensuring you provide your bin with air holes for ventilation), a great premade option is the Subpod In-Garden Compost System, which you can bury partially underground to reduce temperature fluctuations throughout the season. This system comes with several “worm blankets,” which are made of jute and can help shelter your outdoor worms against extreme temperatures.
How to make your own indoor worm farm
While premade worm farms have their charm, there is something very satisfying about DIY projects and, when it comes to creating your own worm farm, you can save a lot of money by creating a simple composting system from a few basic items.
What you need:
- A plastic storage tote with a lid, between 15 and 50 gallons depending on the size of farm you’d like to create. Opt for an opaque, rather than clear, tote as worms do not care for direct sunlight.
- A power drill, or other tool to poke aeration holes
- Plastic canvas or screening (optional)
- Super glue (optional)
- Substrate of your choice – such as coconut coir, coconut fiber sheeting, shredded newspaper, dried and crumbled autumn leaves, or shredded cardboard (without colored inks)
- Garden soil
What to do:
- First, you’ll want to drill a series of air holes for your worms. Like all living things, worms need to breathe and the more holes you drill, the better the aeration will be in your bin, which can help to prevent issues like mold. Using your power drill or other tools, drill or poke holes all over the lid of your tote, as well as along the top of the tote’s sides.
- While this is all you really need to create a worm bin, sometimes, particularly when you’re just setting up your bin, you may find that some worms want to escape. To prevent this, try supergluing small sections of plastic canvas or screening over the holes on the sides of your bin. Although this isn’t necessary, it will ensure that your worms stay exactly where they need to be: in your worm bin.
- Next, you’ll want to add your substrate. What substrate you use is up to you; however, whichever substrate you decide to use, make sure that it is moistened to the consistency of a wrung-out sponge. The amount of substrate you need is dependent upon the size of your worm bin. As worms tend to feed towards the top of the bin, you don’t need a particularly large bin, as a bin between 8 and 12” in height is sufficient to keep worms in. You’ll want to fill your bin at least 75% of the way with substrate, so use this as a guide to determine how much substrate you will need to purchase.
- Once you’ve added your moistened substrate, mix in a few handfuls of organic garden soil. Garden soil will help to provide your worms with the grit they need to digest food scraps and yard waste, so be sure to add a generous amount. After that, you’re done! Now it’s time to add your worms.
A note on different worm bin substrates
What bedding you decide to add to your worm bin is the single most important factor to keeping your worms healthy. You’ll want to choose bedding with a neutral pH, without harsh chemicals or abrasive elements that can damage worms’ delicate skin. It’s also important to choose a bedding that can retain moisture and allow for proper air flow. While there are many different bedding choices to choose from, some of the most popular options are:
- Coconut coir – sold in blocks, coconut coir is made from the dehydrated husks of coconuts and is a renewable soil that expands with water. Although it may be pricier than other options, it excels at water retention and promotes adequate airflow in your bin as well.
- Chopped autumn leaves – a budget-friendly option, autumn leaves are easy to come by and simple to use. Just ensure that whatever leaves you use have not been exposed to chemicals or pesticides that can harm your worms.
- Shredded paper, newspaper or cardboard – another inexpensive option, shredded paper and particularly cardboard is a worm favorite. In fact, up to 50% of a worm’s diet comes from their substrate, so this a great option for your hungry worms. If you choose to use shredded paper or cardboard, be sure to use non-glossy, unbleached paper that is free from colored inks.
- Aged compost or manure – nutrient-dense compost and manure is an obvious choice for your worm bin. Just be sure that any compost or manure you use is properly aged and consider adding some shredded paper, sand or autumn leaves to the mix to improve structure and airflow.
Choosing the right worms for your worm bin
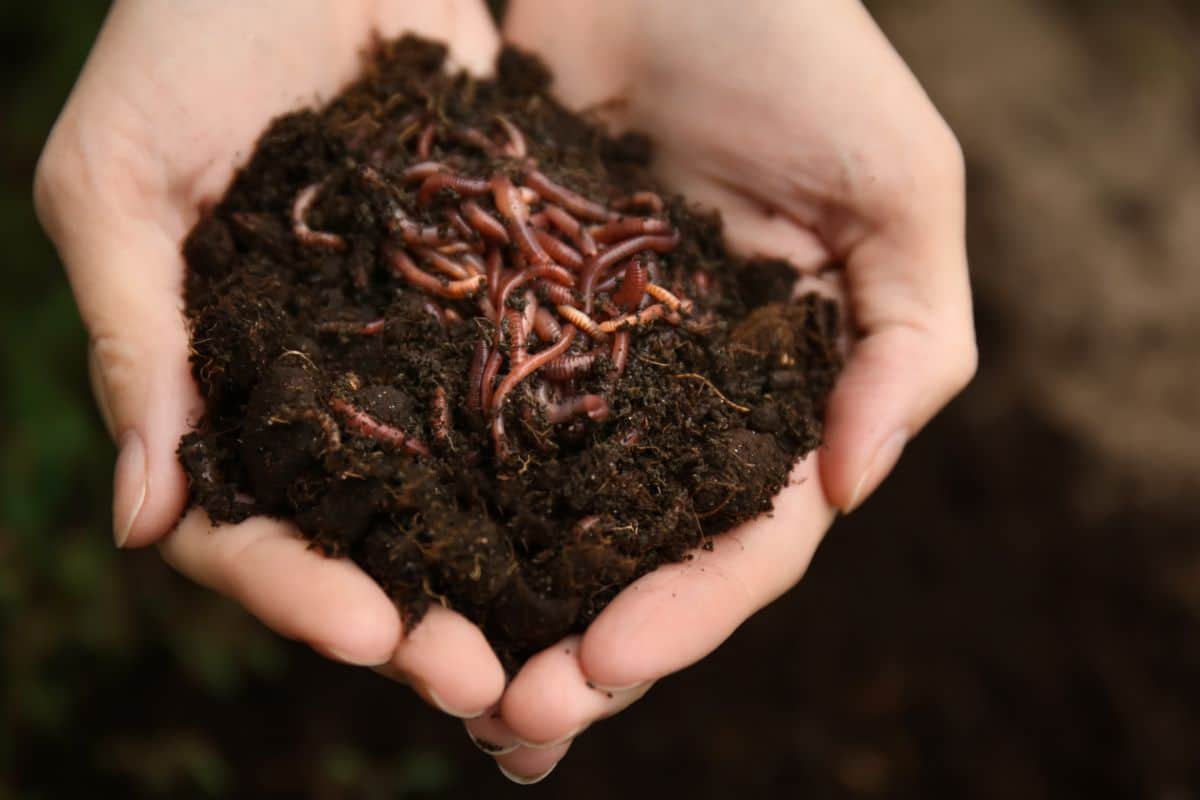
While at first you may be tempted to go out into your garden and dig up some worms to add to your bin, hold that thought. Although nightcrawlers, the most common worms you’ll likely find in your backyard, are great at composting, they are deep soil dwellers and are not well-suited to the tight confines of a worm bin. Instead, you’ll want to seek out red wigglers (Eisenia fetida), which are composting-machines and the best worms to add to your worm bin.
Tiny little red wigglers are smaller than the average nightcrawler by quite a bit, but don’t let their small size fool you. Red wigglers are eating machines and can consume up to half of their body weight in food scraps in a single day. Not picky about what they eat, red wigglers will happily munch through vegetable and fruit scraps, grass clippings, shredded paper, bread and old pasta and so much more.
Content to live out their days in a mixture of soil and food scraps, these hardy little worms can tolerate a range of temperatures, are less inclined to go on adventures and escape and, as they naturally live in colonies, they can thrive in a densely populated worm bin.
Not only that, but red wigglers reproduce rapidly, meaning that you’ll likely end up with enough worms in a short period of time to not only keep your own worm bin going for years, but you’ll probably have enough to share with friends and family who are interested in worm composting too!
When you’re ready to purchase your worms, check with your local garden centers and plant nurseries to see if they have any on hand to sell. Alternatively, there are many websites where you can purchase healthy and hardy red wigglers and have them delivered straight to your door.
Frequently, worms are sold in quantities ranging from 250 to 5000, so choose the amount that you need. For a typical, at-home composting system, a quantity of 1000 to 2000 worms is usually sufficient to begin. And remember, when properly maintained, red wigglers will reproduce rapidly, so be prepared.
Adding your worms to your worm bin
If you’re ordering your worms online, try to plan your shipping order for a period of time when you know you’ll be home and when extreme temperatures are not in the forecast. Red wigglers are susceptible to high and low temperatures, so try to order your worms in spring or autumn, when temperatures are reliably above 55°F.
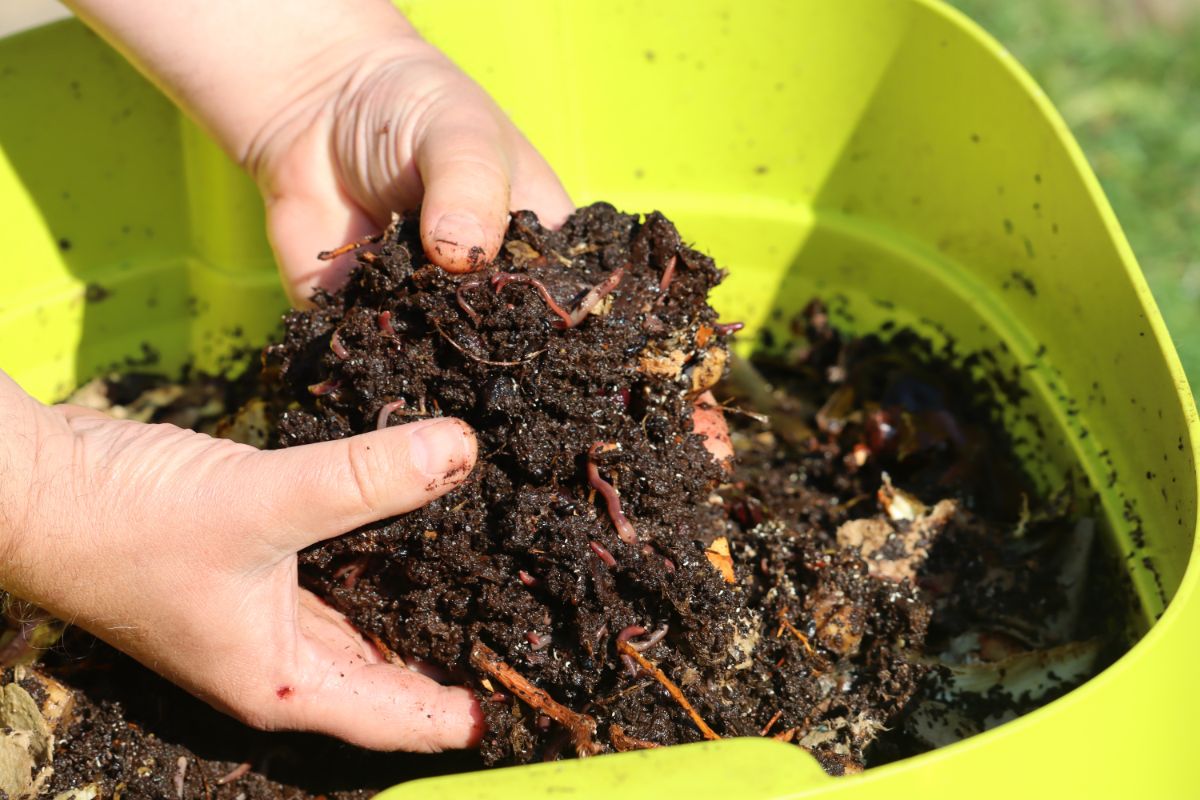
When your worms arrive, they will likely come packaged in a small cloth bag. Inside that bag, expect to see a tight little knot of red wiggler worms ready for your bin. Due to shipping, your worms will probably be a bit stressed so move them into your bin as quickly as possible as soon as they arrive.
To add your worms, simply move aside the soil on one side of your bin and gently dump the worms into the substrate. Carefully cover the worms back up with a thin layer of substrate and ensure that the substrate is adequately moist, but not soggy. For the first two to three days after your worms arrive, allow them to settle in and avoid feeding them anything during this time.
Because they are just getting used to their bin, you may notice a few worms trying to escape at first. To prevent this, add a piece of moistened newspaper on top of your substrate and place your worm bin in a dark room or cupboard to discourage your worms from “adventuring.”
How to compost with your homemade worm farm
Once your worms have had a few days to settle into their new home, it’s time to put them to work. Although you may be tempted to feed your worms daily, it is recommended to only feed your worms once a week, so try adding a countertop compost system to gather food scraps in between feedings.
Once a week, gently dig your food scraps into one side of your worm bin, taking care to cover the food scraps with a layer of the substrate to discourage fruit flies. Every week, add food scraps, alternating which side you add new scraps to each week. If you add food scraps on the left-hand side one week, add it to the right-hand side the next week, and so on. By alternating sides, you can keep track of how much your worms eat. Any food that isn’t eaten in a week should be removed from your bin to prevent mold growth.
You should only ever place as much food in your worm bin as your worms can eat in a week. Until you know how much your worms can consume, keep an eye out for uneaten food. If your worms don’t seem to be eating all their food scraps, reduce how much food you add to the bin next time. If, however, you find your worms have devoured everything you placed in your bin, increase the amount of food you add next time.
Best foods to feed your worms
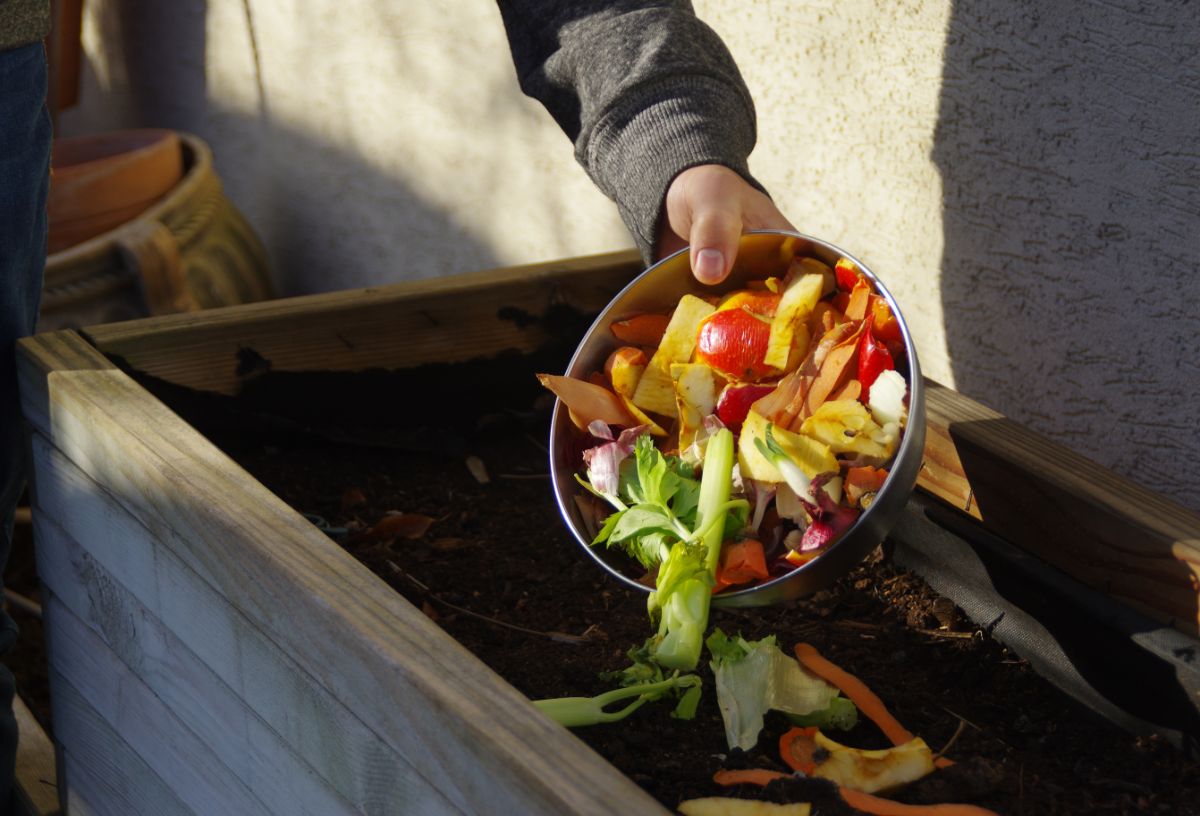
Your composting worms are voracious little eaters and will happily devour most organic matter. Vegetable and fruit scraps, peels, and cores are an ideal food for your worms, as is bread, old pasta, shredded paper and cardboard, pesticide-free yard waste and grass clippings, eggshells, loose-leaf tea, and coffee grounds.
Although worms can handle most food scraps, for easier digestion and faster composting, try cutting larger chunks of food into small, 1” pieces.
Pro tip: Try adding avocado pits to your worm bin. Although worms won’t eat them, the rich worm castings in your bin are the best place for germinating tricky seeds, including avocado pits!
Foods to avoid feeding your worms
Never place household pet waste in your worm bin, as it can carry a whole host of pathogens which have no business being anywhere near your food. For a similar reason, dairy, meat and bones should not be placed in your bins as this can encourage harmful bacteria to take up residence in your worm farm.
Worms tend to avoid citrus fruits, overly spicy foods and alliums (onions, chives, leeks and garlic), while moldy or overly processed foods and glossy paper with colored inks are not great for your worms and should be avoided as well.
Maintaining proper moisture levels
The substrate in your worm bin should be consistently moist, but not soggy, with approximately the same moisture level of a wrung-out sponge. While the food scraps you add to your bin should provide adequate moisture levels, if you notice your substrate feels dry, moisten it with a bit of water.
Too much water can encourage food scraps to rot and promote an environment where unwanted pests can thrive so be sure to only add a bit of water at a time to avoid waterlogged substrate.
How to harvest your finished worm castings
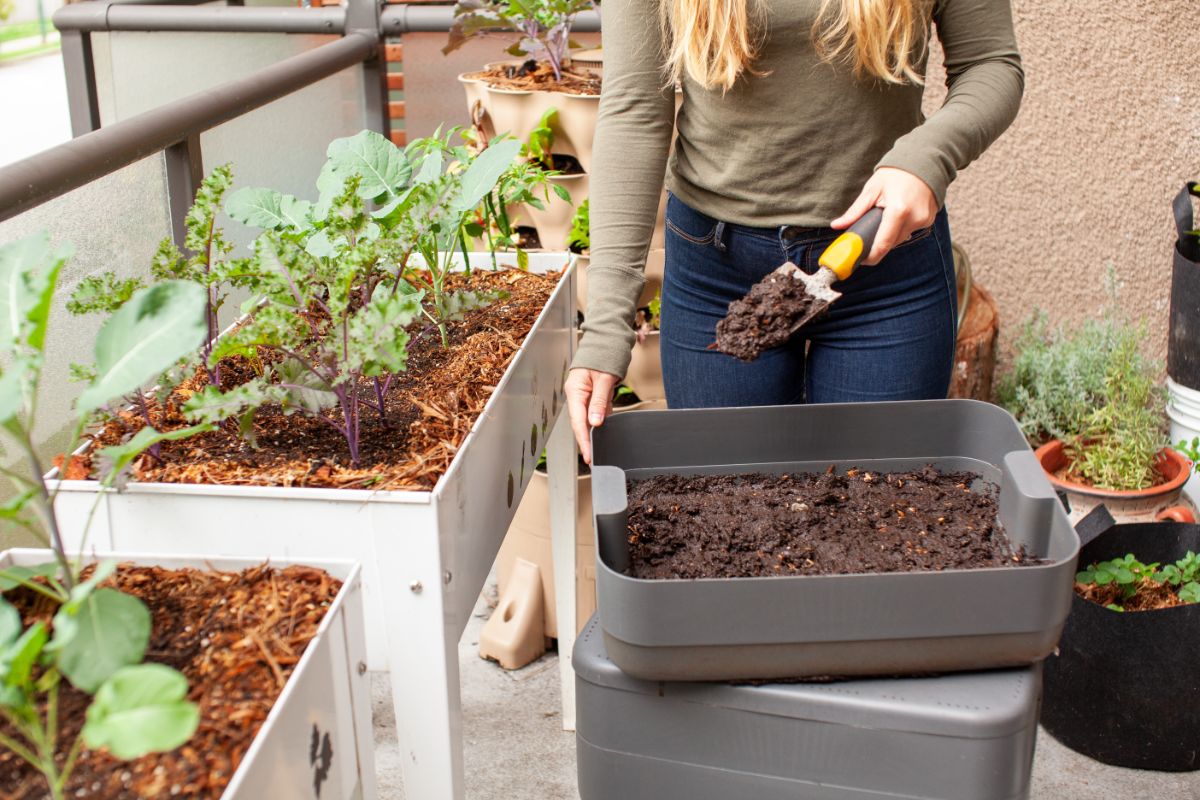
The amount of time it takes to produce a bin full of finished worm compost depends on several factors such as temperature, the food scraps you use and the quantity of worms you’re working with. Although difficult to say precisely how long this process will take, you’ll know it’s time to harvest your worm castings when the majority of your substrate has been replaced with dark brown, pelleted worm castings.
To harvest your worm castings, feed your worms only on one side of your bin for several weeks prior to harvest. This will encourage all of your worms to migrate to one side of your bin for easier separating.
When you’re ready to gather the castings, simply scoop out as much of the castings as you can, taking care to avoid as many worms as possible and returning any stragglers you find to your bin. After you’ve removed as much of the castings as you can, simply replenish your bin with fresh substrate and you’re ready to start the composting process all over again.
While this method of separating your castings is generally quite effective, you can also try sifting your castings with the use of a premade or DIY compost sifter. To make your own compost sifter, simply make a basic frame out of upcycled scrap wood and staple some fine-gauge mesh or hardware cloth to one side. Alternatively, a kitchen colander can work for separating worms out of your compost in a pinch.
Using worm castings in your garden
Applying your worm castings to your garden or houseplants is quick and easy, but the benefits you’ll see in your plants are hard to miss.
Worm castings are an ideal, slow-release fertilizer that can be used directly in your garden and potted plants without fear of burning plants, which can happen with other manures and fertilizers. Worm castings can be added at the beginning of the planting season or used throughout the season as a side dressing.
To enliven a vegetable or flower bed at the beginning of the season, add ¼ to ½ cup of worm castings for every 100 feet of gardening space. After adding your castings, carefully work them into the top few inches of soil prior to planting. When planting nursery starts or transplants, add ¼” cup of castings in each hole before adding your plant.
Throughout the growing season, particularly after your plants set fruit or flowers, side-dress each plant with a few worm castings, scratching the castings gently into the soil at the base of your plants to avoid damaging delicate roots.
For houseplants, use ¼ cup of worm castings per 6” pot and mix the castings well into the soil before potting your plant. Every few weeks, replenish your plant by watering it with a bit of worm tea.
Making worm tea
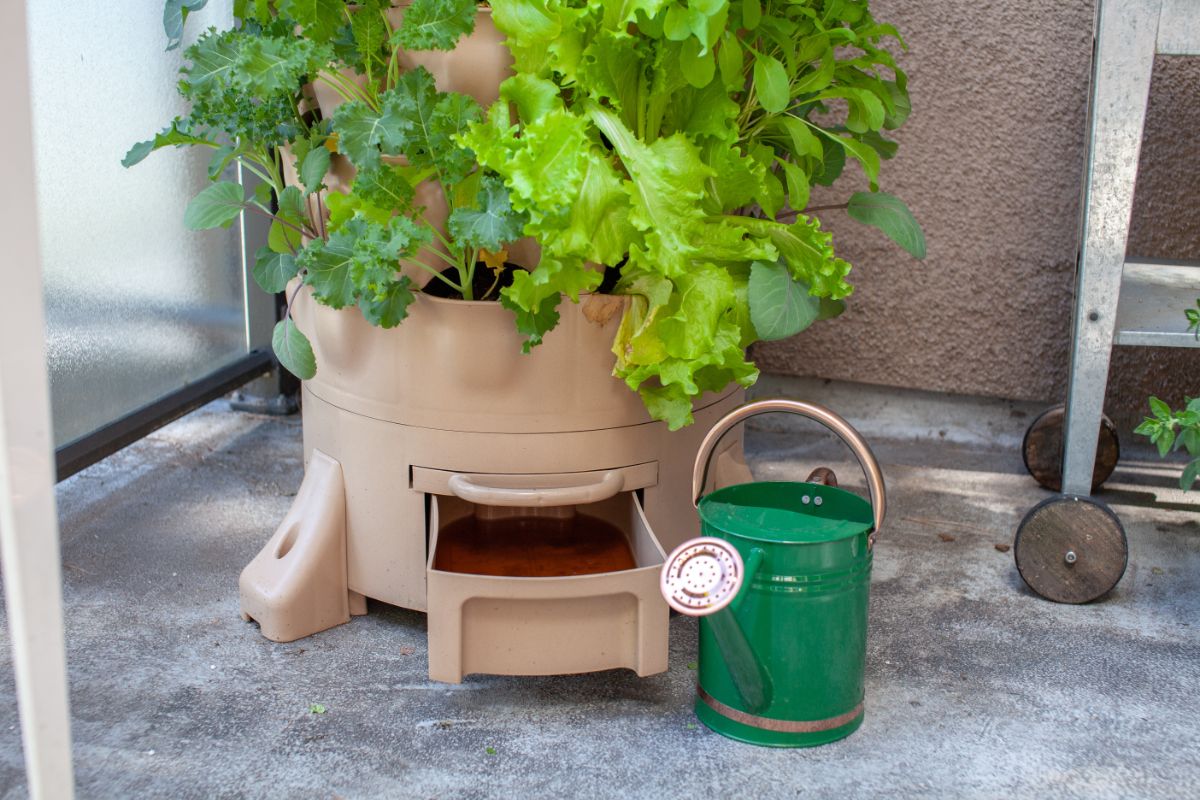
Also known as vermicompost tea, worm tea is an excellent all-natural, organic liquid fertilizer that can boost plant growth in both houseplants and garden beds alike. Rich in all the vitamins and nutrients plants need to thrive, you can’t “overdo” it with worm tea and it won’t burn your plants as excess fertilizer can.
Made by steeping worm castings in water, worm tea can be used as a foliar spray or be watered into the soil at a plant’s base for a quick pick me up.
To make your own worm tea, simply mix 5 to 6 cups of worm castings into a bucket filled with 4 gallons of water. While the castings can be mixed directly in the water, for a tidier tea that won’t clog your watering can consider placing your castings in a bit of cheesecloth to make a “tea bag” of sorts.
To your tea mixture, add 3 tablespoons of molasses, which will help encourage the growth of beneficial microorganisms. Allow your tea mixture to steep for 12 to 24 hours, after which time you should have a dark brown liquid.
Add your worm tea to your watering can and dilute it until it is a light brown color, similar to weak tea. Apply your worm tea as soon as possible before the beneficial microorganisms die off.
For most plants, spray or water your plants with worm tea every two weeks; however, because they are heavy feeders, vegetable and fruit plants can benefit from a weekly feeding of worm tea. If you have plants that seem to be struggling or are plagued by pests or pathogens, apply worm tea more frequently until your plants perk up.
FAQ
While there are several different unwanted pests that may find their way into your bin, the most common are mites. The good news is that, though they are unsightly, the mites that end up in worm bins are harmless to humans and house pets; however, you’ll still want to get rid of them.
The presence of mites hints at several things that may be wrong with your bin: too much moisture, too much food, and a substrate that is too acidic.
To counter these issues, reduce the amount of food scraps you add to your bin, and don’t add any extra moisture so that your bin can dry out a bit.
To counter pH issues, mix some crushed eggshells into your substrate, which can help neutralize the soil making it less hospitable to mites.
Unfortunately, if your worm population seems to be mysteriously on the decline, there is something wrong with your bin and you’ll need to address the problem.
Assess your feeding schedule, your bin’s moisture levels, and air flow, and check the ambient temperature near your bin. If everything seems okay, ensure that there aren’t too many worm castings in your bin as an overabundance of castings over a period of time can affect worm health as well.
If you have an outdoor composting system, the safest option is to move it indoors or into a warm garage during the winter. If that is not an option, many subterranean systems, such as the Subpod In-Garden Compost System, are partially buried beneath the soil line, which may provide adequate insulation for your worm farm as worms will bury themselves deeper to stay worm.
To increase the chances that your worms make it through the winter, try covering your bin with blankets, bales of straw or hay, or other insulating materials, and locate your bin in a sheltered location.
Despite your best efforts, if you have a particularly cold winter, your worms may die off, but any eggs they laid should emerge in spring to restart your worm farm all over again.
If you read vermicomposting forums, you are likely to encounter the question of pumice and whether or not it is necessary in your worm bin.
Pumice, which comes from volcanic igneous rock, is a soil amendment that can improve airflow in your worm bin and prevent soil from becoming compacted.
While it is not necessary in your bin, you may want to add some if you notice your substrate is becoming too dense.
While hiring a sitter for your worm bin may be an option, there is an alternative. Simply bury 2 to 3 feeding’s worth of food in your bin to provide extra food for your worms, then add a layer of moistened newspaper or cardboard on top of your substrate to provide extra food if you worms manage to munch through the food scraps before you return. When you get back, remove any old, uneaten food and begin caring for your worm bin as usual.
Conclusion
Vermicomposting at home may sound intimidating at first, but it is incredibly easy to get started with and the rewards are immense. Not only does vermicomposting help you repurpose food scraps and reduce your environmental impact, but it will have you producing large quantities of rich worm castings that will enliven houseplants and garden beds alike.
Whether you opt for a homemade system or premade worm bin, outdoors or indoors, there’s a place for worm farming in any home. All you need is a few red wigglers and a little know-how and you’ll be producing black gold for your garden in no time.
References:
Donny, B. “Why Red Wiggler Worms?” The Squirm Firm. 24 May 2022. 2014 January.
“Worm Castings.” Burlington Community Gardens. 24 May 2022. 2015.


Emmanuel Mulenga
I love your articles